
As I rummaged through my pantry, my gaze landed on a forgotten box of chocolate fudge cake mix, whispering sweet promises of homemade indulgence. That’s when the idea hit me: why not transform my humble baking leftovers into something extraordinary? Enter the No-Churn Chocolate Cake Ice Cream! This delightful creation combines the rich flavors of luscious chocolate with velvety cake chunks, giving you a dessert that feels both indulgent and nostalgic. Perfect for summer afternoons or a cozy night in, this recipe is as easy as it gets—no ice cream maker required! Plus, it’s a fantastic crowd-pleaser that will have everyone begging for more. So, are you ready to dive into this creamy chocolate dream? Let’s whip up a batch together!
Why is this ice cream so irresistible?
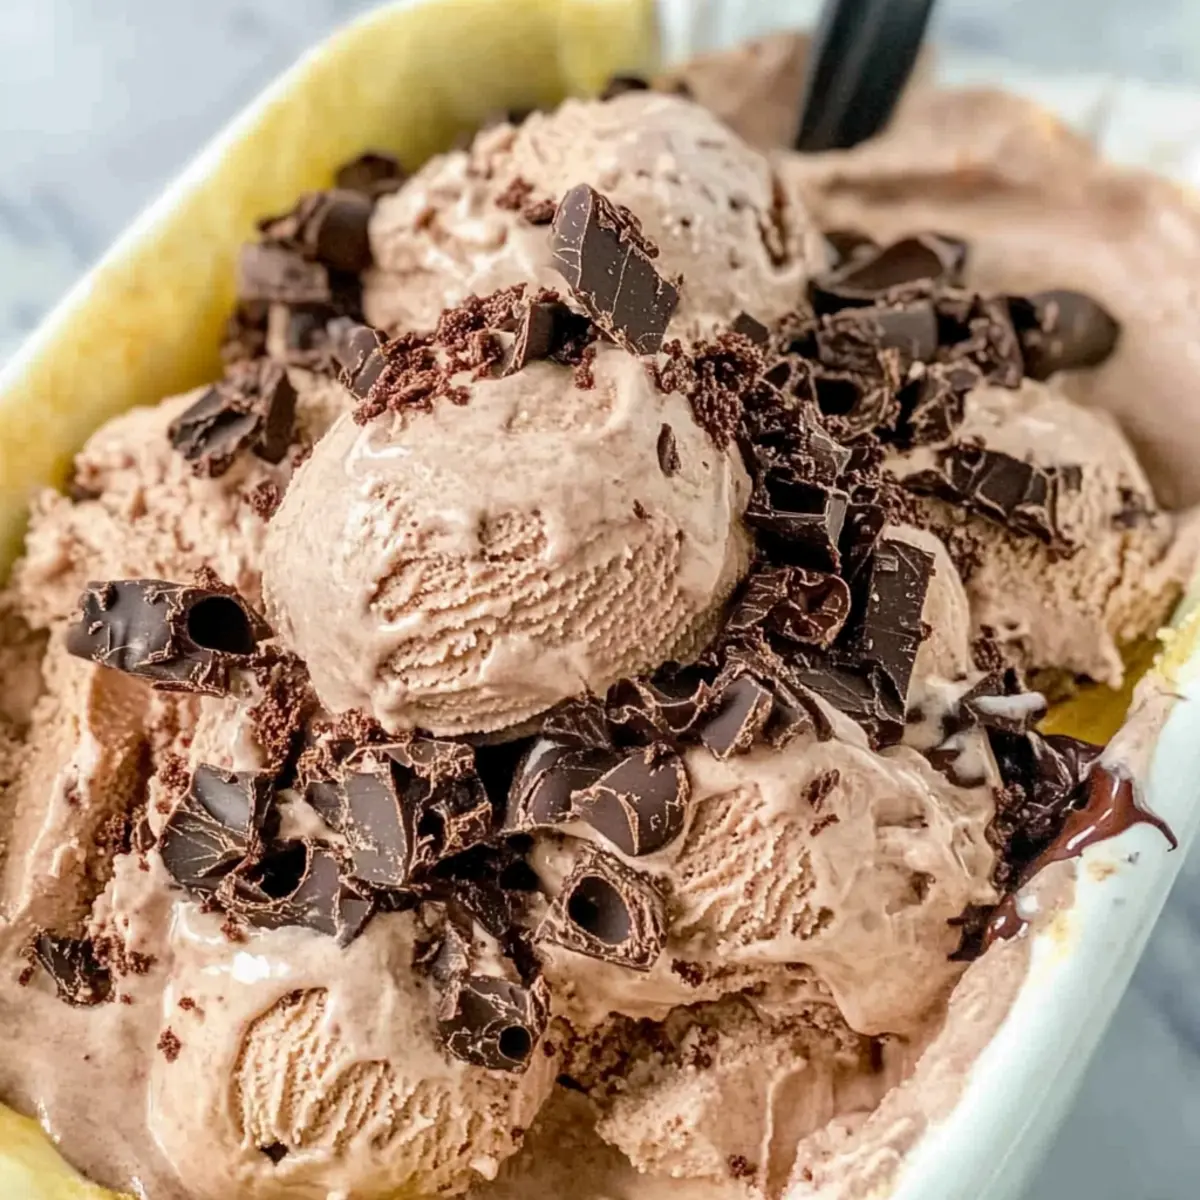
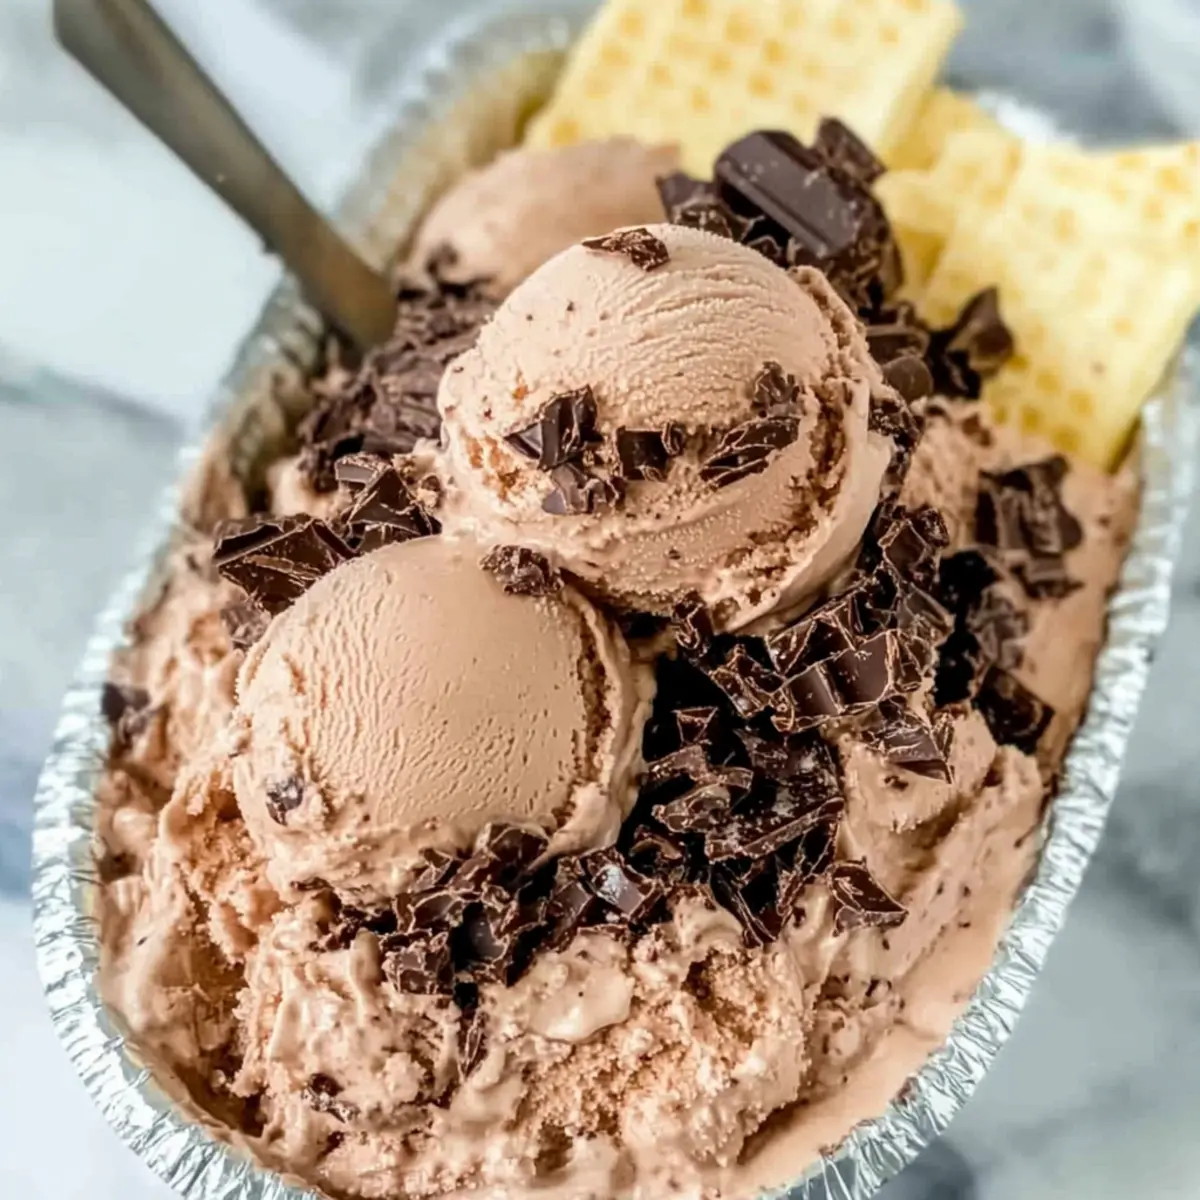
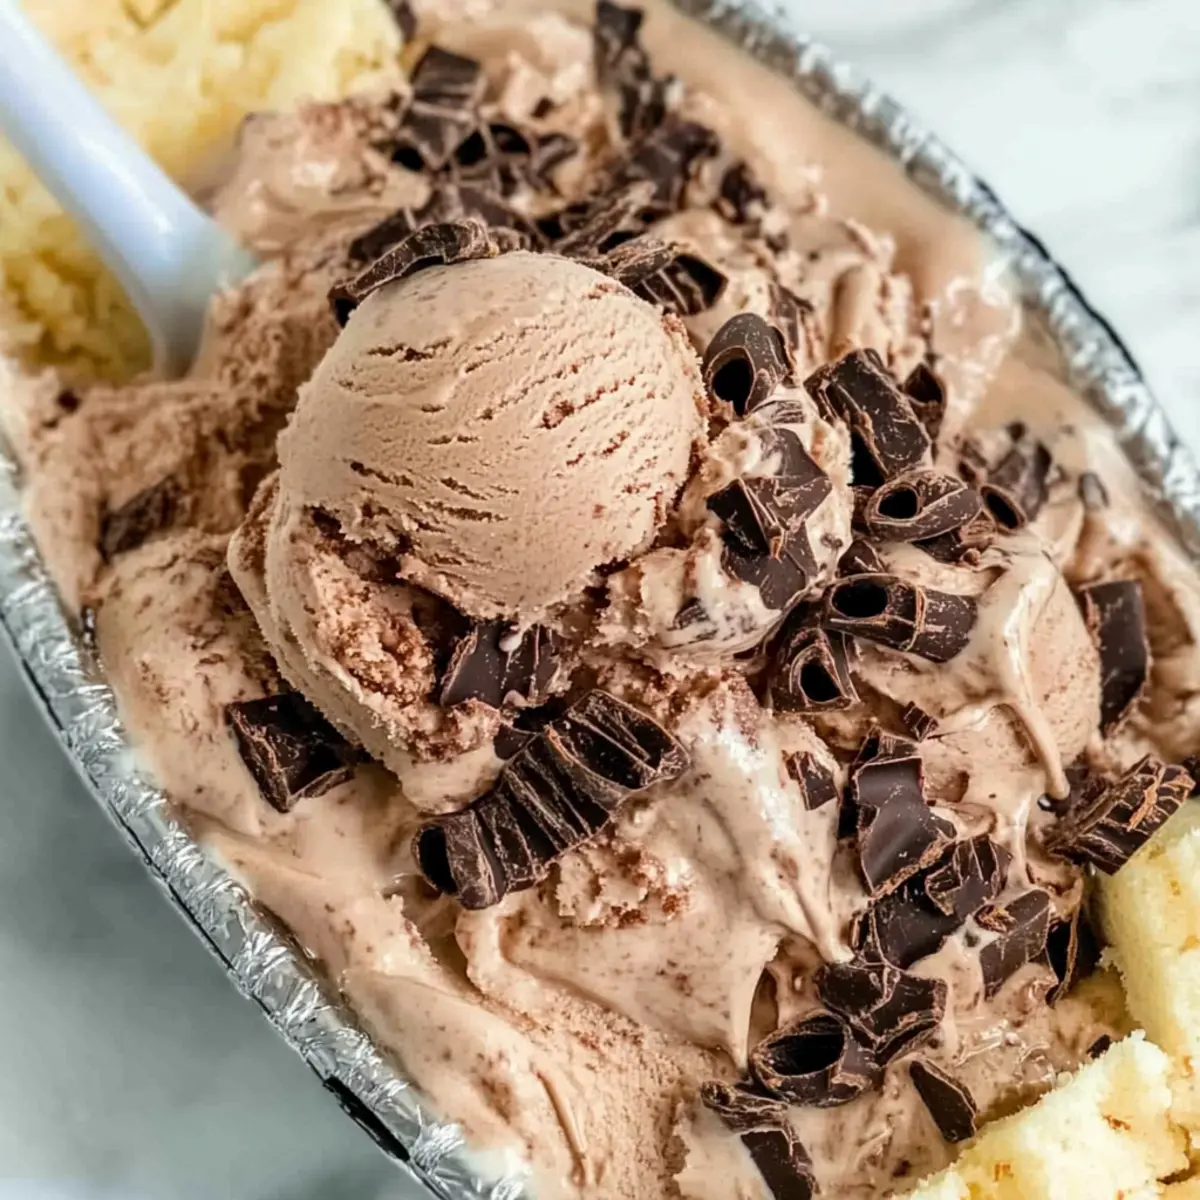
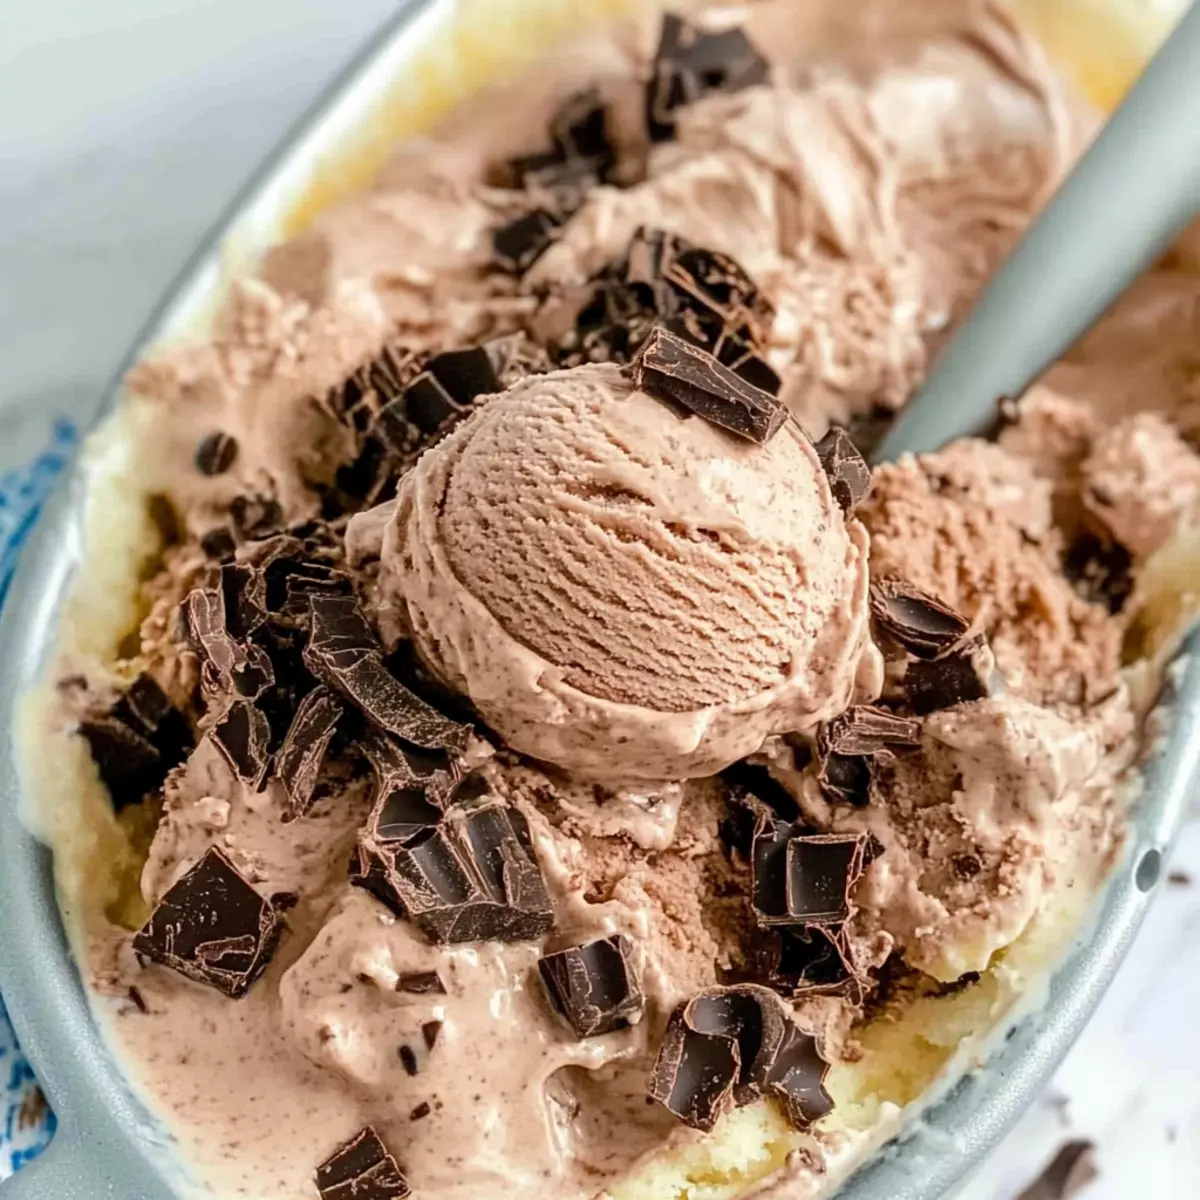
Decadent Chocolate Bliss: The No-Churn Chocolate Cake Ice Cream is a chocolate lover’s dream, blending rich cocoa flavor with chunks of fudge cake for an irresistible treat.
Effortless Indulgence: No ice cream machine? No problem! This recipe is perfect for home cooks of all skill levels, making it quick and easy, especially when you’re craving something sweet.
Versatile Variations: Swap in your favorite cake flavors or add fun mix-ins like crushed cookies or fruits for a personal touch.
Perfect for All Occasions: Whether it’s an afternoon treat or a dessert for a gathering, this crowd-pleaser ensures every scoop brings smiles and satisfaction.
Serve it with an extra drizzle of chocolate syrup, and you might find yourself reminiscing about classic desserts like my Pistachio Cream Cake or the delightful Coconut Cream Pancakes.
No-Churn Chocolate Cake Ice Cream Ingredients
For the Ice Cream Base
- Sweetened Condensed Milk – Adds sweetness and creaminess; can be substituted with evaporated milk for a lower sweetness.
- Vanilla Extract – Provides flavor depth; use pure vanilla for the best taste.
- Heavy Whipping Cream – Creates the desired creamy texture when whipped; avoid low-fat alternatives as they won’t whip correctly.
- Cocoa Powder – Delivers chocolate flavor; use unsweetened cocoa for better sweetness control.
For the Cake Add-In
- Chocolate Fudge Cake – Adds texture and richness; feel free to use store-bought or homemade. For a denser alternative, you can substitute with brownie pieces.
For Garnishing
- Chocolate Curls – Enhances the dessert with extra chocolate flavor; chocolate chips or diced fudge can be substituted.
Get ready to enjoy the delight of homemade No-Churn Chocolate Cake Ice Cream that will fill your heart and satisfy your cravings!
Step‑by‑Step Instructions for No-Churn Chocolate Cake Ice Cream
Step 1: Combine the Base
In a large mixing bowl, whisk together the sweetened condensed milk and vanilla extract until smooth and well-blended. This mixture provides the creamy foundation for your No-Churn Chocolate Cake Ice Cream. Ensure there are no lumps, as a silky base will lead to a luscious texture. Set aside as you prepare your whipped cream.
Step 2: Whip the Cream
In a separate bowl, use a hand mixer or stand mixer to whip the heavy cream until stiff peaks form, which usually takes about 3 to 5 minutes on medium-high speed. You’ll know it’s ready when the cream holds its shape and appears fluffy. Gently sprinkle in the cocoa powder and fold it into the whipped cream until fully incorporated, being careful not to deflate the mixture.
Step 3: Fold Together Mixtures
Slowly fold the whipped cream into the condensed milk mixture using a spatula. Work gently, scooping from the bottom and folding over the top until fully combined. This step is crucial for keeping the No-Churn Chocolate Cake Ice Cream light and airy, so take your time to ensure that the mixture is homogenous without overmixing.
Step 4: Add Cake Chunks
With the base mixture ready, gently fold in the chunks of chocolate fudge cake, ensuring they are evenly distributed throughout the ice cream. This adds delightful texture and richness to each scoop. If you’re using chocolate curls, add them at this stage, folding them in carefully to keep as much air in the mixture as possible.
Step 5: Freeze the Mixture
Transfer the mixture into an airtight container, smoothing the top with a spatula. Cover tightly with a lid or plastic wrap to prevent freezer burn. Freeze for at least 5 hours or until it’s firm and scoopable. This freezing process allows the flavors to meld beautifully, resulting in a decadent No-Churn Chocolate Cake Ice Cream.
Step 6: Serve with Style
When ready to serve your No-Churn Chocolate Cake Ice Cream, remove it from the freezer and let it sit for about 5 minutes to soften slightly. This makes it easier to scoop out those delightful portions. Serve with additional chocolate curls or a drizzle of chocolate syrup for an extra indulgent treat that will have everyone asking for seconds.
How to Store and Freeze No-Churn Chocolate Cake Ice Cream
Fridge: Keep leftovers in an airtight container for up to 3 days, though it’s best enjoyed fresh for maximum creaminess.
Freezer: Store your No-Churn Chocolate Cake Ice Cream in a well-sealed container for up to 2 weeks. For longer storage, tightly wrap it with plastic wrap and foil to prevent freezer burn.
Reheating: For easier scooping, let the ice cream sit at room temperature for about 5 minutes before serving. This will soften the ice cream without melting it too much.
Serving Tip: If you notice ice crystals forming after storage, simply stir the ice cream gently to restore some of its original texture before serving.
What to Serve with No-Churn Chocolate Cake Ice Cream
Treat your taste buds to an incredible array of delightful pairings that will elevate your homemade ice cream experience.
-
Warm Chocolate Sauce: A rich, velvety drizzle of warm chocolate sauce creates a decadent contrast that enhances the chocolate flavor.
-
Fresh Berries: Juicy strawberries or raspberries add a refreshing touch, balancing the richness of the ice cream with their natural tartness. Serve them alongside for a delightful crunch.
-
Crushed Oreos: The crunchy texture of crushed Oreos mixed in or sprinkled on top brings a playful twist, making every scoop a fun experience that’s reminiscent of classic desserts.
-
Whipped Cream: A generous dollop of fresh whipped cream adds an airy lightness that’s perfect against the creamy base of the ice cream, creating a dreamy mouthful.
-
Chocolate Chip Cookies: Serve with warm chocolate chip cookies for a delicious cookie sundae combo, combining soft, chewy warmth with cold, creamy indulgence.
-
Mint Ice Tea: A refreshing glass of mint iced tea pairs beautifully, cutting through the richness of the ice cream with its zesty flavor.
-
Toast Waffles: Golden, crispy waffles provide a delightful base for your ice cream, allowing for extravagant ice cream sandwiches that everyone will enjoy.
-
Coconut Macaroons: The coconut’s chewiness complements the ice cream, bringing an exciting texture and unique flavor that elevates your dessert experience.
These pairings not only enhance flavors and textures but create a memorable dessert experience, turning a simple serving of No-Churn Chocolate Cake Ice Cream into an unforgettable treat!
Expert Tips for No-Churn Chocolate Cake Ice Cream
-
Whipping Perfection: Ensure the heavy cream is whipped to stiff peaks; this is essential for achieving that light and airy texture in your No-Churn Chocolate Cake Ice Cream.
-
Gentle Folding: When combining the whipped cream with the condensed milk, fold gently to maintain airiness. Overmixing can deflate the mixture, leading to a denser ice cream.
-
Storage Solutions: For optimal freshness, store the ice cream in an airtight container. If freezing for more than two weeks, wrap it tightly to avoid freezer burn.
-
Flavor Fun: Get creative with variations! Swap the chocolate fudge cake for a lemon or vanilla cake for new flavor profiles in your No-Churn Chocolate Cake Ice Cream.
-
Prepare Ahead: If making in advance, consider chilling your mixing bowls before whipping the cream. It helps achieve better volume while whipping!
-
Softening Tips: Allow the ice cream to sit out for 5–10 minutes before serving. This slight softening will help you scoop the perfect portions easily.
No-Churn Chocolate Cake Ice Cream Variations
Feel free to get creative with your No-Churn Chocolate Cake Ice Cream, elevating its flavor and texture to suit your mood!
-
Vanilla Cake Substitute: Swap chocolate cake for vanilla or almond cake to let the cocoa shine while still enjoying that delicious cake texture.
Imagine a warm summer afternoon, and this twist will brighten your dessert table! -
Red Velvet Delight: Transform the base by using red velvet cake instead. The cream cheese notes will complement the chocolate beautifully, adding a unique and rich experience that will surprise your guests.
-
Dairy-Free Alternative: Use coconut cream instead of heavy whipping cream and sweetened condensed coconut milk for a creamy, tropical twist that everyone can enjoy.
-
Cookie Crumble Add-In: Crushed Oreos or chocolate chip cookies can be folded in for added crunch and sweetness, creating a delightful surprise in every scoop. It’s like a party in your bowl!
-
Fruity Affair: Incorporate chopped fresh strawberries, raspberries, or bananas into the mixture for a refreshing contrast to the rich chocolate. Each bite bursts with flavor, making it truly memorable.
-
Minty Freshness: Add a few drops of peppermint extract to the base for a refreshing mint chocolate chip twist. This will surely be a hit, especially on warm evenings!
-
Spicy Hot Chocolate: For those who like it hot, sprinkle in a pinch of cayenne or chili powder to bring a kick to your ice cream. The heat enhances the chocolate and adds depth!
Serving your No-Churn Chocolate Cake Ice Cream alongside mini portions of my celebratory Chocolate Peanut Butter Swirl Cookies or sweet, rich Heaven on Earth Cake can create a fabulous dessert spread, perfect for any occasion!
Make Ahead Options
These No-Churn Chocolate Cake Ice Cream delights are perfect for busy home cooks looking to save time! You can prepare the base mixture (sweetened condensed milk, vanilla extract, cocoa powder, and whipped cream) up to 24 hours in advance and refrigerate it in an airtight container. Additionally, you can chop your chocolate fudge cake and store it separately in the fridge for up to 3 days. When you’re ready to serve, simply fold the cake chunks into the ice cream base, transfer it to your container, and freeze for a minimum of 5 hours. This way, you maintain the quality and creamy texture, ensuring your ice cream is just as delicious and indulgent as when made fresh!
No-Churn Chocolate Cake Ice Cream Recipe FAQs
How do I select the best ingredients for this ice cream?
Absolutely! For the best No-Churn Chocolate Cake Ice Cream, choose ripe and fresh ingredients. Opt for sweetened condensed milk that’s smooth and creamy. Be sure your heavy whipping cream is cold before whipping for better volume and stability. Look for unsweetened cocoa powder with no lumps to avoid bitterness. If you’re using chocolate fudge cake, check for a moist texture, as this will elevate the overall indulgence!
What’s the best way to store leftovers?
Very! To keep your No-Churn Chocolate Cake Ice Cream fresh, transfer any leftovers to an airtight container. It will stay delicious for up to 2 weeks in the freezer. If you plan to keep it longer, wrap the container tightly with plastic wrap and foil to prevent freezer burn. Just be sure to store it away from strong odors, as ice cream can easily absorb flavors!
Can I freeze No-Churn Chocolate Cake Ice Cream for longer?
Absolutely! If properly stored in a well-sealed container, your No-Churn Chocolate Cake Ice Cream can last for up to 3 months in the freezer. For best results, cover the surface of the ice cream with a piece of parchment paper before sealing it with the lid. This helps prevent ice crystals from forming, preserving that creamy texture.
What should I do if my ice cream is too hard to scoop?
No worries! If when you first take it out, the ice cream is a little too hard, simply let it sit at room temperature for about 5–10 minutes to soften slightly. This will help you scoop it out easily without melting too much. You can stir it gently to restore the texture if you notice any ice crystals forming during storage.
Are there any dietary considerations for this recipe?
Very! This No-Churn Chocolate Cake Ice Cream contains dairy and should be avoided for anyone with lactose intolerance or dairy allergies. If you’re looking for a non-dairy alternative, try using coconut cream in place of heavy whipping cream and unsweetened coconut milk as a base. Additionally, check cake ingredients to ensure they meet your dietary needs, especially if serving kids or those with allergies.
Can I make flavor variations with this recipe?
Absolutely! The beauty of this No-Churn Chocolate Cake Ice Cream is its versatility. Feel free to swap the chocolate fudge cake for any of your favorite cake flavors, like vanilla, red velvet, or even funfetti! Adding crushed cookies, caramel swirls, or assorted chocolate types can bring delightful twists to your dessert. Let your creativity shine!
Dreamy No-Churn Chocolate Cake Ice Cream You’ll Crave
Ingredients
Equipment
Method
- In a large mixing bowl, whisk together the sweetened condensed milk and vanilla extract until smooth.
- In a separate bowl, whip the heavy cream until stiff peaks form, then fold in cocoa powder.
- Fold the whipped cream into the condensed milk mixture until fully combined.
- Gently fold in the chunks of chocolate fudge cake.
- Transfer the mixture into an airtight container and freeze for at least 5 hours.
- Before serving, let the ice cream sit for 5 minutes to soften slighty.
Leave a Reply