
As I savored my morning espresso, a spark of inspiration hit me—not just any dessert would do, but the Ultimate Coffee Lover’s Cheesecake was calling my name! This luxurious treat combines the rich flavors of coffee with a creamy, dreamy texture that will have every coffee enthusiast swooning. Perfect for gatherings or a quiet night in, this cheesecake offers a quick prep time and effortless baking, making it a real crowd-pleaser that balances sweetness with the bold essence of espresso. Picture this: each slice reveals not just indulgence but also a canvas—a chance to top it with chocolate shavings or fresh berries to suit your whim. So, are you ready to impress your friends and treat yourself to a slice of this velvety delight?
Why is this Coffee Lover’s Cheesecake Unforgettable?
Irresistible flavor: The blend of espresso and cream cheese creates a rich, dreamy experience that coffee lovers crave.
Quick to prepare: With straightforward steps, you can whip up this decadent dessert in no time, making it perfect for busy schedules.
Garnishing options: Top it with chocolate shavings, fresh berries, or whipped cream; the choice is yours! for extra flair.
Crowd-pleaser: Whether for a family gathering or a dinner party, this cheesecake is guaranteed to impress and satisfy your guests.
Versatile: Add seasonal spices or alternative crusts to tailor the cheesecake to your taste, much like my Cheesecake Stuffed Strawberries for a delightful spin!
Coffee Lover’s Cheesecake Ingredients
• Get ready to indulge!
For the Crust
- Graham Cracker Crumbs – Provides the perfect sweet and crunchy base for your cheesecake. Use store-bought or homemade.
- Unsweetened Cocoa Powder – Adds a rich chocolate flavor that enhances the overall taste; opt for high-quality cocoa for best results.
- Brown Sugar – Infuses moisture and subtle caramel sweetness; granulated sugar can be a convenient substitute if needed.
- Unsalted Butter (melted) – Combines the crust ingredients and adds richness; feel free to use margarine if preferred.
For the Filling
- Cream Cheese (full-fat, softened) – The key to a creamy texture and depth of flavor; low-fat options may alter the final result.
- Granulated Sugar – Sweetens the cheesecake, balancing flavors perfectly; adjust the amount based on your sweetness preference.
- Vanilla Extract – Elevates the cake’s flavor; always opt for pure vanilla for the best aroma.
- Eggs – Provides structure; remember to bring them to room temperature for easier mixing.
- Brewed Espresso (cooled) – Infuses the cheesecake with an intense coffee flavor that every coffee lover craves; strong coffee can be used in place of espresso.
- Coffee Liqueur (optional) – Boosts the coffee notes; feel free to skip it if you prefer a lighter flavor.
- Salt (a pinch) – Balances the sweetness and enhances flavors; don’t skip this important ingredient!
For Garnish (optional)
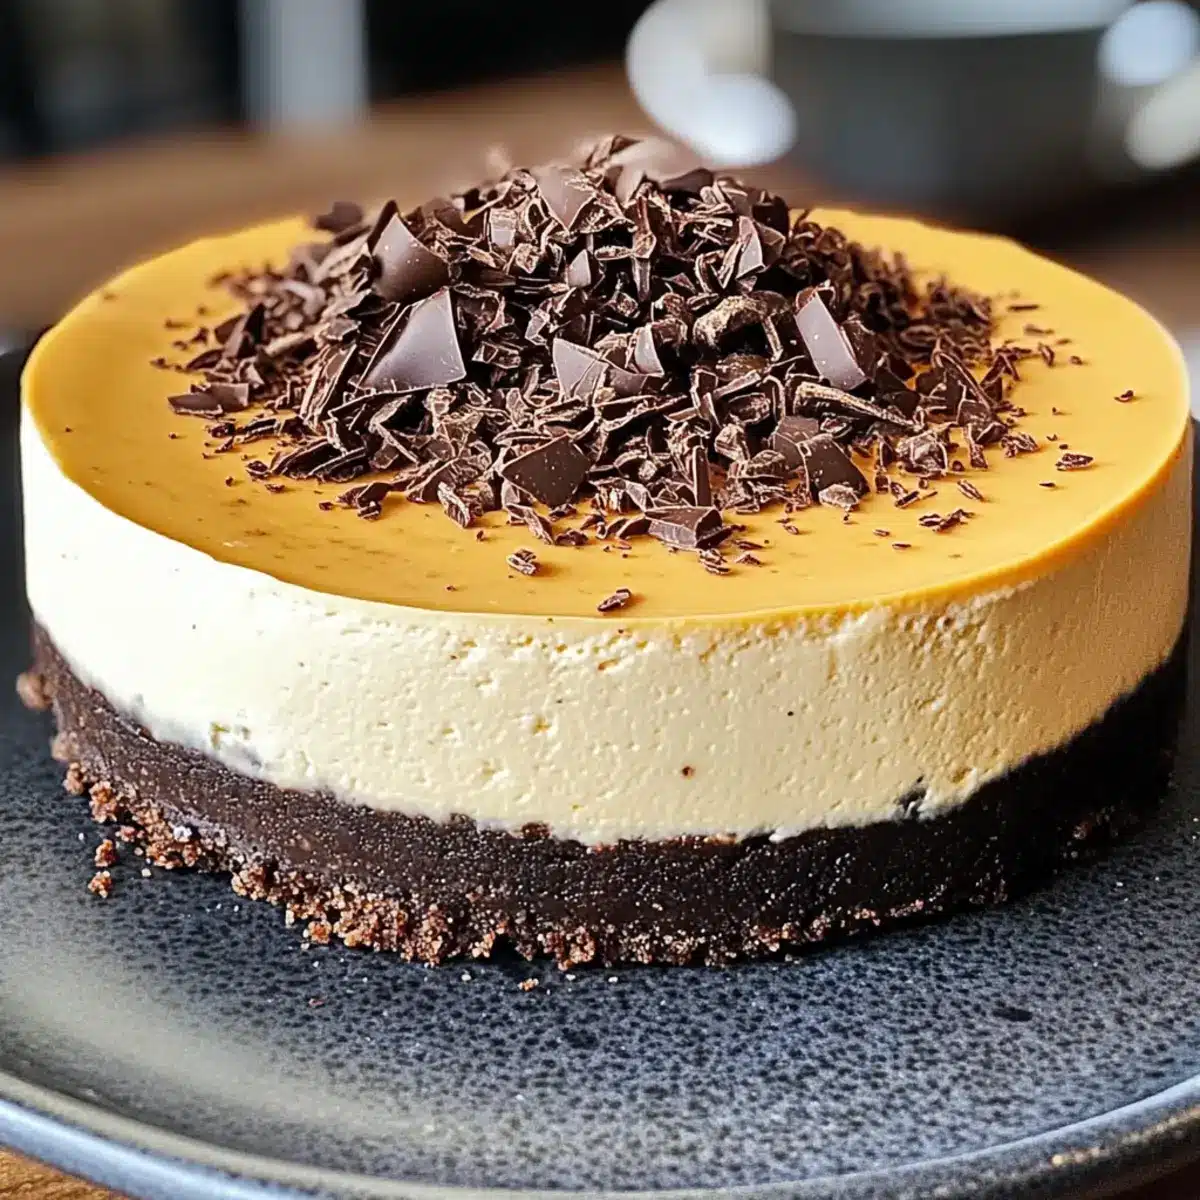
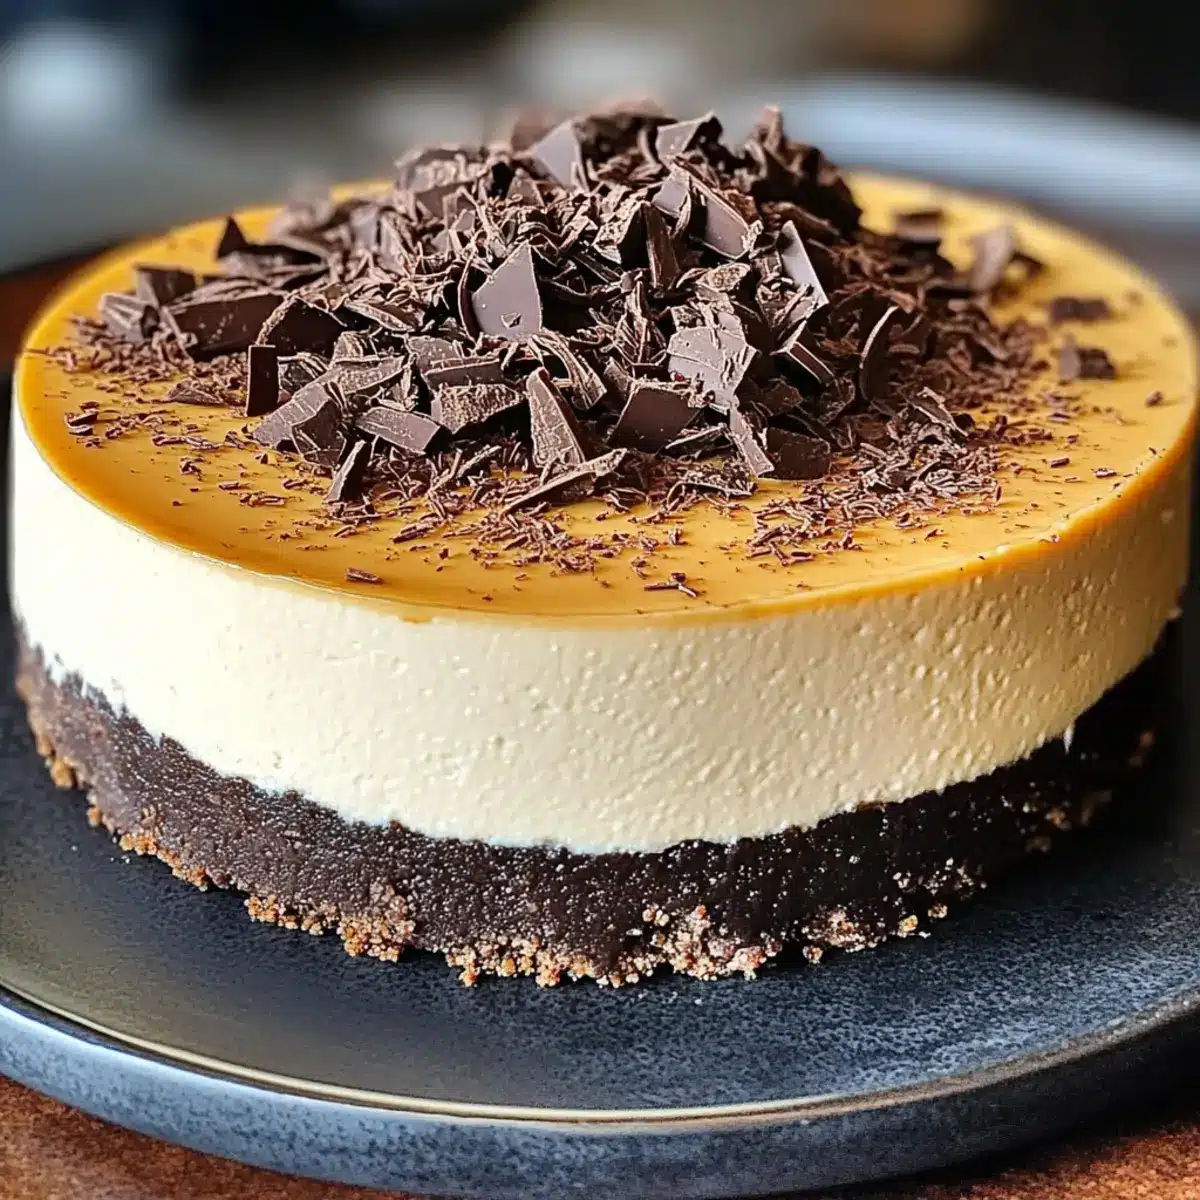
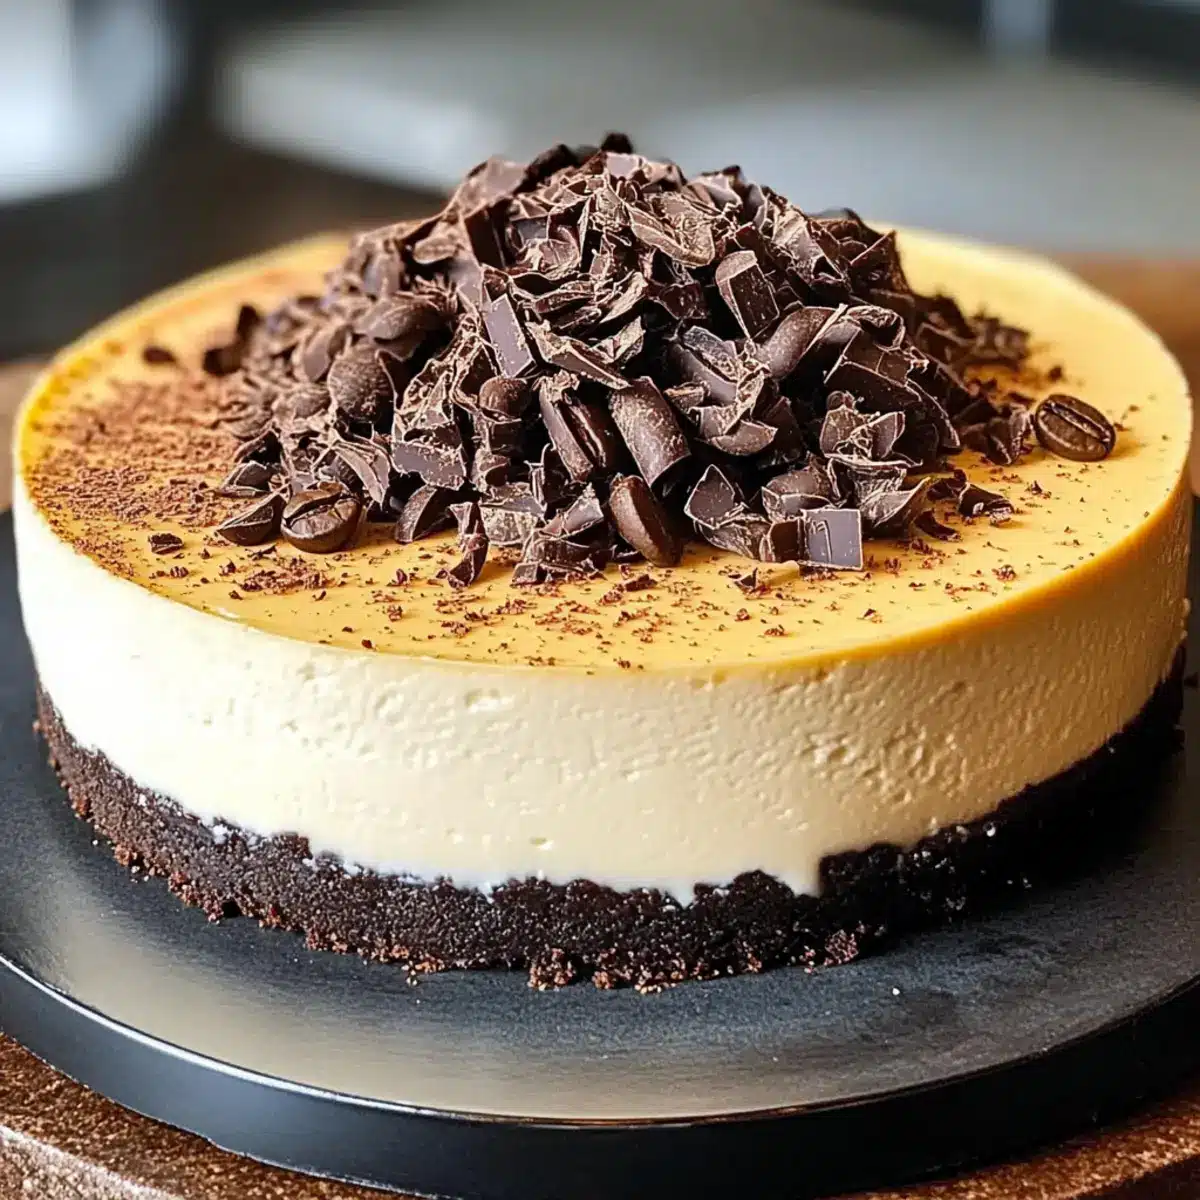
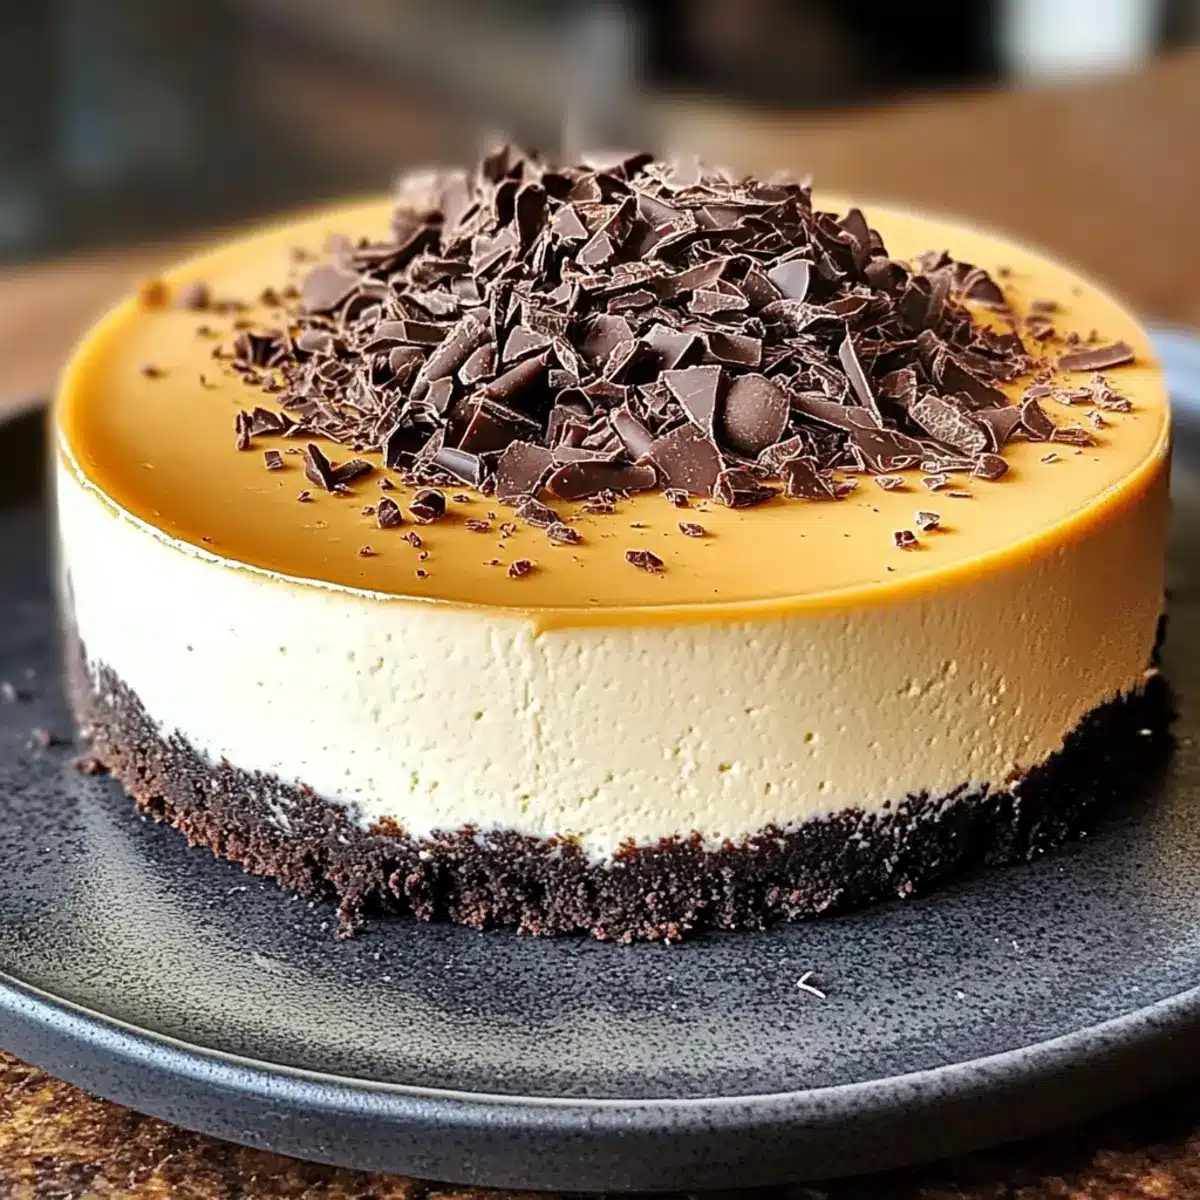
- Chocolate Shavings or Coffee Beans – Adds a beautiful presentation and textural contrast; choose based on your taste preference.
Dive into the indulgence of this Coffee Lover’s Cheesecake and get ready to impress with each heavenly bite!
Step‑by‑Step Instructions for Coffee Lover’s Cheesecake
Step 1: Preheat the Oven
Begin by preheating your oven to 325°F (160°C). This step is crucial as it ensures that the temperature is just right for the ultimate baking experience. While the oven heats up, you can gather your ingredients and prepare your springform pan for the cheesecake.
Step 2: Prepare the Crust
In a mixing bowl, combine graham cracker crumbs, unsweetened cocoa powder, brown sugar, and melted unsalted butter. Mix thoroughly until the mixture resembles wet sand. Press this blend firmly into the bottom of a 9-inch springform pan, ensuring an even layer. Bake for 10 minutes until lightly set, then allow to cool before adding your filling.
Step 3: Make the Filling
In a large bowl, beat the softened cream cheese with an electric mixer until smooth and creamy, about 2-3 minutes. Gradually add the granulated sugar, beating continuously to incorporate it fully. Then, mix in the vanilla extract and a pinch of salt, ensuring a rich flavor profile for your Coffee Lover’s Cheesecake.
Step 4: Incorporate the Eggs
Add the eggs to the cream cheese mixture, one at a time, mixing on low speed just until combined after each addition. Be cautious not to overmix, as this can lead to a cheesecake that cracks while baking. Aim for a smooth and fluffy consistency that will create the perfect texture.
Step 5: Add the Coffee Flavor
Slowly pour in the cooled brewed espresso and optional coffee liqueur, mixing gently until the filling is smooth and well combined. The rich coffee flavor is integral to the Coffee Lover’s Cheesecake, so take your time to ensure it’s fully incorporated and delightful on the palate.
Step 6: Combine with the Crust
Carefully pour the creamy filling over the cooled crust in the springform pan. Using a spatula, smooth the top to create an even surface. This step is important for presentation, as a smooth top enhances the visual appeal of your finished cheesecake.
Step 7: Bake the Cheesecake
Place the springform pan in the preheated oven and bake for 55-60 minutes. You’ll know it’s done when the edges are set but the center still has a slight jiggle. This perfect timing allows the cheesecake to maintain its creamy texture.
Step 8: Cool Gradually
After baking, turn off the oven and crack the door open. Allow the cheesecake to cool inside the oven for 1 hour to prevent cracks. Once cooled to room temperature, transfer it to the refrigerator, letting it chill for at least 4 hours or overnight for the best results.
Step 9: Serve and Garnish
When ready to serve, carefully remove the cheesecake from the springform pan. For an elegant touch, garnish with chocolate shavings or coffee beans on top. The presentation will excite your guests, making the Coffee Lover’s Cheesecake a stunning centerpiece for any dessert table.
Make Ahead Options
These Ultimate Coffee Lover’s Cheesecake are fantastic for meal prep, allowing you to save time and enjoy dessert without the last-minute rush! You can prepare the crust and filling separately up to 24 hours in advance. Simply mix the crust ingredients and press them into the pan, then refrigerate. Make the filling and store it in an airtight container in the refrigerator until you’re ready to bake. When it’s time to bake, pour the filling over the crust and follow the baking instructions. To ensure the cheesecake stays just as delicious, let it cool gradually and chill overnight before serving, enhancing the flavors beautifully.
What to Serve with Ultimate Coffee Lover’s Cheesecake?
Indulging in a slice of coffee lover’s cheesecake invites a delightful opportunity to build a memorable meal surrounding this luxurious dessert.
-
Fresh Berries: The tartness of fresh berries like raspberries or strawberries complements the cheesecakes’ richness while providing a vibrant burst of flavor and color.
-
Whipped Cream: A dollop of freshly whipped cream enhances the cheesecake’s creamy texture, offering a light contrast that balances the heavy, rich flavors of coffee and chocolate.
-
Espresso or Coffee: Serve with a shot of espresso or a cup of freshly brewed coffee to amplify the dessert’s coffee essence. This pairing creates a delightful full-circle experience for coffee enthusiasts.
-
Chocolate Dipped Biscotti: Crunchy and slightly sweet, chocolate-dipped biscotti adds a delightful crunch to each bite and pairs beautifully with the cheesecake as a complementary textural contrast.
-
Peanut Butter Sauce: Drizzling warm peanut butter sauce enhances the coffee and chocolate tones, providing an unexpected twist that coffee lovers will adore. The creaminess of peanut butter creates a rich contrast.
-
Dessert Wines: Pair your cheesecake with a sweet dessert wine, such as a late harvest Riesling or a port, to elevate the overall dining experience; the wine’s sweetness harmonizes with the cheesecake’s rich flavors.
-
Chocolate Ganache: Serve with a side of chocolate ganache for those who crave an extra layer of decadence; it adds a silky smooth chocolate contrast that’s simply irresistible.
-
Nutty Granola: Crunchy, nutty granola provides a textural contrast to the smooth cheesecake, making each bite exciting. The nutty flavor rounds out the coffee profile nicely.
How to Store and Freeze Coffee Lover’s Cheesecake
Fridge: Store your Coffee Lover’s Cheesecake in the refrigerator, tightly covered or in an airtight container, for up to 1 week. This keeps it fresh and delicious!
Freezer: If you want to keep it longer, wrap individual slices tightly in plastic wrap and then place them in a freezer-safe container. It can last for up to 3 months.
Thawing: To enjoy frozen slices, simply transfer them to the fridge for 6-8 hours before serving. This gentle thawing retains the cheesecake’s creamy texture.
Reheating: If you prefer it warm, gently reheat in the oven at 200°F (93°C) for about 10 minutes. Avoid the microwave, as it can change the consistency.
Expert Tips for Coffee Lover’s Cheesecake
• Choose Quality Ingredients: Use high-quality cream cheese and freshly brewed espresso for a superior taste that elevates your Coffee Lover’s Cheesecake.
• Room Temperature Eggs: Ensure your eggs are at room temperature before mixing. This helps create a smooth filling and prevents lumps.
• Avoid Overmixing: Mix the filling just until combined after adding eggs and coffee. Overmixing can lead to cracks in your cheesecake while baking.
• Gradual Cooling: After baking, let the cheesecake cool gradually in the oven with the door cracked to prevent it from cracking.
• Garnish Creatively: Use chocolate shavings or coffee beans as garnishes to add visual appeal and enhance the coffee experience of your cheesecake.
• Make Ahead for Best Flavor: Prepare your Coffee Lover’s Cheesecake a day in advance. It allows the flavors to meld beautifully, resulting in a richer taste.
Coffee Lover’s Cheesecake Variations
Feel free to let your creativity flow and give this dessert your own unique touch!
- Pumpkin Spice: Add a teaspoon of pumpkin pie spice to the filling for a warm, autumn-inspired twist that brings cozy flavors.
- Nut Crust: Swap out the graham cracker crust for a pecan or almond crust for an extra layer of flavor and crunch. It adds a lovely nutty essence that complements the coffee beautifully.
- Vegan Option: Use vegan cream cheese and a flaxseed egg replacement for a cruelty-free dessert that doesn’t sacrifice flavor or texture.
- Caramel Drizzle: For a sweet surprise, drizzle homemade or store-bought caramel sauce on top for an added flavor dimension that pairs perfectly with coffee.
- Chocolate-Hazelnut: Mix in a few tablespoons of chocolate-hazelnut spread into your filling for a decadent twist. It’s like having a cheesecake and a chocolate treat all in one!
- Orange Zest: Add a teaspoon of fresh orange zest to the filling to introduce a refreshing citrus note that brightens the flavor profile.
- Mocha Upgrade: Incorporate a tablespoon of cocoa powder into the filling for a mocha-style version, perfect for chocolate lovers.
- S’mores Version: Top with mini marshmallows and crushed graham crackers for a fun s’mores-inspired dessert reminiscent of campfire evenings. Pair with our delicious Crisp Mini Cheesecakes for more creative ideas.
Experiment with these variations, and you might just stumble upon your new favorite version of this delightful cheesecake!
Coffee Lover’s Cheesecake Recipe FAQs
What type of coffee should I use for the cheesecake?
Absolutely! For the best flavor, use freshly brewed espresso. The robust taste of espresso is perfect for enhancing your cheesecake. If you don’t have espresso, a strong brewed coffee can be used instead; just ensure it’s cooled before adding to the filling.
How should I store leftover cheesecake?
To keep your Coffee Lover’s Cheesecake fresh, store it in the refrigerator, covered tightly with plastic wrap or in an airtight container. It will remain delicious for up to 1 week. Just remember, the flavors become even more delightful the longer it sits!
Can I freeze the cheesecake for later enjoyment?
Yes, you can! Wrap slices of your Coffee Lover’s Cheesecake tightly in plastic wrap, then place them in a freezer-safe container. It will be fine in the freezer for up to 3 months. Be sure to label it so you can indulge again without any surprises!
What should I do if my cheesecake cracks while baking?
If your cheesecake develops cracks, don’t worry! This can happen due to overmixing or not cooling it gradually. To prevent cracks in the future, make sure to mix only until combined and cool the cheesecake gently in the oven after baking. Adding a water bath can also provide a moist environment, helping to keep the cheesecake smooth.
Is this cheesecake suitable for people with dietary restrictions?
The Coffee Lover’s Cheesecake contains cream cheese and eggs, making it unsuitable for vegans and those with dairy allergies. If you’re looking for a dairy-free version, consider experimenting with vegan cream cheese alternatives and flax eggs. However, the texture and flavor will differ from the traditional version.
How can I tell when my cheesecake is done baking?
Very! The key to a perfect cheesecake is to watch for a slightly jiggly center. Bake until the edges are set but the center has a gentle wobble; it will firm up as it cools. Aim for 55-60 minutes in a 325°F (160°C) oven. Remember, patience is key for the best results!
Irresistible Coffee Lover's Cheesecake You Can't Resist
Ingredients
Equipment
Method
- Preheat your oven to 325°F (160°C).
- In a mixing bowl, combine graham cracker crumbs, cocoa powder, brown sugar, and melted butter. Mix until resembling wet sand. Press into a springform pan and bake for 10 minutes. Allow to cool.
- Beat softened cream cheese until smooth. Gradually add granulated sugar, mixing until combined, then add vanilla and salt.
- Add eggs one at a time, mixing on low just until combined.
- Slowly pour in cooled espresso and coffee liqueur, mixing gently until smooth.
- Pour filling over cooled crust, smoothing the top.
- Bake for 55-60 minutes, until edges are set and center jiggles slightly.
- Turn off oven, crack the door, and cool for 1 hour. Chill in the refrigerator for at least 4 hours.
- Remove from the springform pan and garnish with chocolate shavings or coffee beans before serving.
Leave a Reply