
The sizzling sound of crispy chimichangas hitting the hot oil is music to my ears, beckoning me to gather around the table. These Beef and Cheese Chimichangas are my go-to for any casual gathering, combining seasoned ground beef, melty cheese, and the perfect hint of spice wrapped in a golden tortilla. Not only are they incredibly easy to make, but they’re also incredibly customizable, ensuring each bite can cater to your unique taste. Whether you’re frying them for that authentic crunch or opting for a healthier baked version, these delightful Tex-Mex creations promise comfort and joy for everyone. Who can resist the allure of a dish that satisfies both young and old? Let’s dive into making your own scrumptious chimichangas that will have everyone asking for seconds!

Why are Chimichangas So Irresistible?
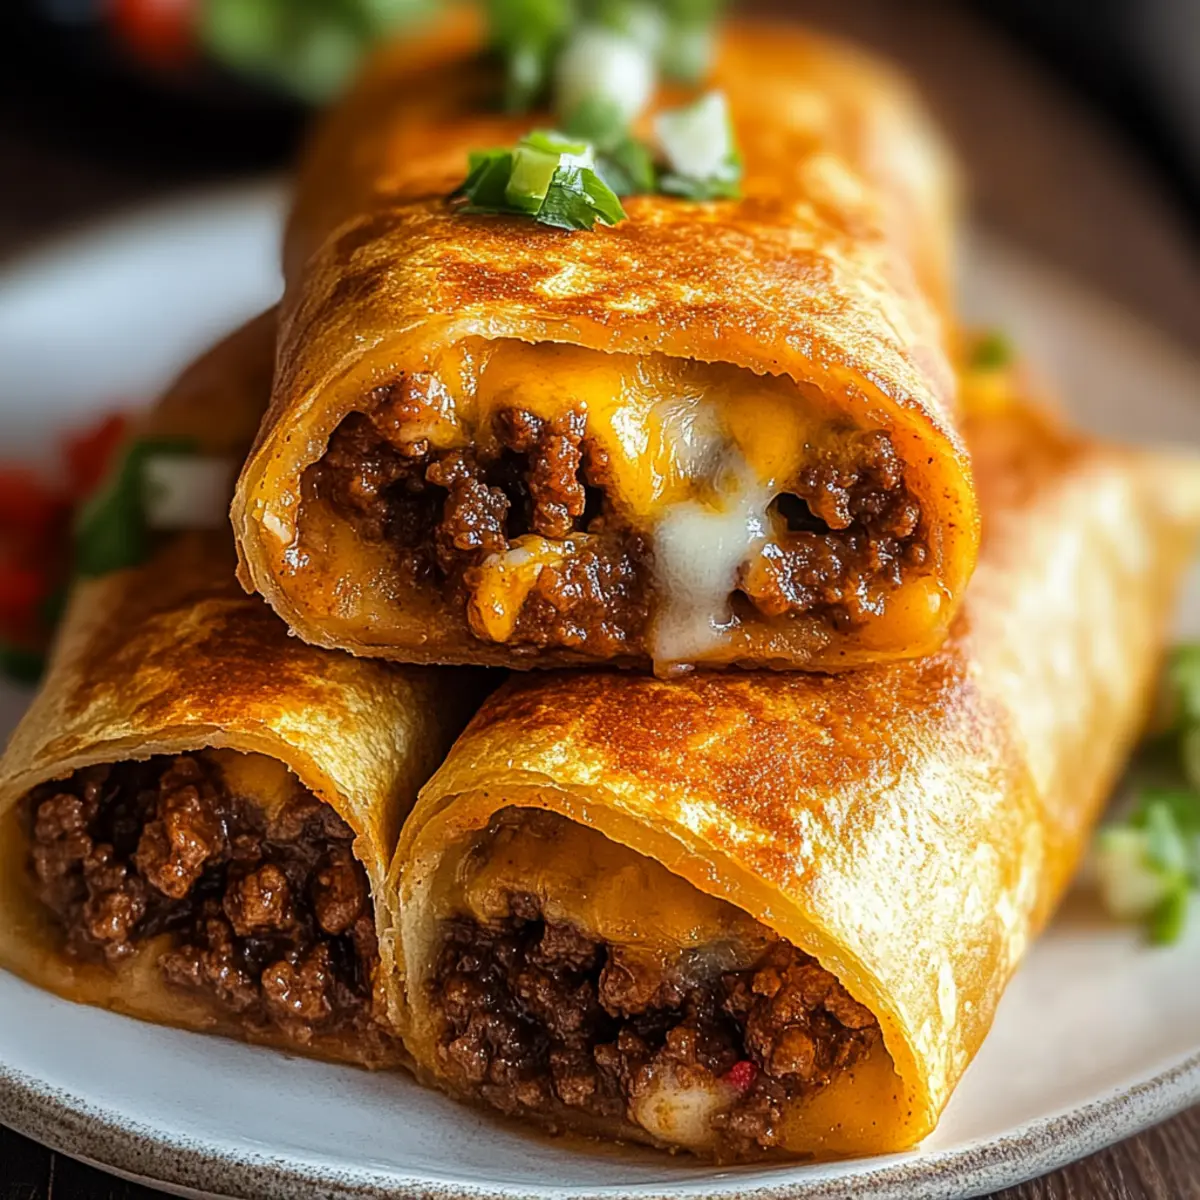
Crispy Perfection: These Beef and Cheese Chimichangas boast a golden, crunchy exterior that gives way to a savory, gooey interior.
Unmatched Flavor: A delicious blend of seasoned beef, melty cheese, and zesty taco seasoning makes every bite a flavor explosion.
Customizable to Your Taste: Feel free to experiment! Whether you want to try a spicy kick with jalapeños or create a vegetarian version, the options are endless.
Family-Friendly Fun: Ideal for gatherings, this dish delights both kids and adults, ensuring a happy dining experience.
Make Ahead & Freeze: Prep your chimichangas in advance and freeze them for those busy nights when homemade goodness is needed, just like with my Crescent Breakfast Bacon recipe!
Easy Clean-up: With simple ingredients and straightforward steps, inspired home chefs will enjoy whipping these up without the hassle.
Beef and Cheese Chimichangas Ingredients
For the Filling
• Ground Beef – A key protein for your chimichangas; opt for lean ground beef to keep them from being greasy.
• Onion – Adds essential depth; finely dice a small onion for optimal flavor.
• Garlic – Elevates the dish’s taste; freshly minced garlic packs the most punch.
• Taco Seasoning – Infuses flavor; feel free to use a store-bought packet or whip up your own mix.
• Salsa – Keeps the filling moist and tasty; go for your favorite type, or substitute with diced tomatoes.
• Refried Beans – Adds creaminess and binds the filling together; optional for a lighter version.
• Shredded Cheese – Guarantees melty goodness; select cheddar, Monterey Jack, or a Mexican cheese blend.
For the Tortillas
• Flour Tortillas – Essential for wrapping; use large (10-inch) tortillas for easy assembly and warmth.
For Cooking
• Vegetable Oil – Used for frying or brushing; can replace with canola oil for a lighter option.
These Beef and Cheese Chimichangas are not just delicious; they are customizable and perfect for a cozy gathering! Enjoy crafting a dish that will leave your loved ones asking for more!
Step‑by‑Step Instructions for Beef and Cheese Chimichangas
Step 1: Cook the Filling
In a skillet over medium heat, add 1 pound of lean ground beef and cook until browned, approximately 5-7 minutes. Stir in 1 finely diced onion and sauté until softened, about 3 minutes. Next, add 2 cloves of minced garlic, 1 packet of taco seasoning, and ½ cup of salsa, simmering for 2-3 minutes until the mixture thickens slightly. Remove from heat and allow it to cool.
Step 2: Assemble the Chimichangas
Warm 6 large flour tortillas in the microwave or on a skillet until pliable, about 10-15 seconds per side. Spread refried beans evenly along the center of each tortilla, followed by a generous scoop of the beef filling and a sprinkle of shredded cheese. Fold the sides in, then roll the tortilla tightly from the bottom to secure the filling.
Step 3: Prepare for Cooking
To ensure a crispy texture, choose your cooking method. For frying, heat 1 cup of vegetable oil in a large skillet to 350°F (175°C). For baking, preheat your oven to 400°F (200°C). If frying, prepare a plate lined with paper towels for draining. If baking, lightly grease a baking sheet with cooking spray.
Step 4: Cook the Chimichangas
For frying, carefully place the chimichangas seam-side down into the hot oil, cooking for 2-3 minutes per side until golden brown and crispy. Drain on paper towels. For baking, place the chimichangas seam-side down on the greased baking sheet, brush with a little oil, and bake for 20-25 minutes until the tortillas are golden and crisp, turning halfway through for even cooking.
Step 5: Serve
Once cooked, allow the chimichangas to rest for a couple of minutes. Serve them warm with sides of sour cream, guacamole, or salsa for dipping. Enjoy the delightful crunch and melty interior of your Beef and Cheese Chimichangas!
What to Serve with Beef and Cheese Chimichangas
Indulge in a Tex-Mex feast by pairing your crispy chimichangas with delightful complementary dishes that elevate your meal.
- Fresh Guacamole: A creamy avocado dip that cools the spicy flavors in the chimichangas, creating a harmonious balance. Pair it with tortilla chips for a crunchy side.
- Zesty Mexican Rice: Fluffy rice cooked with tomatoes, onions, and spices adds a vibrant touch, making every bite a festival of flavors. Its texture contrasts beautifully with the crispy chimichangas.
- Crisp Green Salad: A light mix of leafy greens, tomatoes, and cilantro offers a refreshing crunch that cuts through the richness of the chimichangas. Drizzle with lime for a zesty finish.
- Spicy Black Beans: These beans add protein and a flavorful kick, effectively enhancing your Tex-Mex meal experience. Serve them warm for a comforting addition!
- Sour Cream Dip: Cool and tangy, this classic topping can also transform into a zesty dipping sauce by mixing in herbs or spices. It’s the perfect creamy counterpart to your chimichangas.
- Margaritas: Sip on a refreshing margarita, combining tangy lime and a hint of sweetness, to cleanse your palate. This drink beautifully complements the rich flavors of the chimichangas.
- Churros for Dessert: Don’t forget a sweet finish! These crispy, sugary treats dipped in chocolate sauce will leave everyone grinning with satisfaction after the hearty meal.
These delicious pairings will ensure your Beef and Cheese Chimichangas shine as the centerpiece of a flavorful feast!
Make Ahead Options
These Beef and Cheese Chimichangas are perfect for meal prep enthusiasts! You can assemble the chimichangas (without frying or baking) and refrigerate them for up to 2 days, covered tightly with plastic wrap to maintain freshness. Alternatively, freeze the uncooked chimichangas for up to 2 months; just remember to lay them flat on a baking sheet to keep their shape, then transfer them to an airtight container. When you’re ready to cook, simply fry or bake them directly from frozen, adding an extra few minutes to the cooking time. This method not only saves time during busy weeknights but also allows you to enjoy restaurant-quality chimichangas with minimal effort!
Expert Tips for Beef and Cheese Chimichangas
-
Use Lean Beef: Opt for lean ground beef to minimize greasiness. This ensures your chimichangas remain crispy without being overly oily.
-
Warm Tortillas First: Always warm your flour tortillas before filling them. This helps prevent tearing and makes them easier to roll tightly around the filling.
-
Secure for Frying: If you’re frying them, consider using toothpicks to secure the chimichangas. This can prevent them from unrolling while cooking.
-
Bake for Healthier Option: For a lighter version, bake instead of fry. Brush the chimichangas with oil and they’ll still turn out crispy and delicious!
-
Mind the Filling: Don’t overstuff your chimichangas. A little filling goes a long way and ensures they stay sealed and crispy while cooking.
-
Experiment with Fillings: Customize your Beef and Cheese Chimichangas by adding ingredients like jalapeños for heat or unique cheeses for different flavors.
How to Store and Freeze Beef and Cheese Chimichangas
Fridge: Store cooked chimichangas in an airtight container for up to 3 days. This keeps them fresh and ready for quick meals!
Freezer: For long-term storage, freeze uncooked chimichangas for up to 2 months. Wrap each one in plastic wrap and then foil to prevent freezer burn.
Reheating: Avoid microwaving as it can make the chimichangas soggy. Instead, reheat in an oven or air fryer at 350°F (175°C) for about 10-15 minutes until crispy.
Prep Ahead: Assemble your Beef and Cheese Chimichangas ahead of time and refrigerate them for up to 2 days before cooking. Perfect for meal prepping!
Beef and Cheese Chimichangas Variations
Feel free to explore exciting twists and swaps that make the Beef and Cheese Chimichangas truly your own!
-
Bean & Beef: Add refried beans to the filling for a creamy texture. The beans make it heartier while added flavor boosts the overall taste.
-
Spicy Kick: Incorporate diced jalapeños or swap regular cheese for pepper jack for an extra kick. This simple swap will elevate your chimichangas, making them a hit for spice lovers.
-
Breakfast Delight: Replace the beef with scrambled eggs and cheese for a delightful breakfast variation. These breakfast chimichangas are perfect for a hearty morning meal, providing energy for the day ahead.
-
Vegetarian Twist: Substitute beef with sautéed vegetables and black beans for a filling, meat-free option. This variation isn’t just delicious; it’s also a great way to sneak in healthy veggies!
-
Sauced It Up: Bake chimichangas topped with enchilada sauce or queso for a delicious smothered version. The gooey cheese and savory sauce create a comforting, indulgent dish.
-
Sweet Heat: Add a touch of sweet chili sauce to your beef mixture for a sweet and spicy combo. This unexpected twist will surprise your taste buds in the best way!
-
Herb Infusion: Mix in fresh cilantro or parsley to the filling for a fresh pop of flavor. Adding herbs can brighten up your chimichangas, enhancing the Tex-Mex essence.
-
Crunchy Coating: Before frying or baking, coat your chimichangas with crushed tortilla chips for an extra crispy exterior. This creates a delightful crunch that compliments the soft interior perfectly!
Feel inspired to make these Beef and Cheese Chimichangas your own! And if you’re looking for more ways to enjoy Tex-Mex flavors, try my recipe for Crispy Chilli Beef or connect with delightful sides from my Cottage Cheese Blueberry recipe.
Beef and Cheese Chimichangas Recipe FAQs
How do I select ripe ingredients for my Beef and Cheese Chimichangas?
Absolutely! When choosing ingredients, opt for lean ground beef to ensure tender, juicy filling. For onions, find ones that feel firm and heavy, avoiding any that have soft spots or are sprouting. Fresh, aromatic garlic should be white or pale ivory, with no dark spots or blemishes. For salsa, pick a variety that looks fresh and vibrant; avoid jars with ingredients you can’t pronounce!
What’s the best way to store leftover Beef and Cheese Chimichangas?
Very! Reuse your leftovers by storing them in an airtight container in the fridge for up to 3 days. They’ll remain fresh, perfect for a quick meal later! If you’d like, you can wrap each chimichanga in parchment before placing them in the container for added protection.
Can I freeze my Beef and Cheese Chimichangas? How do I do it?
Absolutely! To freeze, wrap each uncooked chimichanga tightly in plastic wrap, then add another layer of foil to prevent freezer burn. They can last in the freezer for up to 2 months. When you’re ready to cook, no need to thaw—just bake or fry them directly from frozen, adding a few extra minutes of cooking time.
What if my chimichangas open while frying?
No worries! If your chimichangas open up while frying, it’s often due to overfilling or not securing them enough. To prevent this, make sure to roll them tightly and place them seam-side down in the oil first. If you’d like, you can use toothpicks to secure the edges while frying for an extra safeguard.
Are there any dietary considerations I should be aware of?
Very! For those with allergies, make sure to check labels for any fillers in the taco seasoning, cheese, or tortillas. Additionally, if you’re cooking for someone with gluten intolerance, consider using gluten-free tortillas. You can also customize your filling with vegetables or beans for a healthier, vegetarian option that everyone can enjoy!
How can I ensure my chimichangas stay crispy after cooking?
This is a great question! To keep your chimichangas crispy, always warm your tortillas before filling to prevent tearing. After cooking, let them rest on a wire rack instead of a plate. Air circulation will keep them crunchy! Also, if you’re baking them, give them a light brush of oil to enhance that golden, crisp finish.
Beef and Cheese Chimichangas for Crispy Tex-Mex Comfort
Ingredients
Equipment
Method
- In a skillet over medium heat, add the ground beef and cook until browned, about 5-7 minutes. Stir in the onion and sauté until softened, about 3 minutes. Add the garlic, taco seasoning, and salsa, simmering for 2-3 minutes until thickened.
- Warm the tortillas in the microwave or on a skillet until pliable. Spread refried beans along the center, add the beef filling and cheese. Fold sides in and roll tightly from the bottom.
- For frying, heat oil in a skillet to 350°F. For baking, preheat the oven to 400°F. Prepare for cooking based on your method.
- Fry the chimichangas in hot oil for 2-3 minutes per side until golden brown. Drain on paper towels. For baking, brush with oil and bake for 20-25 minutes until golden, turning halfway through.
- Allow the chimichangas to rest for a few minutes before serving with sour cream, guacamole, or salsa.
Leave a Reply