
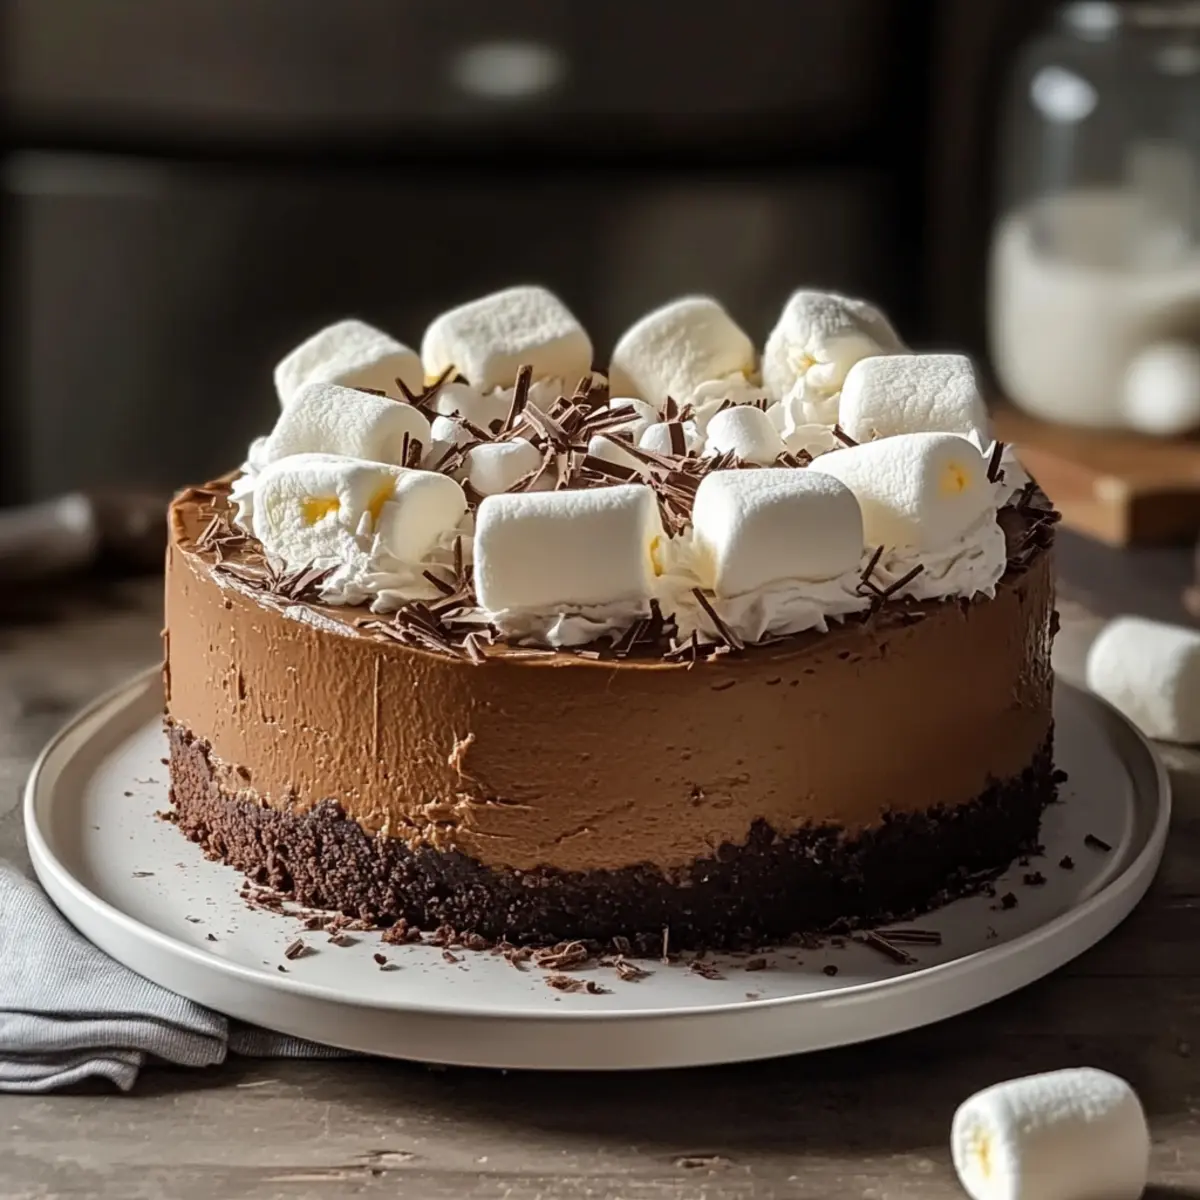
As I was blending the ingredients, a warm, chocolaty aroma wafted through my kitchen, instantly transporting me back to cozy winter evenings by the fire. This Hot Cocoa Cheesecake is not just a dessert—it’s a heartfelt indulgence that wraps you in comfort with every bite. With its creamy texture and fluffy marshmallow whipped cream topping, this cheesecake is surprisingly easy to prepare, making it the perfect show-stopper for holiday gatherings or a soothing treat after a hectic day. It’s also versatile, with options for a gluten-free crust or even a vegan version. Are you curious to discover how to create this delightful winter wonder?
Why is Hot Cocoa Cheesecake a Must-Try?
Decadent Flavor: Each slice offers a rich, chocolatey taste that perfectly mimics your favorite winter drink.
Simple Preparation: With easy-to-follow steps, even novice bakers can impress friends and family.
Customization Galore: Switch it up with flavors like peppermint or nutty crunch—there’s a version for everyone!
Perfect for Gatherings: This show-stopping dessert is sure to be the star of any holiday spread or cozy gathering.
Versatile Options: Whether you prefer a vegan version or a gluten-free twist, this recipe adapts beautifully to dietary preferences.
Indulge yourself and share this delightful creation that’s bound to charm your taste buds and those of your loved ones!
Hot Cocoa Cheesecake Ingredients
Here’s everything you need to whip up this cozy masterpiece!
For the Crust
- Chocolate Cookie Crumbs – Adds a rich, chocolaty base; swap for graham crackers or Oreos for different flavors.
- Unsalted Butter – Binds the crust together; feel free to use margarine if preferred.
For the Cheesecake Filling
- Cream Cheese – Provides that creamy texture; ensure it’s at room temperature for easy blending.
- Granulated Sugar – Sweetens your cheesecake beautifully; consider brown sugar for a caramel-like depth.
- Eggs – Helps the cheesecake set perfectly; using room temperature eggs gives a smoother batter.
- Hot Cocoa Mix – Infuses a beloved chocolate flavor; choose your favorite brand for the best results.
For the Marshmallow Whipped Cream
- Heavy Cream – Creates a fluffy topping; coconut cream can substitute for a dairy-free option.
- Marshmallow Fluff – Adds sweetness and delightful texture to the whipped cream; use regular whipped cream if desired.
This Hot Cocoa Cheesecake is a winter wonder you won’t want to miss!
Step‑by‑Step Instructions for Hot Cocoa Cheesecake
Step 1: Preheat and Prepare
Begin by preheating your oven to 325°F (163°C). Prepare a water bath by placing a large baking dish filled with hot water on the bottom rack of your oven. This will help create a moist environment while baking your delightful Hot Cocoa Cheesecake, ensuring it doesn’t crack.
Step 2: Make the Crust
In a mixing bowl, combine your chocolate cookie crumbs with melted unsalted butter until the mixture resembles wet sand. Firmly press this mixture into the bottom of a 9-inch springform pan, ensuring it’s evenly distributed. Bake the crust in the preheated oven for 10 minutes, then set it aside to cool while you prepare the filling.
Step 3: Prepare the Cheesecake Filling
In a large mixing bowl, beat softened cream cheese with granulated sugar until the mixture is smooth and creamy, about 3-4 minutes. Gradually add in room temperature eggs, one at a time, mixing well after each addition. Then, blend in the hot cocoa mix until fully incorporated, creating a velvety batter that captures the essence of hot cocoa.
Step 4: Bake the Cheesecake
Carefully pour the smooth cheesecake filling over the cooled crust in the springform pan. Bake in the water bath for 50 to 60 minutes, or until the edges are set yet the middle remains slightly jiggly. This slight jiggle is key to achieving a creamy texture in your Hot Cocoa Cheesecake.
Step 5: Cool Gradually
Once baked, turn off the oven and leave the cheesecake inside for an additional hour. This gradual cooling helps to minimize cracking. After an hour, remove it from the oven and let it cool to room temperature before transferring it to the refrigerator to chill for at least 4 hours, or overnight for the best texture.
Step 6: Make the Whipped Cream
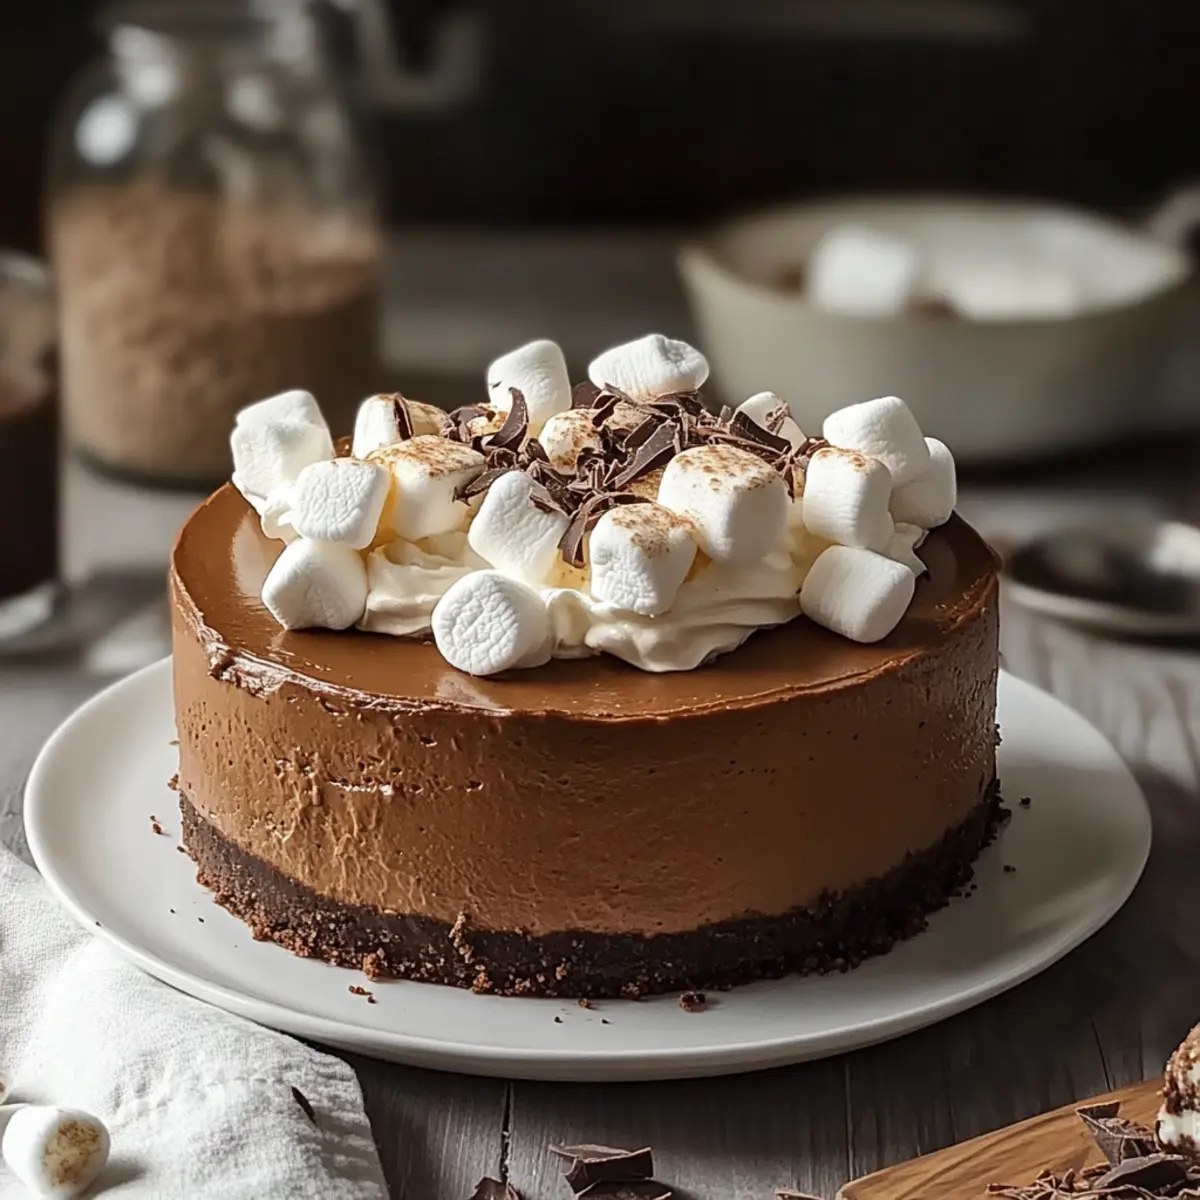
In a mixing bowl, whip heavy cream on high speed until soft peaks form, taking about 3-5 minutes. Gently fold in marshmallow fluff until fully combined, creating a light, fluffy topping. This marshmallow whipped cream is the perfect compliment to your decadent Hot Cocoa Cheesecake.
Step 7: Assemble and Garnish
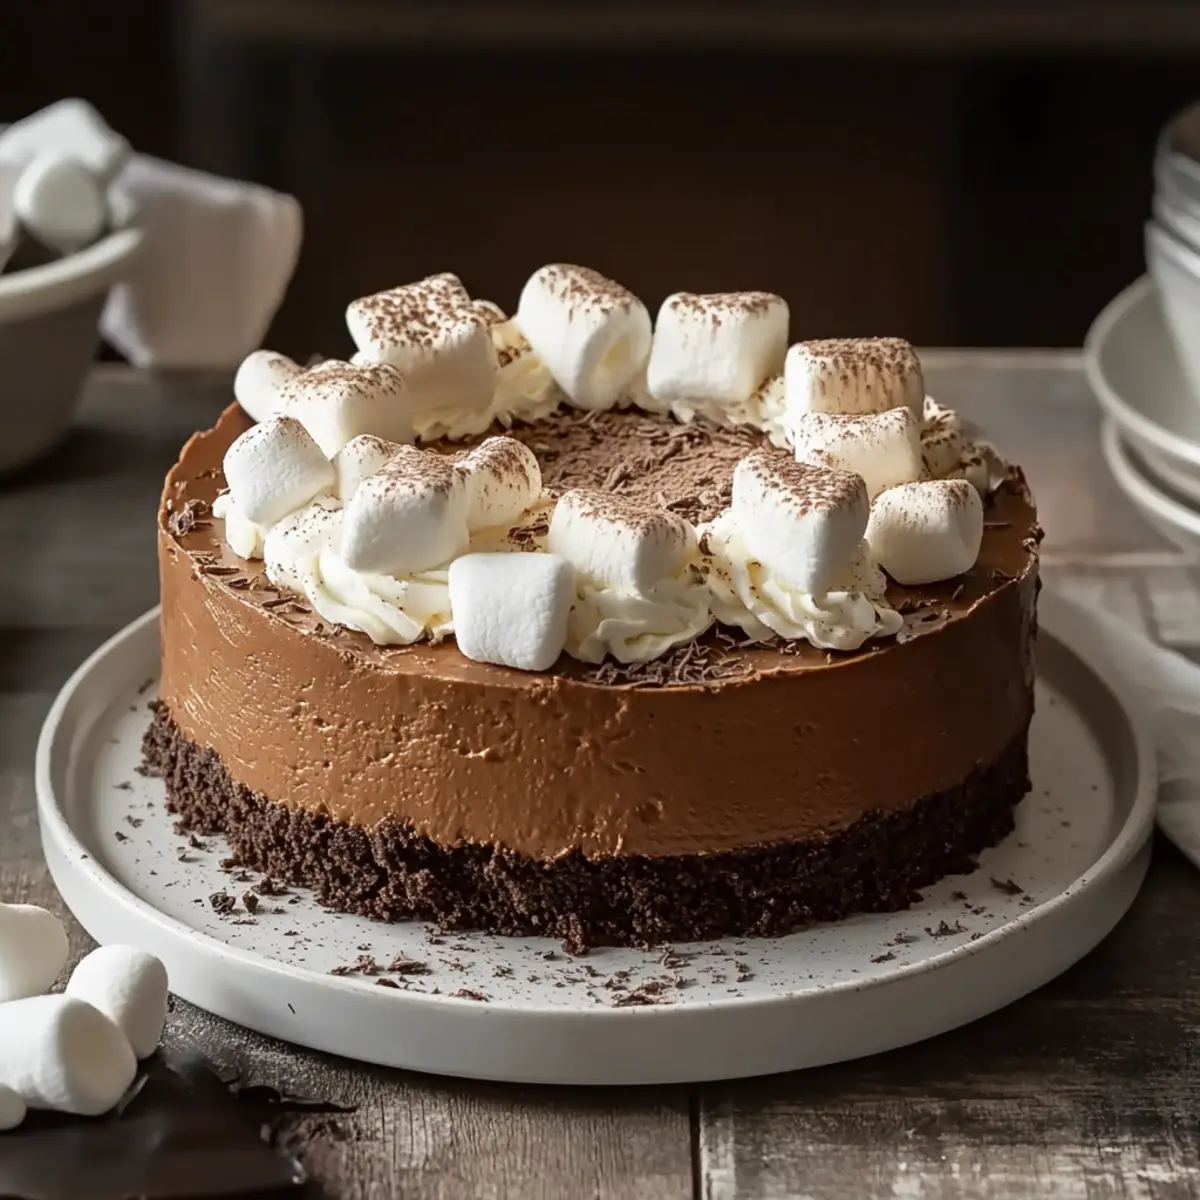
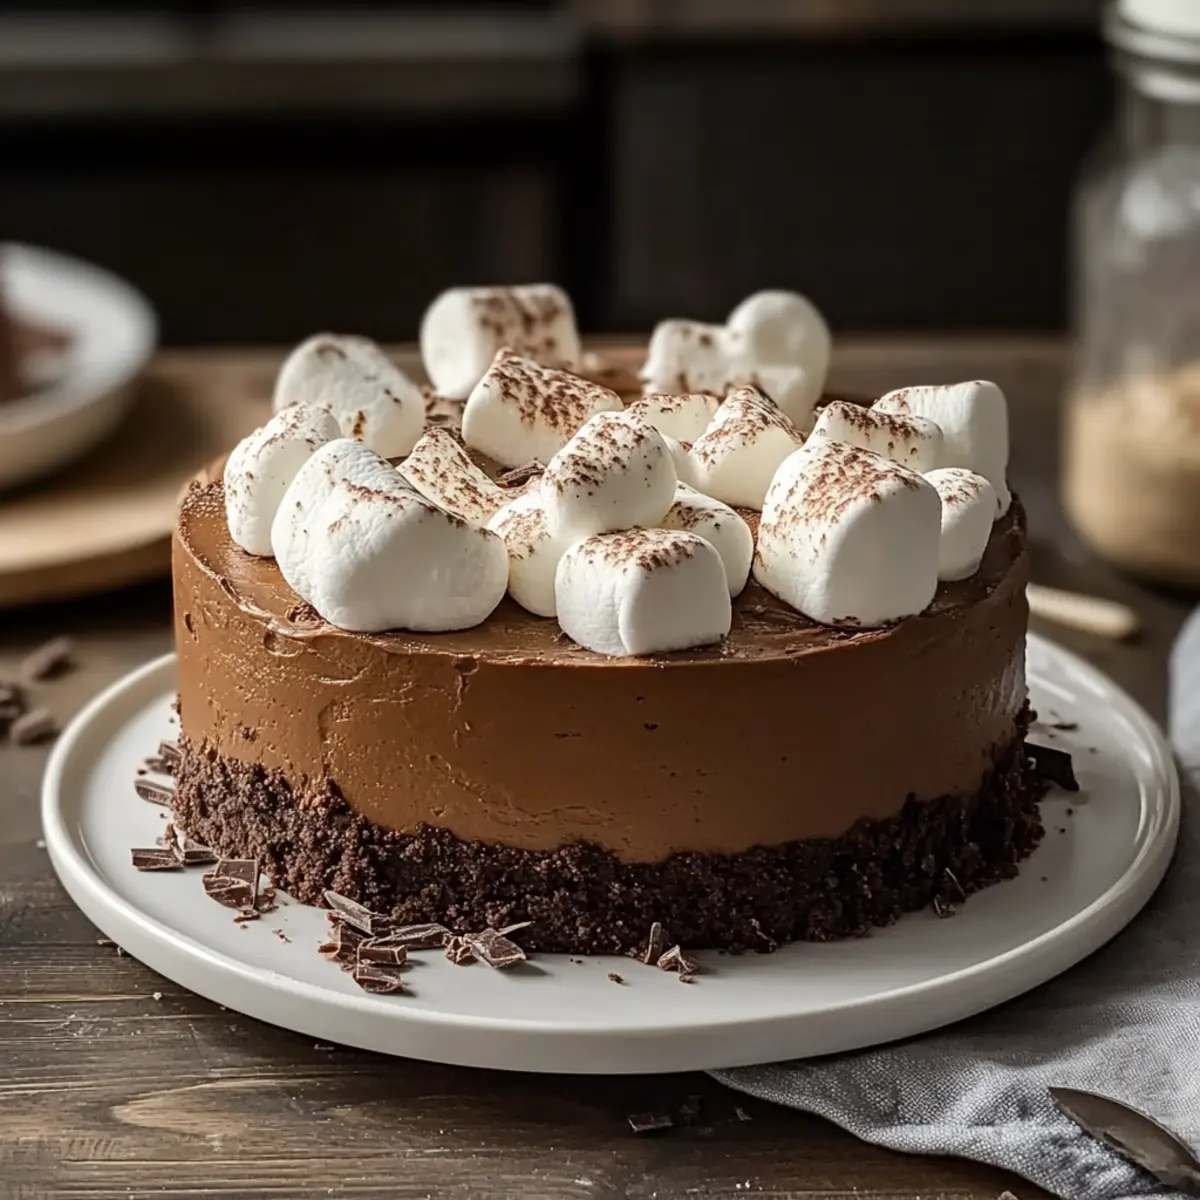
Once the cheesecake is thoroughly chilled, spread the marshmallow whipped cream evenly over the top. If desired, garnish with mini marshmallows or chocolate shavings for extra flair. This will enhance both the visual appeal and the delicious experience of your Hot Cocoa Cheesecake.
Step 8: Serve and Enjoy
Slice your beautifully crafted Hot Cocoa Cheesecake, and serve chilled to friends and family. Pair it with a warm cup of cocoa for an extra cozy treat. Each bite offers the warmth of your favorite winter drink, wrapped in creamy cheesecake bliss!
Make Ahead Options
These decadent Hot Cocoa Cheesecakes are perfect for busy home cooks looking to save time during the hustle and bustle of the week! You can prepare the cheesecake filling up to 24 hours in advance; simply mix the cream cheese, sugar, eggs, and hot cocoa mix, then refrigerate it. The crust can also be made ahead and stored in an airtight container for up to 3 days. When you’re ready to bake, just pour the chilled filling over the pre-made crust and proceed with the baking instructions. To maintain the cheesecake’s creamy texture, cool it gradually in the oven and refrigerate it promptly. Finally, whip the marshmallow cream just before serving to keep its airy fluffiness intact—making your Hot Cocoa Cheesecake just as delicious and indulgent as if you made it fresh!
Hot Cocoa Cheesecake Variations
Embrace the joy of personalization as you create your own delicious twist on this delightful cheesecake!
-
Peppermint Twist: Stir in peppermint extract into the cheesecake mix and sprinkle crushed candy canes on top for a festive touch. The refreshing mint flavor perfectly complements the chocolate, making it a holiday favorite.
-
Salted Caramel Surprise: Swirl in ribbons of warm caramel sauce into the cheesecake batter before baking. Each slice will reveal delightful pockets of gooey caramel that elevate the chocolatey goodness.
-
Nutty Crunch: Mix in chopped toasted pecans or walnuts into the crust for an added texture contrast. This nutty flavor pairs beautifully with the creamy filling, creating a wonderful depth of taste.
-
Dark Chocolate Delight: Opt for dark chocolate hot cocoa mix for a more intense chocolate experience. This rich variation is perfect for true chocolate lover’s who crave a deep, satisfying flavor.
-
Spicy Touch: A sprinkle of cayenne pepper or a dash of cinnamon brings a surprising warmth to this dessert. The addition of spice creates an unexpected but harmonious nuance that elevates the overall experience.
-
Fruit Fusion: Top your cheesecake with fresh berries, adding a tart contrast to the sweet, creamy cheesecake. Strawberries and blueberries not only look beautiful but also offer a refreshing taste that balances the richness.
-
Vegan Version: Replace cream cheese with a homemade cashew cream and use coconut cream for the whipped topping. This version ensures everyone can enjoy a slice of this indulgent treat without dairy!
For more inspiration on incorporating delightful flavors, check out these recipes: try out the creamy Cheesecake Stuffed Strawberries for a fresh twist or dive into our delightful Crisp Mini Cheesecakes that scream versatility!
How to Store and Freeze Hot Cocoa Cheesecake
Fridge: Store the cheesecake in an airtight container for up to 5 days, ensuring it stays fresh and delicious.
Freezer: If you need to store it longer, wrap the cheesecake tightly in plastic wrap and aluminum foil. It can be frozen for up to 2 months.
Thawing: To enjoy frozen slices, transfer them to the fridge and let them thaw overnight for the best texture and flavor.
Reheating: If desired, serve slices at room temperature or gently warm in the microwave for about 10-15 seconds to enhance the rich textures of your Hot Cocoa Cheesecake.
Expert Tips for Hot Cocoa Cheesecake
-
Use a Water Bath: This technique helps achieve even baking, preventing cracks in your Hot Cocoa Cheesecake. Don’t skip this step!
-
Room Temperature Ingredients: Always make sure your cream cheese and eggs are at room temperature before mixing. This creates a smoother, creamier batter.
-
Gradual Cooling: To minimize cracking, let your cheesecake cool slowly in the oven for about an hour before refrigerating. This technique enhances the texture.
-
Gentle Whipping: When making the marshmallow whipped cream, whip the heavy cream to soft peaks, then fold in the marshmallow fluff gently to maintain a light, airy consistency.
-
Chill Before Serving: For the best flavor and texture, refrigerate your cheesecake overnight. This additional chilling time allows the flavors to meld beautifully.
What to Serve with Decadent Hot Cocoa Cheesecake?
Imagine the perfect cozy gathering where every bite of your dessert is complemented with delightful side dishes and drinks.
-
Rich Coffee: A warm cup of freshly brewed coffee contrasts beautifully with the creamy cheesecake, enhancing its chocolatey notes.
-
Vanilla Ice Cream: This classic pairing adds a cool, creamy element that beautifully balances the rich flavors of the cheesecake.
-
Spiced Hot Cocoa: Elevate the experience with a cup of spiced hot cocoa, bringing an extra layer of warmth and sweetness to your dessert.
-
Salted Caramel Sauce: Drizzle this indulgent sauce over the cheesecake to add a touch of savory sweetness that pairs perfectly with chocolate.
-
Fresh Berries: The tartness of raspberries or strawberries cuts through the richness, providing a refreshing contrast.
-
Ginger Snap Cookies: Serve these alongside for a delightful crunch, adding a spicy flavor that complements the warmth of your cheesecake.
Elevate your dessert spread with these pairings to create a memorable culinary experience that everyone will enjoy!
Hot Cocoa Cheesecake Recipe FAQs
What type of chocolate cookie crumbs should I use for the crust?
You can use store-bought chocolate cookie crumbs like Oreos to save time, or crush your favorite chocolate cookies at home! If you’re looking for a different flavor or a gluten-free option, graham cracker crumbs or gluten-free cookies can also do the trick.
How do I store leftover Hot Cocoa Cheesecake?
To keep the cheesecake fresh, wrap it tightly in plastic wrap or store it in an airtight container in the refrigerator for up to 5 days. This way, you can enjoy a delicious slice whenever the craving strikes!
Can I freeze Hot Cocoa Cheesecake?
Absolutely! To freeze it, allow the cheesecake to cool completely, then wrap tightly in plastic wrap followed by aluminum foil. It can be frozen for up to 2 months. When ready to enjoy, thaw it in the fridge overnight for best results.
What should I do if my cheesecake cracks while baking?
No worries! If cracks appear, make sure you have used a water bath to create a moist environment during baking. If it does crack, you can cover it up with whipped cream or a chocolate ganache to hide the imperfections—trust me, no one will mind when they taste it!
Is this Hot Cocoa Cheesecake suitable for people with dietary restrictions?
Yes! This recipe is versatile. To make it gluten-free, just use gluten-free cookies for the crust. For a vegan version, substitute the cream cheese with a creamy cashew blend and use coconut cream for the whipped topping. Everyone can enjoy this cozy dessert!
How long does the marshmallow whipped cream last?
Marshmallow whipped cream tastes best fresh, but you can store any leftover whipped cream in the refrigerator in an airtight container for up to 3 days. Just be sure to give it a gentle re-whip before serving, as it may lose some of its fluffy texture!
Indulge in Heavenly Hot Cocoa Cheesecake Bliss
Ingredients
Equipment
Method
- Preheat your oven to 325°F (163°C) and prepare a water bath by placing a large baking dish filled with hot water on the bottom rack of your oven.
- In a mixing bowl, combine chocolate cookie crumbs with melted unsalted butter until it resembles wet sand. Firmly press into the bottom of a 9-inch springform pan and bake for 10 minutes. Set aside to cool.
- Beat softened cream cheese with granulated sugar until smooth and creamy. Gradually add eggs, mixing well after each addition, then blend in hot cocoa mix until fully incorporated.
- Pour the cheesecake filling over the cooled crust and bake in the water bath for 50 to 60 minutes until the edges are set and the middle is slightly jiggly.
- Turn off the oven and leave the cheesecake inside for an additional hour to cool gradually, then transfer to the refrigerator to chill for at least 4 hours or overnight.
- Whip heavy cream on high speed until soft peaks form, then fold in marshmallow fluff to create a light, fluffy topping.
- Spread the marshmallow whipped cream over the chilled cheesecake and garnish with mini marshmallows or chocolate shavings if desired.
- Slice and serve your Hot Cocoa Cheesecake chilled, ideally paired with a warm cup of cocoa.
Leave a Reply