
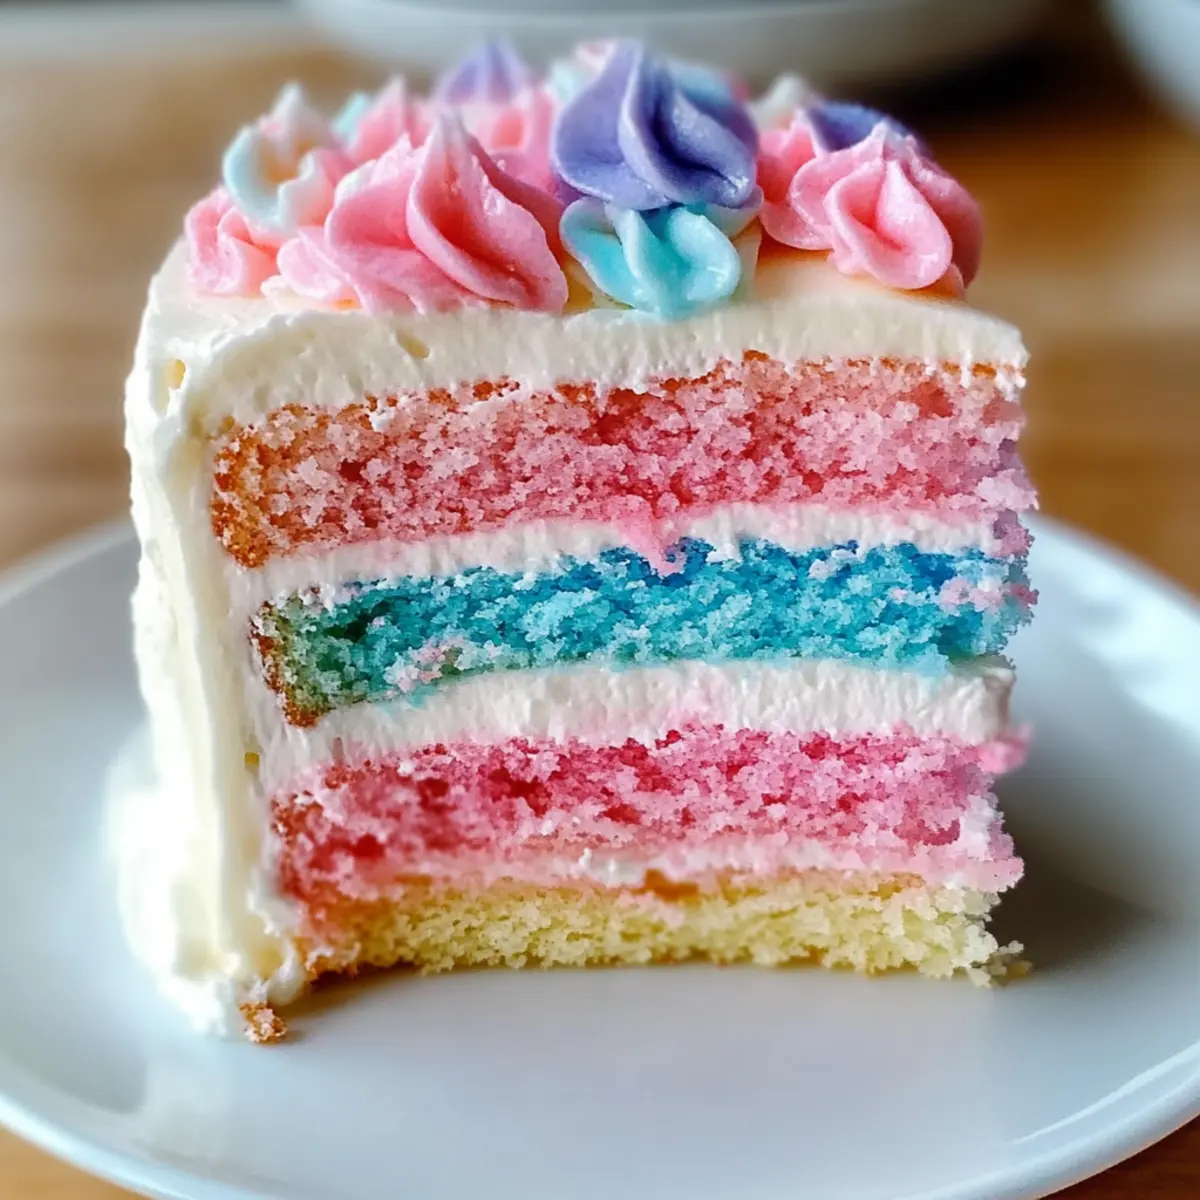
As I stood in my kitchen, the whimsical aroma of cotton candy wafted through the air, instantly transporting me back to my favorite childhood fairs. This Best Cotton Candy Cake recipe captures that enchanting experience in a playful, delicious treat! With fluffy layers of vanilla cake infused with the delightful essence of cotton candy, it’s crowned with vibrant, swirled buttercream that not only looks stunning but is also incredibly easy to whip up. Perfect for birthdays or any festive gathering, this cake is a showstopper that kids and adults alike will adore. Plus, it’s customizable—think mini cupcakes or a spectacular cotton candy drip version! How will you make it your own?
Why is Cotton Candy Cake a Must-Try?
Nostalgic flavors of your childhood come alive with every bite of this whimsical cake, making it perfect for celebrations. Visually stunning, the vibrant pink and blue buttercream swirls create a showstopper that impresses all ages. Easy to customize, you can transform this recipe into mini cupcakes or a dazzling drip cake. Kid-friendly and festive, it guarantees smiles at parties. Host your next gathering with this Cotton Candy Cake that’s sure to be the centerpiece of fun—also consider pairing it with a refreshing drink like fruit punch or lemonade!
Cotton Candy Cake Ingredients
-
For the Cake
-
All-Purpose Flour – Provides structure and balance to the cake; substitute with a gluten-free flour blend for a GF option.
-
Sugar – Adds sweetness and moisture; coconut sugar can be used for a more natural alternative.
-
Baking Powder – Helps the cake rise, creating a fluffy texture; ensure it’s fresh for optimal leavening.
-
Salt – Enhances the sweetness of the cake.
-
Butter – Contributes richness and moisture; dairy-free butter can be used for a vegan option.
-
Milk – Adds moisture; use whole or almond milk for a delightful twist.
-
Vanilla Extract – Enhances flavor; opt for pure for the best taste.
-
Cotton Candy Extract – Delivers the signature cotton candy flavor; adjust to your preference for more sweetness.
-
Eggs – Provide moisture and help bind the ingredients; make sure to use room temperature eggs for fluffiness.
-
For the Frosting
-
Powdered Sugar – Base for the frosting; alternative sweeteners can be utilized if desired.
-
Heavy Cream – Adds creaminess to the frosting; substitute with milk or coconut cream if desired.
-
Food Coloring – Use gel colors (pink and blue) to achieve vibrant frosting shades that match your festive spirit.
-
For Decoration
-
Cotton Candy – Added just before serving for freshness and a whimsical touch.
-
Sprinkles/Edible Glitter – Optional decorative elements for that extra festive flair.
With these delightful ingredients, your Cotton Candy Cake will be a whimsical treat that brings joy and nostalgia to every celebration!
Step‑by‑Step Instructions for Cotton Candy Cake Recipe
Step 1: Preheat the Oven
Begin by preheating your oven to 350°F (175°C). While the oven heats, prepare three 8-inch round cake pans by greasing them generously with butter and dusting them lightly with flour. This will ensure your Cotton Candy Cake easily releases from the pans once baked, creating beautiful layers for your whimsical dessert.
Step 2: Mix Dry Ingredients
In a large mixing bowl, whisk together 2 cups of all-purpose flour, 1 ½ cups of sugar, 1 tablespoon of baking powder, and ½ teaspoon of salt until well-combined. This step is crucial for an even rise during baking, helping your cake layers to achieve a light and fluffy texture. Once the dry ingredients are mixed, set them aside to prepare for the next step.
Step 3: Combine Wet Ingredients
Add ½ cup of softened butter, 1 cup of milk, 2 teaspoons of vanilla extract, and 2 teaspoons of cotton candy extract to the dry ingredients. Using a mixer, beat the mixture on medium speed until it becomes creamy and smooth, which should take about 2 minutes. This will help to infuse the cotton candy flavor into your cake batter, making it delightful and sweet.
Step 4: Incorporate Eggs
Next, crack in 4 room-temperature eggs, one at a time, mixing well after each addition. Continue beating the mixture on medium speed until it is smooth and glossy, about 2 additional minutes. The eggs will help bind the ingredients and contribute moisture, resulting in a fluffy Cotton Candy Cake.
Step 5: Bake the Cake Layers
Divide the batter evenly among the prepared cake pans, smoothing the tops with a spatula. Bake in the preheated oven for 25-30 minutes, or until a toothpick inserted in the center comes out clean. This is the moment your kitchen will fill with the sweet aroma of cotton candy, signaling that your cake layers are ready.
Step 6: Cool the Cakes
Once baked, remove the cake pans from the oven and let them cool in the pans for about 10 minutes. Carefully transfer each cake layer to wire racks to cool completely. This step is vital in preventing the cake from becoming soggy, ensuring a perfect foundation for frosting once cooled.
Step 7: Make the Frosting
In a clean mixing bowl, beat 1 cup of softened butter on high speed until it’s light and fluffy, about 3-4 minutes. Gradually add 4 cups of powdered sugar, 2 tablespoons of heavy cream, and 1 teaspoon of vanilla extract, mixing on low until combined. This frosting will wonderfully complement your Cotton Candy Cake’s sweet flavors.
Step 8: Color the Frosting
Divide the frosting into two bowls and tint one pink and the other blue with gel food coloring. Mix thoroughly until you achieve vibrant, eye-catching hues. These colors will create a playful and festive look on your finished cake, capturing the essence of cotton candy in a delightful way.
Step 9: Layer the Cake
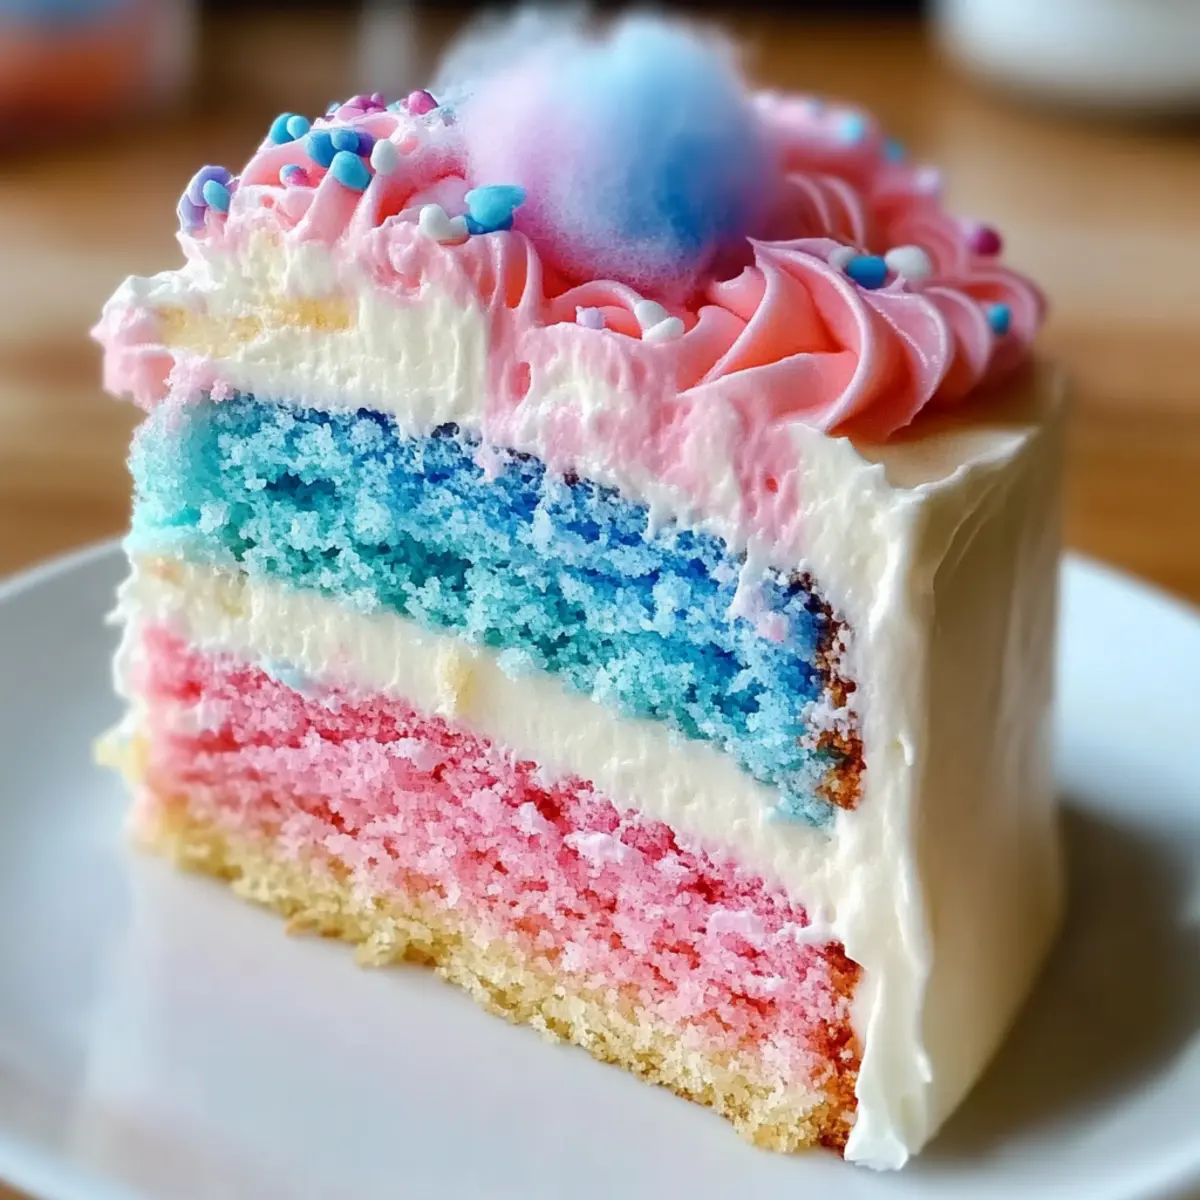
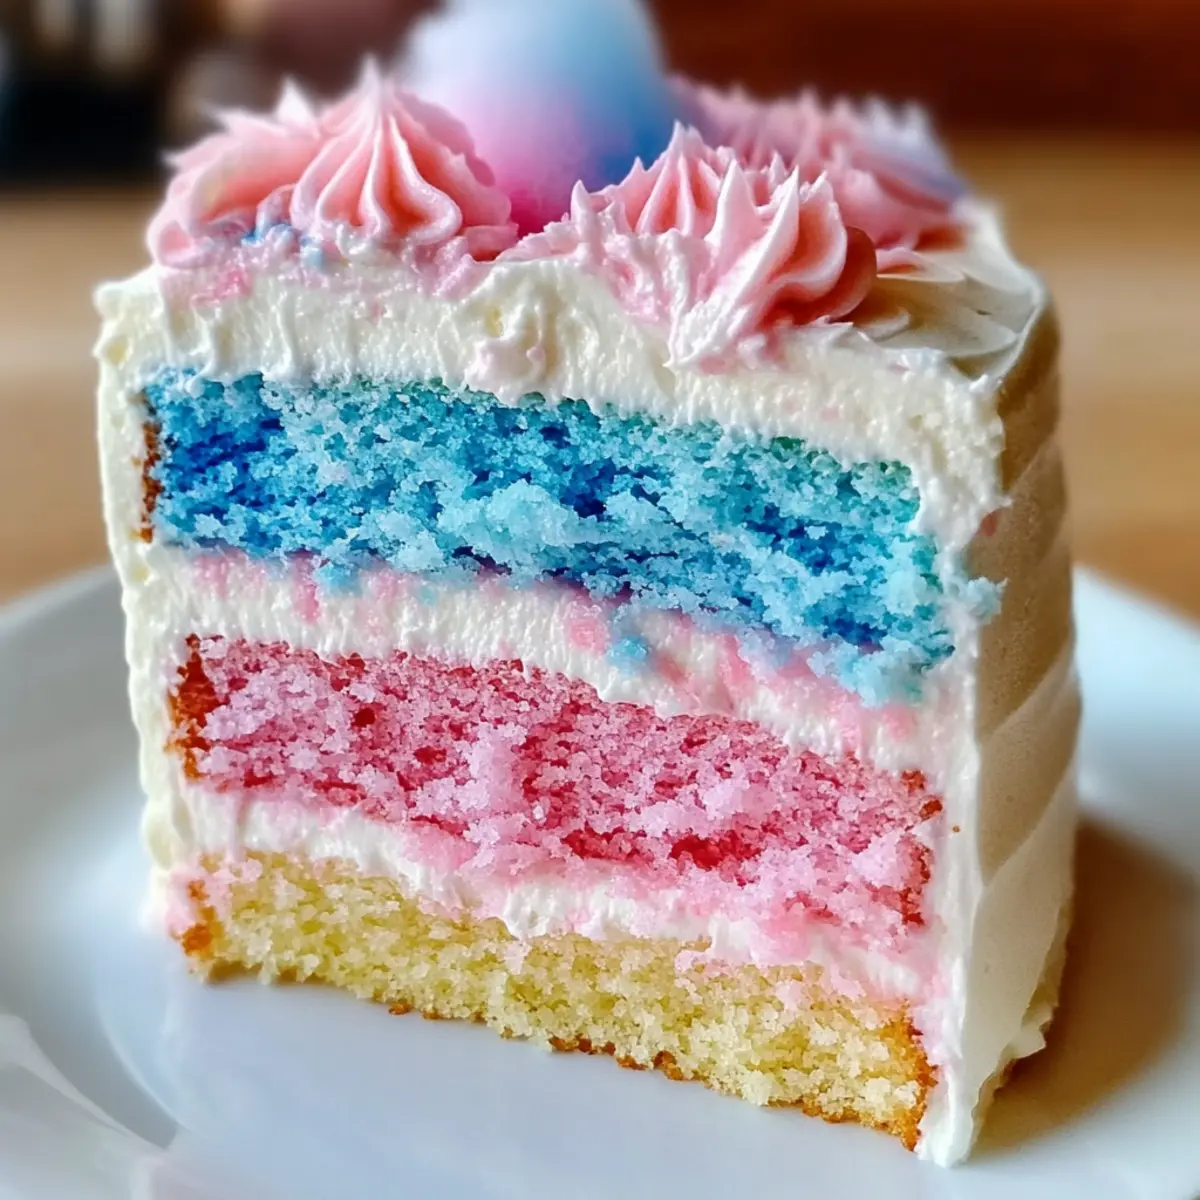
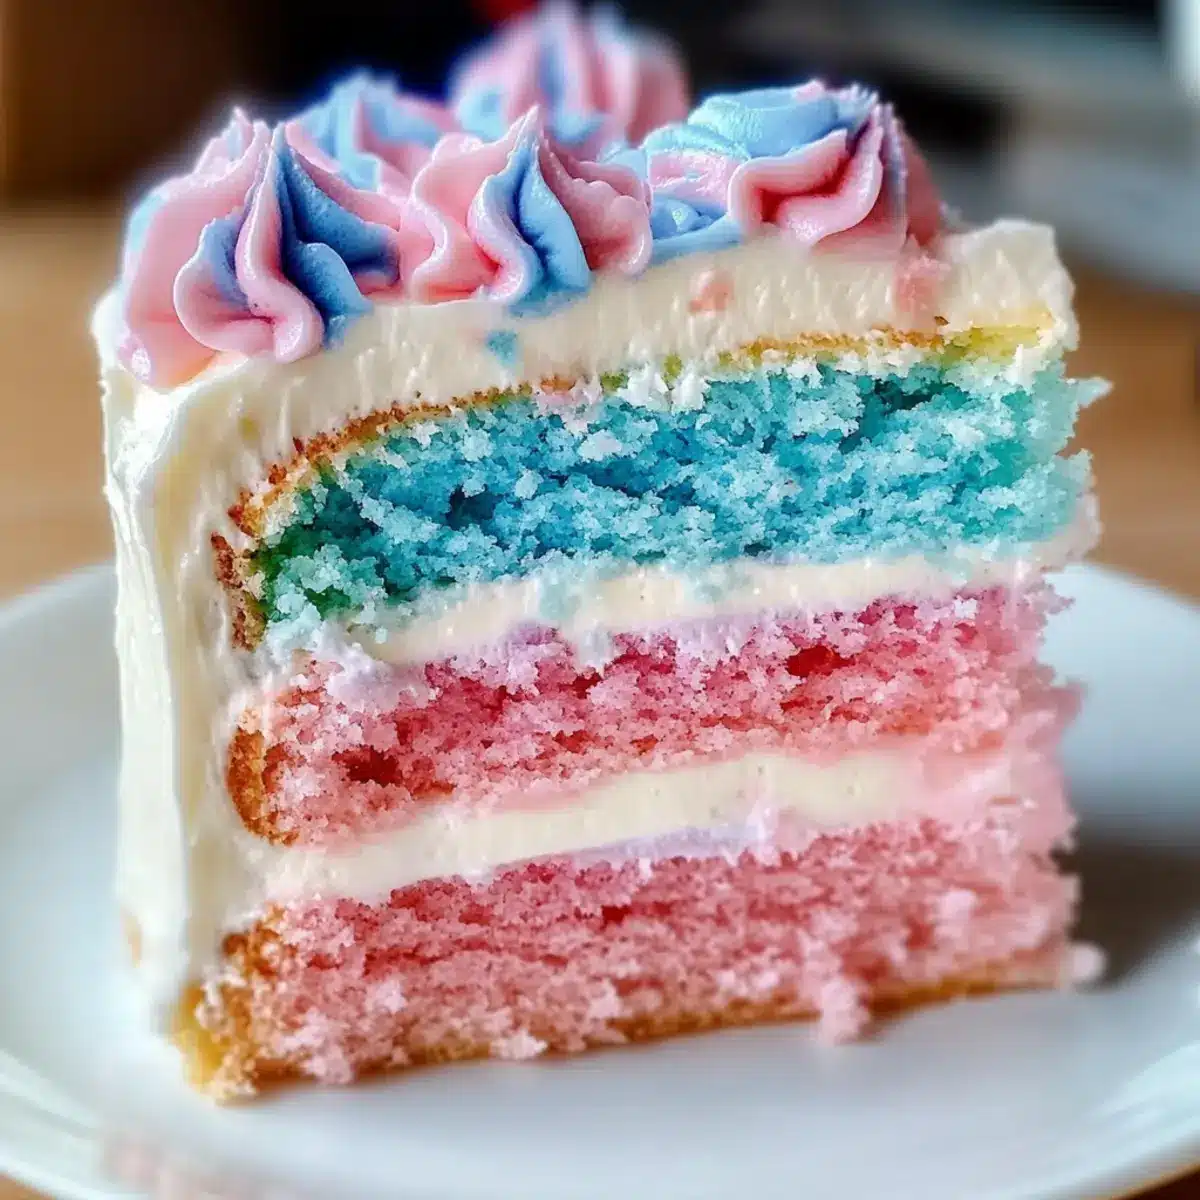
To assemble your Cotton Candy Cake, place one cake layer on a serving platter. Spread a layer of pink frosting on top, followed by a second cake layer, and then a layer of blue frosting. Repeat with the final cake layer, finishing by frosting the sides and top with swirls of both colored frostings for a whimsical finish.
Step 10: Decorate the Cake
Before serving, crown your cake with fluffy cotton candy and sprinkle optional edible glitter or sprinkles over the top. This final touch not only enhances the visual appeal but also ties in with the delightful carnival theme, making your Cotton Candy Cake a true centerpiece for any celebration.
Storage Tips for Cotton Candy Cake
Fridge: Store leftover Cotton Candy Cake in an airtight container for up to 5 days. This helps retain its freshness and keeps the frosting intact.
Room Temperature: If serving within 2-3 days, keep the cake covered at room temperature to avoid drying out. Just remember to add cotton candy as a topping right before serving!
Freezer: For longer storage, wrap individual slices tightly in plastic wrap and place them in a freezer-safe bag. They can be stored in the freezer for up to 2 months.
Reheating: For optimal flavor, allow frozen slices to thaw in the refrigerator overnight and serve at room temperature, or gently microwave for 10-15 seconds just before serving.
Cotton Candy Cake Recipe Variations
Feel free to let your imagination soar and customize this delightful cake into something truly magical!
- Dairy-Free: Substitute dairy butter and milk with coconut oil and almond milk for a vegan-friendly version. You won’t miss the creaminess at all!
- Gluten-Free: Use a gluten-free flour blend to make this cake suitable for those with dietary restrictions. It still rises beautifully!
- Mini Cupcakes: Transform this cake into adorable mini cupcakes using the same batter; perfect for party favors or kids’ treats!
- Cotton Candy Drip Cake: Add a glossy drip of white chocolate ganache around the edges for a stunning finish that enhances the carnival vibe.
- Flavor Twist: Swap out cotton candy extract for bubblegum or vanilla for a different yet equally delightful flavor experience. Each bite will be a charming surprise!
- Frosting Options: Experiment with cream cheese frosting instead of buttercream for a tangy touch; it pairs excellently with the sweetness of the cake.
- Nutty Addition: Fold in crushed nuts like pistachios or pecans into the batter for added texture; it adds a delightful crunch!
- Spicy Surprise: Give a kick to your cake by adding a dash of cayenne or chili powder to the frosting for a unique flavor profile that surprises the taste buds.
Consider pairing your cotton candy creations with a glass of refreshing Mint Lemonade or a scoop of homemade Strawberry Milkshake Pound Cake for the ultimate party experience!
What to Serve with Best Cotton Candy Cake
Transform your magical cotton candy creation into a full feast with the perfect pairings that’ll delight every guest.
- Fruit Punch: This fruity drink adds a refreshing, vibrant touch that complements the sweetness of your cake.
- Lemonade: The tartness of lemonade balances the sugary frosting, providing a delightful contrast for every bite.
- Whipped Cream: A dollop of fluffy whipped cream enhances the cake’s texture, making each slice feel indulgent and light.
- Chocolate Dipped Strawberries: The rich chocolate creates a luscious pairing, playing off the sweetness of cotton candy beautifully.
- Miniature Cupcakes: Using the same batter, these bite-sized treats create a whimsical dessert table at your gathering.
- Cotton Candy Cocktails: For an adult twist, mix up a fun cocktail inspired by the cake, incorporating sweet flavors reminiscent of carnival days.
- Rainbow Fruit Salad: A colorful medley of fresh fruits adds a refreshing contrast, balancing the cake’s sugary richness with each bite.
- Decorated Sugar Cookies: Festively decorated cookies echo the cake’s playful theme, perfect for adding to a sweet spread at parties.
Make Ahead Options
These delightful Cotton Candy Cake layers are perfect for busy home cooks looking to save time on special occasions! You can bake the cake layers up to 3 days in advance; simply allow them to cool completely, then wrap each layer tightly in plastic wrap and refrigerate. The frosting can be prepared up to 5 days ahead—store it in an airtight container in the fridge to keep it fresh. When you’re ready to assemble, just remove the cake layers from the fridge, layer with the frosting, and finish with cotton candy and sprinkles just before serving. With these make-ahead options, you’ll enjoy a whimsical dessert that’s just as delicious without the last-minute stress!
Expert Tips for Cotton Candy Cake
-
Room Temperature Ingredients: Use room temperature eggs and butter to achieve a fluffier, well-integrated batter, making your Cotton Candy Cake truly delightful.
-
Fresh Baking Powder: Always check that your baking powder is fresh to ensure your cake rises beautifully. The right lift is crucial for a light and airy cake.
-
Cooling Time: Allow your cake layers to cool completely in the pans to prevent the frosting from melting. This keeps your Cotton Candy Cake looking perfect.
-
Coloring Tips: For vibrant frosting, use gel food colors instead of liquid dyes. Gel colors give a more intense hue without altering the frosting’s consistency.
-
Final Decorations: Add cotton candy and sprinkles just before serving to retain freshness and crunch, making your Cotton Candy Cake a hit at any celebration.
Best Cotton Candy Cake Recipe FAQs
How do I select the right cotton candy extract?
Absolutely! When choosing cotton candy extract, look for one that emphasizes a sweet, nostalgic flavor. Brands often offer various concentrations; you can start with a teaspoon and adjust according to your taste preference. If you can’t find cotton candy extract, consider using bubblegum extract as a delightful alternative that still captures that sweet essence.
How should I store leftover Cotton Candy Cake?
Very important! Store your leftover Cotton Candy Cake in an airtight container in the refrigerator for up to 5 days. If you prefer keeping it at room temperature, you can cover it lightly for up to 2-3 days, but only if you leave off the cotton candy decoration until serving. Remember to add cotton candy just before enjoying for maximum freshness!
Can I freeze the Cotton Candy Cake?
Absolutely! To freeze your Cotton Candy Cake, first allow it to cool completely. Then, wrap each layer tightly in plastic wrap and place them in a freezer-safe bag. This method will keep them fresh for up to 3 months. When you’re ready to enjoy, let the layers thaw in the fridge overnight before assembling and frosting them for a delicious treat.
What should I do if my cake layers are domed?
Absolutely! If your cake layers come out domed, don’t worry! Use a serrated knife to gently level the tops after they have cooled. This ensures a stable base for layering and frosting, allowing for a more professional finish. Just remember to cool your cakes completely before frosting to prevent any melting mishaps!
Is this Cotton Candy Cake suitable for children with allergies?
Very! It’s key to consider dietary restrictions. This Cotton Candy Cake can be made allergy-friendly by using gluten-free flour for those with gluten intolerance, and dairy-free butter and almond milk for those who are lactose intolerant. Always double-check your ingredients to ensure they’re safe for the specific allergies you are accommodating.
How long can I keep the frosted cake in the refrigerator?
Very knowledgeable question! Once frosted, your Cotton Candy Cake should be enjoyed within 3-5 days when stored in the refrigerator. The fluffy frosting provides a beautiful finish, but longer storage can affect texture, so consuming within this timeframe will ensure your cake is at its freshest and most enjoyable.
Whimsical Cotton Candy Cake Recipe for Sweet Celebrations
Ingredients
Equipment
Method
- Preheat your oven to 350°F (175°C). Grease three 8-inch round cake pans with butter and dust with flour.
- In a large bowl, mix together flour, sugar, baking powder, and salt until well-combined.
- Add softened butter, milk, vanilla extract, and cotton candy extract to the dry ingredients. Beat on medium speed until creamy.
- Incorporate eggs one at a time, mixing well after each addition until mixture is smooth and glossy.
- Divide the batter into prepared pans and bake for 25-30 minutes, or until a toothpick comes out clean.
- Cool in pans for 10 minutes then transfer to wire racks to cool completely.
- Beat softened butter until fluffy, then gradually add powdered sugar, heavy cream, and vanilla extract.
- Divide frosting into two bowls and tint one pink and the other blue with gel food coloring.
- Layer the cake with pink frosting, followed by another layer, then blue frosting, and repeat until completed.
- Decorate with cotton candy and optional sprinkles before serving.
Leave a Reply