
As I sift through my pantry, I stumble upon a treasure trove of colorful pastel candies, and just like that, my mind leaps to the perfect treat: Easter Brownies! These fudgy delights are not only a homage to the holiday but also a canvas for creativity. With a plethora of vibrant toppings waiting to be unleashed, these brownies can transform any ordinary gathering into a festive celebration. Plus, they come together in no time—ideal for those of us seeking delightful homemade treats without the fuss. Whether you’re crafting them for a family get-together or just want to add some seasonal joy to your day, these brownies are bound to put a smile on everyone’s face. Curious how to whip up this simple yet impressive dessert? Let’s dive in!
Why Are Easter Brownies So Special?
Fudgy Delight: These brownies are dense and chocolatey, a perfect treat that will please everyone, from kids to adults!
Customizable Fun: Get creative with toppings like colorful candies and sprinkles, making each batch unique just for your festive occasions.
Easy to Make: The simple steps enable you to whip up a batch in no time, letting you focus on enjoying time with loved ones.
Crowd-Pleaser: These brownies are perfect for gatherings, with their vibrant colors and rich flavors sparking joy at any spring celebration!
Looking for more delicious ideas? Try these Fudgy Cherry Brownies for a fruity twist.
Easter Brownie Ingredients
• Gather your favorites and get ready for a delicious batch of Easter brownies!
For the Brownie Batter
- Unsalted Butter – Melting it first ensures a rich and smooth texture.
- Granulated Sugar – This adds the necessary sweet touch; you can swap it with coconut sugar if desired.
- Large Eggs – Essential for binding and moisture; opt for room temperature eggs for best results.
- Vanilla Extract – Enhances the overall flavor; using pure extract offers a more authentic taste.
- All-Purpose Flour – Provides the structure; feel free to substitute almond flour for a gluten-free option.
- Unsweetened Cocoa Powder – Infuses deep chocolate flavor; always check for freshness to maximize taste.
- Salt – Balances the sweetness; a must-have to bring all flavors together.
- Baking Powder – Adds leavening for a light and fudgy texture; ensure it’s within the expiration date.
For the Decorations
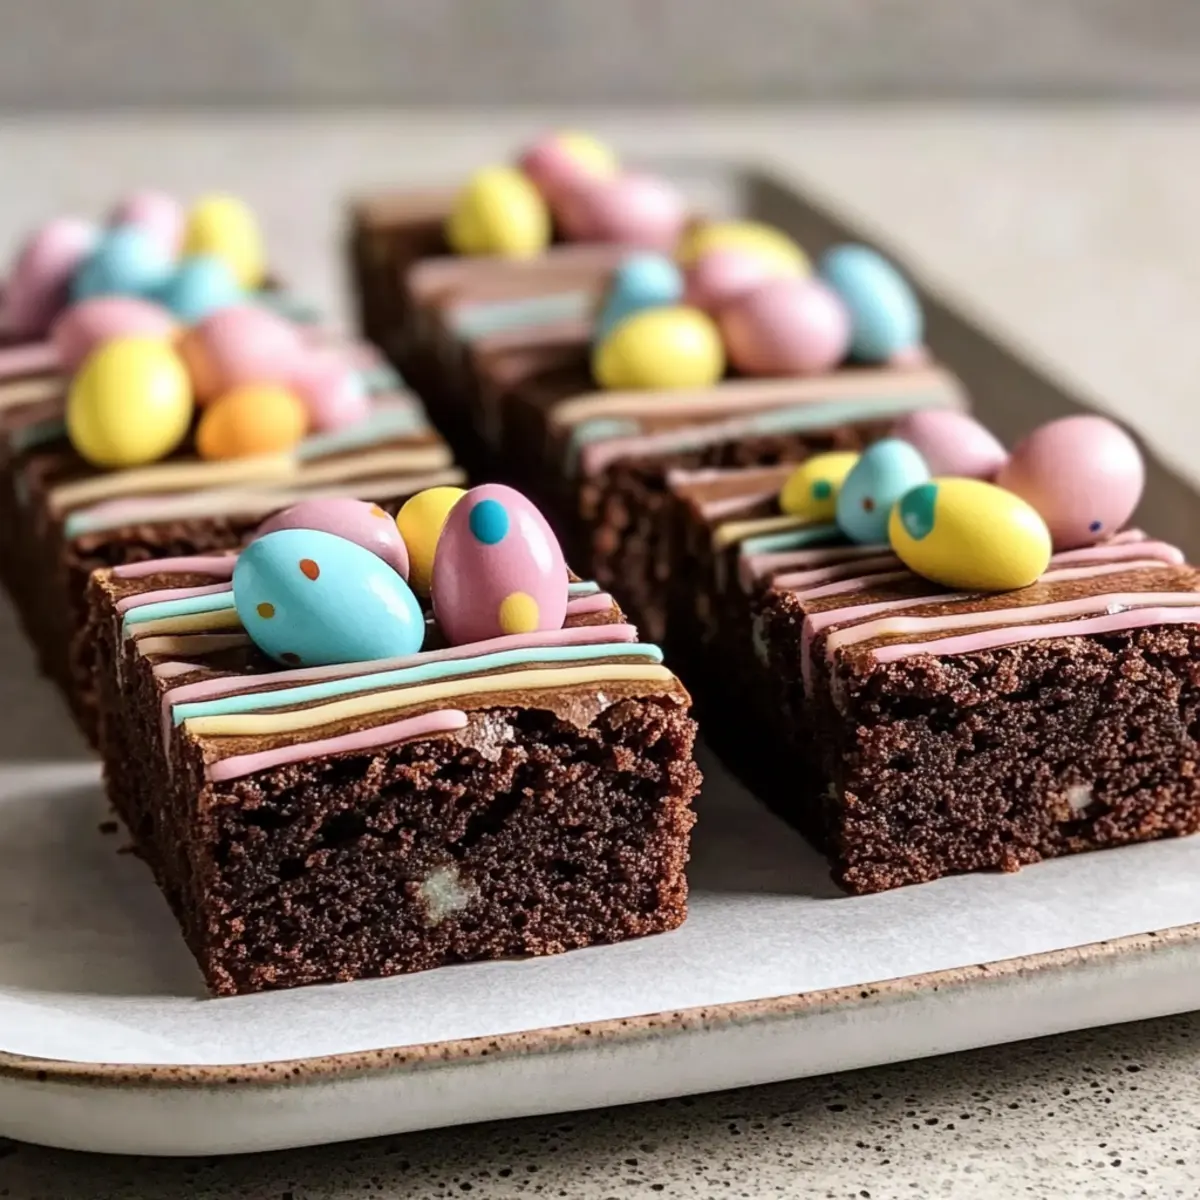
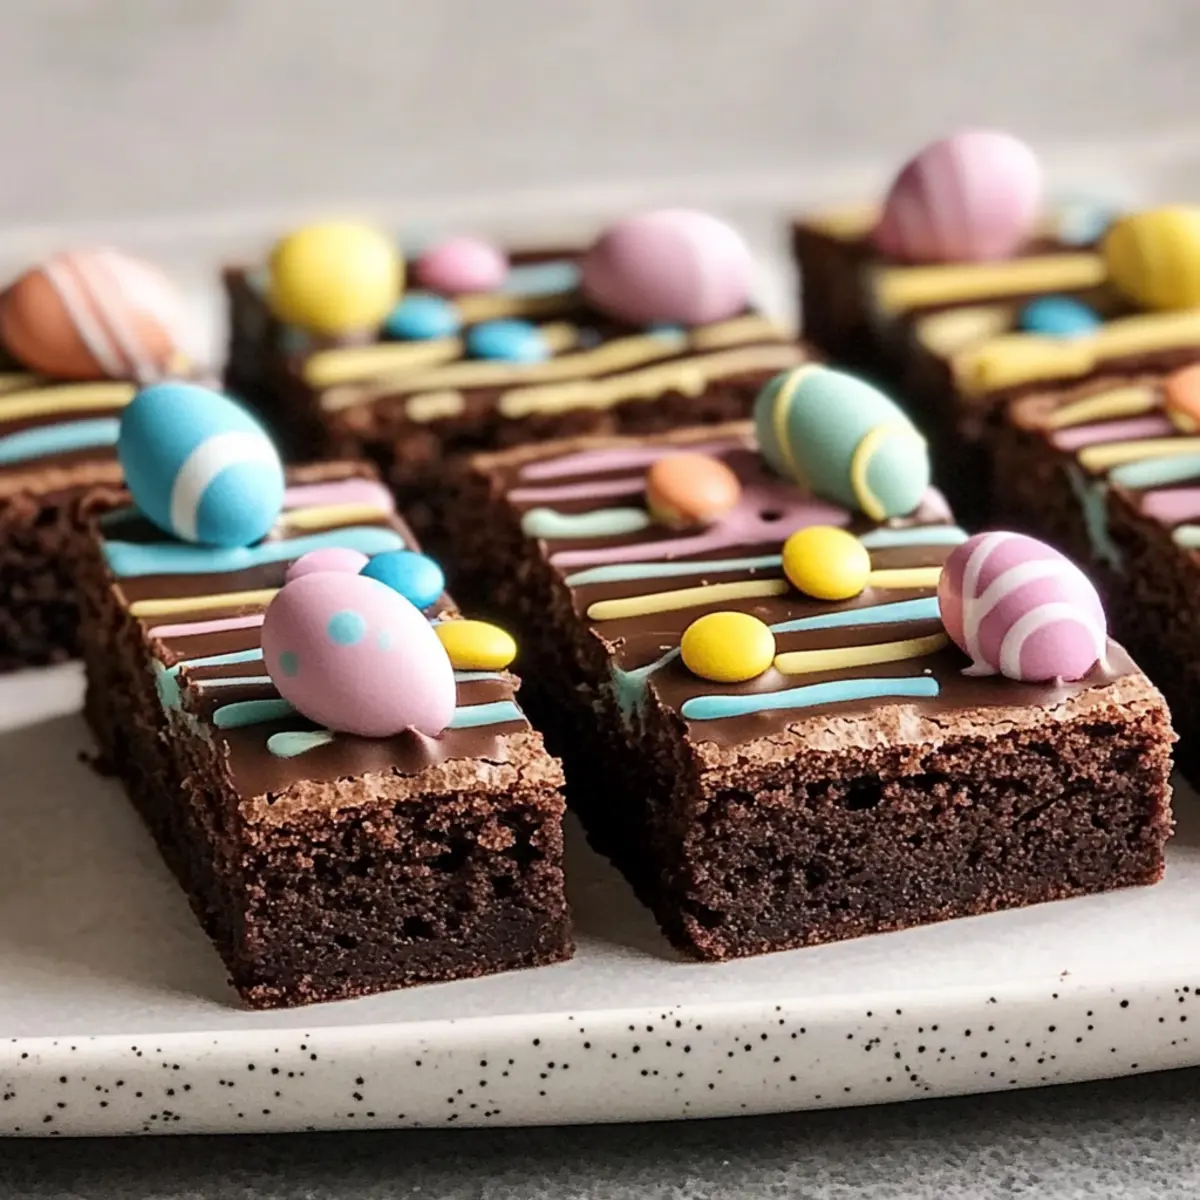
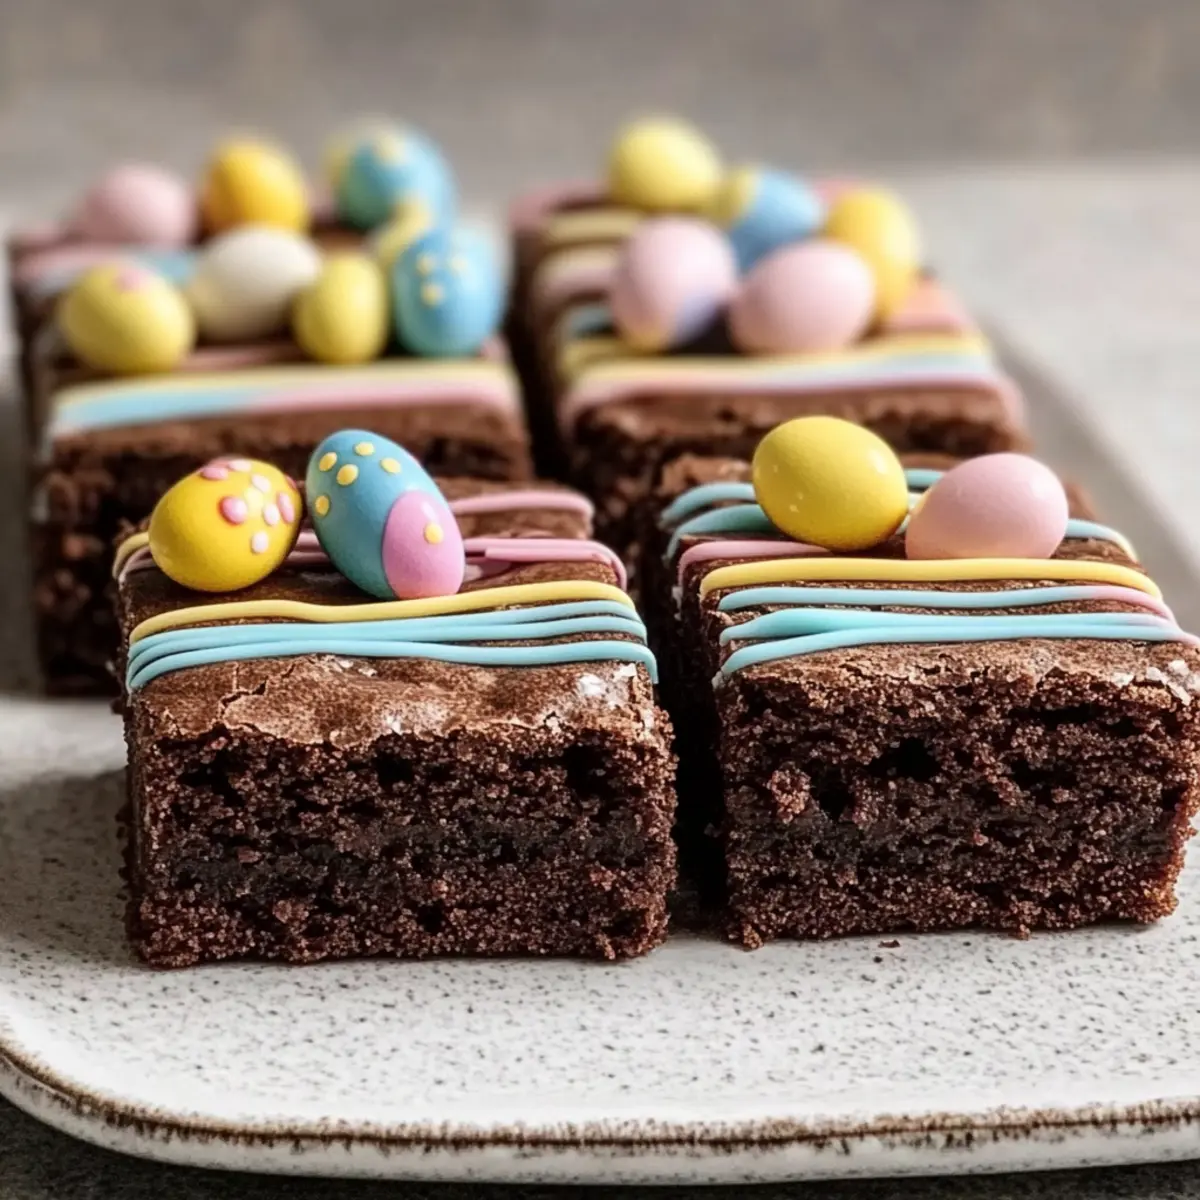
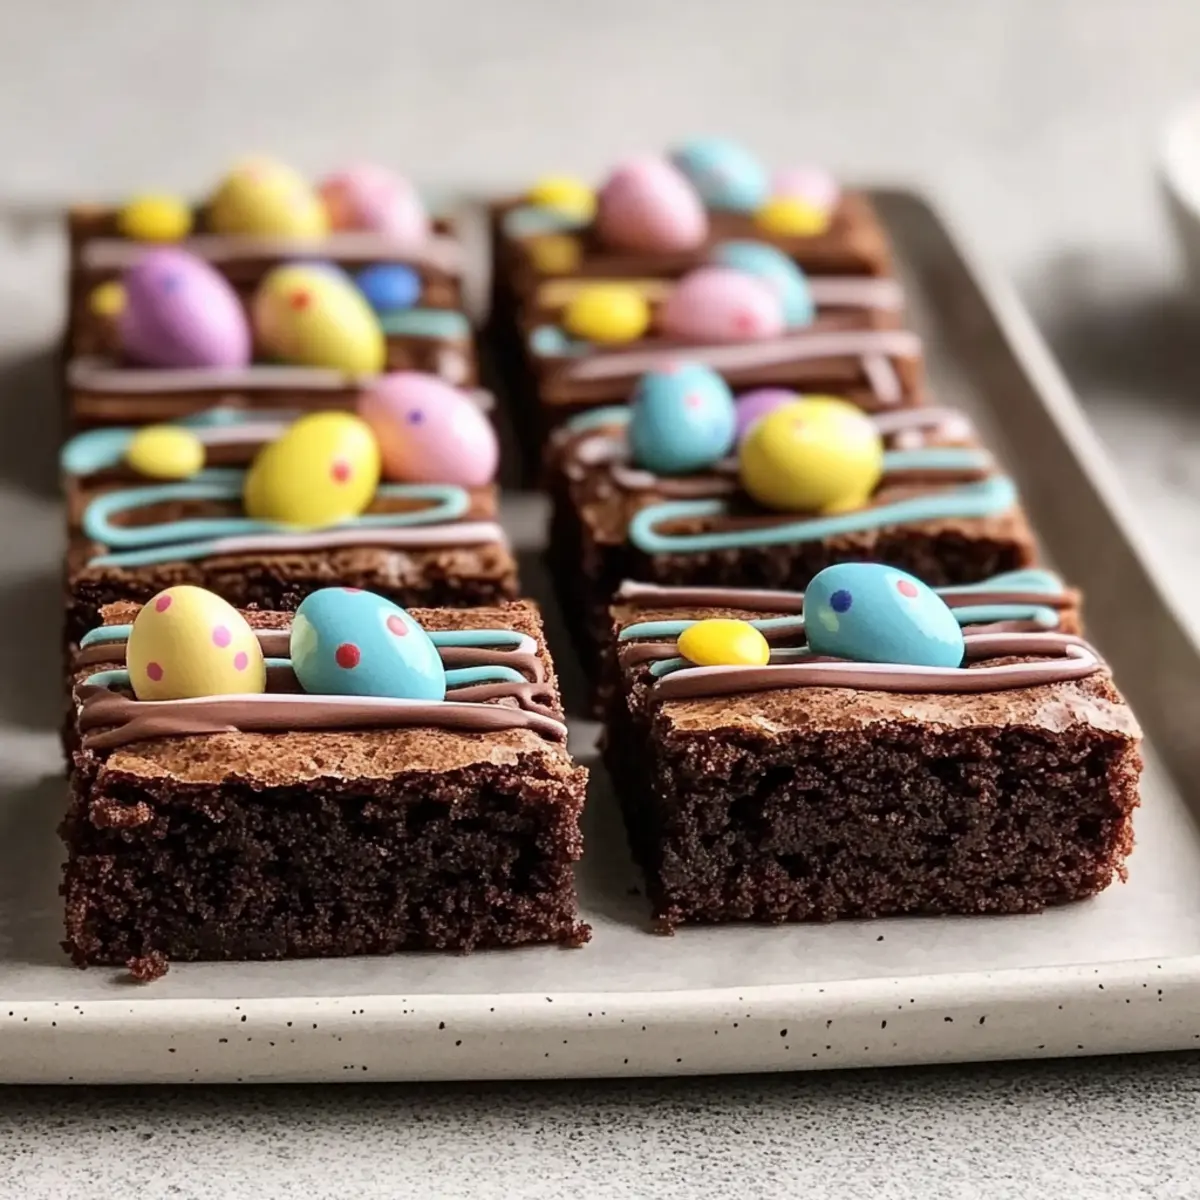
- Chocolate Eggs or Pastel Candies – These festive toppings make the brownies visually stunning; customize them with your seasonal favorites.
Embrace the joy of creating these stunning Easter brownies, complete with all the right ingredients for a delightful experience!
Step‑by‑Step Instructions for Easter Brownies
Step 1: Preheat and Prepare
Begin by preheating your oven to 350°F (175°C). While the oven warms up, grease a 9×13 inch baking pan with butter or line it with parchment paper for easy removal. This preparation will ensure your Easter brownies bake evenly and do not stick to the pan, giving you a perfect, clean-cut treat.
Step 2: Melt and Mix the Wet Ingredients
In a large mixing bowl, melt the unsalted butter in the microwave or over low heat on the stove until it becomes liquid. Once melted, add the granulated sugar, large eggs, and vanilla extract to the bowl. Whisk these ingredients together until you achieve a smooth and glossy mixture, ensuring all elements are thoroughly combined and well blended.
Step 3: Combine the Dry Ingredients
In a separate bowl, whisk together the all-purpose flour, unsweetened cocoa powder, baking powder, and salt. This step is crucial for evenly distributing the leavening agents and cocoa, which will help your brownies rise perfectly and develop that rich chocolate flavor. Make sure there are no lumps in your dry ingredients for a uniform texture.
Step 4: Mix Wet and Dry Ingredients
Gradually add the dry mixture to the bowl containing the wet ingredients. Use a spatula or wooden spoon to gently fold the two mixtures together until just combined. Be careful not to overmix, as you want your Easter brownies to remain dense and fudgy. You’ll know it’s ready when no flour pockets remain, and the batter looks thick and luscious.
Step 5: Pour and Spread the Batter
Pour the brownie batter into your prepared baking pan, spreading it evenly using a spatula. This ensures that all your brownies will bake uniformly, creating that delightful fudgy texture throughout. Give the pan a gentle shake to settle the batter and remove any air bubbles that could disrupt the baking process.
Step 6: Bake to Perfection
Place the pan in the preheated oven and bake your Easter brownies for 20-25 minutes. To check for doneness, insert a toothpick into the center; it should come out with a few moist crumbs, not completely clean. This indicates that your brownies are still fudgy, which is exactly what you want for the perfect treat.
Step 7: Cool and Cut
Once baked, remove the pan from the oven and let it cool completely in the pan on a wire rack. This cooling period helps set the brownies, making them easier to cut into squares. Patience here will pay off, as cutting into warm brownies can lead to crumbly edges and messy portions.
Step 8: Decorate for Easter
After your brownies have cooled, it’s time to get creative with decorations! Scatter chocolate eggs or pastel candies over the top for a festive touch. Feel free to arrange them however you’d like, giving your Easter brownies a cheerful, vibrant look that’s sure to impress both family and friends!
Storage Tips for Easter Brownies
Room Temperature: Keep your brownies tightly covered at room temperature for up to 3 days to maintain their fudgy texture.
Fridge: If you prefer a longer shelf life, store them in an airtight container in the fridge for up to a week; let them come to room temperature before serving.
Freezer: Freeze brownies in a single layer, wrapped in plastic, for up to 3 months. Thaw at room temperature before enjoying.
Reheating: For a warm treat, reheat individual brownies in the microwave for about 10-15 seconds, bringing back that fresh-out-of-the-oven delight!
Make Ahead Options
These Easter Brownies are perfect for busy home cooks looking to save time during the festive season! You can prepare the brownie batter and store it in an airtight container in the refrigerator for up to 24 hours before baking. This allows the flavors to meld beautifully. Just remember, if you choose to refrigerate the batter, give it a gentle stir before pouring it into the prepared pan; this helps to maintain a consistent texture. Additionally, you can decorate the brownies with chocolate eggs or pastel candies up to 3 days in advance, just make sure to keep them in a cool place to keep the candies from melting. When you’re ready to serve, simply bake and cool the brownies, and you’ll have a delightful treat that feels fresh and celebratory!
Easter Brownies: Creative Variations
Feel free to unleash your imagination and make these brownies uniquely yours! The possibilities are as delightful as they are varied.
-
Gluten-Free: Substitute almond flour for all-purpose flour to create a deliciously fudgy gluten-free version. Enjoy the same rich flavor, without compromise.
-
Nutty Delight: Add a handful of chopped walnuts or pecans to the batter for a delightful crunch that complements the chocolate beautifully. The contrast of textures will have everyone begging for more!
-
Swirling Goodness: Incorporate a cream cheese or peanut butter swirl into the brownie batter before baking for a rich and creamy surprise in every bite. It’s a decadent twist that boosts both flavor and presentation.
-
Sweeten the Deal: Consider using coconut sugar instead of granulated sugar to introduce a subtle caramel flavor. It’s a natural alternative that adds depth to this already charming treat.
-
Festive Fun: Mix colorful sprinkles into the batter or on top for a joyous burst of color that reflects the spirit of Easter celebrations. Your brownies will look as fun as they taste!
-
** Candy Overload:** Swap chocolate eggs for your favorite candy like mini marshmallows or caramel chunks. This tweak can introduce unexpected bursts of flavor that elevate each bite.
-
Zesty Twist: For a citrusy kick, add a teaspoon of orange zest to the batter. The bright flavor pairs surprisingly well with chocolate and enhances the overall experience.
Looking for even more inspiration? Explore these delightful Fudgy Cherry Brownies that celebrate a blend of flavor and fun! Each variation will inspire personalized touches that turn your baking into a joyful creation.
What to Serve with Easter Brownies
Indulging in these fudgy delights opens the door to a world of pairing possibilities that can elevate your Easter celebrations.
-
Vanilla Ice Cream: A scoop of creamy vanilla contrasts beautifully with the rich chocolate, creating a heavenly bite. You can drizzle chocolate syrup over it for an extra touch of indulgence.
-
Whipped Cream: Light and fluffy, whipped cream adds a delightful sweetness, enhancing the chocolatey richness of the brownies. Top with a sprinkle of cocoa powder for an elegant finish.
-
Fresh Berries: Juicy strawberries or raspberries bring a burst of tartness that balances the sweetness of the brownies. A sprinkle of powdered sugar can make this combination even more special.
-
Cold Milk: The classic complement to brownies, a glass of cold milk refreshes the palate and enhances the chocolate flavor. It’s the perfect drink to wash down that fudgy goodness.
-
Espresso or Coffee: A rich cup of coffee or espresso deepens the chocolate experience while providing a comforting warmth—a delightful ritual for any chocolate lover.
-
Mint Chocolate Chip Ice Cream: This delightful pairing marries cool mint with rich chocolate, creating a refreshing contrast that tantalizes the taste buds. Perfect for those who love a minty twist!
-
Chocolate Ganache: Drizzling warm chocolate ganache on top adds a luxurious touch, taking your Easter brownies to another level of decadence. It’s an irresistible treat for chocolate enthusiasts!
-
Easter Cookies: Pairing your brownies with decorative Easter cookies creates a delightful dessert platter bursting with color and festivity—perfect for celebrating with family and friends!
Expert Tips for Easter Brownies
• Accurate Measurements: Make sure to measure your ingredients properly; even a slight deviation can affect the final texture of your Easter brownies.
• Butter Consistency: Ensure the butter is fully melted before mixing; this step guarantees a smooth and fudgy brownie texture.
• Mix-Ins Magic: Don’t hesitate to stir in chocolate chips, nuts, or other treats; these additions can elevate the flavor and texture significantly.
• Cool Completely: Allow your brownies to cool in the pan before cutting them into squares; this will ensure clean edges and a perfect presentation.
• Customize Wisely: Feel free to experiment with different toppings or mix-ins, but remember that too many can overwhelm the rich chocolate flavor of your Easter brownies.
Easter Brownies Recipe FAQs
How do I choose the best ingredients for my Easter brownies?
Absolutely! For the best results, select high-quality unsalted butter; it should be creamy and fresh. When choosing eggs, opt for organic and ensure they are at room temperature for better incorporation. For chocolate, use unsweetened cocoa powder that’s fresh, as this elevates the flavor significantly. If you want a gluten-free option, almond flour is a fantastic substitute; make sure it’s finely ground for a smooth texture.
What is the best way to store leftover Easter brownies?
To keep your brownies fresh, store them tightly covered at room temperature for up to 3 days. If you want to extend their shelf life, transfer them to an airtight container in the refrigerator, where they will last for up to a week. Just remember to let them sit at room temperature for a bit before digging in to enjoy that fudgy goodness!
Can I freeze Easter brownies for later?
Very! To freeze your brownies, allow them to cool completely first. Then, wrap them individually in plastic wrap or aluminum foil, or place them in an airtight container. They can be stored in the freezer for up to 3 months. When you’re ready to enjoy, simply thaw them at room temperature for a couple of hours or pop them in the microwave for 10-15 seconds for that fresh-out-of-the-oven taste!
What should I do if my brownies turn out too dry?
If you find your Easter brownies are too dry, it may be due to overbaking or using too many dry ingredients. To prevent this, keep an eye on the baking time; start checking for doneness around the 20-minute mark, as every oven varies. If your brownies are already baked, try serving them warm with a scoop of ice cream or whipped cream to restore moisture and add a delicious twist!
Are there any dietary concerns I should keep in mind?
When making Easter brownies, be mindful of allergies. They contain eggs, dairy, and gluten (unless you opt for almond flour). For those with nut allergies, ensure that any candies or mix-ins you use are nut-free. If serving to pets, never give chocolate to dogs or cats, as it can be toxic to them. Always check labels if you’re uncertain about specific ingredients!
Decadent Easter Brownies to Brighten Your Spring Celebrations
Ingredients
Equipment
Method
- Preheat your oven to 350°F (175°C) and grease a 9x13 inch baking pan.
- Melt the unsalted butter and mix in the granulated sugar, eggs, and vanilla extract.
- In another bowl, whisk together flour, cocoa powder, baking powder, and salt.
- Gradually fold the dry mixture into the wet mixture until just combined.
- Pour the batter into the prepared pan and spread evenly.
- Bake for 20-25 minutes, checking for doneness with a toothpick.
- Let the brownies cool completely in the pan on a wire rack.
- Decorate with chocolate eggs or pastel candies after cooling.
Leave a Reply