
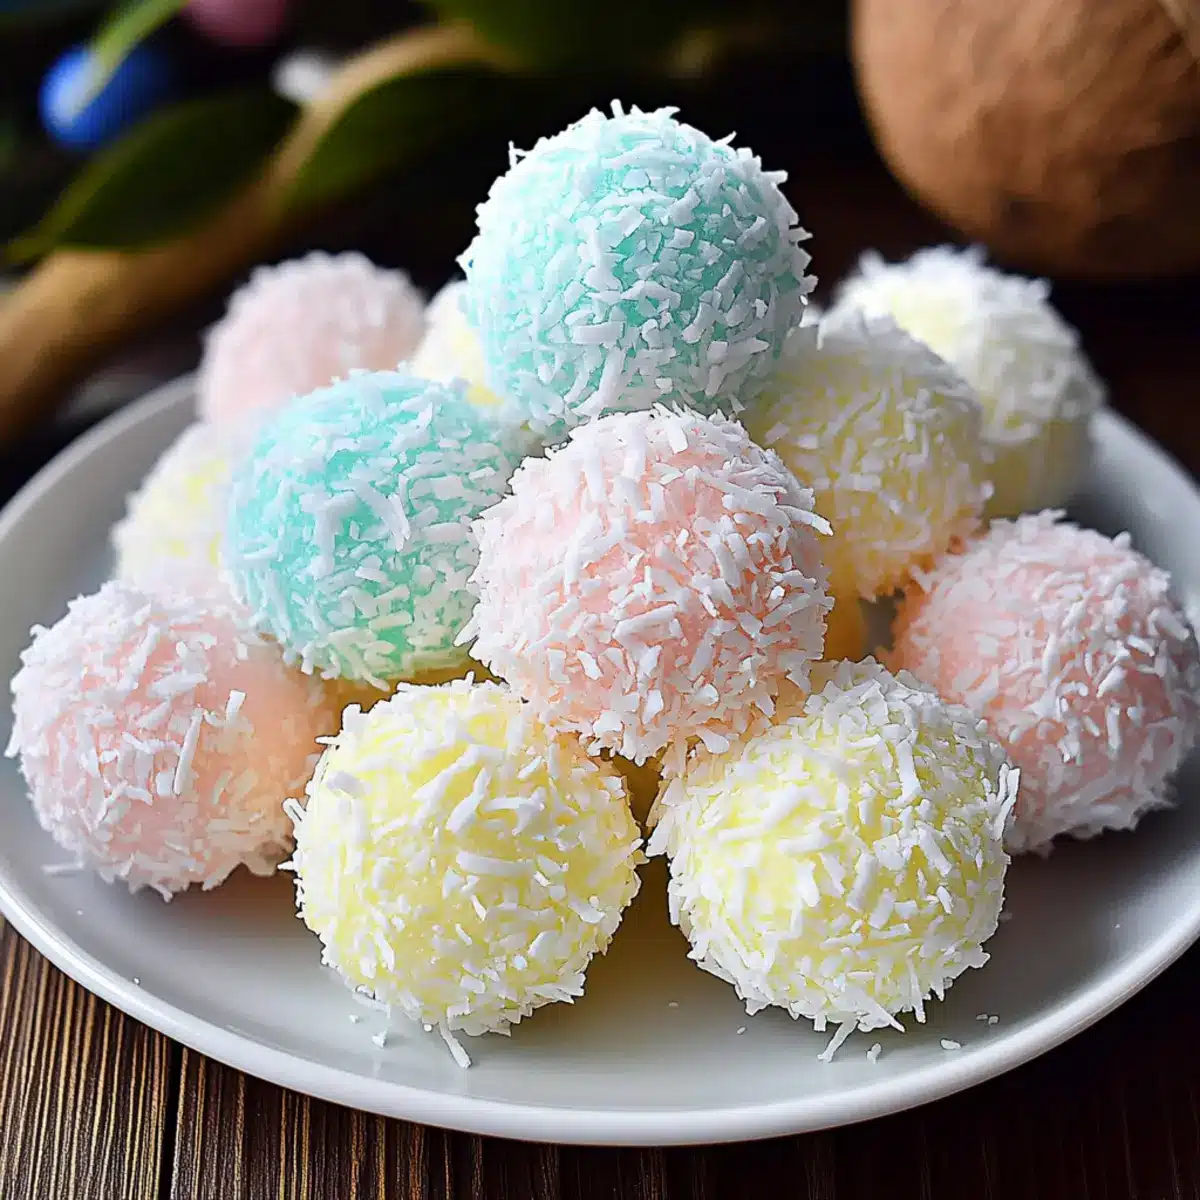
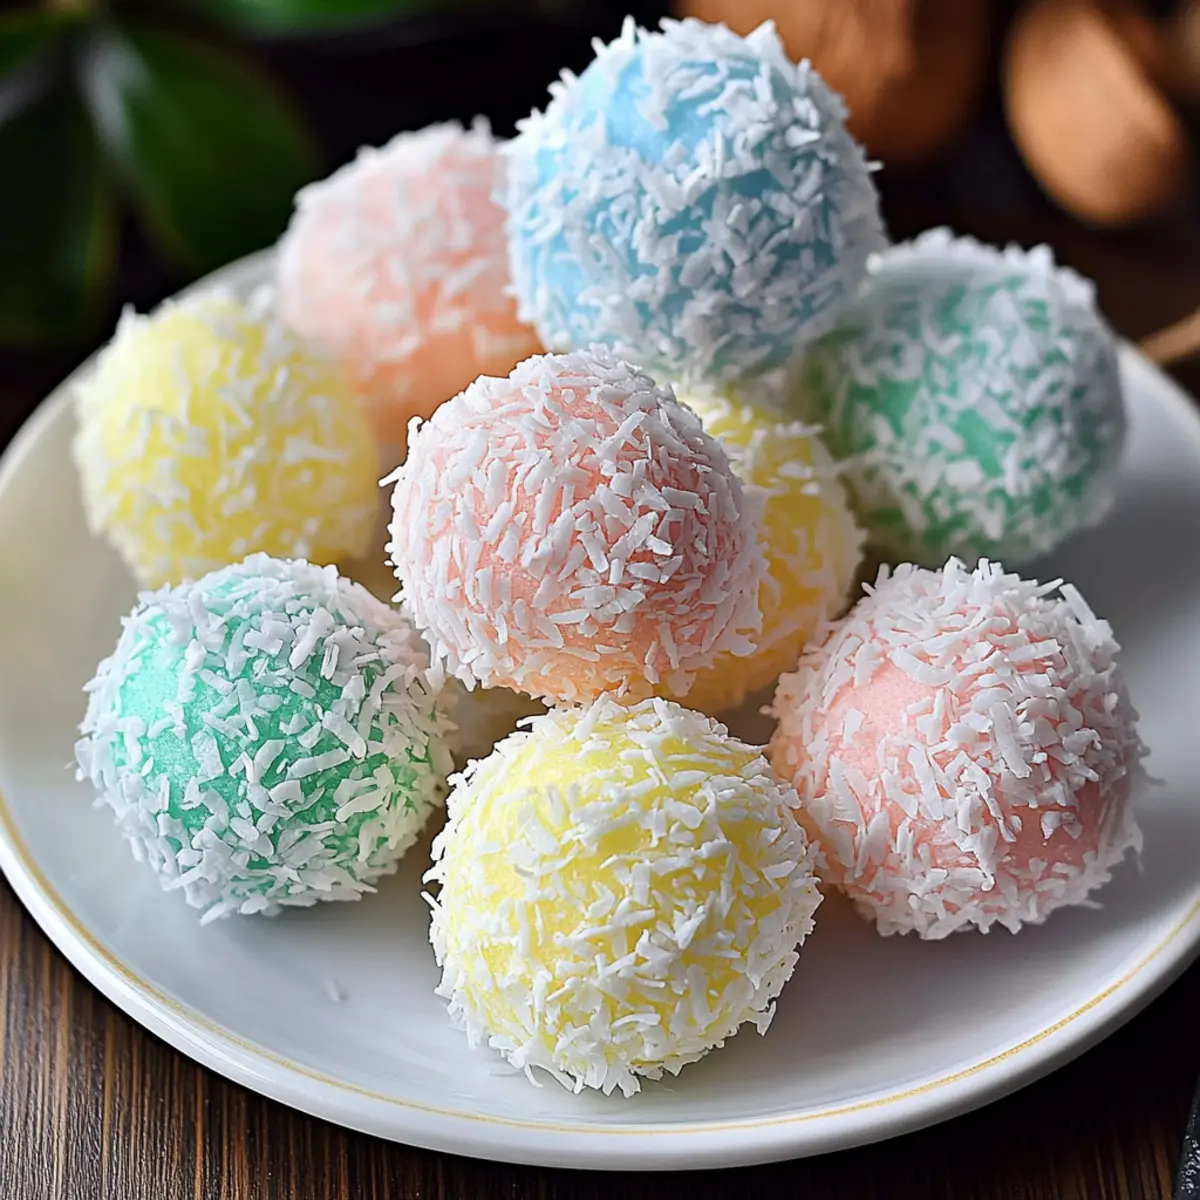
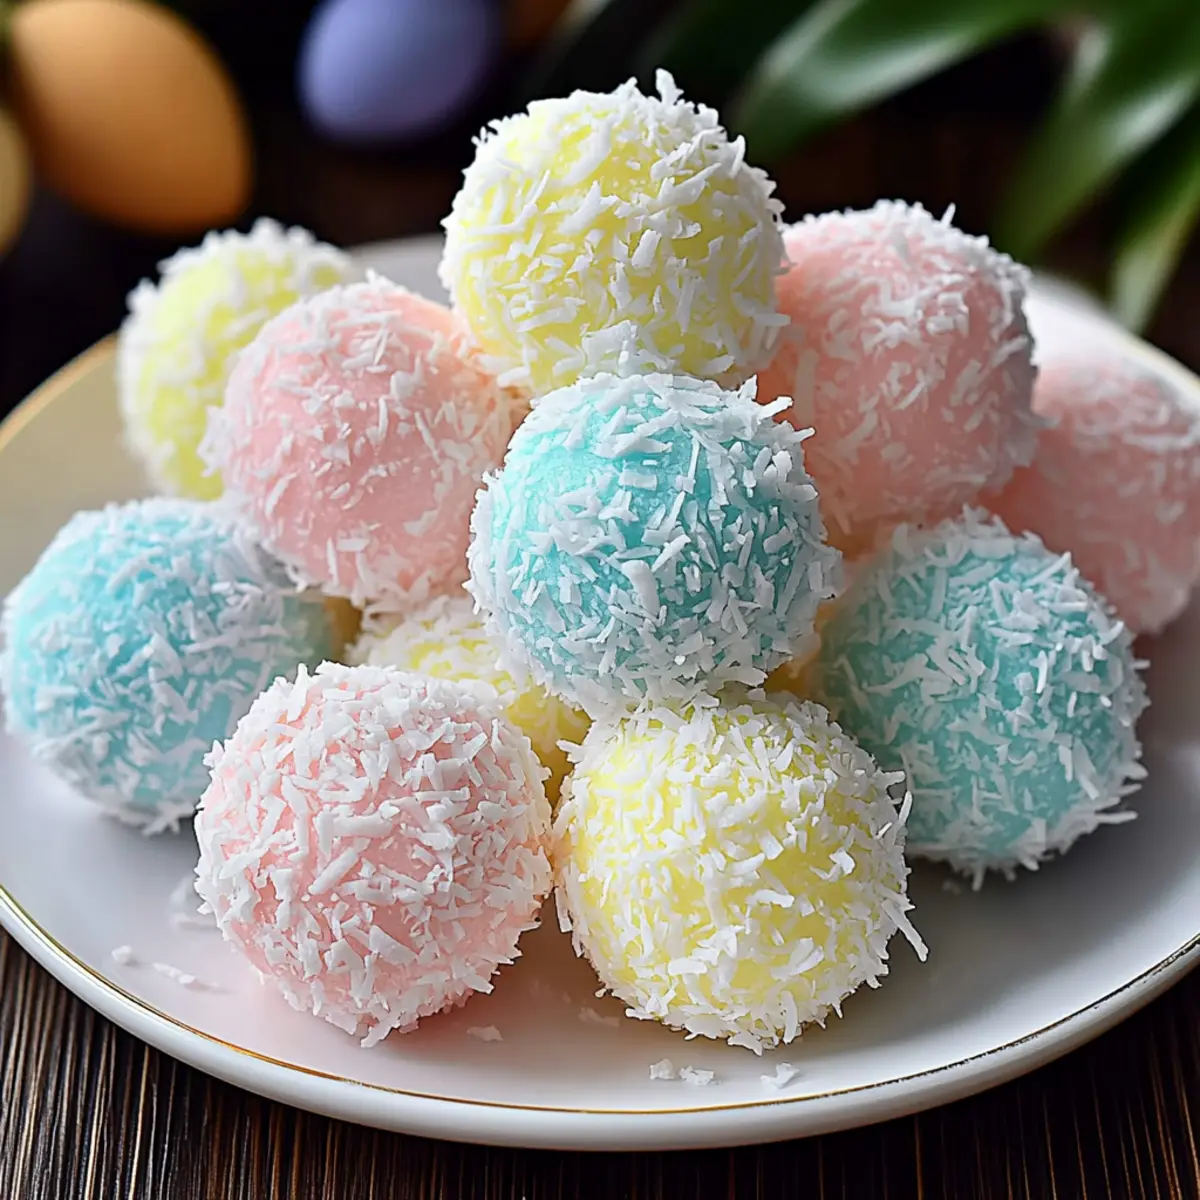
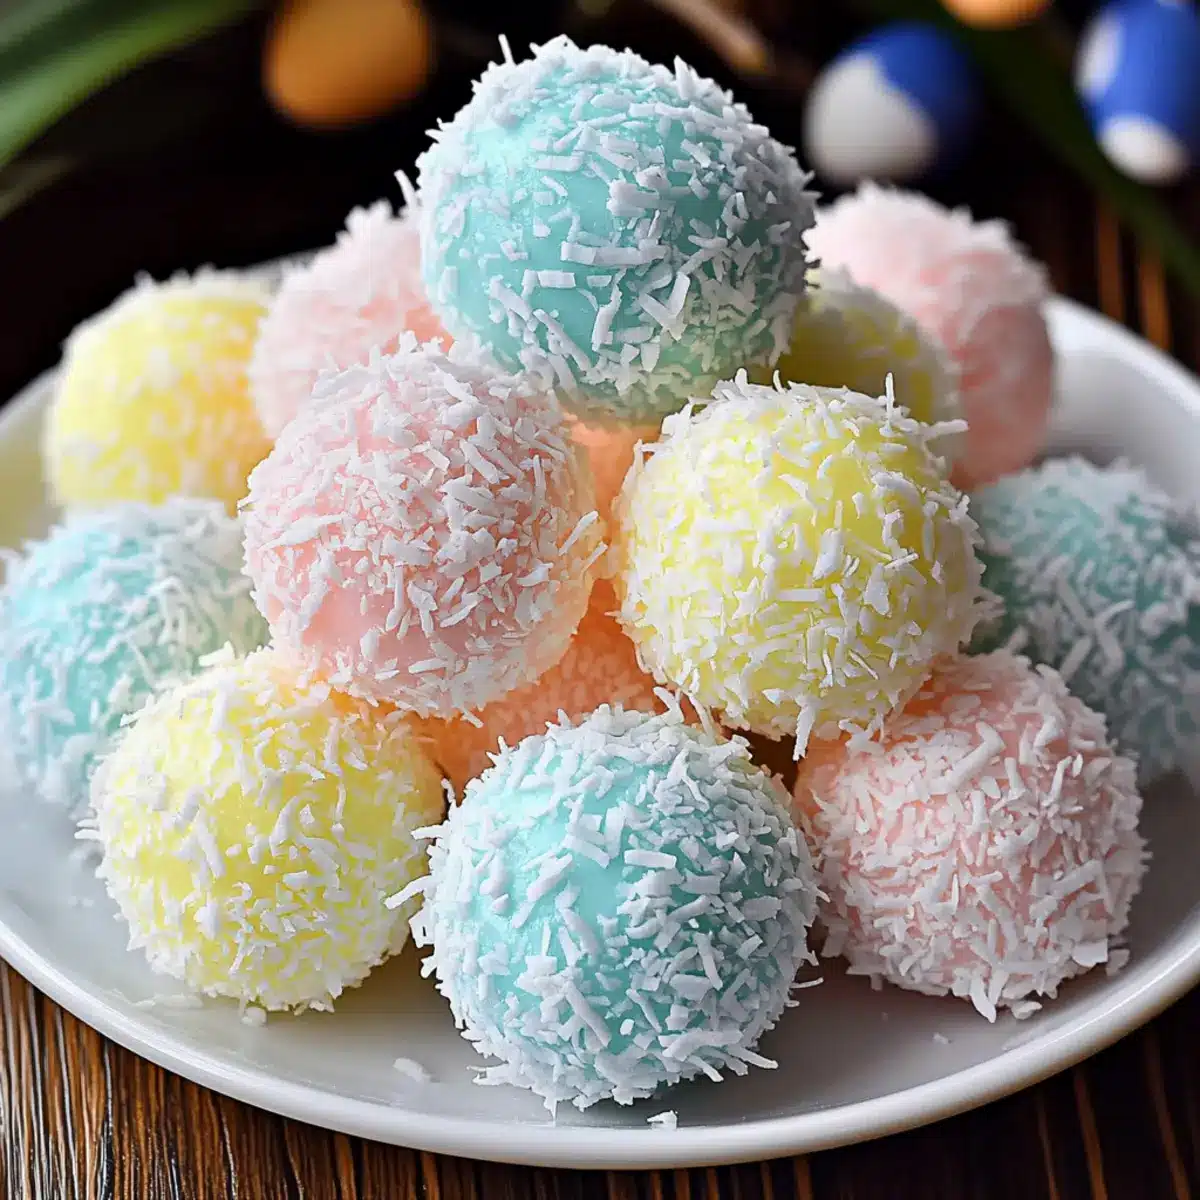
“Just when I thought my Easter baking routine couldn’t get any more exciting, I discovered these charming No-Bake Easter Bunny Coconut Tails. Imagine the laughter that fills the kitchen as kids join in, rolling soft, chewy bites coated in pastel coconut flakes. Not only do these delightful treats promise a festive flair to your holiday table, but they also come together in a snap, making them ideal for busy schedules. The beauty of this recipe lies in its adaptability—whether you’re avoiding certain ingredients or just want to experiment with flavors, these versatile tails have you covered. Ready to bring a playful touch to your Easter celebrations?”
Why Are These Easter Bunny Coconut Tails Special?
Kid-Friendly Fun: The joy of making these little treats is perfect for engaging your children in the kitchen, creating cherished memories together.
No-Bake Simplicity: With minimal time and effort, you can whip up these delightful coconut tails without turning on the oven!
Customizable Flavors: Feel free to switch it up! Add almond extract or even try different types of coconut for a unique touch.
Festive Colors: Ditch the plain and embrace a sprinkle of color! Coloring your shredded coconut brings creativity and cheer to your Easter festivities.
Make Ahead: With a refrigerator life of up to a week (or longer in the freezer), these treats are a hassle-free option for busy families.
Whether you’re celebrating Easter or just looking for a tasty treat, these Easter Bunny Coconut Tails promise sweet smiles all around!
Easter Bunny Coconut Tails Ingredients
For the Base
• Medium Shredded Coconut – This forms the heart of your coconut tails, providing lovely texture; you can choose unsweetened for a lighter taste.
• Sweetened Condensed Milk – Serves as a binder and sweetener, ensuring everything sticks together nicely.
• Melted Butter – Adds richness and moisture; opt for vegan butter for a dairy-free alternative.
• Vanilla Extract – Boosts the flavor profile with a sweet and aromatic touch.
• Confectioner’s Sugar – Sweetens the mixture and helps bring the dough together.
For the Coating
• Fine Shredded Coconut – Creates a vibrant, colorful exterior; perfect for coating each ball.
• Food Coloring – Use this to tint your fine shredded coconut in cheerful pastel shades that scream Easter fun!
These Easter Bunny Coconut Tails are not only delicious but also a whimsical treat that kids love to make!
Step‑by‑Step Instructions for Easter Bunny Coconut Tails
Step 1: Whisk the Base Mixture
In a large mixing bowl, combine 1 cup of sweetened condensed milk, 2 tablespoons of melted butter, and 1 teaspoon of vanilla extract. Whisk these ingredients together until they form a smooth and cohesive mixture. The melted butter should blend seamlessly, and the mixture should be slightly thick. This base is the foundation of your delightful Easter Bunny Coconut Tails!
Step 2: Add Coconut and Sugar
Now, stir in 2 cups of medium shredded coconut and 1 cup of confectioner’s sugar into your creamy mixture. Use a sturdy spatula to mix thoroughly until the coconut and sugar are evenly distributed. You’ll know it’s ready when the mixture holds together well and starts to look like a soft dough. This step builds the chewy texture that everyone loves.
Step 3: Chill the Mixture
Cover the bowl with plastic wrap and place it in the refrigerator for about 15 minutes. Chilling will help firm up the mixture, making it easier to shape into balls. When you remove it, the mixture should be slightly stiff but still malleable, allowing you to roll it smoothly into your Easter Bunny Coconut Tails.
Step 4: Prepare the Colored Coconut
While the mixture chills, divide 2 cups of fine shredded coconut into separate bowls, depending on how many colors you want to create. Add a few drops of food coloring to each bowl and mix until the coconut is evenly tinted in vibrant pastel shades. This colorful coconut will add a festive look to your delightful treats!
Step 5: Shape the Tails
Once the mixture is ready, take about 1½ teaspoons of the chilled mixture and roll it into a smooth ball using your palms. Make sure to compact it well so it holds its shape. Repeat this process with the rest of the mixture, placing the balls on a parchment-lined baking sheet. These will become your charming Easter Bunny Coconut Tails!
Step 6: Coat the Balls
Take each ball and roll it into the colored coconut until it is completely covered. Press gently to ensure the coconut adheres well, creating a fluffy, colorful exterior. Be creative with your colors! Once all the balls are coated, place them back on the parchment-lined sheet, showcasing their cheerful appearances.
Step 7: Set the Tails
Refrigerate the coated Easter Bunny Coconut Tails for about 1 hour to allow them to set properly. This will help the flavors meld and the treats firm up nicely. By the time the hour is up, you’ll have delicious, fun treats that look as delightful as they taste, just in time for sharing at your Easter celebration!
Step 8: Serve and Store
After chilling, your Easter Bunny Coconut Tails are ready to be served! Keep them in an airtight container in the refrigerator until you’re ready to enjoy or present them to your guests. These treats can last up to a week in the fridge, making them a perfect make-ahead option for your festive gatherings!
Expert Tips for Easter Bunny Coconut Tails
-
Coconut Selection: Choose unsweetened coconut to control sweetness. If using sweetened coconut, slightly reduce the confectioner’s sugar to prevent overpowering sweetness.
-
Coloring Caution: When dyeing shredded coconut, dilute gel food coloring with a drop of water for even distribution. This ensures vibrant, uniform colors without clumping.
-
Chilling Matters: Make sure to chill the mixture long enough for easy rolling. If it’s too sticky, it can be difficult to shape into the Easter Bunny Coconut Tails you want.
-
Storage Strategy: Layer parchment paper between the tails when storing to prevent sticking. These treats can stay fresh in the fridge for up to a week!
-
Vegan Variations: Substitute sweetened condensed milk with dairy-free options and use plant-based butter for a delicious vegan version of these treats.
These tips will help you create perfect Easter Bunny Coconut Tails every time!
What to Serve with Easter Bunny Coconut Tails
Enjoying your colorful Easter Bunny Coconut Tails isn’t just about the sweets; it’s about creating a delightful meal experience!
- Fresh Fruit Salad: A vibrant mix of seasonal fruits like strawberries and kiwi adds a refreshing contrast to the sweetness of the coconut tails.
- Pineapple Coconut Smoothie: Blend together ripe pineapple, coconut milk, and ice for a tropical drink that complements the coconut flavors beautifully.
- Chocolate Dipped Strawberries: The rich chocolate pairs perfectly with the soft and chewy texture of the coconut tails, offering a delightful bite.
- Mini Quiches: A savory option, mini quiches filled with cheese and vegetables offer a satisfying balance to the sweet treats.
- Rainbow Veggie Platter: Crisp carrots, bell peppers, and cucumber provide a fresh crunch and a splash of color that matches the festive vibe!
- Lemonade Sparkler: This fizzy drink with a hint of lemon is refreshing and enhances the light, joyous atmosphere of an Easter celebration.
- Carrot Cake Bites: For those with a sweet tooth, these mini-sized cakes echo traditional Easter flavors while providing an additional dessert option.
- Coconut Chia Pudding: Keeping with the coconut theme, this creamy pudding offers a smooth texture that ties together your dessert table beautifully.
Each option pulls together bright colors and inviting flavors, making your Easter gathering a memorable feast for all!
Make Ahead Options
These delightful Easter Bunny Coconut Tails are perfect for meal prep, saving you time during the busy holiday season! You can prepare the base mixture up to 24 hours in advance by following Steps 1-3, then cover and refrigerate it to keep it fresh. Additionally, the assembled treats can be stored in an airtight container and last up to one week in the refrigerator or even up to three months in the freezer. To maintain their quality, place parchment paper between layers if stacking. When you’re ready to serve, simply remove them from the fridge and enjoy these sweet, festive treats that will be just as delicious on the big day!
Easter Bunny Coconut Tails Variations
Feel free to explore these imaginative twists to make your Easter Bunny Coconut Tails uniquely yours!
-
Vegan Version: Substitute sweetened condensed milk with a dairy-free alternative and use plant-based butter to keep it vegan-friendly.
This swap makes these treats inclusive for everyone at the table. -
Nutty Delight: Add a ½ cup of finely shredded nuts such as almonds or cashews to the coconut mixture for a delightful crunch.
This twist not only adds texture but also enhances the flavor profile beautifully. -
Flavor Coffee: For a rich twist, incorporate a teaspoon of coffee extract along with the vanilla for a unique flavor burst.
The combination of coconut and coffee can really elevate your treats to another level! -
Seasonal Colors: Try using different food coloring to match the season—for example, deep reds or greens for Christmas.
This makes these coconut tails so versatile and perfect for any festive celebration! -
Coconut Bliss: Experiment with different types of coconut flakes—flavored, unsweetened, or even toasted— for a subtly varied taste.
Each type brings something unique, making every batch a new adventure in flavor. -
Chocolate Coating: After rolling in coconut, drizzle melted chocolate or dip in chocolate for an indulgent finishing touch.
Chocolate and coconut are a match made in dessert heaven! -
Tropical Fusion: Add a splash of pineapple juice or shredded pineapple to the mixture for a tropical flavor that screams paradise!
Your taste buds will thank you for this unexpected twist! -
Coconut Cream Filling: For extra creaminess, fill the center of each ball with a spoonful of coconut cream before rolling in colored coconut.
This hidden surprise will add a whole new dimension to your coconut tails!
For even more delicious coconut ideas, don’t miss out on our Sweet Coconut Cream and Hawaiian Pineapple Coconut. These variations will not only make your treats delightful but also the talk of the gathering!
How to Store and Freeze Easter Bunny Coconut Tails
Fridge: Keep your Easter Bunny Coconut Tails in an airtight container in the refrigerator, where they will stay fresh for up to 1 week.
Freezer: For longer storage, freeze them in a single layer on a baking sheet, then transfer to a sealed container with parchment paper between layers for up to 3 months.
Thawing: When ready to enjoy, simply thaw in the fridge for a few hours before serving to maintain their soft texture.
Room Temperature: These treats can be kept at room temperature for up to 2 hours during gatherings, but they taste best chilled!
Easter Bunny Coconut Tails Recipe FAQs
How do I know if my coconut is ripe enough?
Absolutely! When selecting medium or fine shredded coconut, look for packages that indicate “unsweetened” or “sweetened,” depending on your preference. If using fresh coconut, the meat should be solid and white, without any dark spots or signs of mold.
What is the best way to store Easter Bunny Coconut Tails?
You can store your Easter Bunny Coconut Tails in an airtight container in the refrigerator for up to 1 week. To keep them fresh longer, layer them with parchment paper to prevent sticking and maintain that delightful texture.
Can I freeze these treats for later use?
Yes! To freeze your Easter Bunny Coconut Tails, first, place them in a single layer on a baking sheet and freeze until solid. Then transfer them to a sealed container, placing parchment paper between layers, and store them for up to 3 months. When you’re ready to enjoy, simply thaw them in the fridge for a few hours.
What if my mixture is too sticky to roll into balls?
If your mixture turns out too sticky, don’t worry! Chill it in the refrigerator for an additional 10-15 minutes to firm it up. If you’re still having trouble, you can slightly dust your hands with confectioner’s sugar while rolling to make it easier.
Are there any dietary considerations for Easter Bunny Coconut Tails?
Absolutely! For a dairy-free or vegan version, simply substitute the sweetened condensed milk with coconut or almond milk mixed with a thickener, and use plant-based butter. Always check that your shredded coconut and other ingredients are free of allergens if you are accommodating specific dietary needs.
Can I customize the flavors of these treats?
Very much so! While the recipe calls for vanilla extract, you can switch things up by adding coconut or almond extract. You can also play around with different types of coconut or add chopped nuts for texture. The more the merrier!
Easter Bunny Coconut Tails that Kids Will Love to Make
Ingredients
Equipment
Method
- Whisk the base mixture: In a large mixing bowl, combine sweetened condensed milk, melted butter, and vanilla extract. Whisk until smooth.
- Add coconut and sugar: Stir in medium shredded coconut and confectioner’s sugar until well combined.
- Chill the mixture: Cover and refrigerate for about 15 minutes to firm up.
- Prepare the colored coconut: Divide fine shredded coconut into bowls and tint with food coloring.
- Shape the tails: Roll chilled mixture into balls about 1½ teaspoons each.
- Coat the balls: Roll each ball in colored coconut until completely covered.
- Set the tails: Refrigerate coated tails for about 1 hour to allow them to firm up.
- Serve and store: Keep in an airtight container in the refrigerator until ready to serve.
Leave a Reply