
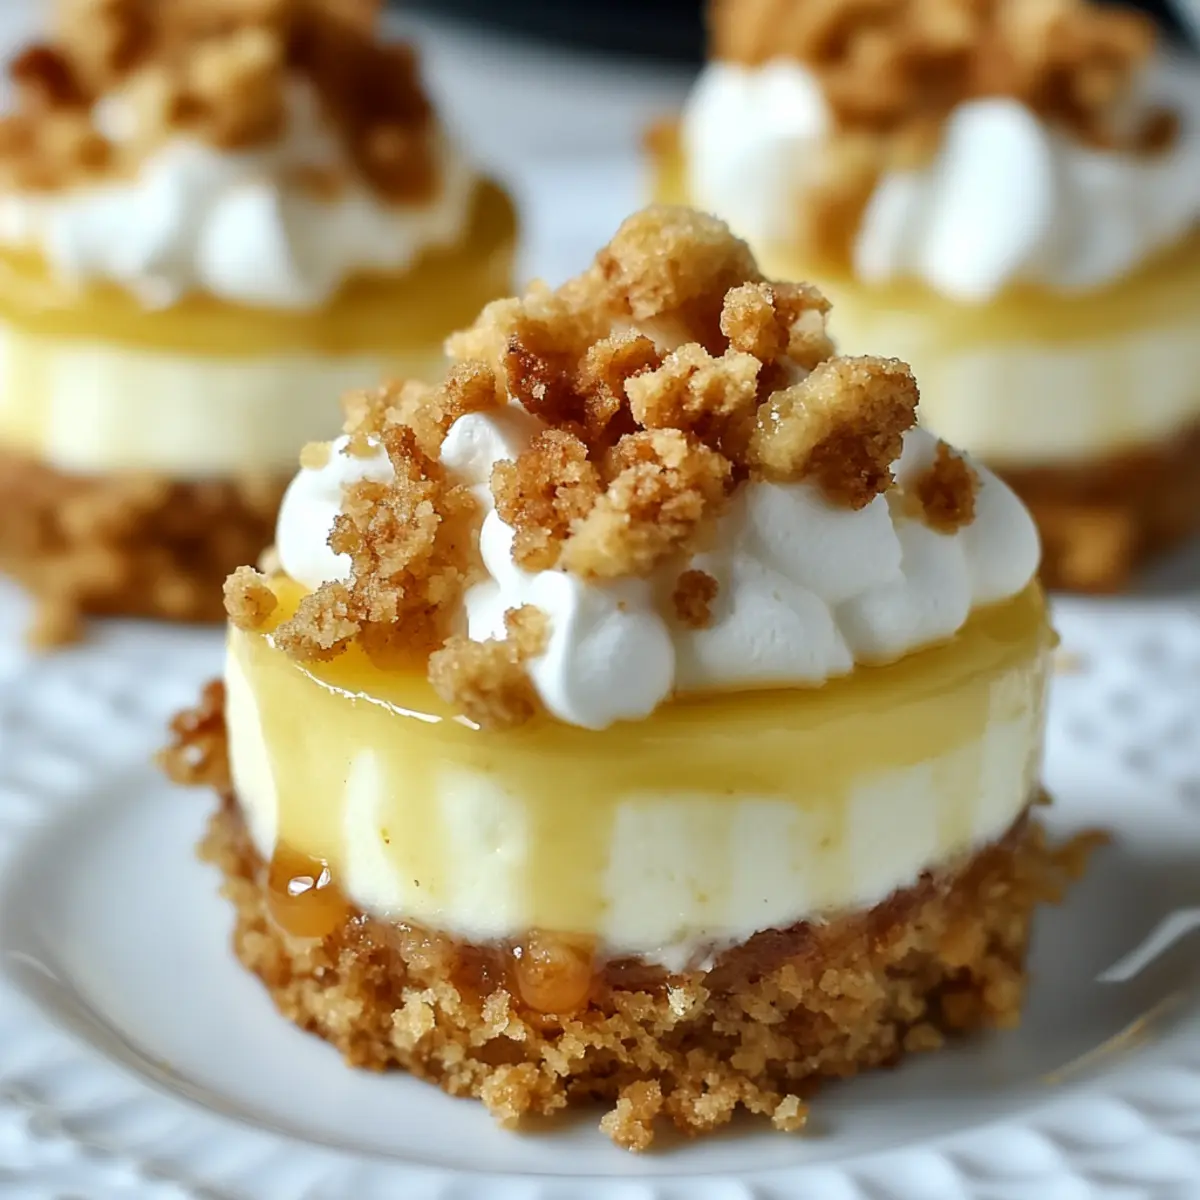
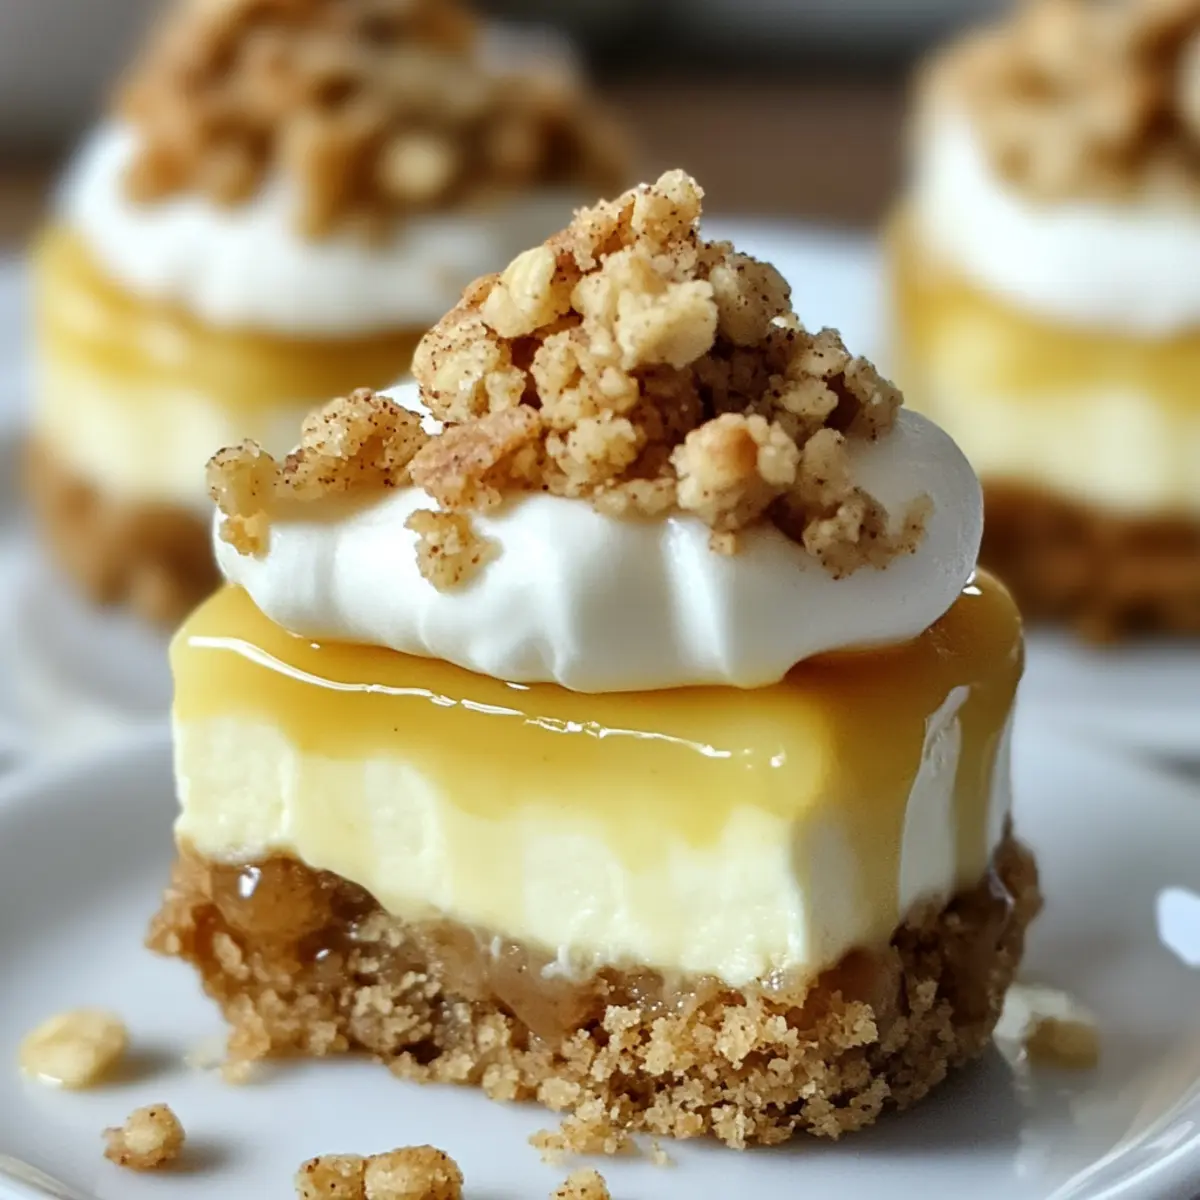
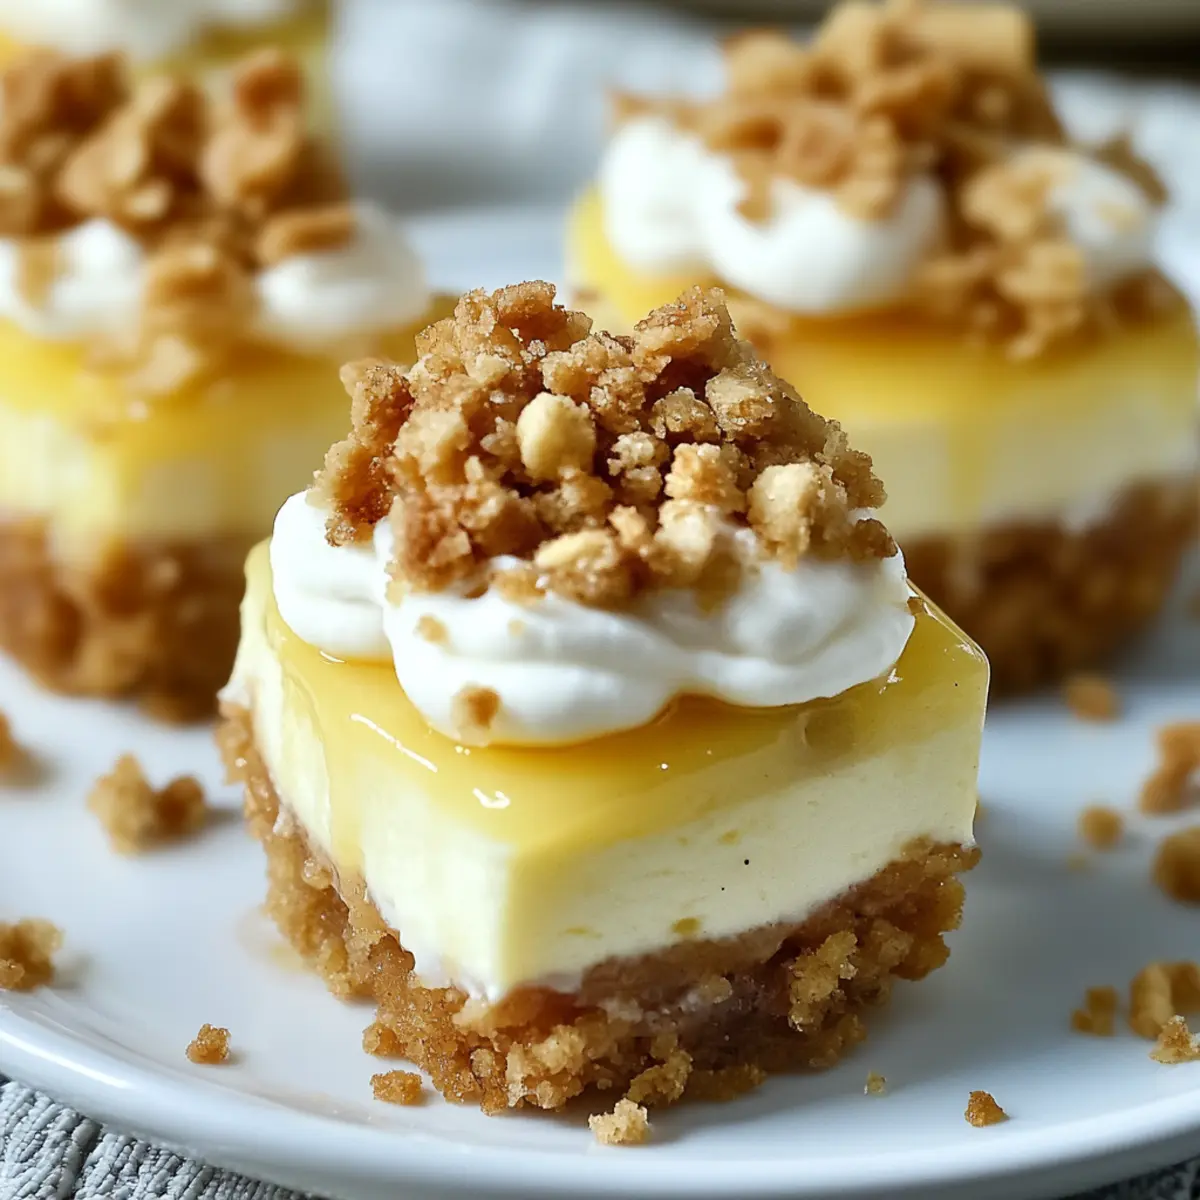
As I stood in my kitchen, the aroma of spiced apples wafting through the air, I was transported to crisp fall days filled with leaves crunching underfoot. That’s the magic of these Apple Crisp Mini Cheesecakes; they marry creamy cheesecake with tender spiced apples and a buttery oat crumble, bringing the essence of autumn into individual dessert cups. What I love most about this recipe is how seamlessly it fits into the bustling holiday season—ready in just 30 minutes and perfect for those of us who cherish homemade desserts without the extravagant time commitment. Whether you’re hosting a cozy gathering or looking for a comforting treat to unwind with, these mini cheesecakes are sure to impress. Curious about how to make this delightful dessert and bring a touch of fall to your next gathering? Just keep scrolling!

Why Are Apple Crisp Mini Cheesecakes Amazing?
Delightful Simplicity: These mini cheesecakes are incredibly easy to whip up, making them perfect for busy bakers or those new to the kitchen.
Fall-Inspired Flavors: The combination of tender spiced apples with a buttery oat crumble evokes the essence of autumn in every bite.
Perfectly Portion Control: Individual servings mean everyone gets a treat without the stress of slicing a full cheesecake—ideal for entertaining!
Make-Ahead Magic: These beauties can be prepared up to three days in advance, making them a lifesaver for holiday gatherings. If time allows, check out my Blueberry Grilled Cheese for another easy dish to wow your guests!
Crowd-Pleasing Appeal: With their creamy and crunchy textures, they are bound to impress family and friends at any event.
Versatile Variation Options: You can easily customize them—think mini chocolate chips for a decadent twist or chopped nuts for added crunch!
Apple Crisp Mini Cheesecakes Ingredients
Get ready to gather everything you need for these delightful desserts!
For the Crust
- Graham Cracker Crumbs – Provides the crust structure; substitute with digestive biscuit crumbs for a similar flavor.
- Granulated Sugar – Sweetness for the crust; can be replaced with a sugar alternative if needed.
- Cinnamon – Adds warmth and flavor to the crust; optional, can be reduced for a less spicy taste.
- Butter (melted) – Binds the crust ingredients together; use coconut oil for a dairy-free version.
For the Cheesecake Filling
- Cream Cheese (softened) – Main filling, gives a rich and creamy texture; use a vegan cream cheese alternative for a dairy-free option.
- Granulated Sugar (for filling) – Sweetens the cheesecake layer; adjust based on your sweetness preference.
- Flour – Provides stability to the cheesecake filling; can use almond flour for gluten-free adaptations.
- Egg – Binds filling together and helps it rise; for egg-free, consider using a flaxseed or chia seed substitute.
- Vanilla Extract – Enhances the flavor of the filling; use almond extract for a different flavor profile.
For the Apple Layer
- Golden Delicious Apples – Base for the apple layer, known for their sweetness and texture; substitute with Honeycrisp or Gala apples as needed.
- Lemon Juice – Brightens the flavor and prevents apples from browning; can replace with vinegar if unavailable.
- Cornstarch – Thickens apple mixture and prevents excess moisture; no substitute is necessary in this context.
- Nutmeg – Complements cinnamon in adding warmth to the apple mixture; optional depending on spice preferences.
For the Streusel Topping
- Oats – Adds crunch to the streusel topping; use gluten-free oats if needed.
- Brown Sugar – Deepens flavor in the streusel; can substitute with coconut sugar for a refined sugar alternative.
- Salt – Balances flavors in the streusel topping; essential for depth of flavor.
- Butter (melted) – Binds the streusel ingredients; use coconut oil for a dairy-free option.
These Apple Crisp Mini Cheesecakes are wonderfully simple to prepare—let’s get cooking!
Step‑by‑Step Instructions for Apple Crisp Mini Cheesecakes
Step 1: Prepare the Crust
In a mixing bowl, combine graham cracker crumbs, granulated sugar, cinnamon, and melted butter until evenly coated. The mixture should hold together when pressed. Firmly press this mixture into the bottom of muffin liners placed in a muffin tin. Chill the crust in the refrigerator for at least 10 minutes to help it set.
Step 2: Make the Cheesecake Filling
Using an electric mixer, beat softened cream cheese and granulated sugar together in a clean bowl until smooth and creamy, about 2-3 minutes. Add in the vanilla extract, flour, and one egg, mixing gently just until combined. Be cautious not to overmix; the mixture should be silky and fluffy, perfect for your Apple Crisp Mini Cheesecakes.
Step 3: Prepare Apples
Dice the Golden Delicious apples into ¼-inch pieces and toss them in a separate bowl with lemon juice, cornstarch, cinnamon, and nutmeg. This blend prevents browning and enhances the apples’ natural sweetness. Set the apple mixture aside, allowing the flavors to meld while you assemble the cheesecakes.
Step 4: Assemble Mini Cheesecakes
Remove the muffin tin from the refrigerator and evenly distribute the cheesecake filling over each chilled crust. Use a spoon or small spatula to smooth the tops. Gently press the prepared apple mixture on top of the cheesecake filling, ensuring an even layer for each of your delightful Apple Crisp Mini Cheesecakes.
Step 5: Make Streusel Topping
In a mixing bowl, combine oats, flour, brown sugar, and melted butter to create the streusel topping. Use your fingers to mix until crumbly, resembling a wet sand texture. Generously sprinkle this mixture over the apple layer, ensuring every bite of your mini cheesecakes will have that delightful crunchy topping.
Step 6: Bake
Preheat your oven to 325°F (160°C). Once heated, place the muffin tin in the oven and bake for 28-30 minutes. The edges should be set with a slight jiggle in the center, indicating the cheesecakes are done. The enticing aroma filling your kitchen will surely signal that these Apple Crisp Mini Cheesecakes are almost ready!
Step 7: Cool
Once baked, remove the tin from the oven and let the mini cheesecakes cool in the pan for 30 minutes. This cooling step helps the filling firm up. Afterward, transfer them to the refrigerator for at least 1 hour to enhance the flavors and ensure they’re properly chilled before serving.
What to Serve with Apple Crisp Mini Cheesecakes?
These delightful mini cheesecakes are perfect for creating a cozy fall meal, inviting flavors and sweet aromas that warm the heart.
- Spiced Apple Cider: This warm beverage echoes the apple and cinnamon flavors in the cheesecakes, creating a comforting pairing for chilly evenings.
- Grilled Vanilla Ice Cream: The creamy richness beautifully complements the texture of the cheesecakes, bringing a delightful contrast of temperatures to your dessert experience.
- Candied Pecans: Their sweet and crunchy texture adds an extra layer of flavor, enhancing every bite while embodying the essence of autumn.
- Caramel Drizzle: A sweet and gooey addition that can be drizzled atop the mini cheesecakes, enhancing their flavor and making them indulgently decadent.
- Buttery Shortbread Cookies: These classic cookies can serve as a perfect textural contrast, offering a crumbly bite alongside the creamy cheesecakes.
- Apple Pie Smoothie: Combining fall flavors, this smoothie can be an energizing drink option that perfectly pairs with your Apple Crisp Mini Cheesecakes, showcasing apples and warm spices.
- Pumpkin Spice Latte: This beloved seasonal drink balances the sweet cheesecakes with its bold coffee flavor, making it a perfect companion for brunch or an afternoon treat.
- Whipped Cream: A dollop of this light topping adds creaminess and elegance, rounding out the rich flavors and inviting a touch of indulgence.
Apple Crisp Mini Cheesecakes Variations
Feel free to embark on a delicious journey and customize these mini cheesecakes to make them uniquely yours!
-
Nutty Crumble: Add chopped pecans or walnuts to your streusel for an irresistible crunch and nutty flavor.
-
Chocolate Delight: Mix in mini chocolate chips in the cheesecake batter for an indulgent chocolate twist that pairs beautifully with apple.
-
Fruity Boost: Incorporate dried cranberries during apple preparation for a pop of tartness and vibrant color in every bite.
-
Gluten-Free Option: Substitute regular flour with almond flour in the cheesecake batter for a gluten-free version that tastes just as amazing.
-
Dairy-Free Delight: Swap out cream cheese for a vegan cream cheese alternative and use coconut oil in the crust for a completely dairy-free treat.
-
Cinnamon Swirl: For a warm spice sensation, swirl additional cinnamon and sugar into the cheesecake filling before baking, enhancing that delightful autumn vibe.
-
Full-Size Cheesecake: Adapt this recipe for a 9-inch springform pan; bake longer at the same temperature for a lovely full-sized cheesecake.
-
Garnish Glam: Top your mini cheesecakes with caramel sauce and a dollop of whipped cream for an extra indulgent finishing touch.
With these variations, your Apple Crisp Mini Cheesecakes can cater to every taste and preference, making them the perfect festive dessert for any gathering. If you’re craving something savory to accompany your treats, consider making a batch of my Chilli Beef for a balanced meal!
How to Store and Freeze Apple Crisp Mini Cheesecakes
Fridge: Store the mini cheesecakes in an airtight container in the refrigerator for up to 3 days. This keeps them fresh and ready for those sweet cravings.
Freezer: These delightful Apple Crisp Mini Cheesecakes can be frozen for up to 3 weeks. Wrap each cheesecake individually in plastic wrap, then store in a freezer-safe container.
Thawing: When you’re ready to enjoy, simply transfer the frozen cheesecakes to the refrigerator overnight to thaw. This gentle method helps maintain their creamy texture.
Reheating: For a warm treat, reheat in the microwave for about 15-20 seconds before serving. Add a drizzle of caramel sauce for an indulgent touch!
Make Ahead Options
These Apple Crisp Mini Cheesecakes are a dream for busy home cooks looking to save time! You can prepare the crust and cheesecake filling up to 24 hours in advance. Simply refrigerate the crust in muffin liners and store the cheesecake filling in an airtight container. The apple mixture can also be made ahead—just toss the diced apples with lemon juice, cornstarch, and spices, then keep it in the fridge for up to 3 days. When you’re ready to bake, assemble the mini cheesecakes with the prepped components and top them with the streusel mixture before baking as directed. This way, you’ll enjoy fresh, delicious desserts with minimal effort, ensuring they remain just as delightful as when made fresh!
Expert Tips for Apple Crisp Mini Cheesecakes
-
Chill the Crust: Allowing the crust to chill for at least 10 minutes ensures it holds its shape and provides the best support for the filling.
-
Avoid Overmixing: When incorporating the egg into the cheesecake batter, mix just until blended. Overmixing can lead to cracks during baking.
-
Use Fresh Apples: Fresh, firm apples such as Golden Delicious or Honeycrisp are crucial for achieving the best flavor and texture in your apple layer.
-
Don’t Skip the Cool Down: After baking, let the mini cheesecakes cool in the pan before refrigerating. This prevents condensation, keeping them perfect for serving later.
-
Customize Your Flavors: Feel free to add extras like chocolate chips or nuts in the cheesecake filling or streusel—these variations can elevate your Apple Crisp Mini Cheesecakes to a new level!
-
Perfect Storage: These cheesecakes are ideal for make-ahead desserts; they can be stored in the refrigerator for up to 3 days or frozen for up to 3 weeks.
Apple Crisp Mini Cheesecakes Recipe FAQs
What type of apples are best for this recipe?
I recommend using Golden Delicious apples due to their sweetness and firmness. However, Honeycrisp or Gala apples work beautifully too! Ensure they are fresh and slightly firm for the best texture in your Apple Crisp Mini Cheesecakes.
How should I store leftover mini cheesecakes?
Absolutely! Store your mini cheesecakes in an airtight container in the refrigerator for up to 3 days. This will keep them fresh and tasting delightful, ready for your next sweet craving.
Can I freeze Apple Crisp Mini Cheesecakes?
Yes, you can freeze them! Wrap each cheesecake individually in plastic wrap, then place them in a freezer-safe container. They’ll stay good for up to 3 weeks, and when you’re ready to enjoy, just transfer them to the fridge to thaw overnight.
What should I do if the cheesecake filling cracks while baking?
To avoid cracks, be careful not to overmix the cheesecake batter after adding the egg. Mix just until incorporated. It’s also essential to let them cool gradually to avoid sudden temperature changes, which can cause cracks.
Are there any allergy considerations for this recipe?
Yes, this recipe contains dairy, gluten, and eggs. For a dairy-free option, use vegan cream cheese and coconut oil. You can substitute the flour with almond flour for a gluten-free version, and for an egg replacement, try a flaxseed or chia seed mixture.
Can I make these cheesecakes ahead of time?
Definitely! These Apple Crisp Mini Cheesecakes can be prepared up to 3 days in advance. Simply store them in the refrigerator until you’re ready to serve, making them a perfect make-ahead dessert for gatherings!
Apple Crisp Mini Cheesecakes: Your Cozy Fall Dessert Delight
Ingredients
Equipment
Method
- In a mixing bowl, combine graham cracker crumbs, granulated sugar, cinnamon, and melted butter until evenly coated. Firmly press into the bottom of muffin liners and chill in the refrigerator for at least 10 minutes.
- Beat softened cream cheese and granulated sugar together until smooth. Add vanilla extract, flour, and egg, mixing gently just until combined.
- Dice the Golden Delicious apples into ¼-inch pieces and toss with lemon juice, cornstarch, cinnamon, and nutmeg.
- Distribute the cheesecake filling over each chilled crust, smooth the tops, and gently press the apple mixture on top.
- Combine oats, flour, brown sugar, and melted butter to create the streusel topping and sprinkle over the apple layer.
- Preheat oven to 325°F (160°C) and bake for 28-30 minutes until edges are set.
- Let the mini cheesecakes cool in the pan for 30 minutes, then transfer to the refrigerator for at least 1 hour.
Leave a Reply