
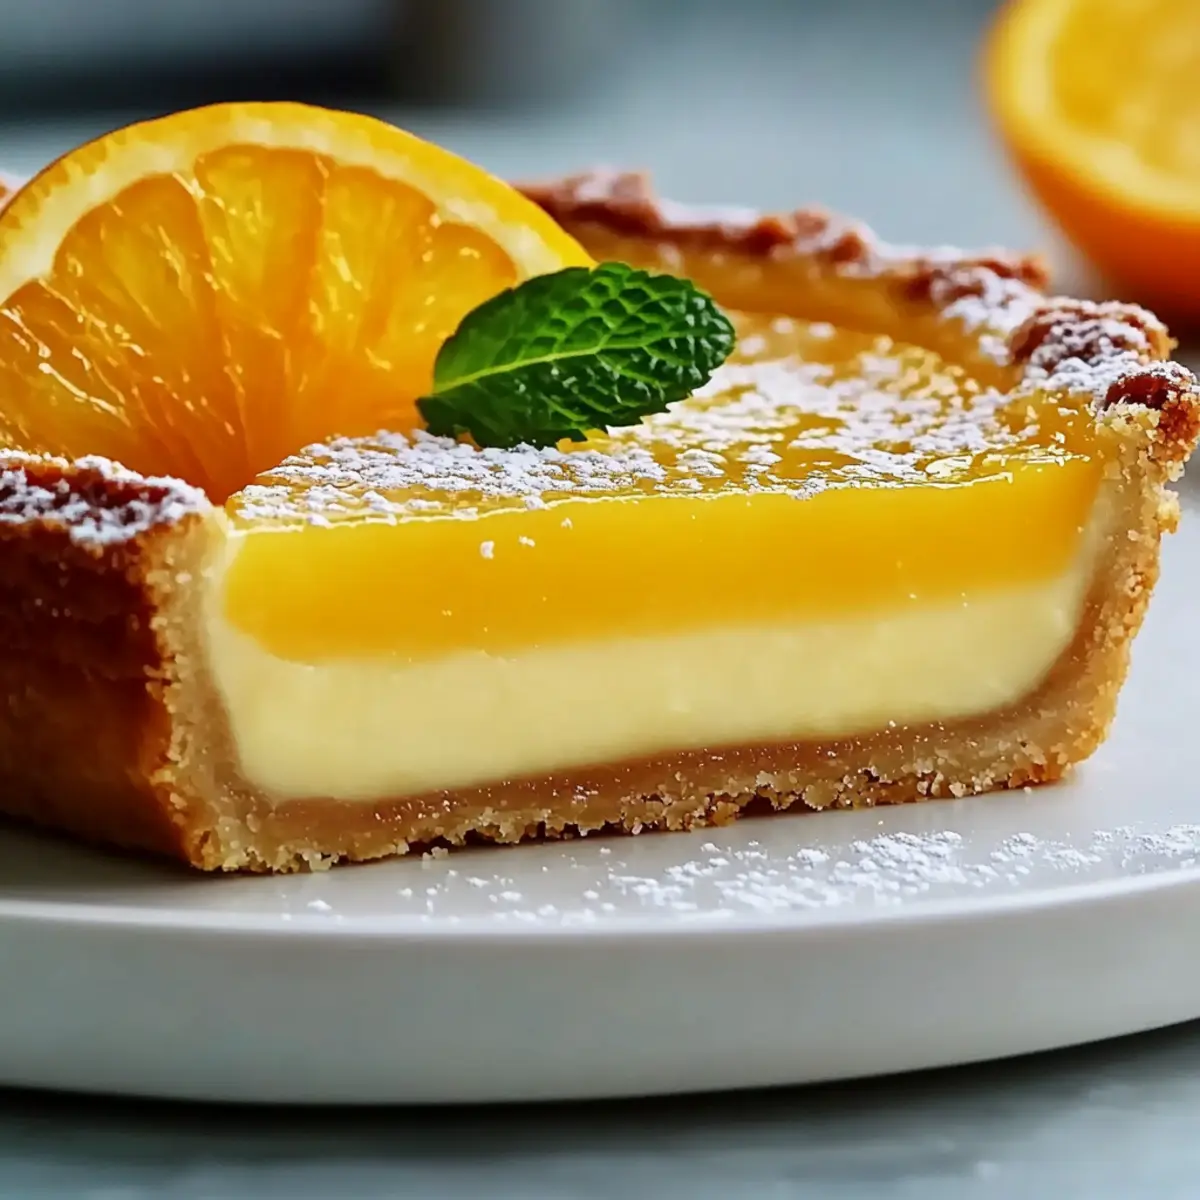
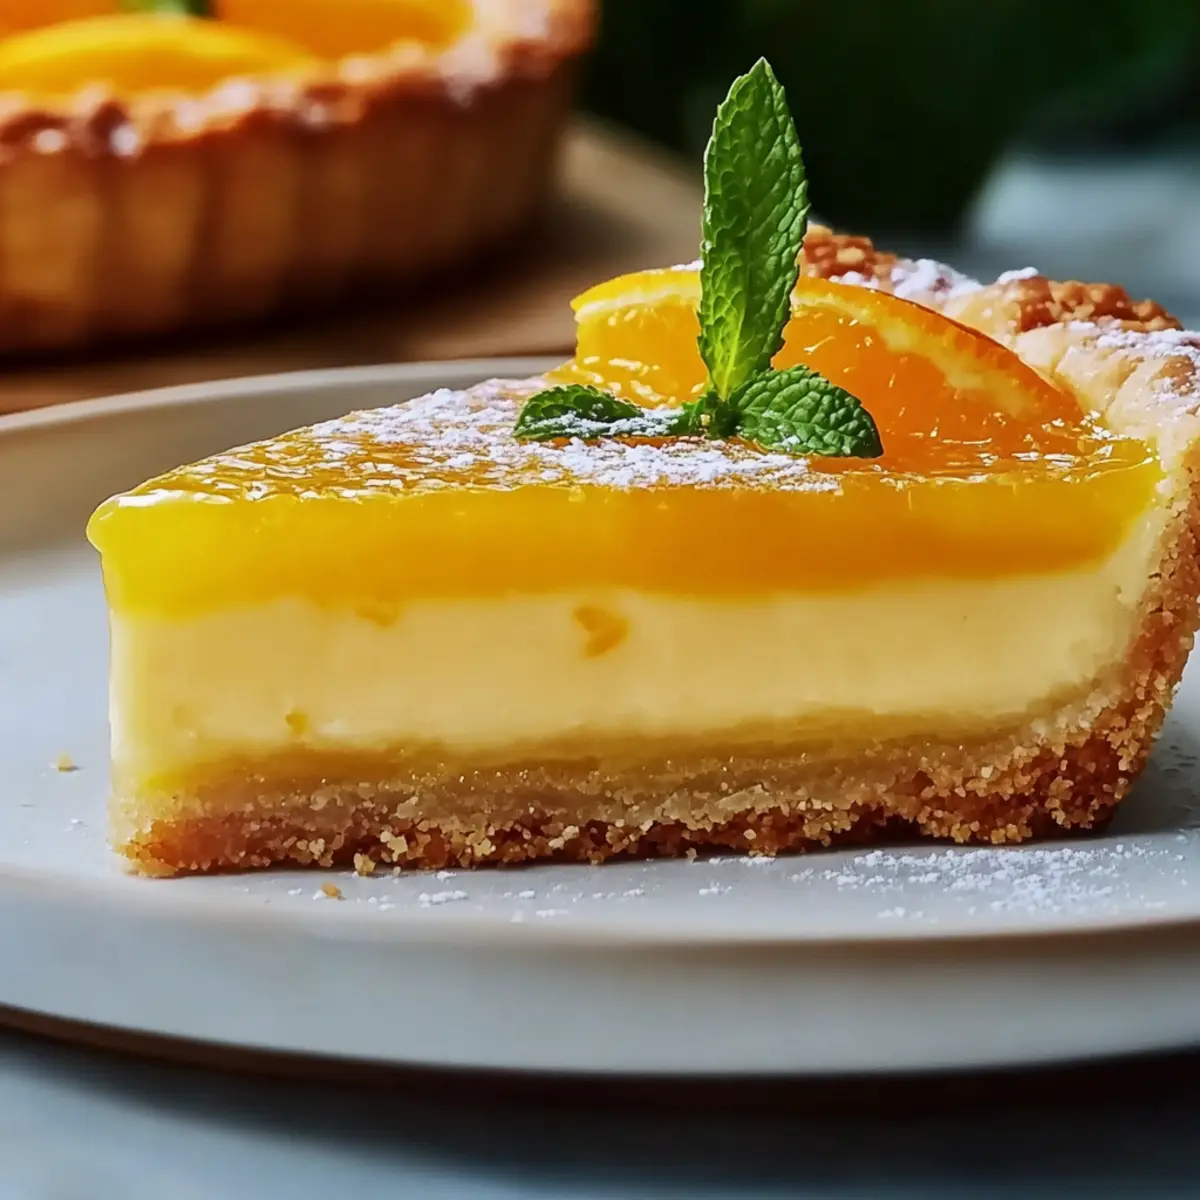
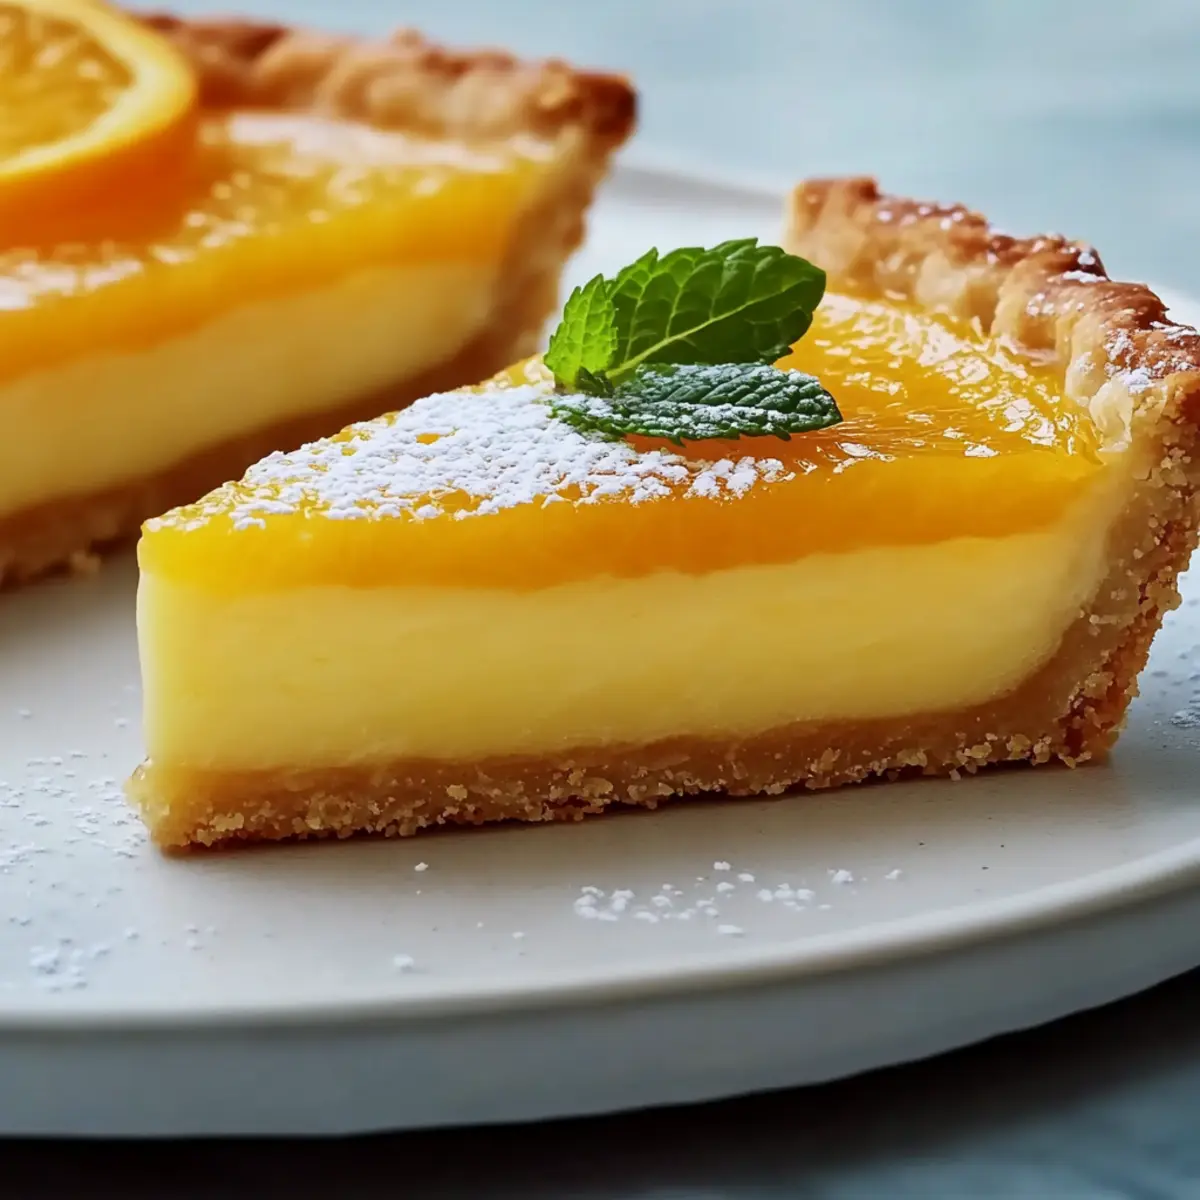
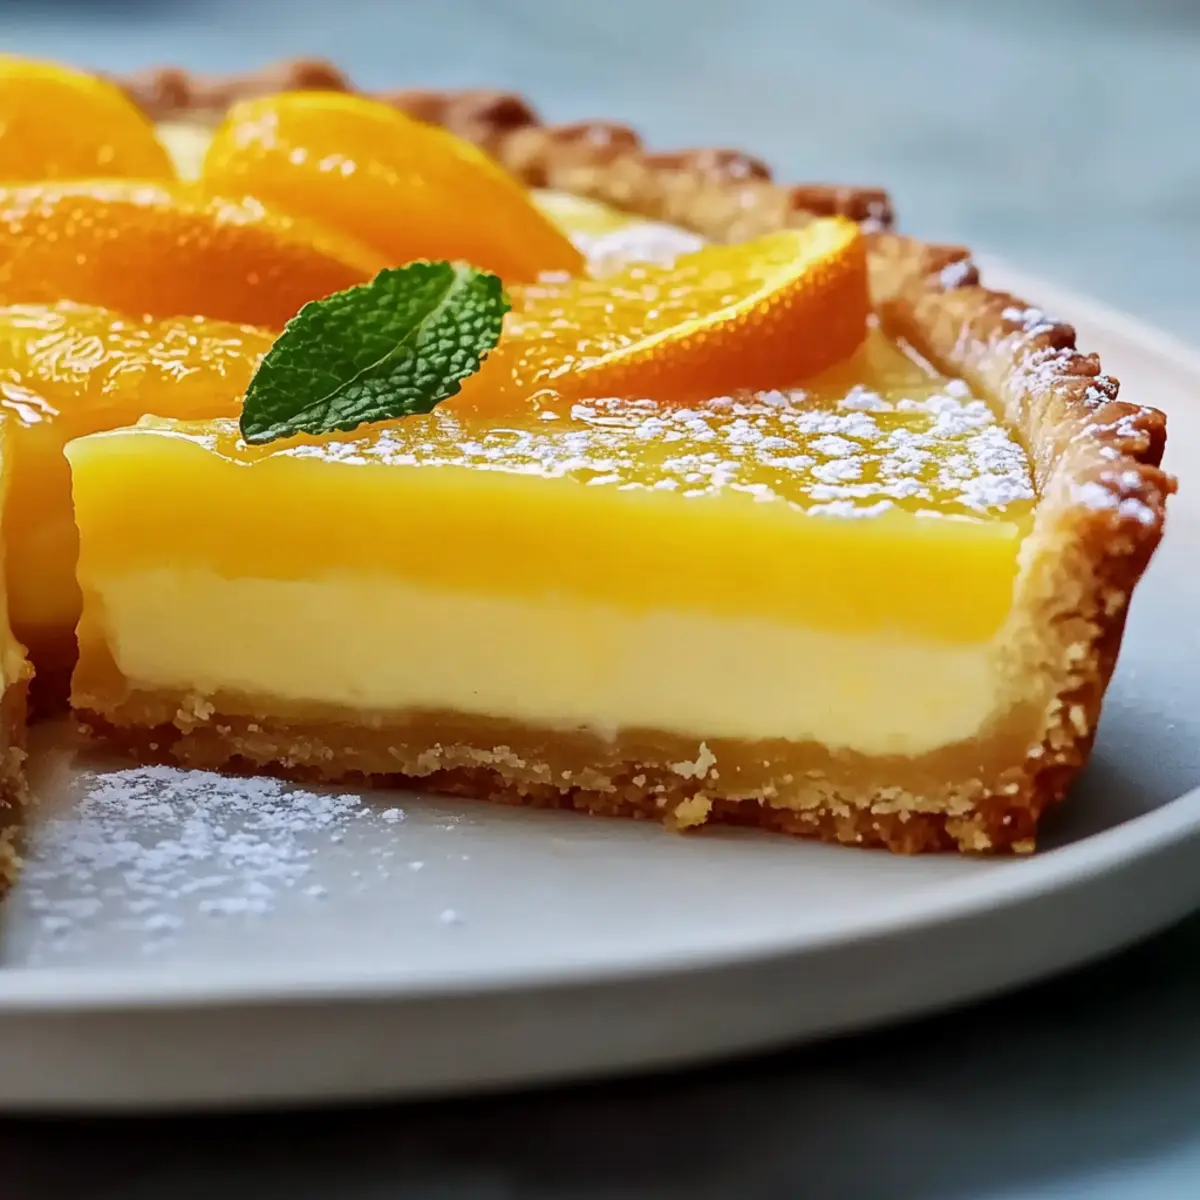
There’s nothing quite like the invigorating scent of freshly squeezed oranges wafting through the kitchen as you prepare an Elegant Classic Orange Tart. This delightful dessert brings a burst of sunshine to any table, combining a flaky crust with a silky smooth citrus filling that’s as refreshing as it is elegant. What I love most about this tart is its effortless charm—it’s an impressive make-ahead option for gatherings, yet so easy to whip up on a whim. Plus, with potential gluten-free options featuring almond flour, it caters to a variety of dietary needs. Are you ready to explore just how delightful a few simple ingredients can be? Let’s dive into this citrusy paradise together!
Why is this tart a must-try?
Simplicity: This Classic Orange Tart features an uncomplicated recipe that even novice bakers can master, bringing elegance to your dessert table without the stress.
Bright Citrus Flavor: The freshly squeezed oranges lend a vibrant burst of flavor that dances on your palate, making each bite feel like a slice of sunshine.
Make-Ahead Convenience: Prepare this tart in advance, allowing the flavors to meld perfectly in the fridge—ideal for unexpected guests or planned gatherings.
Versatile Options: With variations like gluten-free crusts using almond flour or layers of fresh berries, you can easily customize this dessert to suit your preferences.
Crowd-Pleaser: Perfect for dinner parties or family gatherings, this tart promises to impress your guests and leave them asking for the recipe! For more easy dessert ideas, check out my Sweet Sausage Muffins or delightful Spicy Tuna Tartare.
Classic Orange Tart Ingredients
Here’s everything you need to create a stunning Classic Orange Tart!
For the Tart Crust
- Flour – Use all-purpose flour for a sturdy structure; gluten-free flour works too!
- Powdered Sugar – Adds subtle sweetness and helps create a tender crust.
- Almond Flour – Incorporates delicious flavor; essential for a lovely texture.
- Salt – Enhances the overall flavor of the crust.
- Butter – Use chilled, unsalted butter for a flakier texture.
- Egg Yolk – Provides richness and acts as a binding agent.
- Cold Water – Helps mix the dough without toughness.
For the Orange Curd Filling
- Oranges – Freshly squeezed juice and zest brighten the filling; opt for Navel or Valencia oranges.
- Superfine Sugar – Helps the filling dissolve smoothly; regular sugar is a fine substitute.
- Cornstarch – Thickens the curd for a creamy custard texture.
- Gelatin – Assures the curd sets perfectly; try agar-agar for a vegetarian option.
For Whipped Topping
- Heavy Cream – Adds a rich, creamy layer on top of the tart; whip until fluffy.
Optional Garnishes
- Fresh Berries – Add vibrant colors and textures to your presentation.
- Crushed Pistachios – Offers a delightful crunch that pairs well with the filling.
- Chocolate Drizzle – A luxurious touch to elevate this elegant dessert.
Prepare these ingredients, and you’re on your way to impressing your friends and family with a delicious Classic Orange Tart!
Step‑by‑Step Instructions for Classic Orange Tart
Step 1: Prepare the Tart Dough
In a food processor, pulse together 1 cup of all-purpose flour, 1/4 cup powdered sugar, 1/4 cup almond flour, and a pinch of salt until combined. Add 1/2 cup of chilled, cubed unsalted butter and pulse until the mixture resembles coarse crumbs. Next, incorporate 1 egg yolk and 2 tablespoons of cold water, pulsing until the dough just comes together. Shape into a disk, wrap it in plastic, and refrigerate for at least 30 minutes.
Step 2: Roll Out and Blind Bake the Crust
Preheat your oven to 350°F (175°C). On a lightly floured surface, roll out the chilled tart dough to about 1/8 inch thick. Gently fit the rolled dough into a tart pan, trimming any excess. Line the crust with parchment paper and fill with pie weights. Bake for 15–20 minutes, until the crust is lightly golden. Remove the weights and parchment, then bake for an additional 5 minutes to ensure it’s fully cooked. Let it cool completely before filling.
Step 3: Prepare the Orange Curd Filling
In a medium saucepan, combine 1 cup of freshly squeezed orange juice, 3/4 cup superfine sugar, and 4 large eggs. Whisk together over medium-low heat, stirring constantly until the mixture thickens enough to coat the back of a spoon (about 10 minutes). Remove from heat, and then stir in 2 tablespoons of butter and 1 tablespoon of gelatin dissolved in 2 tablespoons of water. Allow the curd to cool slightly before pouring it into the cooled tart crust.
Step 4: Chill the Tart
Once the orange curd is evenly spread in the tart crust, cover it loosely with plastic wrap and refrigerate for at least 3 hours, or overnight if possible. This chilling time will allow the filling to set firmly, creating a beautiful contrast with the flaky crust. When ready to serve, inspect the tart to ensure it’s set and the surface is smooth and glossy.
Step 5: Whip the Cream and Garnish
In a mixing bowl, whip 1 cup of heavy cream until soft peaks form. Gently add in 2 tablespoons of powdered sugar to sweeten the cream, continuing to whip until you achieve soft peaks. Carefully spread the whipped cream over the chilled orange curd, smoothing it lightly. For an elegant touch, garnish with fresh berries, crushed pistachios, or a delicate drizzle of chocolate. Slice and serve your stunning Classic Orange Tart with pride!
Make Ahead Options
These Classic Orange Tart preparations are perfect for busy home cooks looking to save time and impress guests! You can prepare the tart crust and orange curd filling up to 2 days in advance, allowing the flavors to develop beautifully. To do this, simply follow the recipe’s initial steps through the chilling phase. Once chilled and set, cover the tart with plastic wrap to keep it fresh in the refrigerator. On the day of serving, whip the cream and add your sweet toppings just before serving to maintain that delightful texture and presentation. By prepping ahead, you’ll be able to enjoy a stunning dessert without the last-minute rush!
What to Serve with Classic Orange Tart
This delightful dessert pairs beautifully with complementary flavors and textures, creating a memorable meal experience.
- Lightly Sweetened Whipped Cream: A classic topping that adds airy texture and balances the tart citrus notes of the orange tart.
- Fresh Berries: Serve with mixed berries like strawberries and blueberries for a pop of color and natural sweetness, enhancing every bite.
- Vanilla Ice Cream: A scoop of creamy vanilla ice cream brings a luscious creaminess that contrasts the tart’s refreshing citrus tang. A match made in dessert heaven!
- Mint Tea: This fragrant tea complements the orange flavors while providing a refreshing palate cleanser between bites, particularly delightful after a heavy meal.
- Chocolate Drizzle: Adding a rich chocolate drizzle on top of the tart creates a luxurious touch, making it all the more indulgent and visually appealing.
- Cheese Plate: A selection of mild cheeses, like goat cheese or mascarpone, can serve as a savory contrast to the tart sweetness and citrusy flavor, offering a delightful balance.
- Sparkling Water: A chilled glass of sparkling water with a lemon twist refreshes the palate and brings a lightness that pairs wonderfully with sweet flavors.
- Savory Crostini: Light crostini topped with goat cheese and honey blend sweet and savory elements, providing a delicious counterpoint to the bright orange tart.
Expert Tips for Classic Orange Tart
-
Chill the Dough: Ensure the tart dough is properly chilled before rolling it out. This prevents it from shrinking during baking and helps maintain a tender texture.
-
Blind Baking: Don’t skip the blind-baking step! Properly weight the crust while baking to avoid a soggy bottom—it’s crucial for a perfect Classic Orange Tart.
-
Heat Control: Keep the heat low while making the orange curd to prevent scrambling the eggs. Stir continuously for a silky texture and a perfectly thick filling.
-
Smooth Curd: To achieve a wonderfully smooth orange curd, strain the mixture before pouring it into the crust. This removes any bits of cooked egg and gives a professional finish.
-
Chilling Time: Be patient! Allow the tart to chill in the refrigerator for at least three hours after filling. This ensures the curd sets well and enhances the flavors beautifully.
Classic Orange Tart Variations
Feel free to make this Classic Orange Tart your own with some simple twists and substitutions!
- Citrus Medley: Add lemon zest or juice to the filling for an extra bright tang. This combo offers a refreshing burst of flavor that dances on your palate.
- Mascarpone Topping: Substitute whipped cream with a light mascarpone mixture for an ultra-creamy topping that adds richness. It creates a lovely depth, taking your tart to another level.
- Berry Bliss: Fold in fresh raspberries or blueberries into the curd filling for a tart twist and beautiful presentation. The contrast of flavors will leave everyone asking for seconds!
- Nutty Crust: Experiment with different nuts like walnuts or pecans in the crust for unique flavor and texture. This small change can elevate the tart to new heights!
- Almond Extract: A drop or two of almond extract can deepen the flavor profile of the curd, resulting in an aromatic delight. It’s a subtle twist that makes a lovely difference.
- Spicy Kick: Add a pinch of cayenne or chili powder to the curd for an unexpected heat that pairs beautifully with the sweetness. It keeps everyone guessing and adds a fun twist!
- Tropical Variation: Substitute half of the orange juice with pineapple juice for a tropical take on this classic recipe. It’s like a mini vacation on your plate!
- Chocolate Drizzle: For a rich finish, drizzle melted dark chocolate over the whipped cream topping before serving. This luxurious touch will wow your guests and satisfy any chocolate lover!
Don’t forget, if you’re looking for more delightful recipes, check out my Chicken Buttered Noodles for a comforting meal or my delightful Sweet Sausage Muffins for a sweet treat!
Storage Tips for Classic Orange Tart
-
Fridge: Store leftovers in an airtight container in the refrigerator for up to 3 days. This helps maintain the tart’s freshness and prevents it from absorbing other odors.
-
Freezer: For longer storage, freeze the tart unadorned (without whipped cream) for up to 1 month. Wrap it tightly in plastic wrap, then in aluminum foil to avoid freezer burn.
-
Reheating: If you want to enjoy the tart cold, simply thaw it in the fridge overnight before serving. Avoid reheating, as it may change the texture of the filling.
-
Make-Ahead: Prepare the tart crust and orange curd filling up to two days in advance. Assemble the tart by adding the curd and toppings just before serving for the best presentation.
Classic Orange Tart Recipe FAQs
What kind of oranges should I use for my tart?
Absolutely! For the best flavor, I recommend using Navel or Valencia oranges. Their sweet and juicy qualities provide a delightful brightness to the curd filling. If you can’t find those, feel free to experiment with blood oranges for a gorgeous color and slightly different taste!
How should I store my Classic Orange Tart?
You can store your tart in an airtight container in the refrigerator for up to 3 days. This helps keep the crust crispy and prevents it from absorbing other odors in the fridge. If you think you won’t finish it, I recommend enjoying it within this timeframe for the best taste!
Can I freeze the Classic Orange Tart?
Yes, you can! To freeze your tart, do it unadorned—without the whipped cream. Wrap it tightly in plastic wrap, then in aluminum foil to avoid freezer burn, and it can last up to 1 month. To thaw, simply place it in the refrigerator overnight before serving. Just be cautious not to reheat!
What if my tart crust turns out too tough?
Very! If your crust becomes tough, it likely means you overworked the dough or added too much water. For future batches, make sure to mix gently and keep your cold water to a minimum—just enough for the dough to come together. Remember, less is more when it comes to mixing!
Is this Classic Orange Tart suitable for gluten-free diets?
Definitely! To make a gluten-free version, simply substitute the all-purpose flour with gluten-free all-purpose flour and ensure your powdered sugar is gluten-free as well. I often make it with almond flour for added flavor and a wonderful texture—it’s a crowd-pleaser!
Can I make this tart ahead of time?
Yes, indeed! You can prepare the tart crust and the orange curd filling up to two days in advance. Just be sure to assemble the tart and add the toppings right before serving for the freshest, most appealing presentation. Enjoy the compliments at your gathering!
Classic Orange Tart: An Elegant Citrus Delight to Wow Friends
Ingredients
Equipment
Method
- In a food processor, pulse together flour, powdered sugar, almond flour, and salt until combined.
- Add chilled butter and pulse until the mixture resembles coarse crumbs.
- Incorporate egg yolk and cold water, pulsing until the dough just comes together. Shape into a disk, wrap in plastic, and refrigerate for at least 30 minutes.
- Preheat the oven to 350°F (175°C). Roll out the dough to about 1/8 inch thick and fit it into a tart pan.
- Bake for 15-20 minutes with pie weights until lightly golden, then remove weights and bake for an additional 5 minutes.
- Let cool completely before adding filling.
- In a saucepan, combine orange juice, superfine sugar, and eggs. Whisk over medium-low heat until thickened (about 10 minutes).
- Remove from heat and stir in butter and gelatin mixture until smooth. Allow to cool slightly before pouring into the tart crust.
- Cover with plastic wrap and refrigerate for at least 3 hours or overnight.
- Whip cream with powdered sugar until soft peaks form and spread over chilled tart. Garnish as desired.
Leave a Reply