
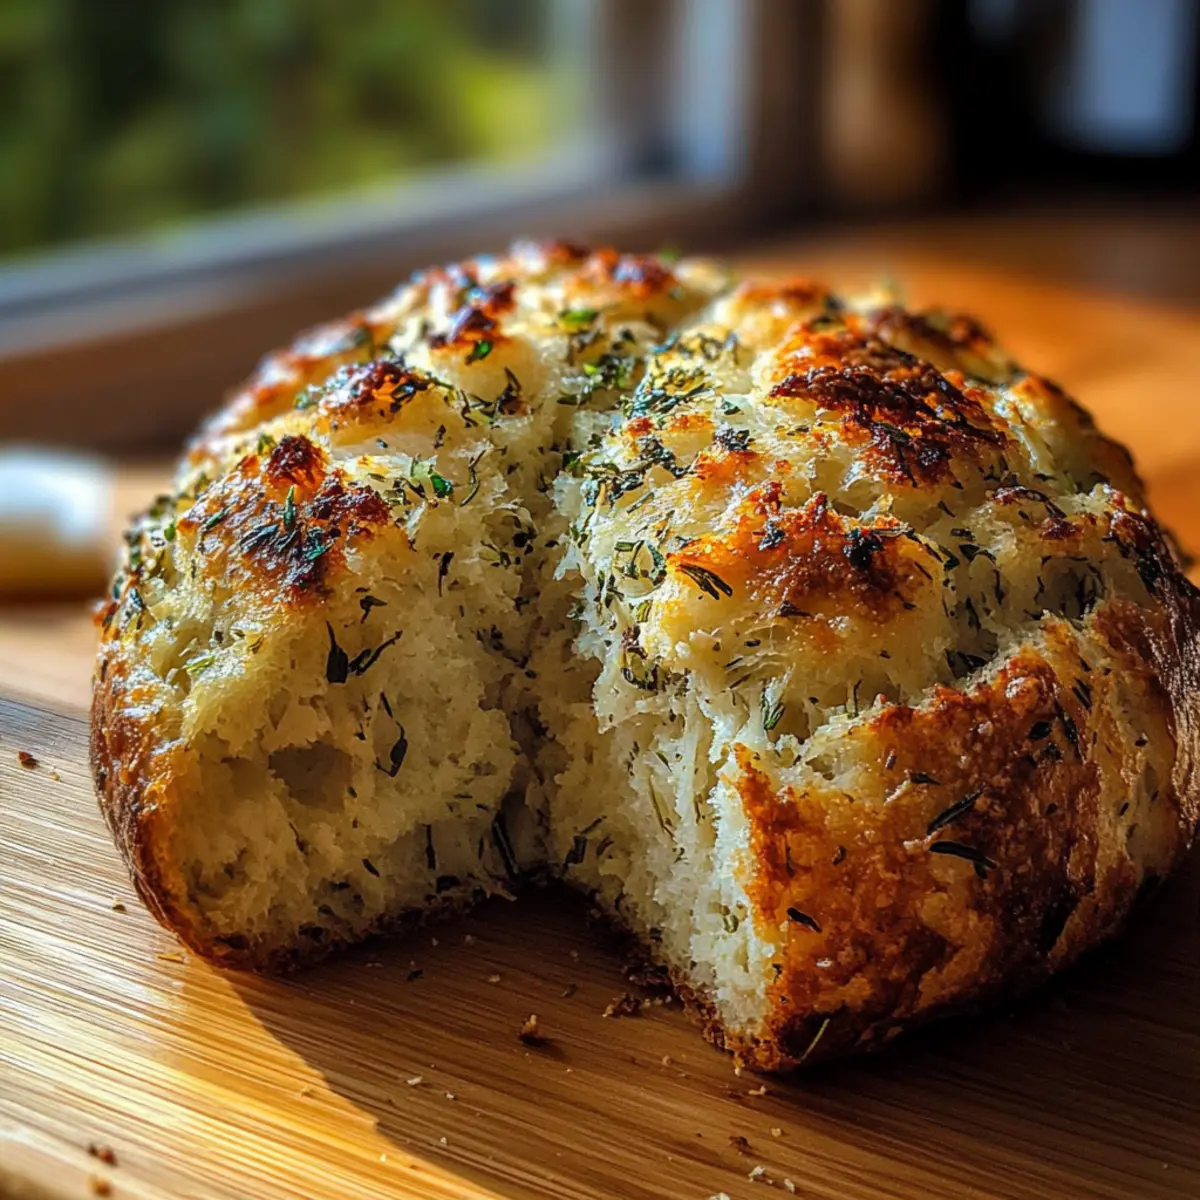
There’s something magical about the smell of freshly baked bread wafting through the kitchen—a scent that evokes warmth and comfort. That joy inspired my Garlic Herb Dutch Oven Bread, a recipe that’s not only easy to make but also impressively delicious. With every bite, you’ll experience the delightful crunch of a rustic crust paired with a pillowy, aromatic interior filled with garlic and fresh herbs. What makes this bread stand out is its long fermentation process, enhancing the flavors and texture while being entirely vegan-friendly. It’s the perfect option for those busy weeknights or lazy weekends when homemade comfort food is desired, yet you want quick prep. So, are you ready to dive into this bread-making adventure and create something truly heartwarming? Let’s get started!
Why is This Bread a Kitchen Essential?
Easy to Make: Even if you’re a novice, this bread requires minimal skills and just a handful of ingredients. Flavor Explosion: The blend of garlic and fresh herbs infuses each bite with an irresistible aroma that will elevate any meal. Versatile Side Dish: Pair it with soups, salads, or enjoy it on its own with a drizzle of olive oil. Long-Lasting Freshness: Discover tips to store and freeze your bread, ensuring you enjoy it longer. Weekend Prep: Prepare the dough the night before for quick baking the next day—a true game-changer for busy schedules! Try this alongside my Cheddar Bacon Dutch for a delightful brunch!
Garlic Herb Dutch Oven Bread Ingredients
For the Dough
- All-purpose flour – Provides structure; feel free to substitute with bread flour for a chewier texture.
- Salt – Enhances flavor and regulates yeast activity; it’s essential for great taste.
- Instant yeast – Acts as a leavening agent to help the dough rise; ensure it’s fresh for the best results.
- Warm water – Activates the yeast and hydrates the flour; use at 110°F for optimal yeast activation.
- Garlic (minced) – Adds a delightful flavor and aroma; fresh garlic is best, but garlic powder can work too.
- Fresh rosemary and thyme (chopped) – Infuses the bread with gorgeous herbal notes; substitute with oregano or basil if needed.
- Olive oil – Adds richness and moisture; it’s critical for preventing the bread from sticking to the pot.
Step‑by‑Step Instructions for Garlic Herb Dutch Oven Bread
Step 1: Mix Dry Ingredients
In a large mixing bowl, combine 4 cups of all-purpose flour, 1.5 teaspoons of salt, and 1 teaspoon of instant yeast. Use a whisk to evenly distribute the dry ingredients until they are well incorporated, creating a fluffy flour mixture that will serve as the foundation for your Garlic Herb Dutch Oven Bread.
Step 2: Combine and Rest
Pour in 1.5 cups of warm water, ideally at 110°F, along with 3 cloves of minced garlic and 2 tablespoons each of chopped fresh rosemary and thyme. Stir until the mixture forms a shaggy dough that pulls away from the sides of the bowl, then cover it tightly with plastic wrap. Let it rest at room temperature for 12 to 18 hours to allow the flavors to develop.
Step 3: Preheat and Prepare
After the resting period, preheat your oven to 450°F (230°C). While the oven heats up, place your Dutch oven (including the lid) inside to warm for about 30 minutes. This step is crucial for achieving that beautiful, crisp crust on your Garlic Herb Dutch Oven Bread.
Step 4: Shape the Dough
Once preheated, carefully remove the hot Dutch oven and remove the cover. Drizzle one tablespoon of olive oil at the bottom to prevent sticking. Gently turn the dough onto a lightly floured surface. With floured hands, gently shape it into a round loaf, being careful not to deflate it too much to keep all those delightful air pockets intact.
Step 5: Bake with Lid
Transfer the shaped dough into the hot Dutch oven, ensuring it’s nestled in the olive oil. Cover with the lid and place it back in the oven. Bake for 30 minutes to create steam that helps the bread rise beautifully while developing a crusty exterior.
Step 6: Bake Uncovered
After 30 minutes, carefully remove the lid of the Dutch oven. Continue to bake the Garlic Herb Dutch Oven Bread for an additional 15 to 20 minutes. Look for a deep golden-brown color on the crust, signaling that it’s done, and enjoy the wonderful aroma filling your kitchen.
Step 7: Cool Before Slicing
Once baked, carefully transfer the bread to a wire rack to cool completely, at least 30 minutes, before slicing. This step is essential to preserve the bread’s structure and texture, ensuring you enjoy the best fluffy interior with a crunchy crust when you dig in.
Make Ahead Options
These Garlic Herb Dutch Oven Bread loaves are perfect for busy home cooks looking to save time! You can prepare the dough up to 24 hours in advance, allowing the flavors to develop overnight. Simply mix the dry ingredients, warm water, minced garlic, and chopped herbs, then let it rest covered at room temperature. The shaped dough can also be refrigerated for up to 3 days; just ensure it’s well-wrapped to prevent drying out. When ready to bake, allow the dough to come to room temperature before following the baking instructions. This make-ahead technique ensures you enjoy fresh, homemade bread with minimal effort, just as delicious as if you made it all in one go!
How to Store and Freeze Garlic Herb Dutch Oven Bread
-
Room Temperature: Store leftover bread in a cloth bag or tightly wrapped in foil at room temperature for up to 2 days to maintain its freshness and flavor.
-
Freezer: For longer storage, slice the bread and place it in an airtight bag. It can be frozen for up to 3 months. When you’re ready, simply toast slices straight from the freezer for the best texture.
-
Reheating: To reheat, you can warm the bread in a preheated oven at 350°F (175°C) for about 10 minutes. This will restore its delightful crust and soft interior.
-
Usage Tip: Always keep your garlic herb Dutch oven bread covered or wrapped when not in use to prevent it from drying out.
Expert Tips for Garlic Herb Dutch Oven Bread
-
Fresh Ingredients: Ensure your yeast is fresh and your garlic is minced just before use for maximum flavor in your Garlic Herb Dutch Oven Bread.
-
Proper Rest Time: Don’t rush the dough’s resting time; allowing it to sit for 12 to 18 hours develops vital flavor and texture.
-
High Heat: Preheat both your oven and Dutch oven thoroughly. This step is crucial for achieving that signature crispy crust we all love.
-
Shaping Technique: Handle the dough gently when shaping. Overworking it can deflate those precious air pockets, affecting the bread’s texture.
-
Cooling Time: Be patient! Let your bread cool completely before slicing to maintain its airy structure and avoid a gummy interior.
What to Serve with Garlic Herb Dutch Oven Bread
There’s nothing quite like the aroma of freshly baked bread to inspire a cozy meal at home.
-
Creamy Tomato Soup: The tangy acidity of the soup complements the rich, garlicky flavor of the bread wonderfully. Dip or scoop—either way, it’s pure comfort!
-
Garden Salad: A fresh, vibrant salad filled with crisp greens and crunchy veggies adds a refreshing contrast to the hearty bread, making each bite feel light yet satisfying.
-
Herb-Infused Olive Oil: Drizzled on warm slices, it elevates the bread’s flavor to new heights. This simple addition magnifies the herb notes of your creation, perfect for an appetizer.
-
Roasted Vegetables: The caramelized sweetness of roasted carrots, bell peppers, and potatoes balances the bread’s savory notes. Their slight char enhances the overall enjoyment.
-
Cheesy Garlic Butter Spread: A compound butter loaded with garlic and herbs takes the garlic taste to another level. Spread it generously on the warm bread for a rich, indulgent treat.
-
Chickpea Salad: This protein-packed salad with lemon, cucumber, and parsley provides a zesty contrast. It’s a wholesome pairing that boosts the feel-good factor!
-
Sangria: A light, fruity drink with citrus notes brings a refreshing element that perfectly complements the rustic flavors of the bread, making every bite feel like a celebration.
-
Chocolate Mousse: For a sweet ending, a rich yet airy chocolate mousse offers a delightful contrast to the savory bread, ensuring your meal ends on a high note.
Garlic Herb Dutch Oven Bread Variations
Feel free to get creative with these variations that will elevate your homemade bread experience even further!
-
Dairy-Free: Swap in plant-based milk for a touch of richness without any dairy. Almond or oat milk works wonderfully!
-
Herb Medley: Mix various fresh herbs—like dill, parsley, and tarragon—for a fragrant twist that complements the garlic beautifully.
-
Cheesy Delight: Add grated vegan cheese into the dough before baking for a melty, savory infusion in your bread.
-
Spicy Kick: Incorporate crushed red pepper flakes for a zesty touch that takes the flavor profile to new heights.
-
Garlic Lovers Twist: Use roasted garlic instead of minced garlic for a milder, caramelized flavor that sweetens the bread’s overall taste.
-
Nutty Texture: Fold in chopped walnuts or sunflower seeds for delightful crunch and added nutrition, creating a bread that feels heartier.
-
Sweet Herb Fusion: Add a touch of honey (or maple syrup for a vegan option) to balance out the garlic and enhance the herb flavors.
-
Olive Oil Infusion: Infuse your olive oil with extra garlic and herbs before using it in the dough; this enriches the flavor from the very start!
Don’t forget to enjoy this alongside my delicious Creamy Steak Pasta Garlic or as a side with your favorite soups! Happy baking!
Garlic Herb Dutch Oven Bread Recipe FAQs
What’s the best way to select garlic for this recipe?
Absolutely! Choose fresh garlic bulbs that feel firm without any dark spots or softness. Fresh garlic cloves provide the best flavor; older garlic may sprout or taste less aromatic.
How should I store leftover garlic herb Dutch oven bread?
Store any leftover garlic herb Dutch oven bread in a cloth bag or tightly wrapped in foil at room temperature for up to 2 days. This helps retain moisture and freshness.
Can I freeze garlic herb Dutch oven bread?
Very! To freeze, slice the bread and place the pieces in an airtight bag. It can be frozen for up to 3 months. When you’re ready to enjoy, simply toast from frozen to restore its delightful texture.
What do I do if my bread doesn’t rise properly?
Don’t worry! If your bread hasn’t risen, check that your yeast is fresh, as inactive yeast won’t help the dough rise. Ensure your water temperature is around 110°F and try letting your dough rest longer; sometimes, a cozy warm spot can do the trick!
Is this recipe vegan-friendly?
Certainly! All the ingredients in this garlic herb Dutch oven bread are suitable for a vegan diet, making it a perfect option for anyone looking for plant-based deliciousness.
How can I tell if my bread is done baking?
Look for a beautiful deep golden-brown crust to know your garlic herb Dutch oven bread is done baking. Tap the bottom of the loaf; it should sound hollow when fully baked. If you want to be sure, use an instant-read thermometer—aim for an internal temperature of about 200°F to ensure it’s baked through.
Garlic Herb Dutch Oven Bread That Elevates Every Meal
Ingredients
Equipment
Method
- In a large mixing bowl, combine all-purpose flour, salt, and instant yeast. Use a whisk to evenly distribute the dry ingredients.
- Pour warm water, minced garlic, rosemary, and thyme into the dry mixture. Stir until a shaggy dough forms and cover tightly with plastic wrap. Let it rest for 12 to 18 hours.
- Preheat your oven to 450°F (230°C) and place the Dutch oven with the lid inside to warm for about 30 minutes.
- Remove the hot Dutch oven and drizzle olive oil at the bottom. Turn the dough onto a floured surface and shape into a round loaf.
- Transfer the dough into the hot Dutch oven, cover with the lid, and bake for 30 minutes.
- After 30 minutes, remove the lid and continue to bake for an additional 15 to 20 minutes until a deep golden-brown crust forms.
- Transfer the bread to a wire rack to cool completely, at least 30 minutes, before slicing.
Leave a Reply