
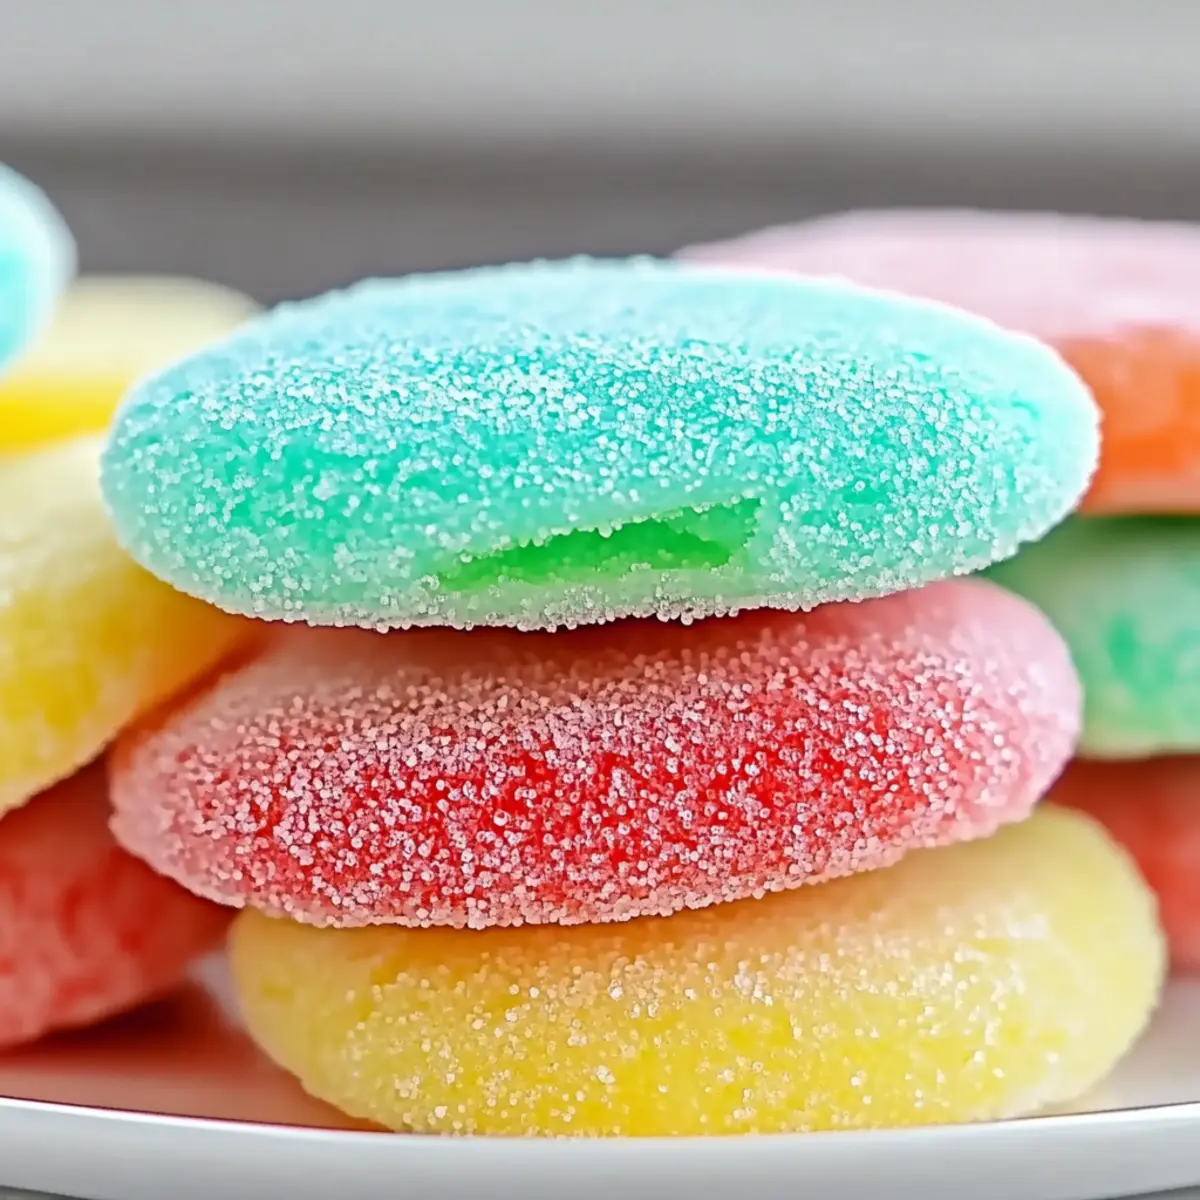
As I stood in the kitchen, a childhood memory danced back to me—a table adorned with vibrant, wobbly Jello and kids laughing, eagerly scooping their favorite flavors. That joyful spirit inspired my twist on a classic favorite: Jello Cookies. These delightful treats are not just a feast for the eyes; they’re soft, chewy, and infused with the fun colors and flavors of Jello, making them ideal for birthdays, holidays, or any celebration. The best part? They’re incredibly easy to make, allowing you to whip up a batch in no time, and their lively appearance will surely win over both kids and adults alike. Ready to add a splash of joy to your dessert table? Let’s dive into making these Jello Cookies together!
Why are Jello Cookies so irresistible?
Colorful creations: These Jello Cookies shine with bright hues, instantly uplifting any gathering and attracting both kids and adults. Easy to make: With minimal ingredients and straightforward steps, these treats come together with ease, perfect for busy bakers. Flavorful surprises: Each bite bursts with the fun flavors of your favorite Jello, making them a unique twist on traditional cookies. Versatile options: Play with different Jello flavors, or add in chocolate chips and sprinkles for extra flair. Perfect for sharing: Their playful look and delightful taste make them a hit at birthdays and celebrations—after all, who can resist a colorful cookie? Dive into these treats today, and elevate your dessert offerings like Hawaiian Pineapple Cookies for an extra tropical flair!
Jello Cookies Ingredients
For the Dough
• Unsalted Butter – Provides richness and tenderness to cookies; make sure it’s softened for optimal mixing.
• Granulated Sugar – Adds sweetness and contributes to the cookie’s texture; can substitute with a sugar alternative for a lower-calorie option.
• Egg – Binds all ingredients together and adds moisture; use room temperature eggs for better emulsification.
• All-Purpose Flour – Provides structure to the cookies; for a gluten-free version, substitute with a gluten-free flour blend.
• Baking Powder – Leavening agent that helps cookies rise; ensure it’s fresh for the best results.
• Salt – Balances sweetness and enhances flavors; this is a crucial component, even in sweet recipes.
• Jello Mix (2 packages, 3 oz each) – Infuses flavor and vibrant color; experiment with different flavors for diversity in your Jello Cookies.
Step‑by‑Step Instructions for Jello Cookies
Step 1: Preheat and Prepare
Begin by preheating your oven to 350°F (175°C). While that’s heating up, take a large baking sheet and line it with parchment paper. This will prevent your Jello Cookies from sticking and ensure an easy transfer after baking. Having your workspace ready allows for a smooth baking experience.
Step 2: Cream Butter and Sugar
In a mixing bowl, combine your softened unsalted butter and granulated sugar. Use a hand mixer or stand mixer to cream them together until the mixture is light, fluffy, and pale in color, approximately 3-5 minutes. This process introduces air, which helps create tender Jello Cookies, so keep an eye on that texture!
Step 3: Add Egg
Once your butter-sugar mixture is airy, crack in one room temperature egg. Blend until the egg is thoroughly incorporated into the mixture, which should take about 1-2 minutes. You’ll want to see a smooth consistency without any lumps, as this step helps bind the ingredients together for your delightful cookies.
Step 4: Combine Dry Ingredients
In a separate bowl, whisk together the all-purpose flour, baking powder, and salt. This ensures even distribution of the leavening agent and enhances the flavors in your Jello Cookies. Whisking for about 1-2 minutes should create a well-mixed dry blend that will seamlessly combine with the wet ingredients.
Step 5: Mix Wet and Dry Ingredients
Gradually add the dry ingredient mixture to your wet batter, stirring gently until just combined. Be sure not to overmix; the goal here is a cohesive cookie dough. This blending, which should only take about 1-2 minutes, is where your Jello Cookies start to come together, so enjoy the transformation!
Step 6: Divide Dough and Add Jello
Now, divide your cookie dough into portions based on how many flavors of Jello you want to use. Add your chosen Jello mix to each portion, mixing thoroughly until the color and flavor are evenly distributed. Watch how the dough transforms with vibrant hues—this is where the fun begins!
Step 7: Shape Cookies
Roll the dough into 1-inch balls and place them onto your prepared baking sheet, ensuring they have space to spread. Lightly flatten each ball using your palm to create a slight disk shape. This step is essential as it prepares your Jello Cookies for even baking, producing soft, chewy treats.
Step 8: Bake Cookies
Slide the baking sheet into your preheated oven and bake the Jello Cookies for 8-10 minutes. Keep an eye on them; they’re ready when the edges are set but the centers remain slightly soft. This is crucial for achieving that chewy texture in your cookies.
Step 9: Cool and Enjoy
Once baked, remove the cookies from the oven and let them cool on the baking sheet for a few minutes before transferring them to a wire rack. Allow them to cool completely; this resting period enhances the flavors and texture, making your colorful Jello Cookies even more irresistible when served.
What to Serve with Colorful Jello Cookies
Indulging in vibrant Jello Cookies is delightful, but let’s make your dessert table sing with a few perfect pairings!
-
Cold Milk: A classic combo, the creamy richness of cold milk perfectly balances the sweetness and playfulness of your Jello Cookies.
-
Fresh Fruit Salad: Brighten your dessert spread with a refreshing fruit salad. The natural sweetness and varied textures of fruits like strawberries and melons complement the chewy cookies beautifully.
-
Vanilla Ice Cream: Serve your Jello Cookies alongside a scoop of velvety vanilla ice cream for an irresistibly fun twist. The melting ice cream becomes a perfect dipping companion, bringing extra richness and texture.
-
Lemonade or Fruit Punch: Bright, fruity beverages like lemonade or a refreshing fruit punch add just the right zest to elevate your cookie experience. Their tangy notes will make each sweet bite more exciting.
-
Chocolate Dipping Sauce: For chocolate lovers, a warm, drippy chocolate sauce for dipping adds decadence and a fun interaction while enjoying the cookies. It creates an exciting flavor contrast with the fruity Jello!
-
Mini Cupcakes: Serve mini cupcakes in coordinating Jello flavors for a playful dessert platter. Their lightness and sweetness will pair well with the colorful cookies and add variety to your celebration.
-
Chocolate Milkshake: How about a rich and creamy chocolate milkshake? This indulgent treat adds a nostalgic twist, making dessert feel like a true celebration for all ages.
-
Whipped Cream: A dollop of whipped cream can transform your serving experience. Offer it on the side for an airy add-on that enhances the flavors of your Jello Cookies.
Experiment with these pairings to create a lovely dessert experience that draws everyone in!
How to Store and Freeze Jello Cookies
Room Temperature: Store Jello Cookies in an airtight container at room temperature for up to 3 days to retain their soft and chewy texture.
Fridge: If you’d like to keep them fresher for longer, refrigerate in an airtight container for up to 1 week; this will help maintain their vibrant flavors.
Freezer: For longer storage, freeze Jello Cookies by wrapping them individually in plastic wrap and placing them in a zip-top freezer bag for up to 3 months.
Reheating: To enjoy your frozen cookies, simply thaw them in the fridge overnight and reheat in the oven at 350°F (175°C) for 5 minutes to regain that fresh-baked goodness!
Jello Cookies Variations & Substitutions
Feel free to explore these delightful twists to make Jello Cookies uniquely yours!
-
Different Jello Flavors: Mix various Jello flavors in one batch for a fun layered effect. Each cookie will surprise with a mix of tastes, perfect for those adventurous palates.
-
Dairy-Free: Substitute unsalted butter with coconut oil or dairy-free margarine. This swap allows everyone to enjoy these colorful treats while still being soft and chewy.
-
Gluten-Free: Use a gluten-free flour blend in place of all-purpose flour. Not only can everyone enjoy without worry, but the cookies still remain deliciously vibrant!
-
Add-Ins: Toss in chocolate chips, sprinkles, or chopped nuts to add texture. These extras create a delightful surprise in every bite, making your cookies even more enticing!
-
Seasonal Flavors: Use holiday-themed Jello flavors to bring a festive twist to your cookies. Think red and green for Christmas or pastel shades for Easter celebrations—perfect for brightening up any gathering.
-
Chilled Dough: Chill the dough for about 30 minutes before baking to prevent spreading. This small step makes a significant difference, ensuring perfect cookie shapes every time.
-
Cookie Sandwiches: Turn these cookies into fun sandwiches with frosting or whipped cream filling. Extra layers of flavor and creativity will wow both kids and adults alike!
Consider pairing your Jello cookies with delicious options like Hawaiian Pineapple Cookies or trying out delightful Chocolate Peanut Cookies for a colorful dessert table that’s sure to impress!
Make Ahead Options
These Jello Cookies are perfect for busy weeknights and can be made ahead for effortless entertaining! You can prepare the dough up to 24 hours in advance by mixing all the ingredients up to the shaping stage. Once the dough is ready, divide it into portions, add your Jello mixes, and wrap tightly in plastic wrap before refrigerating. This helps to enhance the flavors while keeping the dough fresh. When you’re ready to bake, simply remove the dough from the fridge, shape it into balls, and bake as per the recipe instructions. With this make-ahead option, you’ll enjoy delicious, soft cookies that are just as colorful and delightful, saving you time when it’s time to celebrate!
Expert Tips for Jello Cookies
- Room Temperature Ingredients: Ensure butter and eggs are at room temperature for best mixing results, yielding tender Jello Cookies without lumps.
- Avoid Overmixing: Mix just until the ingredients combine for softer cookies; overmixing can lead to tough, dry treats.
- Chill the Dough: Consider chilling the dough for about 30 minutes before baking; this helps cookies maintain their shape and prevents spreading.
- Watch Your Baking Time: Keep an eye on the cookies as they bake; pulling them out when edges are set but centers are soft results in a chewy texture.
- Experiment with Flavors: Don’t hesitate to mix different Jello flavors together or add extras like chocolate chips for a fun twist to your Jello Cookies!
Jello Cookies Recipe FAQs
How do I choose the right Jello flavor?
Absolutely! The choice of Jello flavor can greatly affect the taste and color of your cookies. I recommend experimenting with popular flavors like strawberry, orange, raspberry, or even lime for a refreshing twist. Each flavor brings a unique hue and taste, so don’t be afraid to mix and match for a vibrant dessert experience!
What is the best way to store leftover Jello Cookies?
To keep your Jello Cookies deliciously fresh, store them in an airtight container at room temperature for up to 3 days. If you want to extend their shelf life, you can refrigerate them for up to 1 week. Just ensure they’re well-sealed to maintain their texture and flavor!
Can I freeze Jello Cookies for later?
Yes, you can absolutely freeze Jello Cookies! Start by wrapping each cookie individually in plastic wrap, then place them into a zip-top freezer bag. They can be stored in the freezer for up to 3 months. When you’re ready to enjoy them, simply thaw them in the fridge overnight. For a warm, fresh-from-the-oven feel, reheat the cookies in the oven at 350°F (175°C) for about 5 minutes.
What should I do if my cookie dough is too sticky?
Very! A sticky dough can happen for several reasons, such as too much butter or humidity. To remedy this, I recommend adding a bit more flour, in small increments—about 1 tablespoon at a time—until the dough reaches a manageable consistency. Additionally, chilling the dough for 30 minutes can help firm it up and make it easier to handle.
Are Jello Cookies safe for those with allergies?
It’s important to consider allergies when baking for others! Jello Cookies typically contain common allergens like gluten (from all-purpose flour) and eggs. For a gluten-free version, I suggest using a gluten-free flour blend and ensuring your Jello mix is made in a gluten-free facility. Always check the ingredient labels for potential allergens, especially when serving to children or guests with dietary restrictions.
Colorful Jello Cookies: A Fun Twist for Sweet Celebrations
Ingredients
Equipment
Method
- Preheat your oven to 350°F (175°C) and line a baking sheet with parchment paper.
- Cream softened butter and granulated sugar in a mixing bowl until light and fluffy, about 3-5 minutes.
- Add the room temperature egg and blend until incorporated, about 1-2 minutes.
- In a separate bowl, whisk together the all-purpose flour, baking powder, and salt for 1-2 minutes.
- Gradually add the dry ingredients to the wet batter, stirring gently until just combined, about 1-2 minutes.
- Divide the dough into portions based on Jello flavors, mixing the chosen Jello mix into each.
- Roll the dough into 1-inch balls, place them on the baking sheet, and lightly flatten each ball.
- Bake in the preheated oven for 8-10 minutes until edges are set, but centers are soft.
- Cool on the baking sheet for a few minutes before transferring to a wire rack.
Leave a Reply