
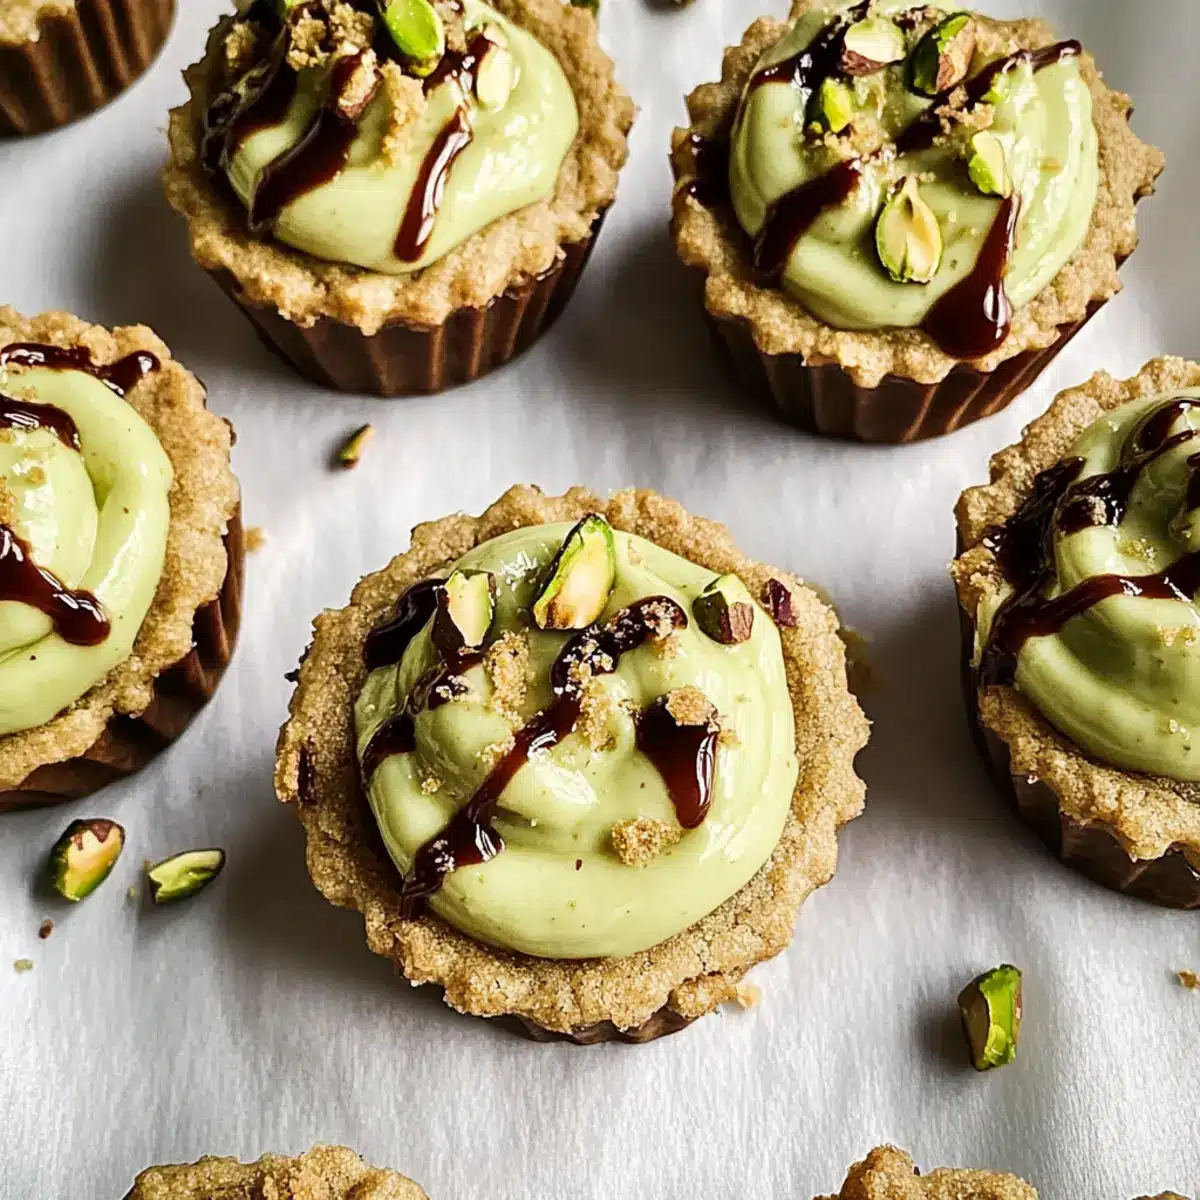
As I stood over my mixing bowl, the kitchen filled with a warm, nutty aroma that instantly transported me to sunny afternoons spent sharing treats with loved ones. That’s when I knew it was time to whip up a batch of Pistachio Cookie Cups. These little delights are not only quick to make, with a total prep and bake time of under an hour, but they’re also a guaranteed crowd-pleaser, perfect for both spontaneous get-togethers and cozy family nights. Each bite delivers a creamy pistachio filling paired with a crunchy base, making them as satisfying as they are scrumptiously unique. What’s your favorite way to add a personal touch to a classic dessert?
Why Pistachio Cookie Cups Are a Must-Try?
Quick to make: These delightful cookie cups come together in under an hour, making them ideal for busy bakers.
Customizable flavors: From nut-free options to gluten-free alternatives, you can easily adapt this recipe to suit any dietary need.
Crowd-pleaser: With their rich, creamy filling and crunchy base, these cookie cups are sure to impress family and friends at any gathering.
Versatile treat: Serve them as a dessert alongside fresh berries or even a scoop of ice cream for an extra special touch.
Gourmet twist: The unique combination of pistachios and chocolate elevates this dessert beyond the ordinary, making it a memorable treat.
Whether you’re looking for a new favorite dessert or simply want to surprise your guests, these Pistachio Cookie Cups are your answer!
Pistachio Cookie Cups Ingredients
For the Cookie Cups
- Unsalted Butter – Provides richness and structure; try substituting with brown butter for added nuttiness.
- All-purpose Flour – Forms the base for the cookie cups; a 1:1 gluten-free flour blend can be used as a substitution.
- Baking Powder – Helps the cookie cups rise and is fundamental for maintaining texture.
- Kosher Salt – Enhances overall sweetness and flavor; a pinch is sufficient for balance.
- Baking Soda – Balances acidity and contributes to texture; essential in combination with dark brown sugar.
- Dark Brown Sugar – Adds depth and richness to sweetness; can be substituted with light brown sugar for a milder flavor.
- Granulated Sugar – For added sweetness, adjust according to your taste preferences.
- Large Egg – Binds ingredients together for good structure; replace with a flax egg for vegan options.
- Vanilla Extract – Adds aromatic flavor that beautifully complements pistachios.
For the Filling
- Chopped White Chocolate – Provides creaminess and sweetness; feel free to swap for dark chocolate for a richer taste.
- Chopped Salted Roasted Pistachios – Supplies both crunch and flavor; consider pumpkin seeds as a nut-free alternative if there’s an allergy.
- Chopped Dark Chocolate – Enhances richness; using 70% cacao or higher is recommended for a deeper flavor.
- Pistachio Cream Spread – Serves as a decadent filling; this can be replaced with any nut butter for an alternative flavor.
Treating yourself to these Pistachio Cookie Cups means diving into a delightful combination of flavors and textures in every bite!
Step‑by‑Step Instructions for Pistachio Cookie Cups
Step 1: Brown the Butter
Melt the unsalted butter in a saucepan over medium-low heat for about 5 minutes, stirring constantly until it becomes foamy and takes on a nutty aroma. Remove the pan from heat and let the browned butter cool until solid in the refrigerator, which will help your Pistachio Cookie Cups hold their shape.
Step 2: Preheat and Prepare Dry Ingredients
While the butter is chilling, preheat your oven to 350°F (175°C). In a mixing bowl, sift together the all-purpose flour, baking powder, kosher salt, and baking soda. This step helps ensure that your dry ingredients are well-combined and will lead to a perfectly textured base for your cookie cups.
Step 3: Cream Sugars and Butter
Once the cooled butter is solid, beat it in a large mixing bowl with dark brown sugar and granulated sugar using an electric mixer on medium speed. Continue mixing for about 3 minutes until the mixture is light and fluffy in texture. Afterward, add in the large egg and vanilla extract, blending briefly until combined.
Step 4: Combine Wet and Dry Ingredients
Gradually incorporate the sifted dry ingredients into the wet mixture at low speed, mixing just until combined, which should take around 1 minute. Avoid overmixing to keep your cookies tender. Next, gently fold in the chopped white chocolate, pistachios, and dark chocolate, ensuring even distribution in the dough for your Pistachio Cookie Cups.
Step 5: Shape the Cookie Dough
Using a tablespoon, scoop out portions of the cookie dough and roll them into balls. Place each ball in a mini muffin tray, filling each cup about three-quarters full. The cookie cups will spread out beautifully while baking, creating the perfect hollow shape for the decadent filling later on.
Step 6: Bake and Form Wells
Bake the cookie cups in your preheated oven for 12-14 minutes, or until the edges are set and the centers appear slightly soft. When they come out of the oven, use a teaspoon to create a well in the center of each cup while they are still warm, preparing them for the delicious filling.
Step 7: Cool and Release
Allow the cookie cups to cool in the tray for about 15 minutes. Then, carefully run a knife around the edges of each one to loosen them before transferring them to a cooling rack to cool completely. This method ensures a perfect shape and texture for your Pistachio Cookie Cups.
Step 8: Drizzle and Fill
Melt the remaining dark chocolate in a microwave-safe bowl or over a double boiler. Once smooth, drizzle it over the cooled cookie cups for a rich, chocolatey finish. Then, fill each cup generously with pistachio cream, creating that luscious center that pairs beautifully with the crunchy base.
Step 9: Set and Store
Refrigerate the completed Pistachio Cookie Cups for about 5 minutes, allowing the chocolate to set. Once ready, store them in an airtight container, where they will remain fresh for up to a week at room temperature. Enjoy this delightful treat whenever your sweet cravings strike!
Expert Tips for Perfect Pistachio Cookie Cups
Chill the Butter: Ensure the browned butter is chilled before mixing to help the cookies retain their shape while baking.
Avoid Overmixing: Mix your wet and dry ingredients until just combined to prevent tough cookie cups. This keeps them soft and chewy.
Watch the Baking Time: Keep an eye on the cookies while they bake. The centers should remain slightly soft for that gooey texture in the Pistachio Cookie Cups.
Create Perfect Wells: Use a teaspoon to form wells in the cookie cups immediately after baking when they are still warm for the best filling.
Store Wisely: To maintain freshness, store your cookie cups in an airtight container away from direct sunlight.
How to Store and Freeze Pistachio Cookie Cups
Airtight Container: Store your Pistachio Cookie Cups in an airtight container at room temperature for up to 1 week to keep them fresh and delicious.
Refrigerator: If you prefer a colder treat, these cookie cups can be stored in the fridge for up to 2 weeks, maintaining their delightful texture.
Freezer: For longer storage, wrap each cookie cup individually in plastic wrap and place them in a freezer-safe bag. They can be frozen for up to 3 months; thaw before enjoying.
Reheating: To revive the warm, gooey center, reheat the cookie cups in the microwave for just a few seconds before serving. Enjoy the burst of flavors!
What to Serve with Irresistible Pistachio Cookie Cups
Indulge in a delightful accompaniment that enhances the baked flavors of these creamy, crunchy treats.
- Fresh Berries: The tartness of strawberries or raspberries balances the sweetness of cookie cups, creating a refreshing contrast.
- Vanilla Ice Cream: A scoop of rich vanilla ice cream melts beautifully on warm cookie cups, enhancing the creamy filling with pure bliss.
- Chocolate Sauce: Drizzle a decadent chocolate sauce over the cookie cups for an extra layer of indulgence; the combination is heavenly!
- Coffee or Espresso: The bold richness of coffee pairs perfectly with the nutty flavors of pistachio, making it an ideal dessert duo.
- Mint Tea: A warm cup of refreshing mint tea cleanses the palate and complements the cookie’s sweetness, adding an aromatic touch.
- Coconut Whipped Cream: Light and airy coconut whipped cream provides a tropical twist that beautifully complements the flavors of pistachios.
- Nutty Granola: Serve a side of crunchy nutty granola for an added textural contrast; its nutty flavors echo the cookie cups.
- Pistachio Milkshake: A creamy pistachio milkshake ties everything together, boosting the Pistachio Cookie Cups’ flavor profile with every sip.
- Mango Sorbet: The tropical fruitiness of mango sorbet introduces a vibrant sweetness that beautifully contrasts with the cookie’s crunch.
Pistachio Cookie Cups Variations
Feel free to play around with these delightful twists to make the Pistachio Cookie Cups truly your own!
-
Nut-Free: Substitute pistachios with chocolate chips or caramel bits for a delicious alternative. Enjoy the sweet touch of chocolate or the gooeyness of caramel in every bite.
-
Gluten-Free: Use a gluten-free flour blend to make these cookie cups accessible for everyone. They will still turn out perfectly chewy and satisfying, proving that dietary restrictions don’t mean compromising on flavor.
-
Vegan: Swap the butter for coconut oil and use a flax egg to keep these cookie cups plant-based. The rich, creamy texture of coconut adds an exciting tropical flair that pairs beautifully with pistachios.
-
Less Sweet: Reduce the sugar by 1/4 cup and sprinkle in a pinch of cinnamon to give a warm, nuanced flavor. Adjusting the sweetness can highlight the natural flavors of the nuts and chocolate.
-
Citrus Zest: Brighten the flavor profile by adding orange or lemon zest into the dough. This lovely twist will enhance the nutty aroma, making your kitchen smell divine while adding a fresh zing.
-
Extra Crunch: If you’re looking to amp up the texture, toss in some toasted coconut flakes or crushed pretzels for an exciting crunch. It’s a fun way to add contrasting flavors and an unexpected surprise in each bite.
These adjustable ideas can elevate your Pistachio Cookie Cups further, so let your creativity shine! And if you love experimenting with flavors, you might also enjoy these tempting recipes like Cookie Butter Cheesecake or Chocolate Peanut Cookies.
Make Ahead Options
These Pistachio Cookie Cups are perfect for meal prep, saving you time and effort during busy weeknights! You can prepare the cookie dough up to 24 hours in advance; simply scoop and roll the dough into balls, then refrigerate them in an airtight container. The cookie cups can also be baked and stored for up to 3 days at room temperature in an airtight container—just remember to let them cool completely before storing to maintain their texture. When you’re ready to enjoy, fill each cup with pistachio cream and drizzle with melted chocolate, and you’ll have a delicious dessert ready to go with minimal effort!

Pistachio Cookie Cups Recipe FAQs
What type of pistachios should I use?
Absolutely! Use roasted and salted pistachios for the best flavor and crunch. If you have dietary restrictions or are allergic, you can substitute them with pumpkin seeds for a nut-free alternative.
How should I store my Pistachio Cookie Cups?
Store your Pistachio Cookie Cups in an airtight container at room temperature for up to 1 week. If you prefer, they can be kept in the refrigerator for up to 2 weeks, which keeps them deliciously fresh!
Can I freeze Pistachio Cookie Cups?
Yes, you can! Wrap each cookie cup individually in plastic wrap and place them in a freezer-safe bag. They can be frozen for up to 3 months. When ready to enjoy, simply thaw them at room temperature or reheat briefly in the microwave for that gooey center!
What if my cookie cups spread too much in the oven?
If your cookie cups spread excessively, it might be due to the butter being too warm when mixed. Always chill the browned butter completely before incorporating it into the dough. Additionally, make sure to follow the recommended baking time of 12-14 minutes for best results.
Are there gluten-free options for this recipe?
Very! You can easily make your Pistachio Cookie Cups gluten-free by substituting all-purpose flour with a 1:1 gluten-free flour blend. This will help maintain the same texture without compromising taste.
Can I replace the egg for a vegan option?
Of course! For a vegan version, simply replace the large egg with a flax egg. To make one, mix one tablespoon of ground flaxseed with three tablespoons of water and let it sit for about 5 minutes until it thickens. Enjoy your delicious vegan Pistachio Cookie Cups!
Delicious Pistachio Cookie Cups to Satisfy Your Sweet Cravings
Ingredients
Equipment
Method
- Melt the unsalted butter in a saucepan over medium-low heat for about 5 minutes, stirring constantly until it becomes foamy and takes on a nutty aroma. Remove from heat and let it cool until solid.
- Preheat your oven to 350°F (175°C). In a mixing bowl, sift together the all-purpose flour, baking powder, kosher salt, and baking soda.
- Once the cooled butter is solid, beat it with dark brown sugar and granulated sugar using an electric mixer on medium speed until light and fluffy. Add the large egg and vanilla extract, blending briefly.
- Gradually incorporate the sifted dry ingredients into the wet mixture at low speed, mixing just until combined. Gently fold in the chopped white chocolate, pistachios, and dark chocolate.
- Scoop out portions of the cookie dough and roll them into balls. Place each ball in a mini muffin tray, filling about three-quarters full.
- Bake the cookie cups for 12-14 minutes or until the edges are set and the centers appear slightly soft. Use a teaspoon to create a well in the center of each cup while they are still warm.
- Allow the cookie cups to cool in the tray for about 15 minutes, then run a knife around the edges of each one to loosen them.
- Melt the remaining dark chocolate and drizzle it over the cooled cookie cups. Fill each cup generously with pistachio cream.
- Refrigerate the completed cups for about 5 minutes to allow the chocolate to set. Store in an airtight container.
Leave a Reply