
As I stood in my kitchen, the comforting aroma of simmering beef wrapped around me like a warm hug, I realized that I had stumbled upon something truly special. This Irresistible Korean Pot Roast is not just a meal; it’s an experience that transforms a simple dinner into a comforting family feast. With hands-off cooking, this recipe requires minimal effort while delivering bold, savory flavors that even the pickiest eaters won’t be able to resist. Imagine tender, fall-apart beef bathed in a rich sauce infused with ginger, garlic, and a touch of sweetness; it truly is the epitome of comfort food. Whether you’re looking to impress or just need a hearty family dinner, this dish has got you covered. Are you ready to bring a taste of Korean cuisine into your home? Let’s get cooking!
Why is this Korean Pot Roast unforgettable?
Hearty Comfort: This Korean pot roast is the definition of cozy, offering a savory escape with every bite. Hands-Off Cooking: Just set it and forget it! You can enjoy quality time with family while it simmers to perfection. Bold Flavors: Infused with garlic, ginger, and gochujang, it tantalizes taste buds in a way only Asian cuisine can. Versatile Pairings: Serve it with rice or kimchi for a balanced meal that satisfies. Impressive Presentation: Serve it family-style; everyone will be reaching for seconds! If you’re in the mood for more effortless yet flavorful dishes, consider trying Crockpot Tuscan Chicken or Crockpot Chicken Tacos next.
Korean Pot Roast Ingredients
For the Beef
• Chuck Roast – Look for a well-marbled cut for optimal tenderness; ask your butcher to pre-cut it into 3-inch pieces if possible.
• Kosher Salt – Crucial for seasoning the beef before cooking, enhancing its overall flavor.
For the Aromatics
• Vegetable Oil – Used for searing the beef to prevent sticking and add depth of flavor.
• Sweet Onion – Adds a sweet balance to the sauce; yellow onion is a suitable substitute if needed.
• Garlic (6 cloves) – Freshly minced garlic maximizes aromatic depth and flavor.
• Fresh Ginger (1 tbsp) – Grated for a warm, spicy undertone; fresh ginger offers the best flavor profile.
For the Flavor Base
• Gochujang Paste (2 tbsp) – Brings a kick of heat and umami; for milder flavor, mix with chili paste and a bit of sugar.
• Brown Sugar (1/4 cup) – Balances the savory elements while adding a touch of sweetness; granulated sugar or honey can be alternatives.
• Low-Sodium Soy Sauce or Tamari (1/2 cup) – Essential as the salty flavor base of the sauce; use tamari for a gluten-free option.
• Beef Stock (2 cups) – Adds moisture to the braise; feel free to use homemade or store-bought stock based on preference.
For Garnish and Serving
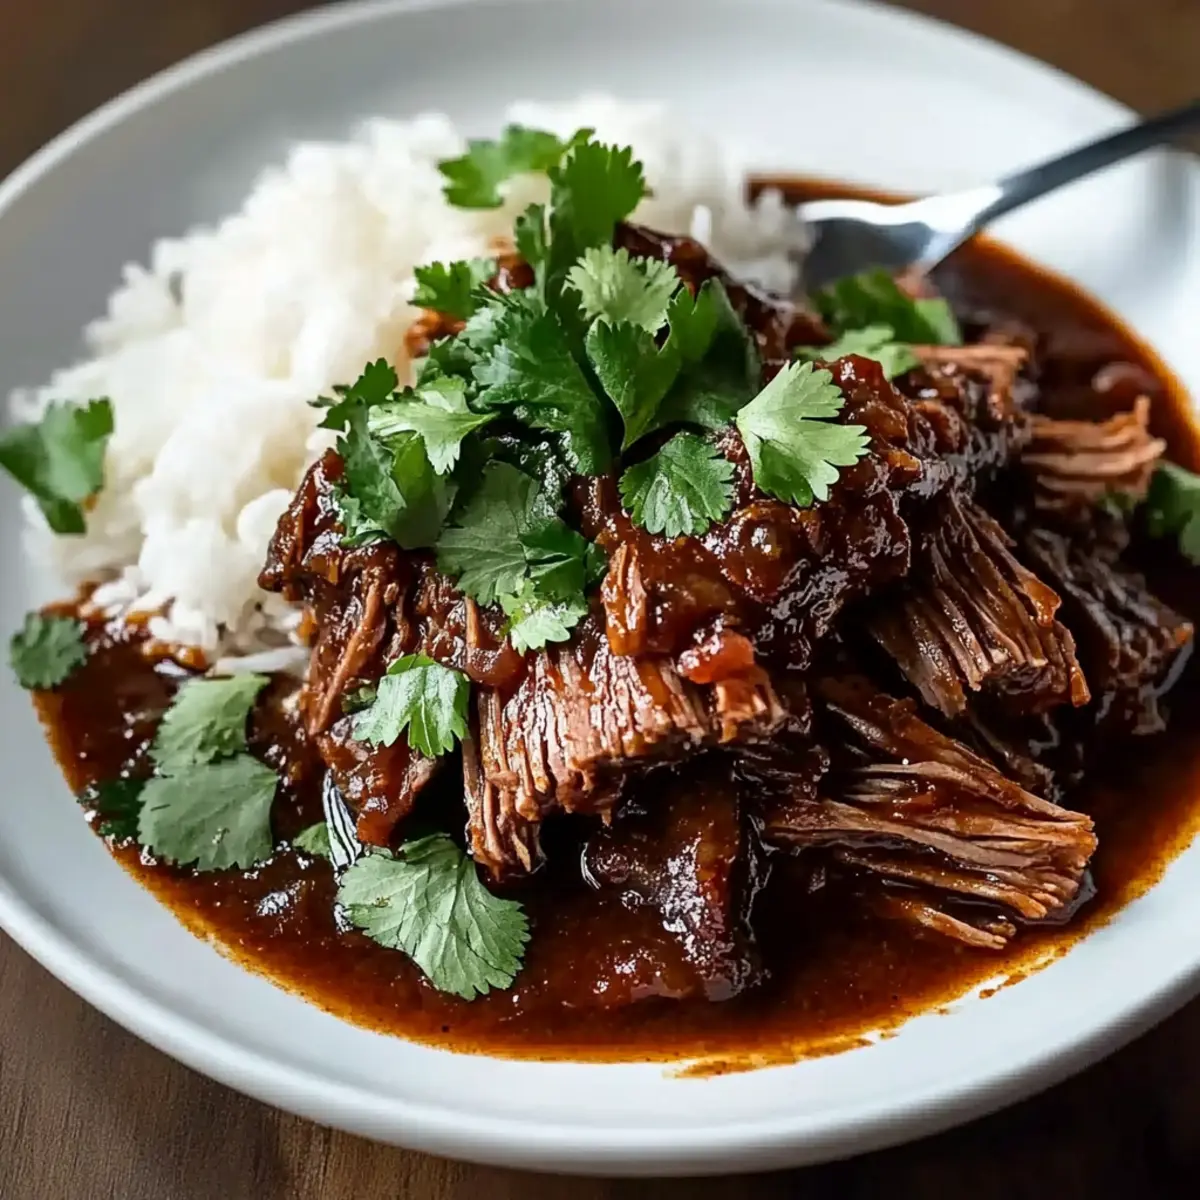
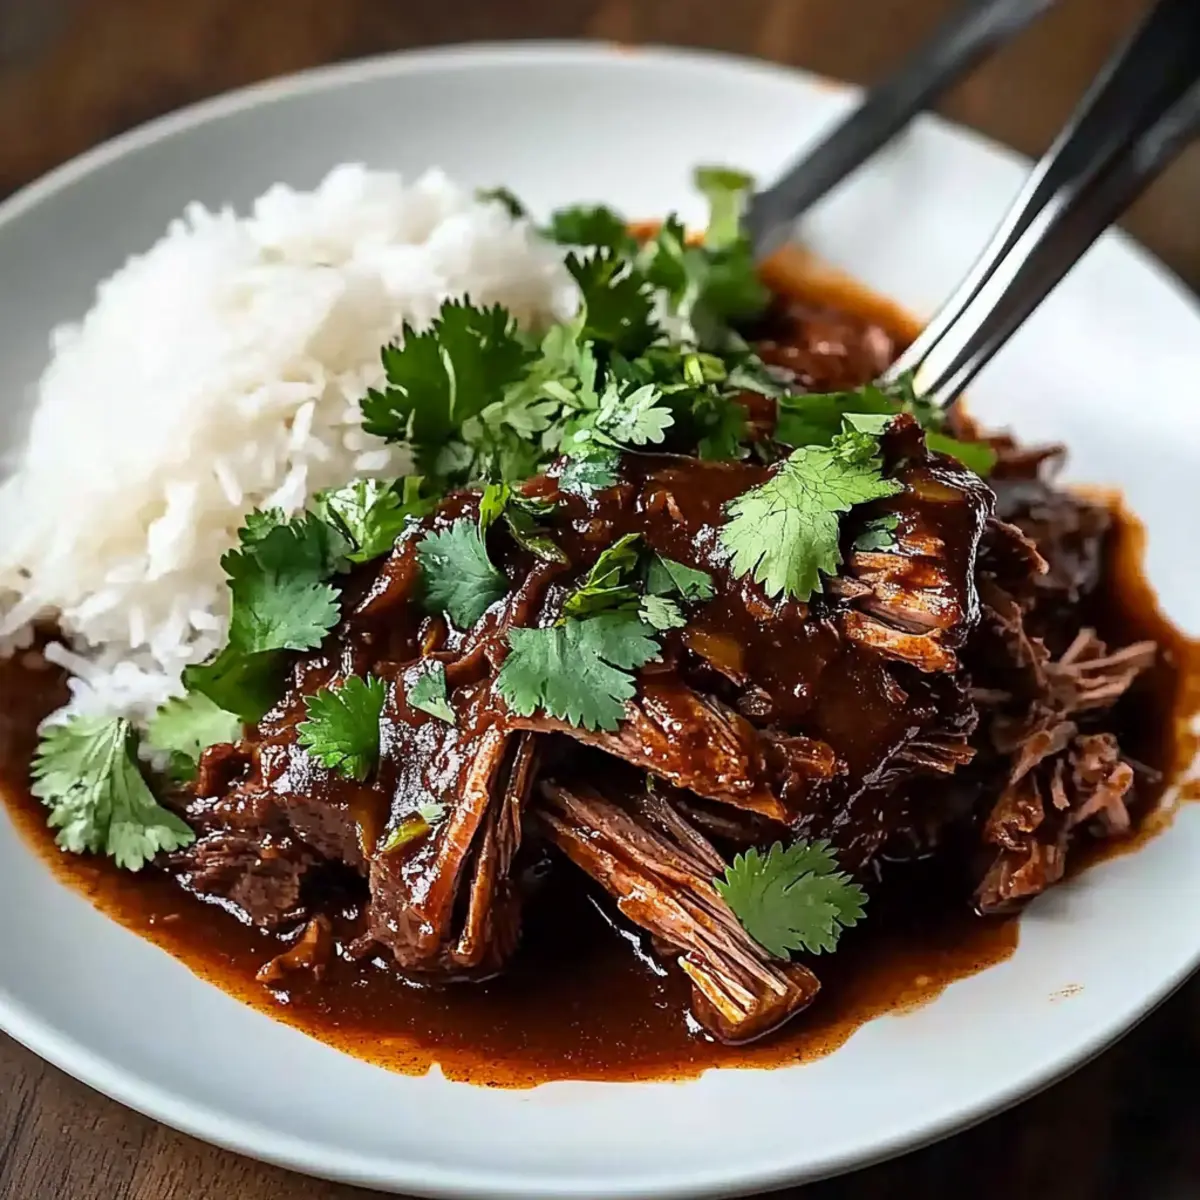
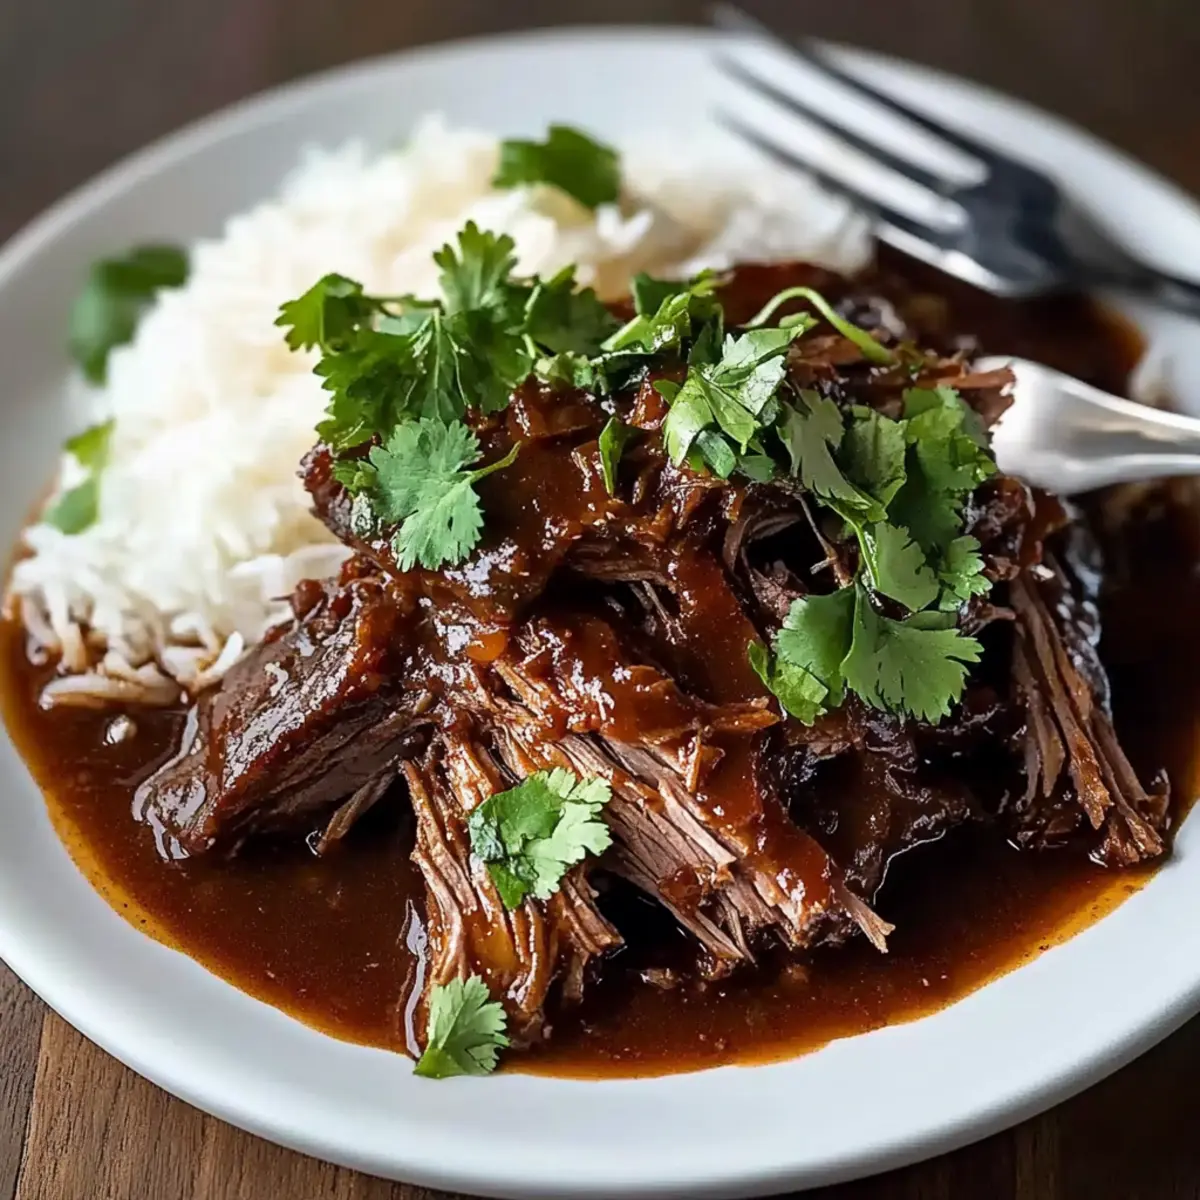
• Fresh Cilantro – Adds a refreshing touch when served; a perfect contrast to the richness of the pot roast.
• Cooked Rice – Serves as a delightful base to soak up the flavorful sauce; both white or brown rice work splendidly.
• Kimchi – A traditional Korean side dish that offers a spicy crunch to complement the richness of the beef.
This Korean pot roast is designed to create an unforgettable family dinner experience full of warmth and flavor!
Step‑by‑Step Instructions for Korean Pot Roast
Step 1: Preheat the Oven
Begin by preheating your oven to 350°F (175°C) with the rack positioned in the lower third. This temperature is perfect for slowly braising the beef, ensuring it becomes tender and flavorful. As the oven warms, you’ll set the stage for a comforting Korean pot roast that fills your home with savory aromas.
Step 2: Prepare the Beef
While the oven is heating, pat the chuck roast pieces dry with paper towels to remove excess moisture. Generously season the beef with kosher salt on all sides, allowing the salt to enhance the overall flavor and tenderness. This simple preparation step will ensure your Korean pot roast shines with deep, savory notes.
Step 3: Sear the Beef
In a large Dutch oven, heat a tablespoon of vegetable oil over medium-high heat until shimmering. Add the seasoned beef pieces and sear them for about 10 minutes, turning occasionally, until they are nicely browned on all sides. This step creates a rich crust that adds layers of flavor to your pot roast, so don’t rush it!
Step 4: Sauté the Aromatics
Reduce the heat to medium and add the sliced sweet onion to the pot. Cook for about 4 minutes, stirring occasionally, until the onion becomes slightly softened and fragrant. Then, incorporate the minced garlic and grated ginger, stirring for an additional minute until their aromas fill your kitchen and everything looks lovely and golden.
Step 5: Build the Sauce
Next, mix in the gochujang paste, brown sugar, and low-sodium soy sauce (or tamari) into the pot. Stir everything together for about a minute to combine the flavors, creating a deliciously fragrant base for your Korean pot roast sauce. Doing this allows the flavors to meld beautifully.
Step 6: Combine Ingredients
Return the browned beef to the Dutch oven and pour in the beef stock. Bring the mixture to a simmer over medium heat, about 5 minutes, ensuring everything is well-coated in the sauce. This is the moment when the savory depth of the sauce develops, promising a hearty meal to come.
Step 7: Braise the Pot Roast
Cover the Dutch oven with its lid and transfer it to the preheated oven. Allow the pot roast to braise for 2 hours, checking occasionally to make sure it’s not sticking and enjoying the mouthwatering aroma filling your home. By the end of this cooking time, the beef will be incredibly tender and bursting with flavor.
Step 8: Serve the Korean Pot Roast
Once the pot roast is tender, carefully remove it from the oven. Allow it to rest for about 10-15 minutes before slicing to ensure the juices redistribute. Serve your Korean pot roast family-style, garnished with fresh cilantro and accompanied by cooked rice and kimchi for a complete, comforting meal that everyone will adore.
Make Ahead Options
These Korean pot roast preparations are a game changer for busy home cooks! You can season and sear the beef up to 24 hours in advance; simply refrigerate the browned meat to maintain its flavor and tenderness. Additionally, the sauce can be prepared ahead of time and stored in the fridge for up to 3 days. When it’s time to enjoy, just combine the seared beef and prepared sauce in the Dutch oven, bring it to a simmer, and transfer to the oven as instructed. This way, you’ll have a comforting family dinner with minimal last-minute efforts, ensuring your meal is just as delicious without the stress!
What to Serve with Irresistible Korean Pot Roast?
A delightful spread elevates this mouthwatering dish from good to unforgettable, bringing warmth and flavor to your family table.
- White Rice: This soft, steamed base absorbs the rich, thick sauce, making every bite a burst of flavor that complements the tender beef.
- Kimchi: The crunchy, spicy tang of kimchi cuts through the richness, offering a refreshing contrast that brightens the meal. Enjoying bite after bite together creates a traditional Korean experience that’s hard to resist.
- Steamed Broccoli: Its vibrant green color and tender texture add a fresh element, while a sprinkle of sesame seeds enhances its nutty flavors. This side brings balance and nutrition to the table.
- Savory Gravy: Drizzle additional gravy over your rice or roasted veggies to amplify the umami experience, making each spoonful an adventure in flavor harmony.
- Pickled Cucumbers: Crisp and tangy, these pickles add a delightful crunch that cuts through the richness of the pot roast, refreshing the palate for the next bite.
- Sesame Noodles: Tossed in a light, savory sauce, these noodles make for a fun, satisfying side that cradles the flavors of the pot roast beautifully, enhancing the overall dining experience.
- Soda or Iced Tea: Sip on a refreshing drink like sweet iced tea to balance the dish’s boldness with a hint of sweetness, or enjoy a fizzy soda for a delightful flavor contrast.
- Chocolate Mousse: A smooth, rich dessert can cap off the meal perfectly, providing a luxurious finish that leaves everyone craving just a little more sweetness at the end of dinner.
Storage Tips for Korean Pot Roast
Fridge: Store your Korean pot roast in an airtight container for up to 4 days. This allows the flavors to deepen and improve, making it even more delicious on the second day!
Freezer: If you want to keep it longer, freeze the pot roast in a freezer-safe container for up to 3 months. Make sure to cool it completely before sealing to maintain its quality.
Thawing: When you’re ready to enjoy your frozen pot roast, thaw it overnight in the refrigerator. This gradual thawing helps retain the tender texture of the beef.
Reheating: To reheat, place the pot roast in a covered pot over low heat on the stovetop or microwave in short intervals. Add a splash of beef stock to keep it moist while warming.
Korean Pot Roast Variations & Substitutions
Feel free to explore these exciting variations to make the Korean pot roast your own and elevate your dining experience!
-
Alternative Cuts: Swap the chuck roast for brisket or round roast, yielding a slightly different flavor and texture that’s equally tender.
-
Thicker Sauce: To achieve a thicker sauce, incorporate a cornstarch slurry towards the end of cooking or reduce the liquid on the stovetop before serving.
-
Spice Level: Adjust the heat by modifying the amount of gochujang paste; start with a smaller amount for a milder kick.
-
Vegetable Additions: Add carrots or baby potatoes during the braising process for a heartier, veggie-packed dish the whole family will love.
-
Herbal Twist: Infuse your pot roast with fresh herbs like thyme or rosemary for a fragrant twist that complements the savory flavors beautifully.
-
Sweetness Boost: For extra sweetness, use a mix of brown sugar and honey, which adds a delightful depth to the overall flavor profile.
-
Umami Punch: Enhance the umami factor by incorporating a tablespoon of miso paste into the sauce, deepening its savory essence.
-
Low-Carb Option: Serve the pot roast over cauliflower rice instead of traditional rice for a delicious low-carb alternative that doesn’t skimp on flavor.
If you’re looking for more simple yet scrumptious family dinners, don’t miss out on my favorite Crockpot Tuscan Chicken or One Pot Chicken. Each of these recipes brings something unique to your dinner table!
Expert Tips for Korean Pot Roast
• Don’t Rush the Sear: Take time to brown the beef thoroughly. Skipping this step leads to a less flavorful sauce and chewy texture.
• Use Low Sodium Soy Sauce: This allows for better control of saltiness. Too much salt can overpower the delicate balance of flavors in your Korean pot roast.
• Check Liquid Levels: Avoid a watery sauce by adhering to the recommended beef stock amount. If it looks too thin, reduce it on the stovetop before serving.
• Rest Before Slicing: Allow the roast to rest for 10-15 minutes post-cooking. This vital step redistributes juices, ensuring every bite is moist and rich.
• Customize Your Heat: Adjust gochujang for personal spice preferences. Start with less if you’re unsure, as you can always add more later!

Korean Pot Roast Recipe FAQs
How do I choose the right cut of beef for my Korean pot roast?
Absolutely! For the best results, choose a well-marbled chuck roast, as the fat adds flavor and tenderness during cooking. Don’t hesitate to ask your butcher to cut it into 3-inch pieces if needed; this will enhance cooking efficiency and flavor absorption.
How should I store leftover Korean pot roast?
Perfect question! Store your Korean pot roast in an airtight container in the fridge for up to 4 days. I often find that letting it sit overnight intensifies the flavors, making it even more delightful on day two.
Can I freeze my Korean pot roast?
Yes, it freezes beautifully! To do this, cool the pot roast completely before placing it in a freezer-safe container. It can be frozen for up to 3 months. When you’re ready to enjoy it, simply thaw it overnight in the refrigerator.
What if my pot roast turned out tough?
Very! Tough meat usually indicates it hasn’t been cooked long enough or at a low temperature. Make sure to braise the roast at 350°F for the full 2 hours, and always allow it to rest after taking it out of the oven. This rest period helps the fibers relax and redistribute the juices.
Can I make this recipe gluten-free?
Definitely! You can use tamari instead of regular soy sauce to keep this dish gluten-free. Always check labels on additional ingredients like broth or gochujang paste to ensure they fit your dietary needs.
How do I know if my beef is properly cooked?
To check for doneness, look for a fork to easily shred the beef; if it pulls apart effortlessly, you’ve hit the jackpot! Additionally, the internal temperature should reach around 190°F for optimal tenderness during the braising process. Enjoy your cozy family dinner!
Melt-in-Your-Mouth Korean Pot Roast for Cozy Family Dinners
Ingredients
Equipment
Method
- Preheat your oven to 350°F (175°C) with the rack positioned in the lower third.
- Pat the chuck roast pieces dry with paper towels and season generously with kosher salt.
- Heat a tablespoon of vegetable oil in a large Dutch oven and sear the beef for 10 minutes until browned.
- Reduce heat, add sliced sweet onion and cook for 4 minutes, then stir in garlic and ginger for 1 more minute.
- Mix in gochujang paste, brown sugar, and soy sauce, stirring for 1 minute to combine flavors.
- Return the browned beef to the Dutch oven, pour in beef stock, and bring to a simmer for 5 minutes.
- Cover and transfer to the oven, braising for 2 hours until the beef is tender.
- Remove from the oven, let rest for 10-15 minutes, then slice and serve garnished with cilantro, rice, and kimchi.
Leave a Reply