
As I stood in my kitchen, searching for a sweet fix that wouldn’t ruin my healthy eating goals, inspiration struck. Enter the Healthy Peanut Butter Buster Bars! These little wonders are just what you need for a guilt-free treat that feels indulgent without the calories. With only three simple ingredients, these bars fit effortlessly into your busy lifestyle, whether you’re a dedicated home-chef or simply someone seeking a healthier alternative to store-bought snacks. Each bar is packed with protein, making them a perfect post-workout pick-me-up. Plus, they’re delightfully customizable—vegan or gluten-free options are a breeze! Ready to savor a deliciously creamy, chocolate-coated treat that won’t derail your well-being? Let’s dive in!
Why are Healthy Buster Bars a Must-Try?
Irresistibly creamy: These Healthy Peanut Butter Buster Bars have a rich, smooth texture that satisfies any sweet craving without the guilt.
Quick and easy: With only three ingredients, you can whip these up in no time, making them an ideal choice for busy schedules.
Customizable delight: Whether you’re vegan or gluten-free, you can easily adapt the recipe. Enjoy a variety of flavors with simple swaps like almond or cashew butter!
Protein-packed: Each bar delivers over 15 grams of protein, making them a delicious post-workout snack or afternoon energy booster.
No-bake convenience: Forget the oven! These bars require minimal effort and give you a refreshing treat, perfect for warm days.
Experience the joy of homemade treats with these Healthy Buster Bars; they’re sure to become a staple in your snack rotation!
Healthy Buster Bars Ingredients
For the Base
• Yogurt – Provides creaminess and acts as the base; opt for vegan yogurt if you prefer a dairy-free option.
• Peanut Butter – Adds flavor and protein; swap with almond butter for a nut-free alternative.
• Sweetener – Enhances taste, especially if the yogurt is unsweetened; for a sugar-free option, try stevia.
For the Coating
• Chocolate Chips – Forms the delicious chocolate coating; use dairy-free chocolate chips for a vegan treat.
• Coconut Oil (optional) – Creates a smoother chocolate coating; omit if you prefer a thicker texture.
For Extra Crunch (optional)
• Peanuts – Adds a delightful crunchy texture; can be left out for a nut-free version.
Step‑by‑Step Instructions for Healthy Peanut Butter Buster Bars
Step 1: Whip the Base
In a mixing bowl, combine yogurt, peanut butter, and your choice of sweetener. Using a handheld mixer or whisk, blend the ingredients until the mixture is smooth and creamy, which should take about 2-3 minutes. The consistency should resemble a thick batter, ensuring that the peanut butter is well-incorporated with no lumps remaining.
Step 2: Add Chocolate Chips (Optional)
Once the base is ready, consider stirring in mini chocolate chips for an extra layer of texture and flavor. Use a spatula to gently fold them into the mixture until they’re evenly distributed. This should only take about 1 minute and will give your Healthy Buster Bars a delightful surprise of chocolate in every bite.
Step 3: Prepare the Tray
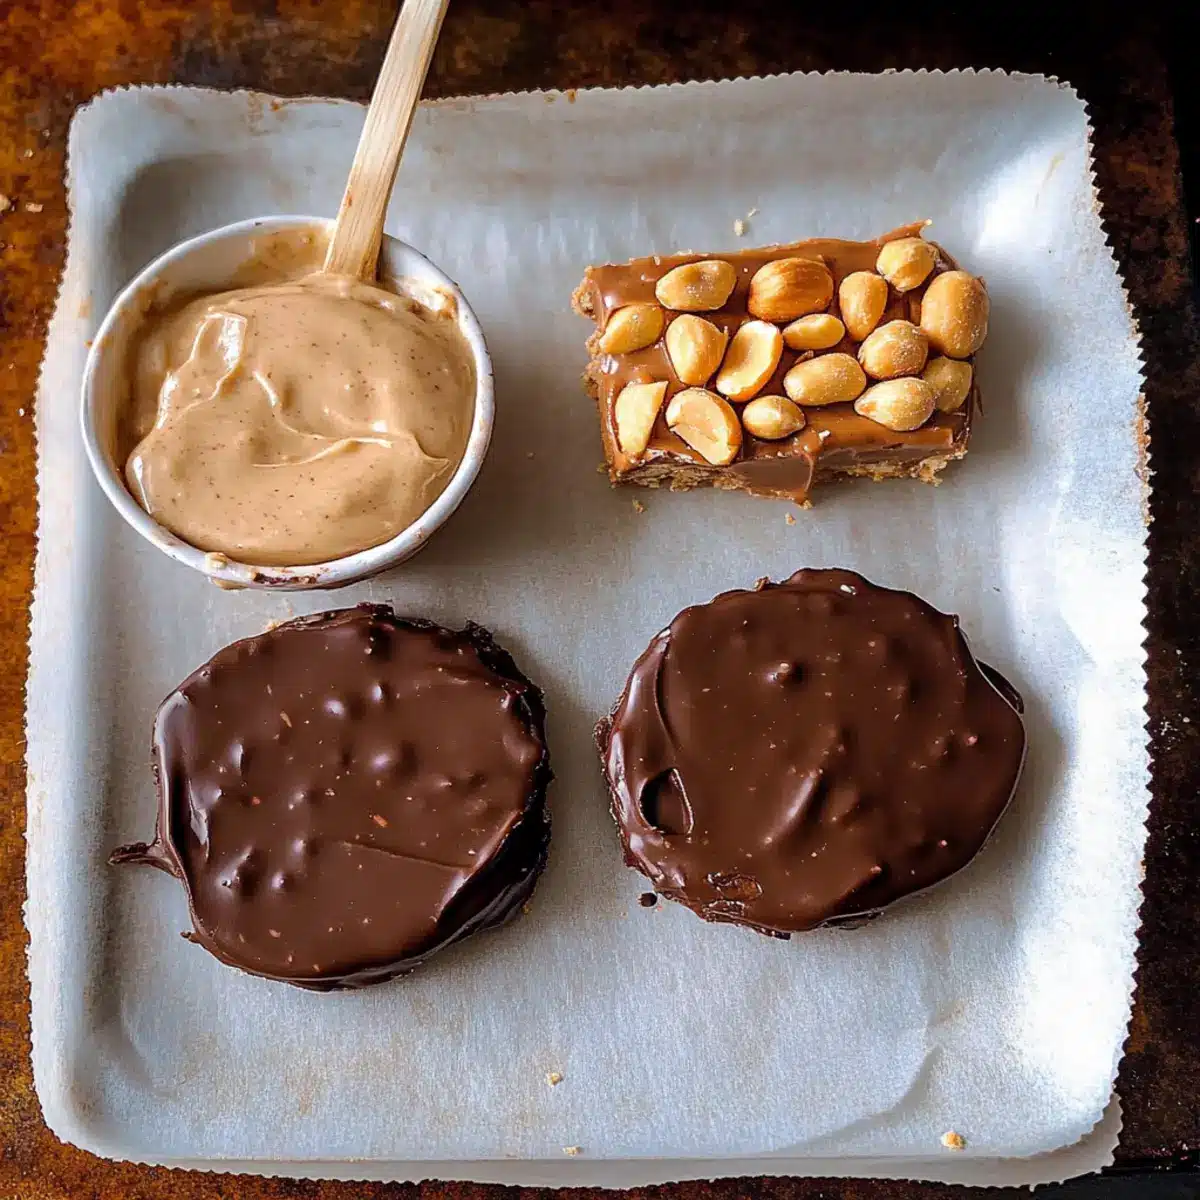
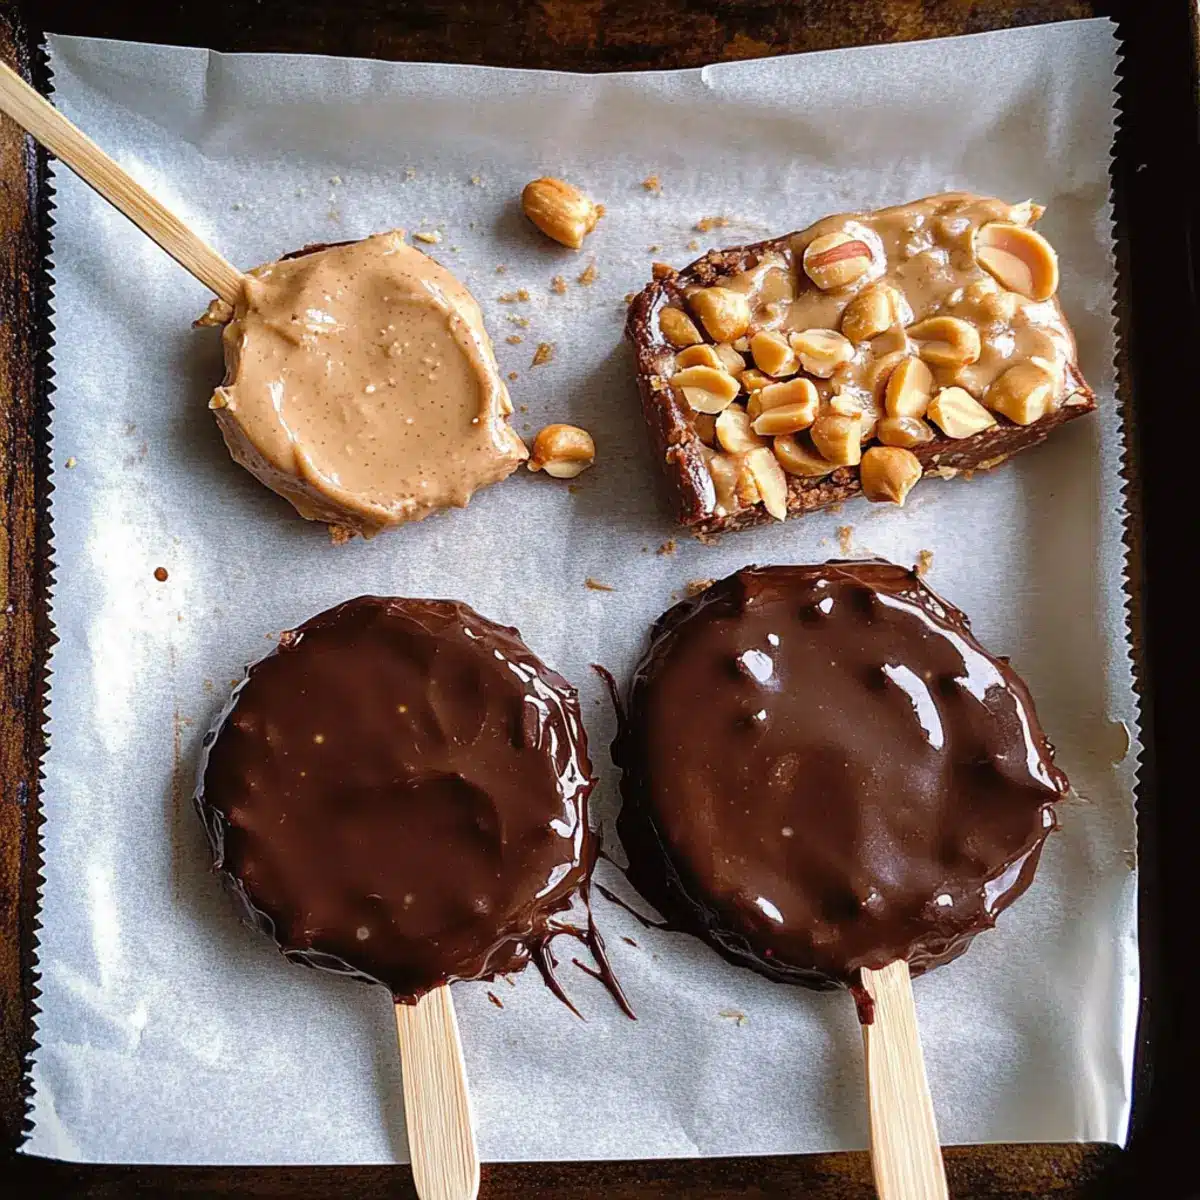
Line a baking tray with parchment paper to prevent sticking. Using a cookie scoop or a tablespoon, drop spoonfuls of the mixture onto the prepared tray, spacing them out for even freezing. Press a popsicle stick into the center of each scoop, making sure it’s stabilizing the mixture. Aim for about 12-15 portions, ensuring they’re roughly uniform in size for even freezing.
Step 4: Smooth and Add Toppings
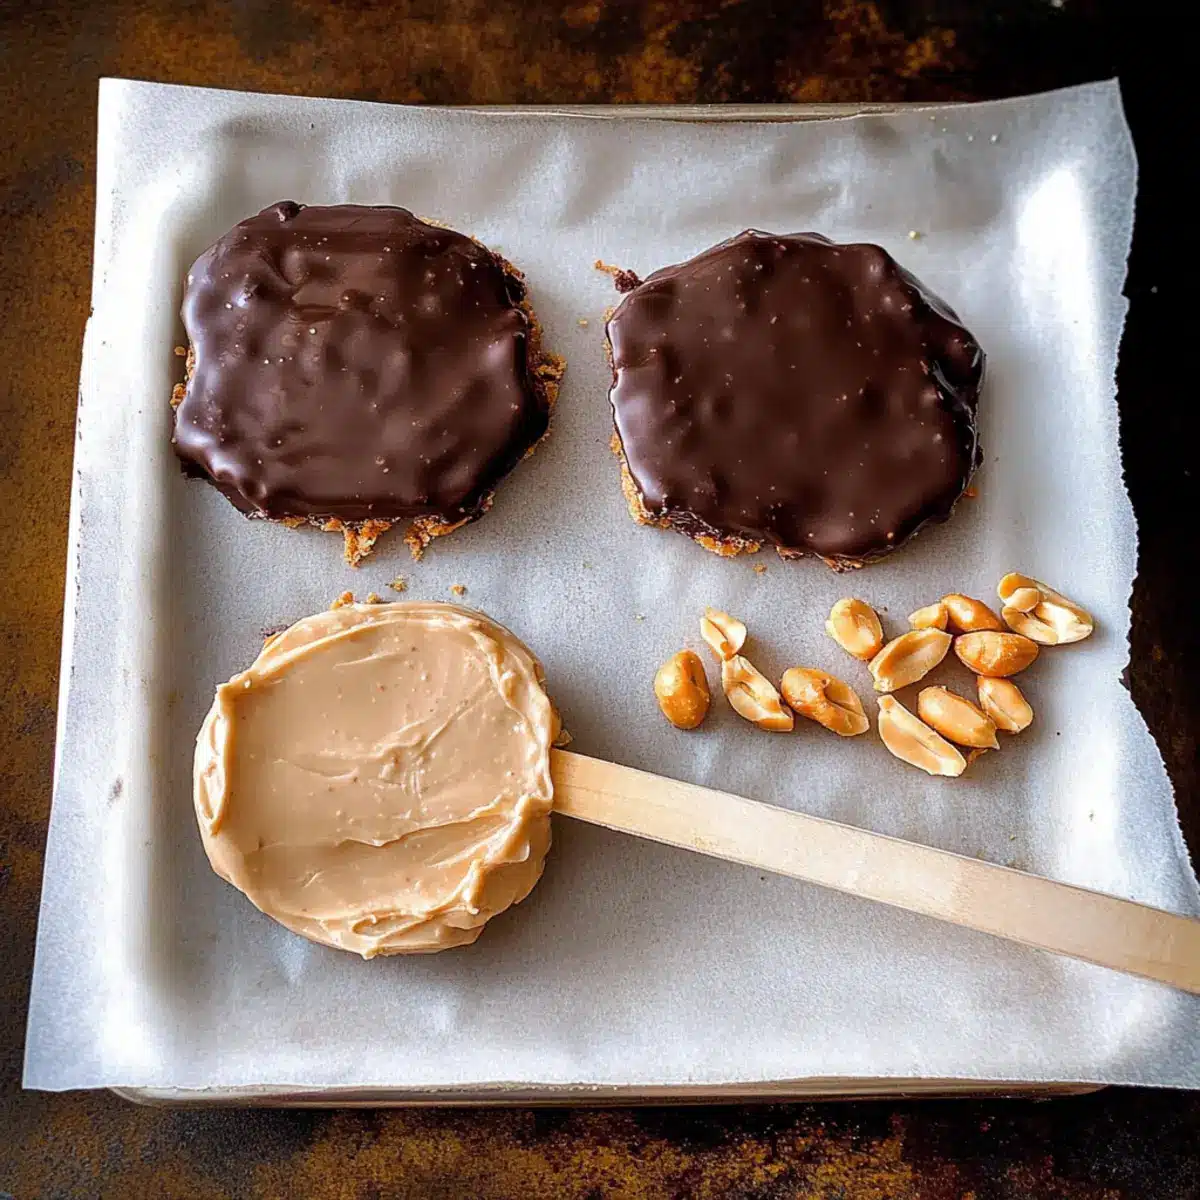
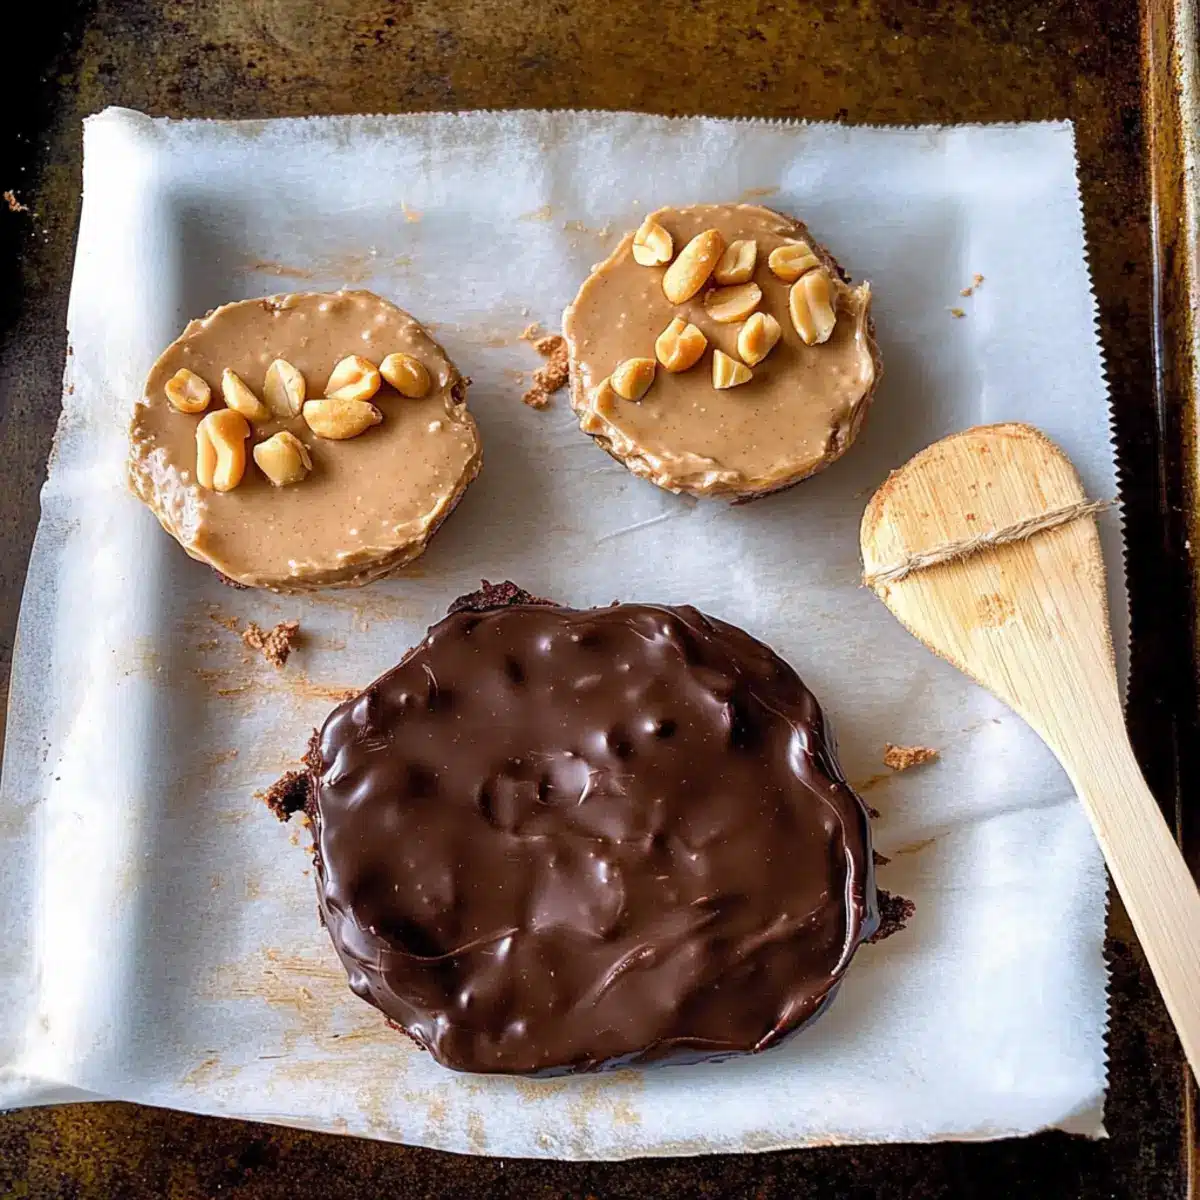
If you desire a polished look, use the back of a spoon to smooth down the tops of each scoop. Optionally, sprinkle chopped peanuts on top for added crunch and flavor. This step only takes a minute and will elevate the visual appeal of your Healthy Buster Bars, making them even more tempting.
Step 5: Freeze Until Solid
Transfer the tray to the freezer and allow the bars to set for at least 2 hours or until completely firm. Check for doneness by gently pushing on the bars; they should feel solid and hold their shape. This freezing step is crucial as it ensures your Healthy Peanut Butter Buster Bars have the right texture.
Step 6: Melt the Chocolate Coating
In a microwave-safe bowl or using a double boiler, melt chocolate chips over medium heat. If desired, stir in a tablespoon of coconut oil to achieve a smoother consistency. Heat in 30-second intervals, stirring in between, until the chocolate is entirely melted and glossy, typically taking about 1-2 minutes in total.
Step 7: Dip Each Bar
Once your chocolate is melted and smooth, dip each frozen bar into the chocolate, ensuring it’s fully coated. Use a fork to lift them out, letting any excess chocolate drip back into the bowl. Place each coated bar back onto the parchment-lined tray, creating a beautiful chocolate-covered treat that’s hard to resist.
Step 8: Final Freeze
Return the tray to the freezer and allow the chocolate coating to set for an additional 30-60 minutes. Check that the chocolate has hardened before removing the bars, ensuring that each Healthy Peanut Butter Buster Bar is ready for serving. This final freeze will lock in all flavors and textures, giving you a delightful treat.
Expert Tips for Healthy Buster Bars
- Yogurt Consistency: Ensure yogurt is well-mixed and smooth to prevent icy texture; this will keep your Buster Bars creamy.
- Use a Cookie Scoop: For uniform sizes, use a cookie scoop when dropping mixture onto the tray; it simplifies the process and ensures even freezing.
- Let Chocolate Cool: Allow melted chocolate to cool slightly before dipping the bars, preventing them from melting and maintaining their shape.
- Add Flavor Variations: Don’t hesitate to experiment with flavored extracts like vanilla or almond in your yogurt mix for more delicious twists!
- Freezing Time: Be patient during the freezing process; ensuring bars are solid will give you the best texture and taste when ready to serve.
What to Serve with Healthy Peanut Butter Buster Bars
Enhance your snack experience with delightful pairings that complement the rich, creamy flavor of your Healthy Buster Bars.
-
Fresh Berries: Their tangy sweetness contrasts beautifully with the bars, adding a burst of freshness in each bite.
-
Dollop of Greek Yogurt: A creamy accompaniment that adds protein and a tangy flair, perfect for breakfast or a post-workout snack.
-
Chopped Nuts: Sprinkle crushed almonds or walnuts for a satisfying crunch, elevating the texture and nutty flavor of your bars.
-
Banana Slices: The natural sweetness and soft texture of bananas pair perfectly, creating a delightful flavor combination.
-
Coconut Flakes: Sprinkle toasted coconut on top for a tropical touch; it’s a wonderful complement to the peanut butter and chocolate.
-
Nut Butter Drizzle: A drizzle of melted peanut or almond butter provides an extra layer of richness, making your buster experience even more indulgent.
-
Iced Coffee: Enjoy a chilled iced coffee alongside for a refreshing beverage that balances the sweetness of the bars wonderfully.
-
Dark Chocolate Covered Almonds: For a satisfying crunch and added chocolate flavor, pair these snacks to amplify the indulgence of your dessert.
Make Ahead Options
These Healthy Peanut Butter Buster Bars are ideal for busy home cooks looking to simplify meal prep! You can prepare the base (yogurt, peanut butter, and sweetener) up to 24 hours in advance and store it in an airtight container in the refrigerator to maintain quality. Simply scoop and freeze the mixture before coating it in chocolate. Additionally, the bars can be frozen for up to a month; just make sure to keep them in a good quality freezer-safe container to avoid freezer burn. When you’re ready to serve, melt the chocolate and dip each frozen bar, allowing it to set before enjoying this guilt-free treat!
How to Store and Freeze Buster Bars
Fridge: Store any leftover bars in an airtight container in the refrigerator for up to 3 days for a quick grab-and-go snack.
Freezer: For longer storage, freeze the Buster Bars in a single layer, then transfer to an airtight container for up to 1 month. This maintains their flavor and texture.
Reheating: Allow bars to thaw in the fridge for about 30 minutes before enjoying, or leave them at room temperature for a quick and convenient treat.
Wrapping: When freezing, wrap individual bars in parchment paper to prevent sticking and keep them fresh; this makes it easier to enjoy just one or two when cravings hit!
Buster Bars: Exciting Variations Await!
Feel free to play around with ingredients and flavors, creating your own twist on these delicious bars!
-
Vegan Option: Substitute regular yogurt with coconut or cashew yogurt for a refreshing dairy-free delight.
-
Nut-Free Twist: Use sunflower seed butter or tahini instead of peanut butter to keep these bars nut-free while maintaining rich flavor.
-
Extra Crunch: Mix in crispy rice cereal or chopped almonds to the base mixture for delightful added texture in each bite.
-
Flavor Boost: Add a splash of vanilla or almond extract to the yogurt mix for an aromatic enhancement that elevates the flavor profile.
-
Fruit Adventure: Freeze a layer of blended berries or bananas beneath the peanut butter mixture for a fruity burst that complements the creaminess beautifully.
Imagine the surprise of biting into a bar and tasting fresh fruit—the perfect contrast to the rich peanut butter! -
Spicy Surprise: For those who like some heat, add a dash of cayenne pepper into the chocolate coating, creating an unexpected and delightful kick that will tingle your taste buds.
-
Chocolate Lovers: Instead of a chocolate coating, try a drizzle of melted dark chocolate or even a sprinkle of cocoa powder for a chocolatey charm that’s less messy but still satisfying.
-
Sugar-Free Alternative: Use erythritol or stevia as a sweetener for a guilt-free version of your bars that caters to keto diets, allowing everyone to indulge without worry!
Feel free to explore these variations and create a version that speaks to your taste buds! Each twist allows you to enjoy a new treat while embracing the basics of creating your own healthy snacks.
Healthy Peanut Butter Buster Bars Recipe FAQs
How do I choose the right yogurt for these bars?
Absolutely! For the best results, use a creamy yogurt that suits your dietary needs. If you’re aiming for a vegan option, I recommend using coconut or almond yogurt. Unsweetened Greek yogurt works well too, providing a thicker texture. Just be sure it’s free from excess water to keep your bars from becoming icy.
What’s the best way to store leftover Buster Bars?
You can store leftover bars in an airtight container in the refrigerator for up to 3 days. If you want them to last longer, freeze them in a single layer, and then transfer to an airtight container or freezer bag for up to 1 month. This will keep them fresh and flavor-packed!
Can I freeze the Healthy Buster Bars?
Absolutely! Freezing these bars is a great way to enjoy them later. After preparing, place them on a parchment-lined tray in the freezer until solid (about 2 hours). Once frozen, wrap each bar in parchment paper and store in a freezer-safe bag or container for up to 1 month. Just remember to thaw for about 30 minutes in the fridge before enjoying!
What if my Buster Bars turn out icy?
Very! If your bars end up icy, it may be due to insufficient mixing of the yogurt before freezing. Ensure the yogurt is blended smoothly; it should be thick and creamy. Also, consider letting them set longer in the freezer to firm up without icy texture. If you notice they remain icy, try reducing your freeze time or adjusting the yogurt consistency.
Are there any allergy considerations for this recipe?
Absolutely! If you or your loved ones have allergies, be cautious with substitutions. For nut allergies, use sunflower seed butter instead of peanut butter and check labels on yogurt and chocolate chips to ensure they’re nut-free. If you’re making these for pets, remember that chocolate is toxic to dogs, so be sure they don’t get any of the coated bars.
Can I customize the flavors in my Buster Bars?
Yes, you can customize the flavors creatively! Try adding different extracts, like vanilla or almond, into your yogurt mixture. You can also mix in fruits—think blended bananas or cooked apples—for a delightful twist! Mix in chocolate chips or sprinkle nuts on top to suit your taste preferences. The more the merrier!
Healthy Buster Bars: Guilt-Free 3-Ingredient Delight
Ingredients
Equipment
Method
- Combine yogurt, peanut butter, and sweetener in a mixing bowl. Blend until smooth and creamy, about 2-3 minutes.
- If desired, stir in mini chocolate chips until evenly distributed.
- Line a baking tray with parchment paper. Drop spoonfuls of the mixture onto the tray, spacing them out. Press a popsicle stick into each scoop.
- Smooth the tops with a spoon and optionally sprinkle chopped peanuts on top.
- Freeze the tray for at least 2 hours until the bars are solid.
- Melt chocolate chips over medium heat, stirring until smooth. Optionally add coconut oil for a smoother consistency.
- Dip each frozen bar into the melted chocolate, then place back on the tray.
- Return tray to freezer and let chocolate set for 30-60 minutes.
Leave a Reply