
With just four simple ingredients and minimal prep time, this creamy fail-proof egg custard recipe takes me straight back to family gatherings filled with laughter and warmth. It’s a refreshing reminder that homemade desserts don’t have to be elaborate to be delightful. The silky texture and rich flavor make this custard a beloved classic that pleases everyone at the table, whether you’re hosting friends or looking for a cozy treat after a long day. Plus, it’s versatile—swap in almond milk for a dairy-free option or get creative with flavors like citrus zest. Ready to whip up a dessert that combines nostalgia and simplicity? Let’s dive into making this enchanting egg custard!

Why is This Egg Custard a Must-Try?
Simplicity at its finest: With just four ingredients, this creamy fail-proof egg custard recipe is incredibly easy to whip up, making it perfect for anyone, even novice cooks!
Versatility shines: Feel free to swap in almond milk for a delightful dairy-free version or experiment with various flavorings like vanilla or citrus zest.
Crowd-pleasing delight: Whether you’re serving it at family gatherings or enjoying it solo, this custard offers comfort and pleasure to everyone.
Quick prep time: In just 40 minutes, you can indulge in this delicious dessert, allowing you more time to enjoy your company or relax.
Elevate your dessert game and check out this velvety creation that reminds us that homemade treats are truly the best! Consider pairing it with a sprinkle of nutmeg or perhaps some fresh berries for a classic touch. For more comforting dessert ideas, don’t forget to explore our recipes like Cheese Banana Pudding or Salmon Sushi Bake.
Creamy Fail-Proof Egg Custard Ingredients
• This creamy fail-proof egg custard recipe is a delightful treat that everyone will adore!
For the Custard
- Eggs – Fresh large eggs are vital for richness and flavor; substitutes may alter texture.
- Milk – Whole milk is recommended for ultimate creaminess, but almond or coconut milk can create a dairy-free version.
- Sugar – Granulated sugar is standard for sweetness; brown sugar can add a deeper flavor, and substitutes are available for lower-calorie options.
- Vanilla Extract – Pure vanilla extract enhances the flavor beautifully; vanilla essence works in a pinch.
- Salt – Just a hint of salt amplifies the overall deliciousness of the custard.
Optional Garnishes
- Nutmeg – A light sprinkle of nutmeg adds a warm, aromatic touch on top.
- Fresh Berries – Add a burst of color and flavor with fresh berries for a refreshing finish.
Step‑by‑Step Instructions for Creamy Fail-Proof Egg Custard Recipe
Step 1: Preheat the Oven
Begin by preheating your oven to 325°F (165°C). This is crucial as a consistent temperature will help your creamy fail-proof egg custard to bake evenly. While the oven heats, gather your ingredients and equipment, including a mixing bowl, whisk, saucepan, and ramekins for the custard.
Step 2: Whisk the Eggs
In a medium bowl, gently whisk the fresh large eggs until they are just combined. Take care not to over-whisk, as we want them to remain smooth for our custard. This step is essential for a rich and creamy foundation, setting the stage for the delightful flavors to come.
Step 3: Warm the Milk
Next, pour your whole milk into a saucepan and heat it over medium heat. Continue heating until the milk becomes warm but avoid boiling—this should take about 5 minutes. Watching closely is key to prevent curdling; you want the milk steaming, not boiling, to gently blend with the eggs.
Step 4: Temper the Eggs
Gradually add the warm milk to the eggs while whisking continuously. This tempering step is vital to prevent the eggs from scrambling and ensures a smooth custard mixture. Combine them slowly, drizzling the milk in a steady stream, until fully incorporated for that luscious texture.
Step 5: Add Sugar and Flavorings
Once the milk and eggs are well mixed, stir in the granulated sugar, vanilla extract, and a pinch of salt. Mix until the sugar is completely dissolved, which adds sweetness and enhances the custard’s flavor profile. Pay attention to the texture, as it should feel silky and smooth at this point.
Step 6: Strain the Mixture
For an exceptionally creamy finish, strain the custard mixture through a fine sieve into another bowl. This step removes any lumps and ensures a velvety smooth result. Take your time with this process; it’s essential to achieve the perfect consistency for your creamy fail-proof egg custard.
Step 7: Pour into Ramekins
Carefully pour the strained custard into your ramekins, filling each one about three-quarters full to allow room for any expansion during baking. Place the ramekins on a baking sheet, ensuring they are stable and won’t tip over during the hot water bath that will follow.
Step 8: Prepare the Water Bath
To create a water bath, place the ramekins in a large baking dish and fill it with hot water until it reaches halfway up the sides of the ramekins. This technique allows for gentle cooking, preventing the egg custard from curdling and giving it a smooth, even texture during baking.
Step 9: Bake the Custards
Put the baking dish in the preheated oven and bake for about 35-40 minutes. Keep an eye on them, and look for a slight jiggle in the center when they are done; this indicates they are perfectly set. The edges should be firm, while the center should remain a bit creamy.
Step 10: Cool and Chill
Once baked, remove the ramekins from the water bath and let them cool to room temperature. After they have cooled, cover them and refrigerate for at least 2 hours. This chilling time is crucial, as it allows the custard to firm up even more, resulting in that delightful, creamy texture.
Step 11: Garnish and Serve
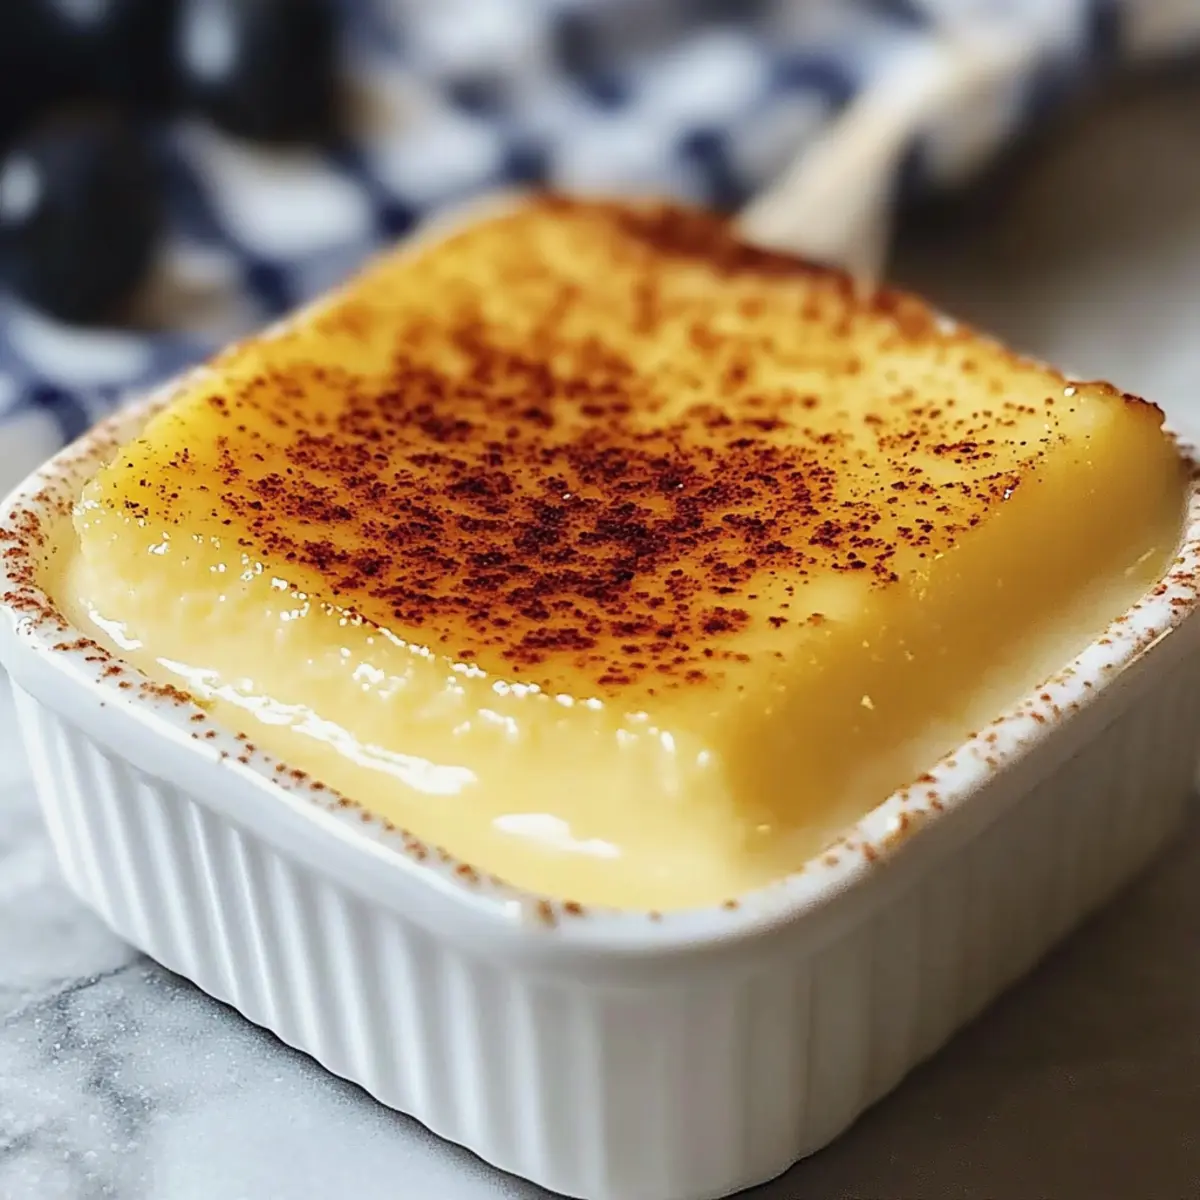
Before serving your creamy fail-proof egg custard, sprinkle a light dusting of nutmeg on top for a hint of warmth and aroma. Optionally, serve with fresh berries for added flavor and visual appeal. This delightful dessert is sure to be a hit, bringing smiles to all at the table!
Storage Tips for Creamy Fail-Proof Egg Custard
Fridge: Store any leftover creamy fail-proof egg custard in an airtight container for up to 3 days. This keeps it fresh and ready to enjoy.
Room Temperature: It’s best to avoid leaving the custard at room temperature for more than 2 hours to maintain its quality and safety.
Freezer: If you want to freeze the custard, wrap it well in plastic wrap and place it in a freezer-safe container. It can be frozen for up to 2 months, but note that the texture may change slightly upon thawing.
Reheating: For the best experience, let the custard thaw in the fridge overnight, then serve it chilled. If desired, allow it to reach room temperature for enhanced flavor.
What to Serve with Easy and Creamy Egg Custard
Creating the perfect dining experience doesn’t end with a delightful custard; elevate your meal with these inviting pairings!
-
Fresh Berries: A mix of strawberries, blueberries, and raspberries adds a burst of color and refreshing tartness that perfectly complements the creamy custard.
-
Whipped Cream: A dollop of lightly sweetened whipped cream enhances the custard’s texture, making every bite even more indulgent and cloud-like.
-
Chocolate Sauce: Drizzling a rich chocolate sauce over the custard introduces a classic combination of flavors that will satisfy any sweet tooth.
-
Almond Biscotti: Crunchy almond biscotti provides a delightful contrast to the smooth custard, making for a well-rounded dessert experience.
-
Coffee or Espresso: A steaming cup of coffee or espresso balances the sweetness of the custard, inviting you to savor each spoonful while enjoying its warm richness.
-
Citrus Fruit Salad: Zesty citrus fruits like oranges, grapefruits, and mandarins offer a refreshing, bright touch that cuts through the custard’s creaminess and adds a seasonal flair.
For those who want an extra touch, a sprinkle of nutmeg on top of the custard is a lovely garnishing nod, inviting all to indulge in this creamy fail-proof egg custard recipe.
Expert Tips for Creamy Fail-Proof Egg Custard
-
Egg Temperature: Use room temperature eggs for a smoother custard. Cold eggs can lead to an uneven mixture and may affect the custard’s texture.
-
Avoid Boiling Milk: Heat milk just until warm, not boiling. Boiling can curdle the eggs, ruining your creamy fail-proof egg custard.
-
Watch the Baking Time: Keep an eye on the custard towards the end of baking. It should have a slight jiggle in the center to ensure it doesn’t overcook and become grainy.
-
Straining is Key: Don’t skip straining the mixture! This critical step ensures your custard is silky and free from lumps, elevating the overall texture.
-
Customize Flavor: Experiment with different extracts or citrus zest for unique variations. Just a hint can transform your creamy fail-proof egg custard into a delightful experience.
Make Ahead Options
These creamy fail-proof egg custard recipes are perfect for meal prep enthusiasts! You can prepare the custard mixture up to 24 hours in advance; simply whisk the eggs and warm the milk, then combine and strain them as outlined in the recipe. Cover the ramekins and refrigerate until you’re ready to bake. This not only saves time but also allows the flavors to meld beautifully while keeping the custard just as delicious. When ready to serve, simply place the ramekins in a water bath and bake as directed. Enjoy the ease of having a delightful dessert ready in no time, making it ideal for busy weeknights or last-minute gatherings!
Creamy Fail-Proof Egg Custard Variations
Feel free to explore these delightful twists on the classic egg custard, letting your creativity flow in the kitchen!
-
Dairy-Free: Swap whole milk with almond milk or coconut milk for a light, creamy custard without the dairy. The coconut adds a subtle sweetness that elevates the dish beautifully!
-
Sweetener Swap: Use brown sugar instead of granulated sugar to introduce a richer flavor profile. It adds depth that pairs wonderfully with the custard’s creamy texture.
-
Flavor Infusion: Experiment with flavored extracts, like almond or hazelnut, for a unique twist. Just a drop can transform your custard into an exciting flavor journey.
-
Citrus Zest: Incorporate a teaspoon of lemon or orange zest for a refreshing hint of brightness. This twist is especially delightful in warmer months, lifting the custard to new levels!
-
Spiced Delight: Add a dash of cinnamon or cardamom to the custard mixture for a warming spice note. These spices can create a cozy atmosphere, perfect for family gatherings.
-
Chocolate Variation: Fold in melted chocolate or cocoa powder for a decadent chocolate custard. It’s a rich, indulgent treat that chocolate lovers will adore!
-
Nutty Texture: Incorporate finely chopped nuts, like pistachios or almonds, into the custard before baking. This will introduce a delightful crunch that contrasts beautifully with the silky custard.
-
Heat It Up: A pinch of cayenne pepper or chili powder can add a surprising kick, balancing sweetness and heat in a unique way. This bold twist will excite the tastebuds and leave an impression!
Looking for more delicious recipes? Consider trying out our Asparagus Chicken Penne or indulge in a comforting Vegetable Casserole for your next family dinner!

Creamy Fail-Proof Egg Custard Recipe FAQs
How do I choose the best eggs for this recipe?
Absolutely! Fresh large eggs are crucial for the richness and flavor of your creamy fail-proof egg custard. Look for eggs without any dark spots or cracks on the shell. If you’re going for a vegan option, you could use an egg replacer, although the texture may be slightly different.
What’s the best way to store leftover custard?
Store any leftover creamy fail-proof egg custard in an airtight container in the refrigerator for up to 3 days. Let it cool completely first before sealing, so you can enjoy it cold straight from the fridge or allow it to reach room temperature to enhance the flavor.
Can I freeze the custard?
Yes, you can freeze it! To freeze, wrap the custard tightly in plastic wrap and place it in a freezer-safe container. It can be frozen for up to 2 months. Once you’re ready to enjoy, thaw it in the fridge overnight. Keep in mind the texture may change slightly, but the flavor will still be delightful!
What if my custard turns out grainy?
Very! If the custard becomes grainy, it often means that the eggs were cooked too quickly, which can happen if the milk was too hot when mixed in. To prevent this in the future, always gradually add warm milk to the eggs, whisking continuously. If you find yourself with a grainy custard, you can try blending it slightly to smooth it out before serving, or simply enjoy it with whipped cream to improve the texture.
Are there any dietary considerations for this recipe?
Definitely! If you or anyone you are serving has allergies or dietary restrictions, you can easily customize the recipe. For a dairy-free version, substitute whole milk with almond milk or coconut milk. Also, for lower-calorie options, consider using sugar substitutes. Always check the labels for any potential allergens!
How can I customize the flavor of my egg custard?
Very much! You can experiment with various flavored extracts or even citrus zests to create unique variations. Adding a teaspoon of lemon or orange zest can impart bright, refreshing notes. You could also try infusing the milk with spices like cinnamon or cardamom before blending with the eggs for a warm, aromatic twist!

Creamy Fail-Proof Egg Custard Recipe Everyone Will Love
Ingredients
Equipment
Method
- Preheat your oven to 325°F (165°C).
- In a medium bowl, gently whisk the fresh large eggs until just combined.
- Pour the whole milk into a saucepan and heat it over medium heat until warm.
- Gradually add the warm milk to the eggs while whisking continuously.
- Stir in the granulated sugar, vanilla extract, and pinch of salt until the sugar is dissolved.
- Strain the custard mixture through a fine sieve into another bowl.
- Carefully pour the strained custard into ramekins, filling them about three-quarters full.
- Place the ramekins in a large baking dish and fill with hot water halfway up the sides.
- Bake for about 35-40 minutes, looking for a slight jiggle in the center.
- Once baked, let them cool to room temperature, then refrigerate for at least 2 hours.
- Before serving, sprinkle nutmeg on top and optionally serve with fresh berries.
Leave a Reply