
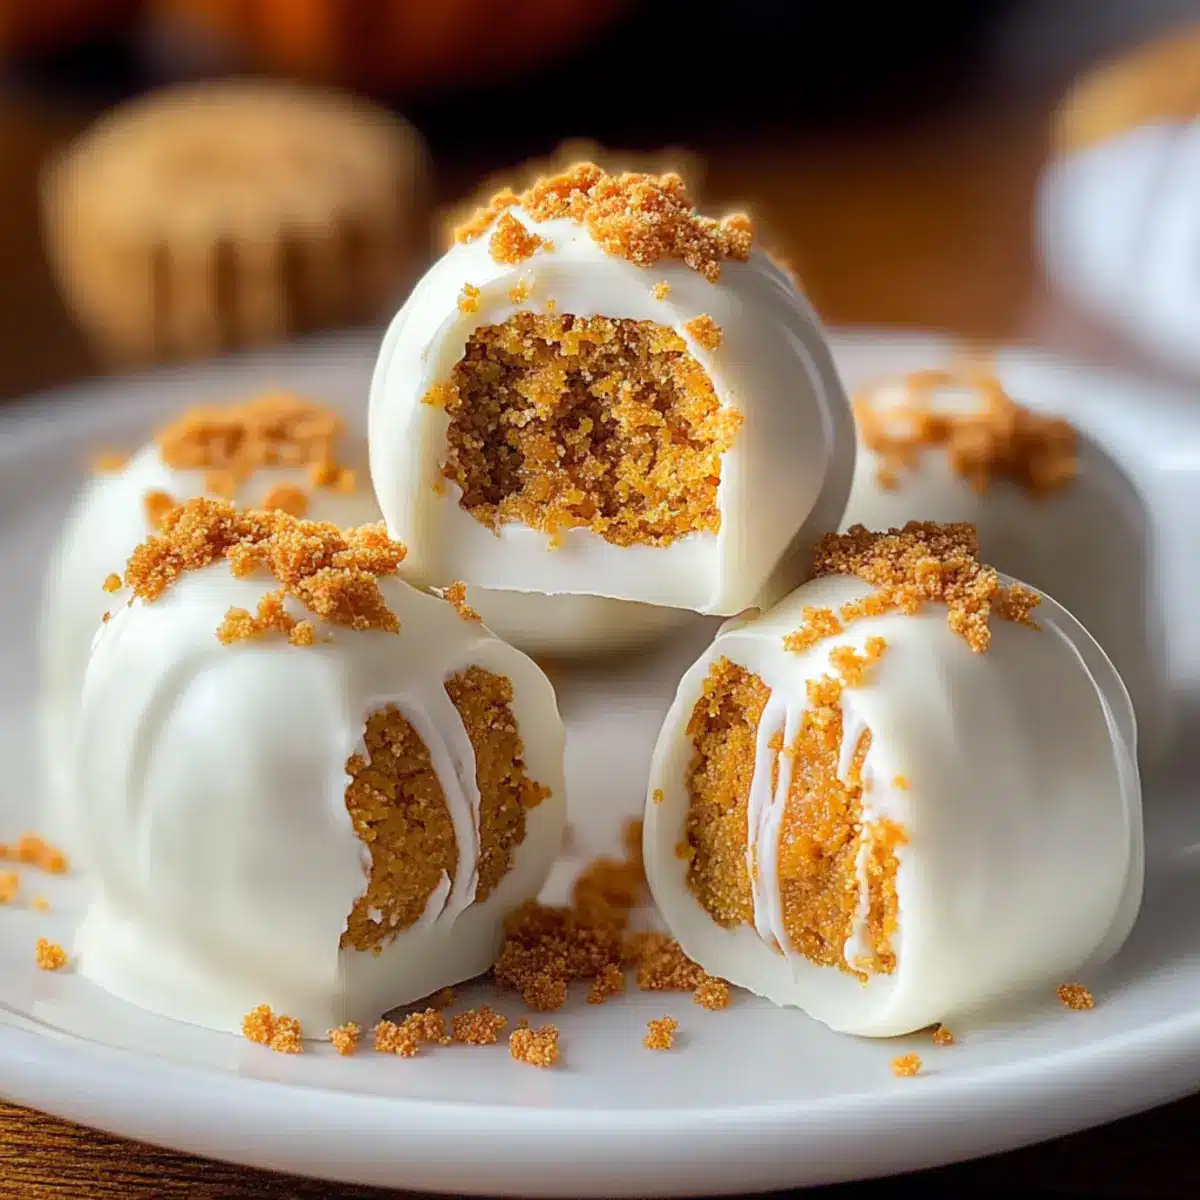
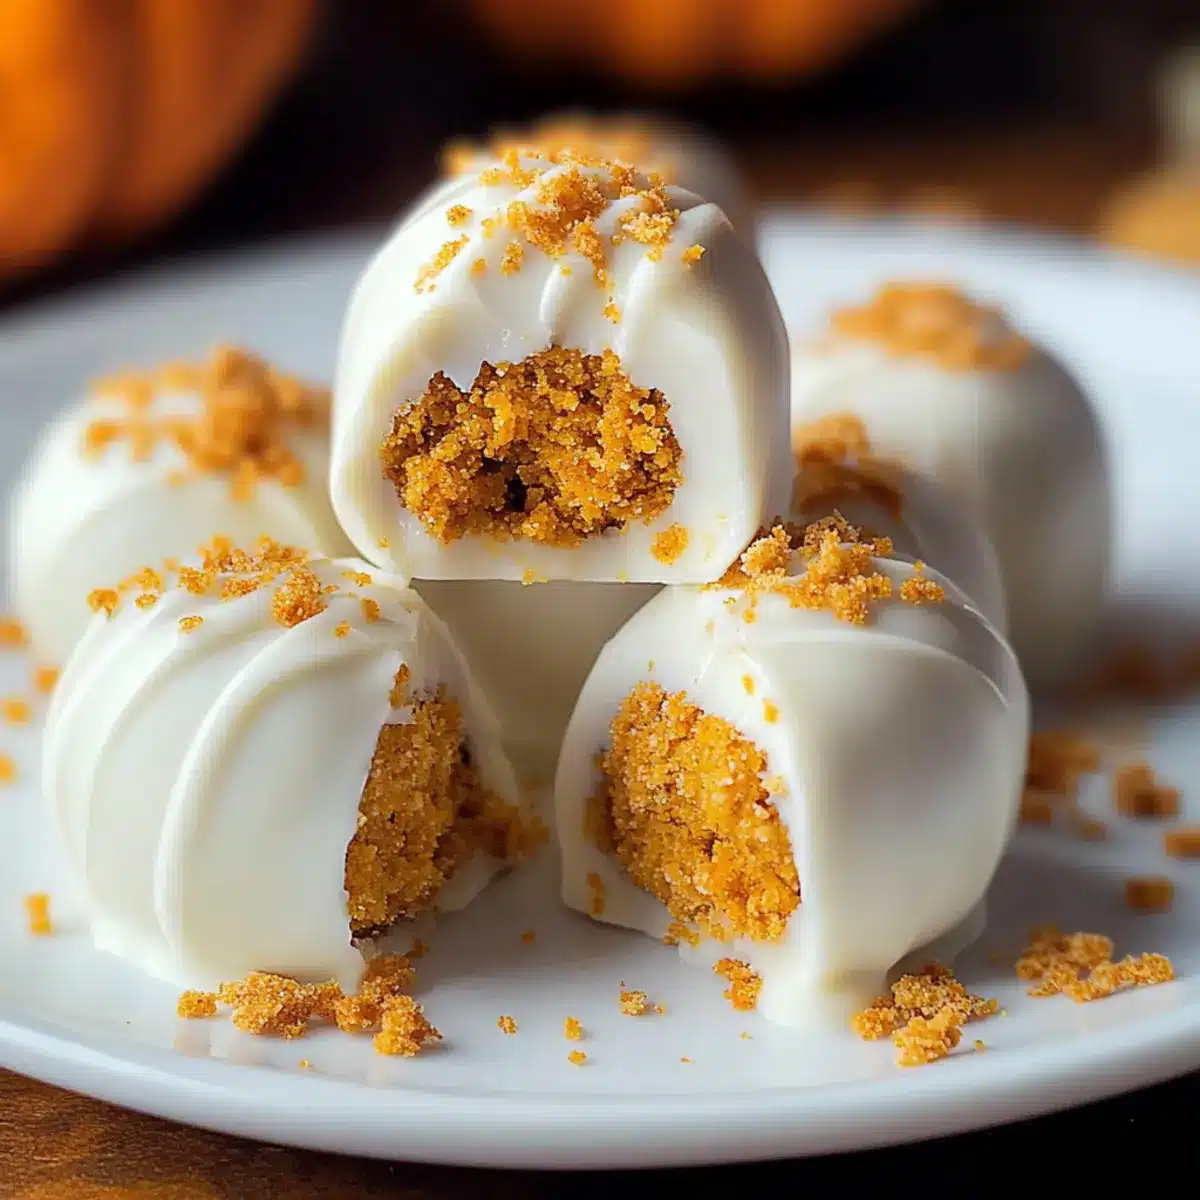
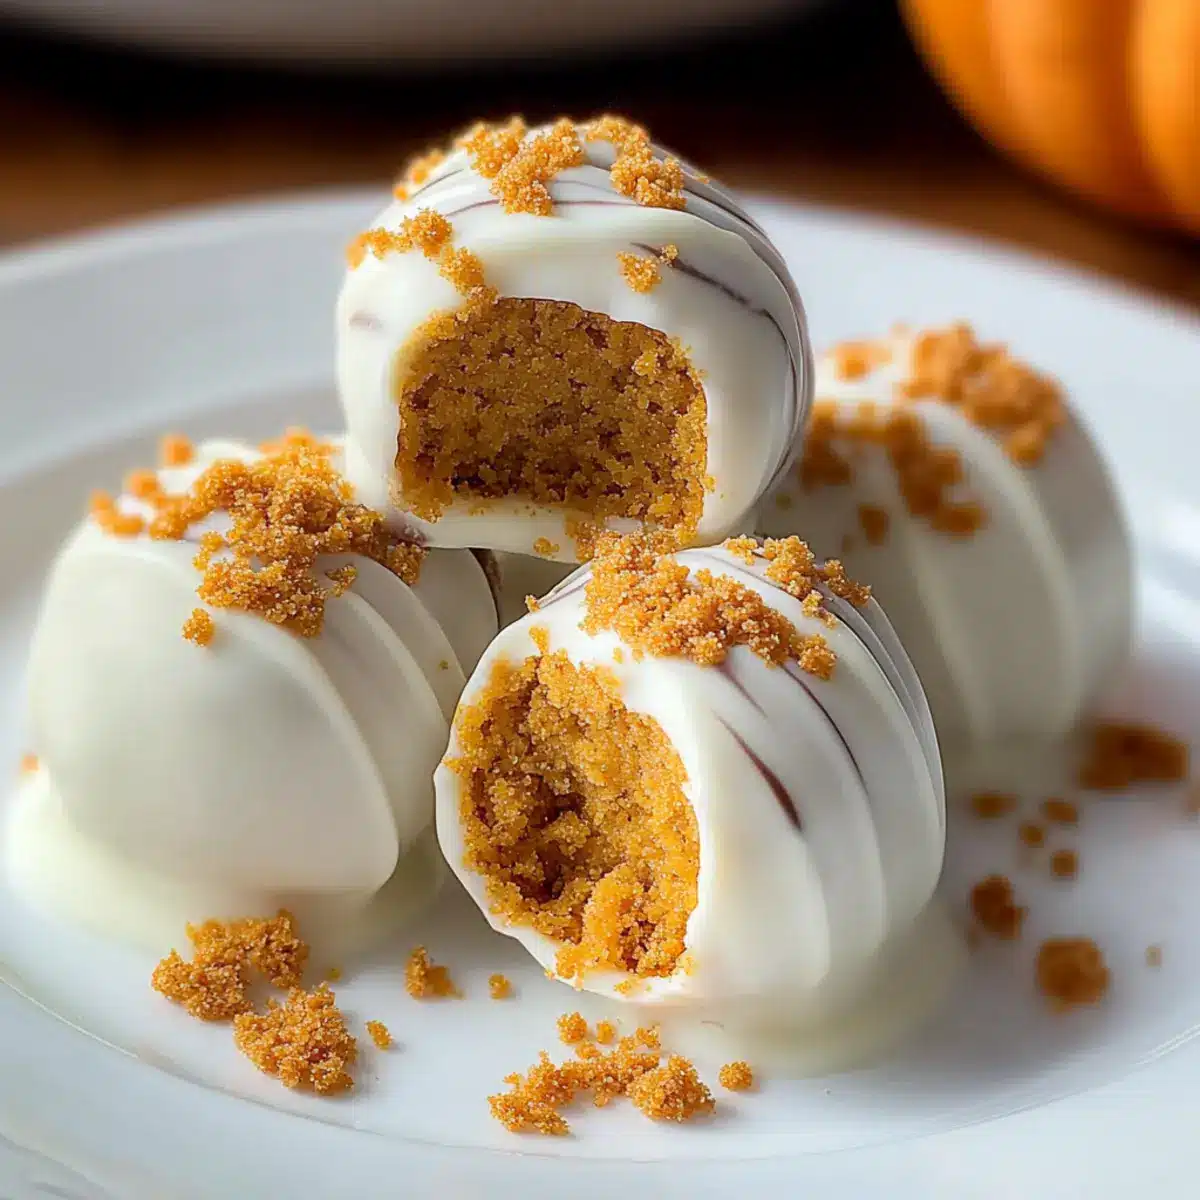
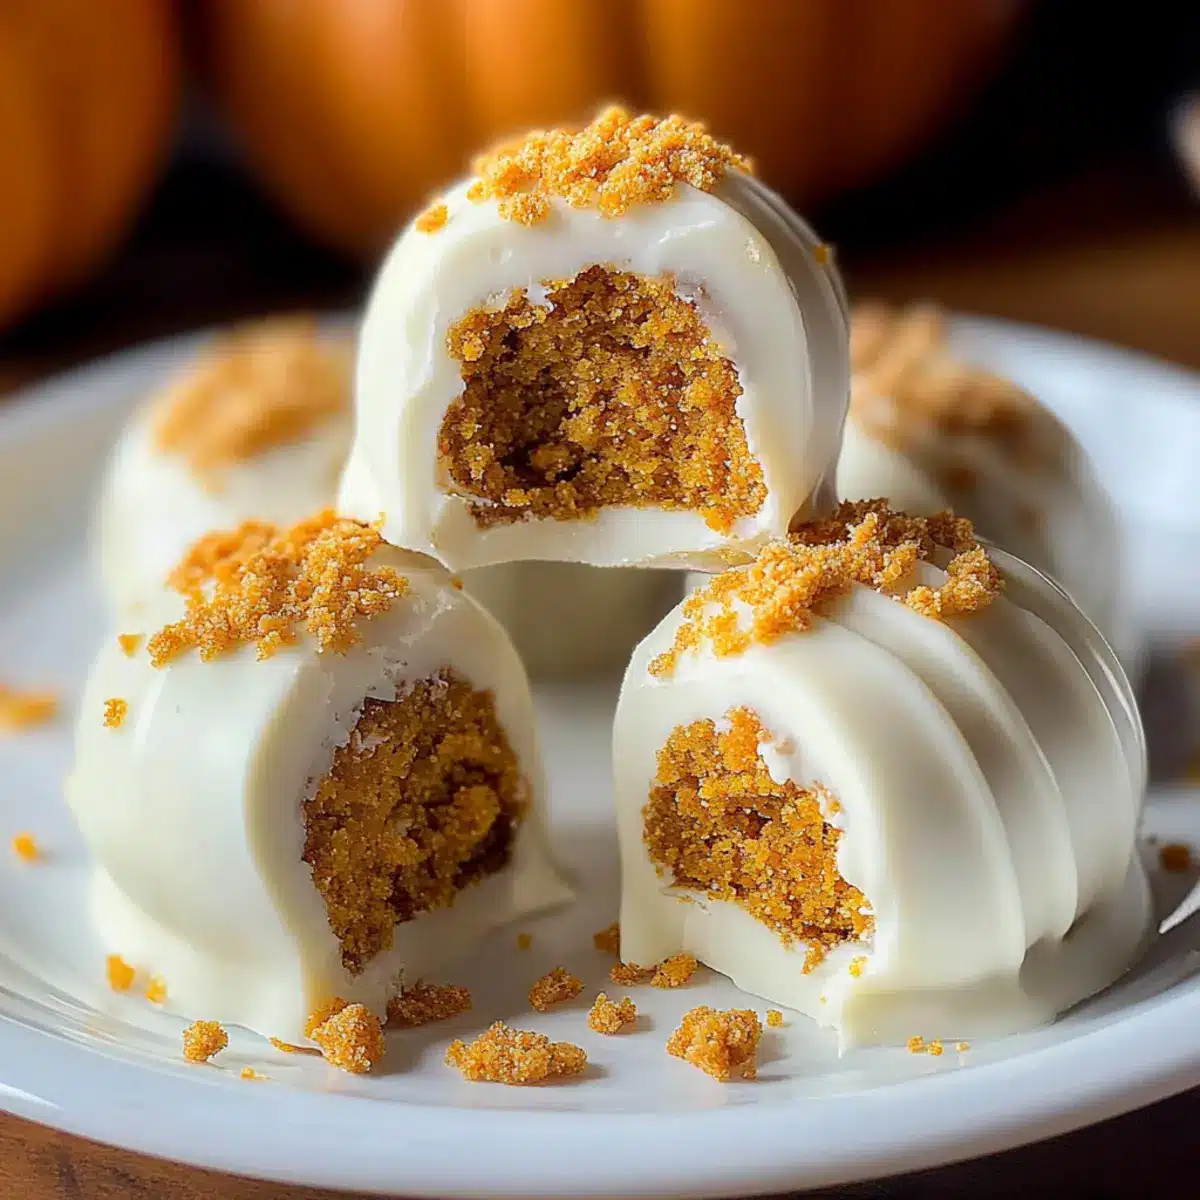
As the scent of autumn fills the air, I can’t help but think of cozy kitchens and sweet treats. That’s where No Bake Pumpkin Balls come in, offering a delightful combination of pumpkin and cream cheese that captures the essence of fall flavors in a single bite. These easy desserts not only come together in a snap, making them ideal for those last-minute gatherings, but they’re also a hit with kids and adults alike. With just a handful of ingredients, you’ll whip up creamy, dreamy bites that evoke memories of pumpkin pie and cheesecake. Are you ready to discover how simple it is to create this irresistible treat?
Why Are No Bake Pumpkin Balls Perfect?
Effortless Preparation: Making these No Bake Pumpkin Balls takes minimal time and effort, so you can focus on enjoying the fall season rather than stressing over complicated desserts.
Kid-Friendly Fun: These sweet bites are not only delicious but also a hit with kids, making them a fantastic addition to lunchboxes or festive gatherings.
Versatile Flavors: Feel free to customize with different spices or toppings—try adding nuts or dark chocolate for a delightful twist!
Creamy Indulgence: With a luscious cream cheese base paired with the warm spice of pumpkin, each bite is a creamy, dreamy experience that perfectly captures autumn.
Perfect for Sharing: These treats present beautifully on a platter, making them the ideal centerpiece for holiday parties or casual get-togethers. Pair them with a Spicy Chorizo Pumpkin for an unforgettable fall feast!
No Bake Pumpkin Balls Ingredients
• Create your perfect No Bake Pumpkin Balls with these simple ingredients!
For the Pumpkin Mixture
- Cream Cheese – Provides creaminess and richness; make sure it’s softened for easy mixing.
- Powdered Sugar – Adds sweetness and a smooth texture; adjust based on your desired sweetness level.
- Pumpkin Puree – The star ingredient that gives these balls their delicious fall flavor.
- Graham Cracker Crumbs – Adds structure and texture; substitute with gluten-free crumbs if needed.
- Pumpkin Pie Spice – Enhances the pumpkin flavor with warming spices; can be swapped with cinnamon, nutmeg, and ginger if desired.
- Cinnamon – Adds a spiced warmth; feel free to increase or decrease according to taste.
For the Coating
- White Chocolate Chips – Coating for the balls, adding sweetness and a rich finish; dark chocolate can be used for a different flavor.
- Coconut Oil (optional) – Helps to thin melted chocolate for easier coating; omit if you don’t have it on hand.
With these ingredients at your fingertips, you’re just a few steps away from creating delightful No Bake Pumpkin Balls that celebrate the essence of fall!
Step‑by‑Step Instructions for No Bake Pumpkin Balls
Step 1: Mix the Creamy Base
In a mixing bowl, beat together 8 oz of softened cream cheese and 1 cup of powdered sugar until the mixture is smooth and creamy, about 2-3 minutes. Ensure there are no lumps, and the texture is beautiful and velvety. This creamy base will be the foundation for the delicious No Bake Pumpkin Balls.
Step 2: Add Pumpkin and Spices
Incorporate 1 cup of pumpkin puree, 1 teaspoon of pumpkin pie spice, and ½ teaspoon of cinnamon into the cream cheese mixture. Mix until all the ingredients are fully combined and the mixture reaches a uniform consistency. The warm autumnal scent of pumpkin and spices should fill your kitchen, setting the perfect atmosphere.
Step 3: Incorporate Graham Cracker Crumbs
Stir in 1 cup of graham cracker crumbs, ensuring the mixture is well combined. The crumbs should be fully integrated, adding texture to your No Bake Pumpkin Balls. As you stir, envision the delightful bites you’ll create; the mixture should be thick yet manageable.
Step 4: Chill the Mixture
Cover the bowl with plastic wrap and refrigerate the pumpkin mixture for at least 30 minutes. This chilling time allows the flavors to meld beautifully and makes rolling the mixture into balls much easier. When ready, it should be slightly firmer and cooler to the touch.
Step 5: Shape the Balls
Line a baking sheet with parchment paper. Once chilled, use a tablespoon to scoop out heaping amounts of the mixture and roll them into balls, about 1 inch in diameter. Place the formed balls on the lined baking sheet, arranging them so they are spaced apart to allow for chocolate coating later.
Step 6: Chill Again
Put the baking sheet with the formed pumpkin balls back into the refrigerator for another 30 minutes. This step ensures that they hold their shape while being dipped in chocolate. When you take them out, they should feel firm and slightly cold.
Step 7: Melt the Coating
In a microwave-safe bowl, melt 1 cup of white chocolate chips in 30-second intervals, stirring frequently until the chocolate is completely smooth and glossy. Be cautious to avoid overheating the chocolate, as it can seize; it should be silky and inviting for coating the No Bake Pumpkin Balls.
Step 8: Dip the Pumpkin Balls
Carefully dip each chilled pumpkin ball into the melted chocolate, using a fork to ensure an even coating. Allow the excess chocolate to drip off before placing them back on the parchment paper. This step creates a delightful shell around your creamy pumpkin filling, enhancing the overall flavor and texture.
Step 9: Add Final Touches
If desired, drizzle any remaining melted chocolate over the dipped pumpkin balls for added flair. Feel free to sprinkle some additional graham cracker crumbs or fall-themed sprinkles on top while the chocolate is still soft. These finishing touches will give your No Bake Pumpkin Balls a festive, eye-catching appeal.
Step 10: Allow to Harden
Let the decorated pumpkin balls chill in the refrigerator until the chocolate coating is completely firm, about 20-30 minutes. Once set, these delectable treats are ready to be served and enjoyed, offering a delightful blend of flavors that perfectly encapsulates the spirit of fall.
No Bake Pumpkin Balls: Customize Your Treats
Feel free to explore these delightful variations to make the No Bake Pumpkin Balls truly your own!
-
Nutty Crunch: Add ½ cup of finely chopped pecans or walnuts for a satisfying crunch. The nuts will provide an additional layer of texture that complements the smooth creaminess.
-
Spice It Up: Swap the pumpkin pie spice for 1 teaspoon of chai spice for a warm, aromatic twist. This change will elevate the flavor profile, giving it a more exotic flair.
-
Dark Chocolate Dip: Use dark chocolate chips instead of white chocolate for a richer, more decadent coating. The bittersweet contrast works beautifully with the sweetness of the filling.
-
Coconut Coating: Roll the chilled balls in unsweetened shredded coconut for a tropical touch. This addition enhances the flavor and adds extra texture with each bite.
-
Peanut Butter Swirl: Mix ¼ cup of creamy peanut butter into the filling for a nutty flavor boost. This twist will give your pumpkin balls an irresistible, creamy indulgence that’s hard to resist.
-
Add Some Heat: For a little kick, include a pinch of cayenne pepper to the pumpkin mixture. Just a dash creates a surprising yet delightful end note that will keep your taste buds intrigued.
-
Fruit Infusion: Fold in ½ cup of dried cranberries or raisins to add bursts of sweetness and a chewy texture. This fruity addition is also a great way to boost the nutritional value!
-
Additional Flavor: Enhance each ball with a touch of vanilla extract. Just a teaspoon will harmonize the flavors beautifully and bring an exquisite aroma to your delicious treats.
As you create your No Bake Pumpkin Balls, remember to think about pairing them with other festive recipes like French Onion Chicken Rice Bake or adding them to a dessert platter alongside Mint Chocolate Balls for a harmonious fall feast!
Make Ahead Options
These No Bake Pumpkin Balls are perfect for meal prep enthusiasts! You can prepare the pumpkin mixture up to 24 hours in advance. Simply follow the initial steps of mixing the cream cheese, powdered sugar, pumpkin puree, and spices, then cover and refrigerate (this helps to meld the flavors). When it’s time to finish, scoop and roll the mixture into balls, chill again, and dip in melted white chocolate. For optimal quality, store the formed and dipped pumpkin balls in an airtight container in the fridge for up to 5 days or freeze for up to 2 months. This way, they’ll be just as delicious and ready to impress your family or guests with minimal effort!
Storage Tips for No Bake Pumpkin Balls
Fridge: Store your No Bake Pumpkin Balls in an airtight container in the refrigerator for up to 5 days. This keeps them fresh and delicious for those spontaneous sweet cravings.
Freezer: For long-term storage, freeze the pumpkin balls in a single layer on a baking sheet, then transfer to an airtight container for up to 2 months. They make for a quick thaw-and-serve dessert anytime!
Thawing: When you’re ready to enjoy frozen No Bake Pumpkin Balls, transfer them to the fridge for a few hours to thaw. This helps retain their creamy texture while ensuring they’re perfectly chilled.
Reheating: There’s no need to reheat these treats; simply enjoy them chilled or at room temperature. If you prefer a warm treat, use the microwave for a few seconds, but be careful not to melt the chocolate coating!
Tips for the Best No Bake Pumpkin Balls
Use Softened Cream Cheese: Ensure your cream cheese is at room temperature for a smooth mixture. Cold cream cheese can create lumps, affecting the texture of your No Bake Pumpkin Balls.
Chill Thoroughly: Don’t skip the chilling steps! Properly chilling the mixture makes it easier to roll into balls and allows the flavors to meld beautifully.
Watch Your Chocolate: Melt chocolate slowly and stir frequently to avoid overheating, which can cause it to seize. A smooth coating makes all the difference for your finished No Bake Pumpkin Balls.
Quality Graham Cracker Crumbs: For the best texture, crush your graham crackers finely. Larger pieces won’t hold together as well and can lead to a crumbly end product.
Customize for Flavor: Feel free to experiment with spices or add-ins like nuts or toasted coconut for a unique twist on the classic No Bake Pumpkin Balls.
What to Serve with No Bake Pumpkin Balls
As you savor these creamy treats, consider pairing them with delightful options that amplify the fall experience.
-
Creamy Mashed Potatoes: Their buttery texture complements the sweetness of the pumpkin balls, creating a comforting contrast that’s perfect for the season.
-
Roasted Brussels Sprouts: These nutrient-packed greens add a savory crunch, balancing the rich flavors of the No Bake Pumpkin Balls beautifully.
-
Hot Apple Cider: The warm spices in cider enhance the pumpkin flavors, making it an utterly cozy drink to accompany your sweets.
-
Cheesecake Bites: For an indulgent dessert platter, serve mini cheesecake bites alongside. Their creamy richness echoes the pumpkin balls’ texture while offering variety.
-
Nutty Granola: Sprinkle some crunchy granola around your pumpkin balls for a delightful textural contrast and a wholesome touch of earthiness.
-
Pumpkin Spice Latte: As a comforting drink option, a pumpkin spice latte captures the essence of fall, pairing seamlessly with the flavors of your dessert.
-
Caramel Dipping Sauce: For an extra layer of decadence, offer caramel sauce for drizzling or dipping, adding a sweet and salty kick that complements the pumpkin.
-
Vanilla Ice Cream: Serve a scoop of creamy vanilla alongside your pumpkin balls for a dreamy combination that’s always a crowd-pleaser.
-
Chocolate-Dipped Fruit: Fresh fruit, such as strawberries or bananas, dipped in chocolate, adds brightness and a touch of sweetness, balancing the rich flavors of the pumpkin balls.
These pairing ideas will help you create a memorable fall feast, bringing warmth and joy to your table.
No Bake Pumpkin Balls Recipe FAQs
What’s the best way to choose pumpkin puree?
Absolutely! When selecting pumpkin puree, look for cans labeled “100% pumpkin” rather than “pumpkin pie filling,” which contains added sugars and spices. For a fresher option, consider using homemade pumpkin puree. To make it, roast a pie pumpkin in the oven at 375°F for about 45-60 minutes, cool it, then scoop out the flesh and blend until smooth.
How should I store leftover No Bake Pumpkin Balls?
I recommend keeping your No Bake Pumpkin Balls in an airtight container in the refrigerator to maintain their freshness. They will stay good for up to 5 days. If they are properly sealed, you won’t have to worry about them losing their creamy texture or flavor!
Can I freeze No Bake Pumpkin Balls?
Very! To freeze your No Bake Pumpkin Balls, place them in a single layer on a baking sheet and pop them in the freezer until solid, about 2 hours. Once frozen, transfer them to an airtight container or a freezer bag. They can be kept frozen for up to 2 months. When you’re ready to enjoy them, simply move them to the fridge to thaw for a few hours, so they retain their delicious creamy texture!
What should I do if my chocolate coating is too thick?
If your melted chocolate is too thick to coat the pumpkin balls smoothly, add a teaspoon of coconut oil or vegetable oil to the bowl of melted chocolate. This will thin it out, making it easier to coat the balls evenly. Stir well and check the consistency; it should become silky and smooth, perfect for that beautiful finish!
Are there any dietary considerations for pets regarding pumpkin?
Absolutely! While pumpkin is generally safe and even beneficial for dogs (it’s great for digestion), be cautious with the sugar content in your No Bake Pumpkin Balls. Ensure your furry friends only get plain pumpkin puree without added spices or sugar. As for cats, it’s best to stick to their regular diet, as they are more sensitive to changes in their food.
No Bake Pumpkin Balls: Creamy Fall Treats You’ll Love
Ingredients
Equipment
Method
- In a mixing bowl, beat together 8 oz of softened cream cheese and 1 cup of powdered sugar until smooth and creamy, about 2-3 minutes.
- Add 1 cup of pumpkin puree, 1 tsp of pumpkin pie spice, and ½ tsp of cinnamon, mix until fully combined.
- Stir in 1 cup of graham cracker crumbs until well integrated.
- Cover and refrigerate the mixture for at least 30 minutes.
- Line a baking sheet with parchment paper, use a tablespoon to scoop and roll the mixture into 1-inch balls.
- Refrigerate the balls for another 30 minutes.
- Melt 1 cup of white chocolate chips in a microwave-safe bowl in 30-second intervals until smooth.
- Dip each pumpkin ball in the melted chocolate, allow excess chocolate to drip off.
- Drizzle remaining melted chocolate over dipped pumpkin balls and sprinkle additional graham cracker crumbs if desired.
- Chill until the chocolate coating is firm, about 20-30 minutes.
Leave a Reply