
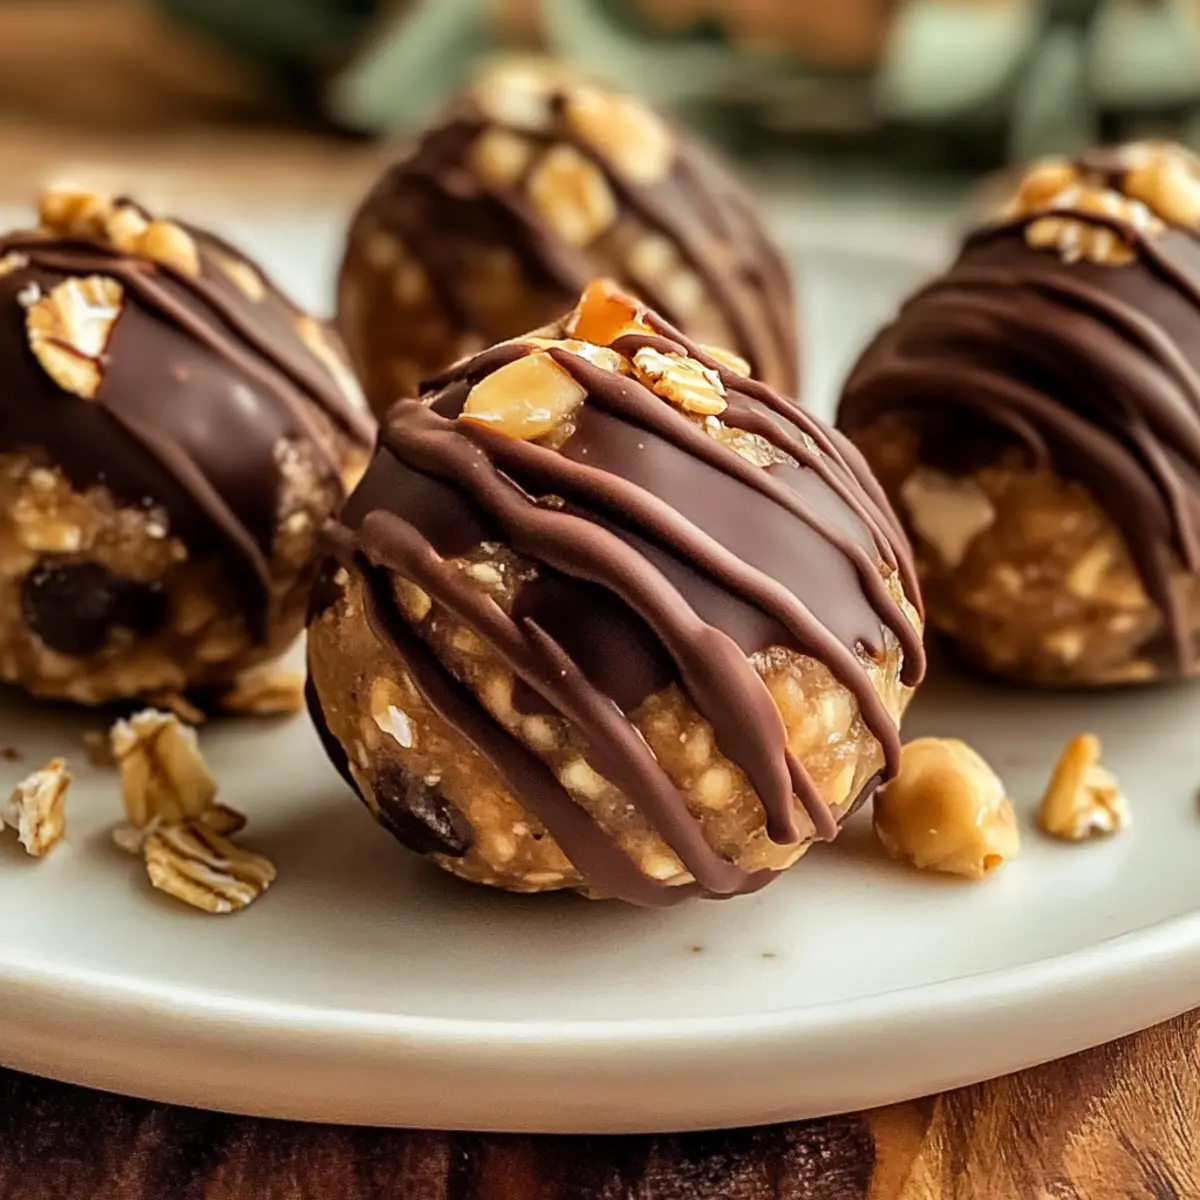
As I rummaged through my pantry during a busy afternoon, it struck me: the perfect snack was hiding in plain sight. Enter my Chocolate Peanut Butter Protein Balls! These no-bake delights whisk together wholesome ingredients into a delightful fusion of flavors, making them an ideal choice for those juggling a busy lifestyle while striving for clean eating. Not only are these little gems packed with high protein to keep you energized, but they also offer the convenience of quick prep—say goodbye to fast food guilt! Each recipe variation is designed to cater to various dietary needs, so whether you’re gluten-free, keto, or just seeking a healthier treat, there’s something here for everyone. Are you ready to elevate your snack game and satisfy those cravings? Let’s dive into these mouthwatering recipes!
Why Are These Protein Balls a Must-Try?
Convenient and Quick: These protein balls come together in a matter of minutes, making them the perfect solution for busy schedules.
Nutrient-Packed: Each bite is a burst of energy, filled with high-protein goodness to fuel your day.
Customizable Flavors: From the rich, chocolatey notes of our Chocolate Peanut Butter variation to fruity delights like dried mango, the options are endless!
Healthy Indulgence: Satisfy your sweet tooth without compromising your health goals—no refined sugars here!
Crowd-Pleaser: Whether for a post-workout snack or a healthy treat at the office, these bites are sure to impress anyone.
Chocolate Peanut Butter Protein Ball Ingredients
• Get ready to mix up deliciousness!
For the Base
- Peanut Butter – A creamy base that adds richness and binding; almond butter can substitute for a nut-free option.
- Rolled Oats – Provides structure and a chewy texture; gluten-free oats work great for those avoiding gluten.
- Protein Powder – Boosts protein content for sustained energy; choose whey or plant-based depending on your dietary needs.
- Honey or Maple Syrup – A natural sweetener that binds ingredients; for a vegan option, use agave syrup.
For the Flavor
- Cocoa Powder – Offers a rich chocolate flavor without added sugars; ensure it’s unsweetened for the best taste.
- Dark Chocolate Chips – Adds layers of chocolatey goodness; opt for dairy-free chips to keep it vegan.
- Dates – Naturally sweet with a caramel flavor and added fiber; Medjool dates are preferred for their softness.
For the Crunch
- Nuts (e.g., Almonds, Cashews) – Introduces crunch and healthy fats; you can substitute seeds like pumpkin or sunflower for nut-free snacks.
For Extra Flavor
- Spices (e.g., Cinnamon, Nutmeg) – Enhance flavor profiles; adjust amounts according to your taste preference.
- Fruit (e.g., Freeze-Dried Berries, Dried Mango) – Provides natural sweetness and flavor variety; look for no-sugar-added options for a healthier treat.
Step‑by‑Step Instructions for Chocolate Peanut Butter Protein Balls
Step 1: Combine Dry Ingredients
In a large mixing bowl, combine 1 cup of rolled oats, 1 scoop of protein powder, and 2 tablespoons of unsweetened cocoa powder. Stir these dry ingredients together until evenly mixed, helping to ensure the flavors distribute evenly. This mixture serves as the foundational base for your Chocolate Peanut Butter Protein Balls.
Step 2: Mix Wet Ingredients
In a separate bowl, blend together 1 cup of creamy peanut butter, 1/4 cup of honey, and a pinch of cinnamon until the mix is smooth and well combined. The creamy texture of the peanut butter combined with the liquid sweetness of honey will help bind your protein balls together and infuse them with flavor.
Step 3: Combine Mixtures
Pour the wet mixture into the bowl of dry ingredients, and mix well with a spatula or wooden spoon until no dry spots remain. The Chocolate Peanut Butter Protein Balls should start to form a dough-like consistency. If the mixture seems too crumbly, you can add an additional drizzle of honey for better binding.
Step 4: Add Mix-ins
Fold in 1/2 cup of dark chocolate chips and your choice of 1/4 cup of chopped nuts or dried fruit into the mixture. Gently incorporate these ingredients until they’re evenly distributed, ensuring every bite of your protein balls is packed with delightful bursts of flavor and texture.
Step 5: Shape into Balls
With clean hands, take small portions of the mixture—about 1 tablespoon each—and roll them into bite-sized balls. Aim for uniform shapes so they chill evenly once placed in the refrigerator. This step is crucial for achieving the perfect texture in your Chocolate Peanut Butter Protein Balls.
Step 6: Chill & Store
Place the formed protein balls on a baking sheet lined with parchment paper, ensuring they don’t touch each other. Chill them in the refrigerator for at least 30 minutes, allowing them to firm up. Once set, transfer the Chocolate Peanut Butter Protein Balls to an airtight container for storage, where they can last up to a week in the fridge or longer if frozen.
Expert Tips for Chocolate Peanut Butter Protein Balls
- Ingredient Temperature: Ensure all ingredients are at room temperature for easier mixing. Cold or hard ingredients can lead to a lumpy texture.
- Mixing Technique: Be careful not to over-mix once the wet and dry ingredients combine, as this can affect the texture of your no-bake protein balls.
- Uniform Size: Use a small cookie scoop to shape your protein balls evenly; this ensures they chill consistently and have a similar texture.
- Storage Solution: Keep your protein balls in an airtight container in the fridge, where they should stay fresh for up to a week, or freeze for longer storage.
- Customization Freedom: Feel free to experiment with different mix-ins like seeds or dried fruit to create your signature Chocolate Peanut Butter Protein Balls.
Storage Tips for Chocolate Peanut Butter Protein Balls
Fridge: Store your protein balls in an airtight container in the refrigerator for up to 1 week. This keeps them fresh and ready for snacking anytime!
Freezer: For longer storage, freeze the chocolate peanut butter protein balls for up to 3 months. Place them in a single layer on a baking sheet to freeze individually before transferring to a container.
Thawing: To enjoy, simply remove the desired amount from the freezer and let them sit at room temperature for about 10-15 minutes before serving.
Reheating: There’s no need to reheat these protein balls, as they are best enjoyed cold and chewy directly from the fridge or freezer!
What to Serve with Chocolate Peanut Butter Protein Balls
These delightful energy bites can be the star of your snack lineup, perfect for complementing a balanced meal or snack time!
-
Fresh Fruit Salad: Bright, juicy fruits like berries and melons offer refreshing sweetness that balances the rich chocolate of the protein balls. The natural sugars provide an added energy boost, making this duo a perfect pick-me-up.
-
Greek Yogurt Parfait: Layering creamy Greek yogurt with granola and nuts adds a delightful texture contrast. Drizzle honey on top for a sweet finish that enhances the flavors of the protein balls.
-
Protein Smoothie: Blend spinach, banana, almond milk, and a scoop of protein powder for a nutrient-packed drink. This combination ensures a filling snack that keeps you energized throughout the day.
-
Hummus with Veggies: A savory option! Pair your protein balls with crunchy carrots and bell pepper slices dipped in hummus for a perfect mix of sweet and savory. This balance also keeps your meal interesting and fun.
-
Oatmeal Bowl: A warm bowl of oatmeal topped with your favorite nuts, seeds, and a dollop of peanut butter creates a satisfying breakfast. It harmonizes beautifully with the protein balls for added texture and sustenance.
-
Dark Chocolate-Covered Nuts: If you’re craving more chocolate, indulge in dark chocolate-covered almonds or cashews. This snack harmonizes well with your energy bites, enhancing that chocolatey experience.
-
Nut Milk: Pair these protein balls with a glass of almond or cashew milk. The creamy, nutty flavor is a comforting companion to the rich taste of the chocolate peanut butter bites.
-
Chai or Herbal Tea: Warm up with a soothing cup of chai or herbal tea. The spices in the tea match the deep flavors of the protein balls, making for a cozy snack pairing.
-
Energy Bars: For a more substantial option, consider pairing with your favorite homemade or store-bought energy bar. This combo helps to keep your snacking exciting and helps you check off those protein goals!
Variations & Substitutions for No-Bake Protein Balls
Feel free to personalize these delicious no-bake protein balls with creative twists that tickle your taste buds!
-
Nut-Free: Substitute peanut butter with sunflower seed butter to make a delightful nut-free version that maintains all the creaminess.
-
Gluten-Free: Use certified gluten-free rolled oats to make these protein balls accessible for those with gluten sensitivities. Nothing says healthy snacking like a little customization!
-
Vegan-Friendly: Swap honey for agave syrup to cater to vegan diets, satisfying sweet cravings without adding any animal products. Sweetness knows no bounds when it’s plant-based!
-
Flavor Boost: Add a teaspoon of vanilla extract or a sprinkle of cinnamon for extra flavor depth, making these snacks even more aromatic and delightful.
-
Texture Variation: Mix in chia seeds or ground flaxseeds for added crunch and fiber, creating a delightful chewiness that’ll keep you coming back for more.
-
Seasonal Twist: Embrace the flavors of the season! Use pumpkin spice in fall or lemon zest in summer to make your no-bake protein balls fittingly festive.
-
Chocolate Lovers: Opt for chocolate protein powder instead of vanilla to enhance that chocolatey goodness throughout your protein balls, creating a deep, satisfying experience.
-
Additional Fruits: Toss in other dried fruits like cranberries or apricots to introduce a delightful tang and sweetness, enhancing both the flavor and texture of each bite.
As you explore these variations, consider trying them alongside other treats like Cookie Butter Cheesecake or even after a serving of Cowboy Butter Chicken. Simple adaptability makes these protein balls a go-to energy boost on any occasion!
Make Ahead Options
These Chocolate Peanut Butter Protein Balls are a fantastic choice for meal prep enthusiasts! You can prepare the base mixture—combining the oats, protein powder, and wet ingredients—up to 24 hours in advance; simply store it in an airtight container in the refrigerator. For optimal quality, remember to mix in any chocolate chips, nuts, or dried fruits right before shaping the balls to keep them fresh and prevent any undesired moisture. When you’re ready to serve, just roll into balls and chill for at least 30 minutes. This way, you can have your snacks ready in no time, making it easier to grab a healthy bite on your busy days!
Chocolate Peanut Butter Protein Balls Recipe FAQs
What kind of peanut butter is best for protein balls?
I recommend using creamy peanut butter for a smooth texture that helps bind the ingredients together. If you’re looking for a nut-free option, almond butter works wonderfully, providing a similar creaminess without compromising flavor.
How long can I store my protein balls?
You can store your Chocolate Peanut Butter Protein Balls in an airtight container in the fridge for up to 1 week. If you want to keep them longer, they freeze beautifully for up to 3 months! Just make sure to place them in a single layer on a baking sheet to freeze individually before transferring them to a container.
Can I substitute the protein powder?
Absolutely! Feel free to use any protein powder you prefer – be it whey, casein, or plant-based. Each will provide a unique flavor and nutritional profile, and you can even choose a flavored protein powder like chocolate or vanilla for extra taste!
What if my mixture is too crumbly?
If your mixture seems a bit on the dry side, don’t worry! You can add an extra drizzle of honey or a splash of almond milk to help bind it. Mix well and check the consistency; it should form a dough-like texture that’s not too sticky but holds together well.
Are these protein balls suitable for people with nut allergies?
Yes! Simply substitute the nut butter (like peanut or almond) with sunflower seed butter or tahini for a nut-free version. Just ensure that any added ingredients, like chocolate chips, are also nut-free to avoid cross-contamination.
How do I thaw frozen protein balls?
To enjoy your frozen Chocolate Peanut Butter Protein Balls, just remove them from the freezer and let them sit at room temperature for about 10-15 minutes. This thawing period allows them to become deliciously chewy once again, perfect for a quick snack!
Irresistible Chocolate Peanut Butter Protein Balls for Energy Boost
Ingredients
Equipment
Method
- In a large mixing bowl, combine rolled oats, protein powder, and cocoa powder. Stir until evenly mixed.
- In a separate bowl, blend together peanut butter, honey, and a pinch of cinnamon until smooth.
- Pour the wet mixture into the dry ingredients, and mix well until no dry spots remain.
- Fold in dark chocolate chips and your choice of nuts or dried fruit until evenly distributed.
- With clean hands, take small portions of the mixture and roll them into bite-sized balls.
- Chill the formed protein balls on a baking sheet lined with parchment paper for at least 30 minutes.
Leave a Reply