
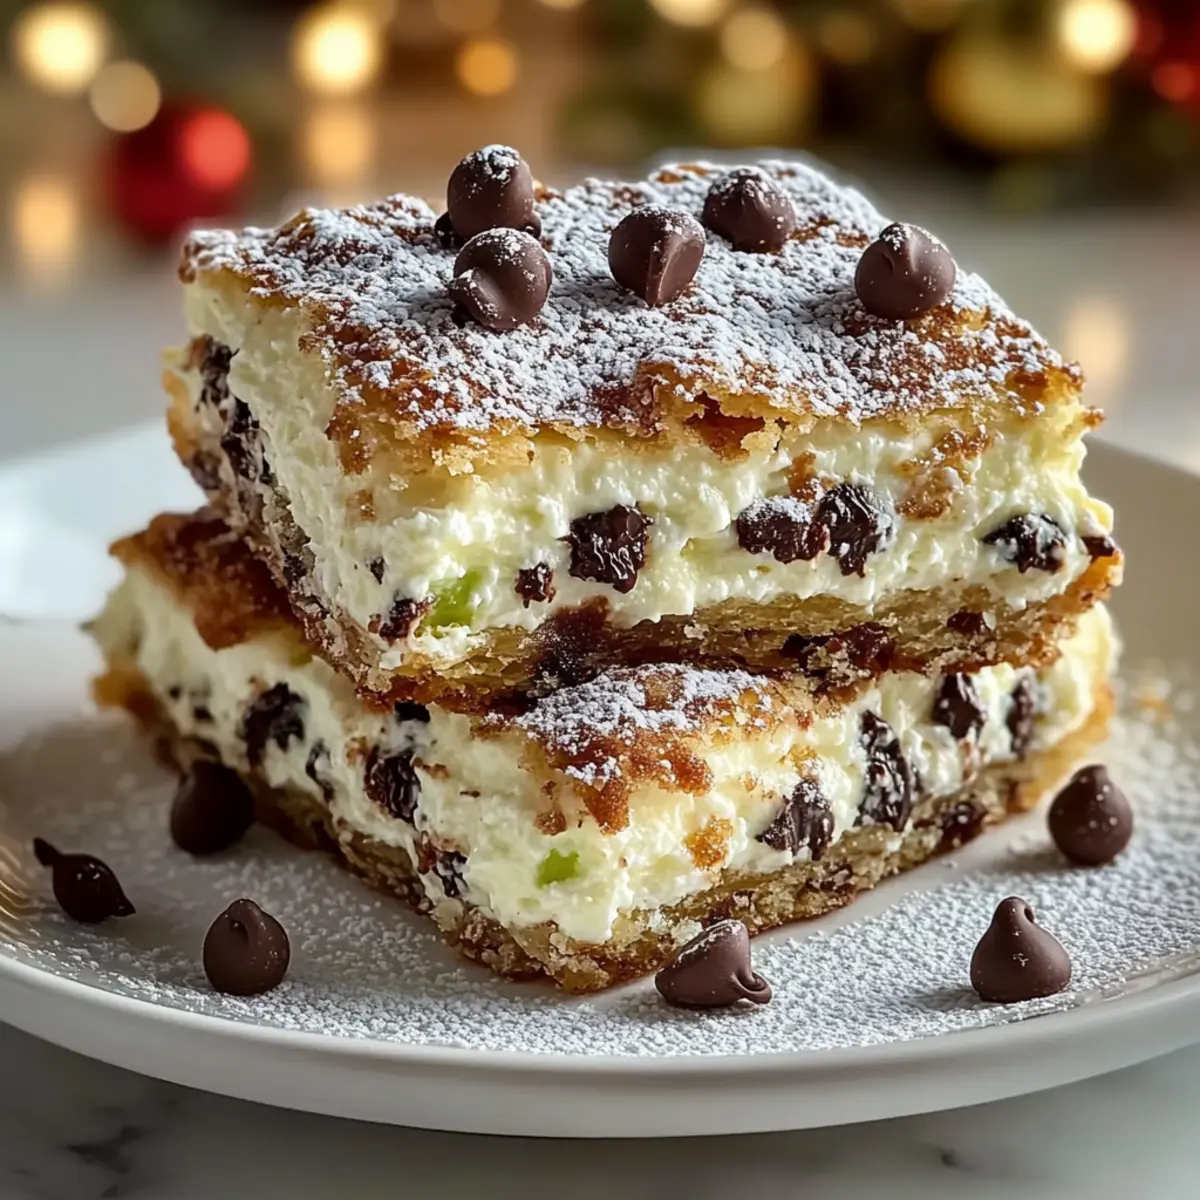
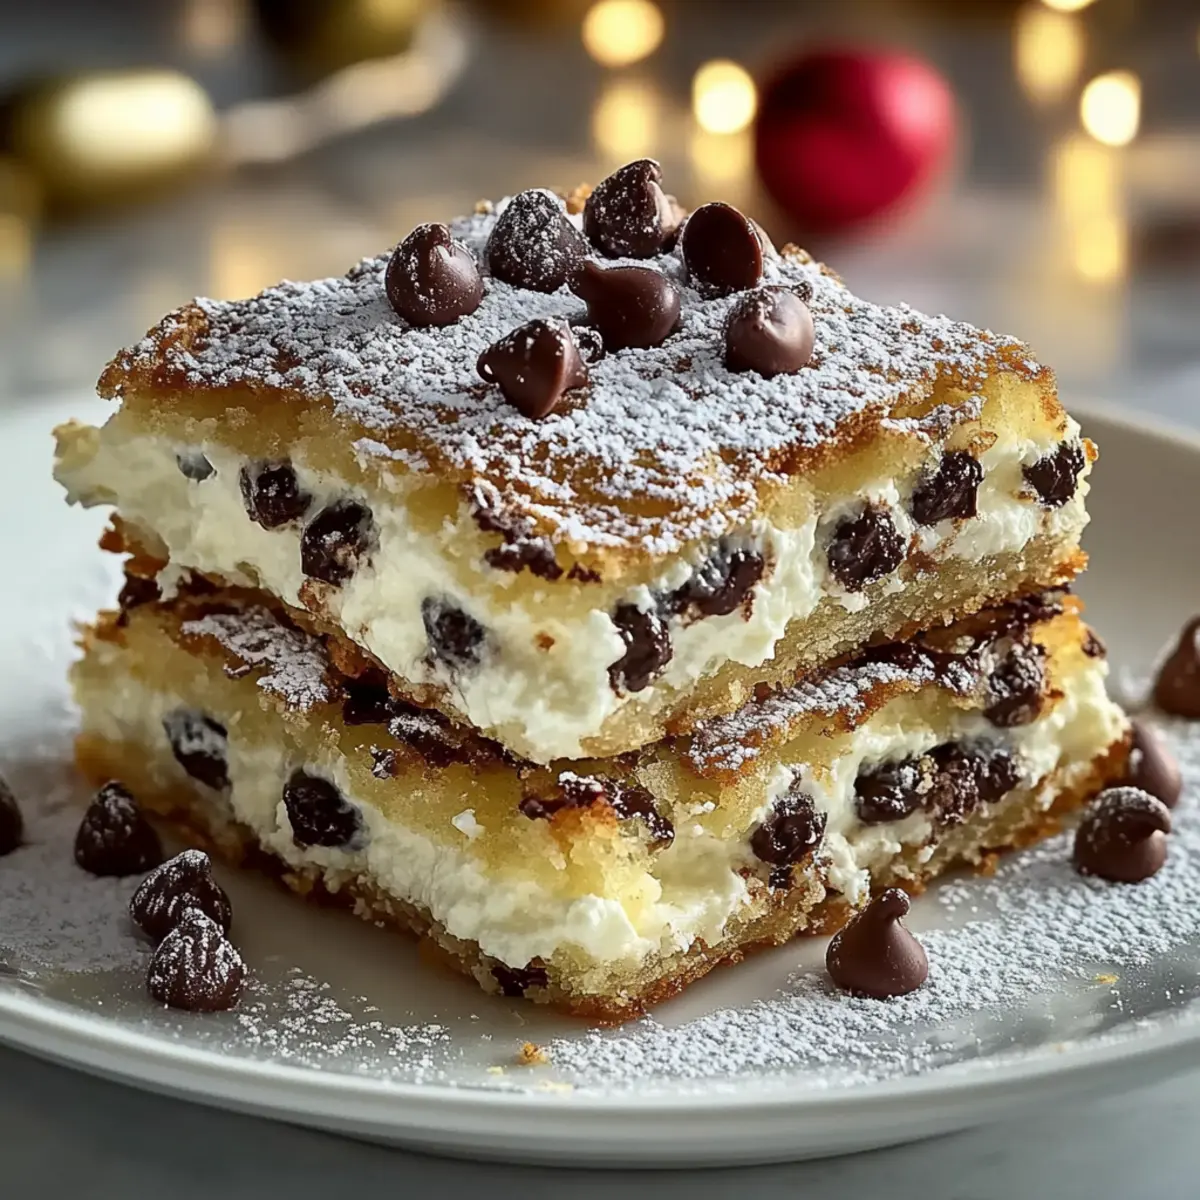
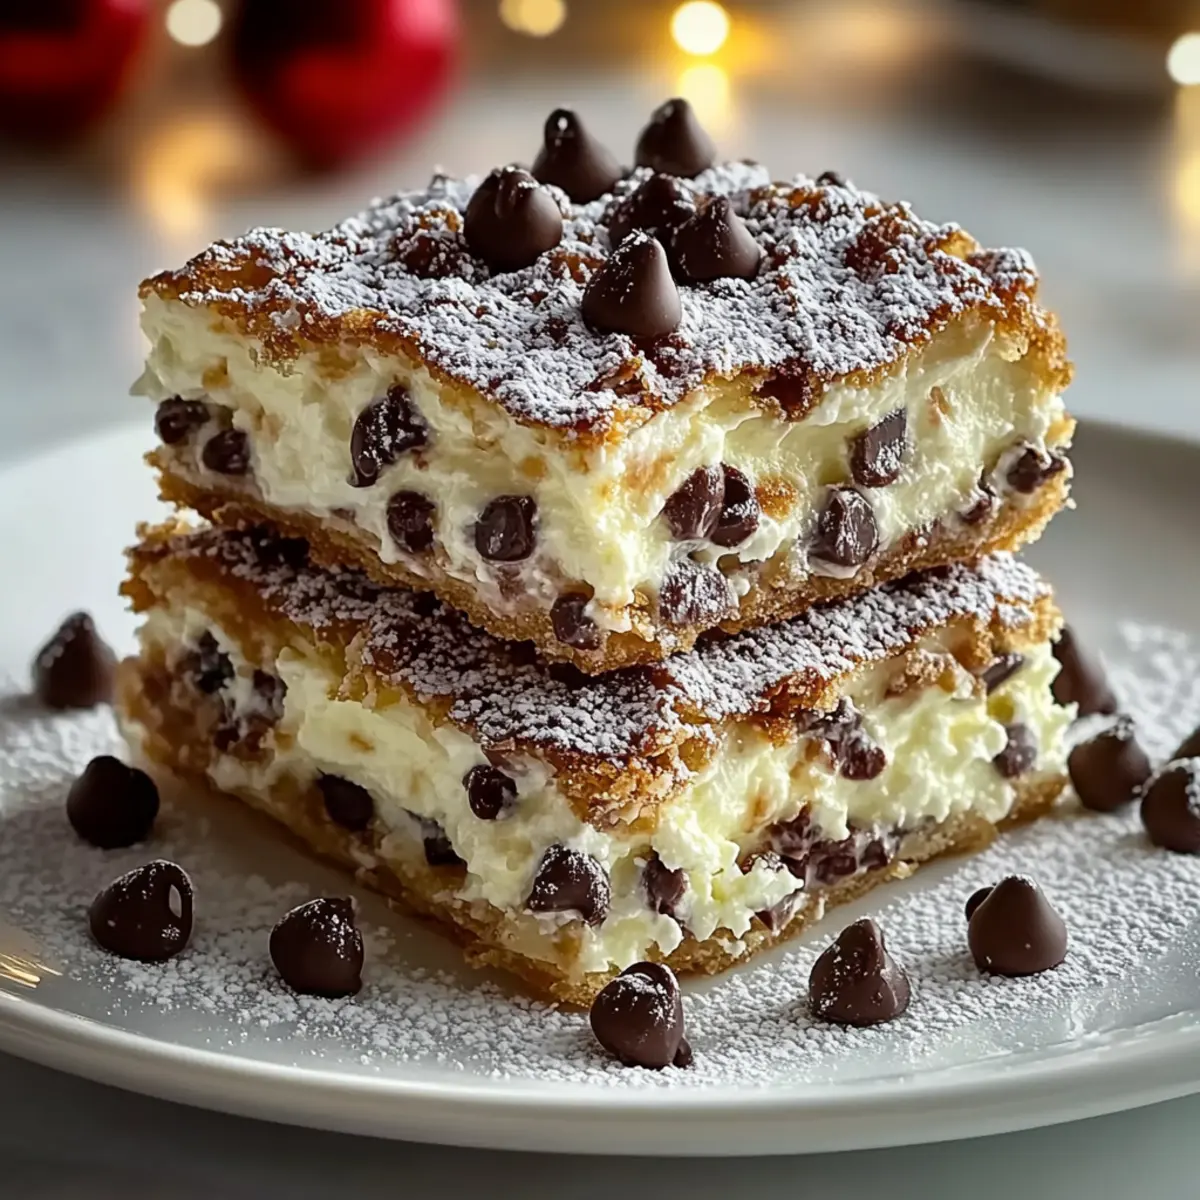
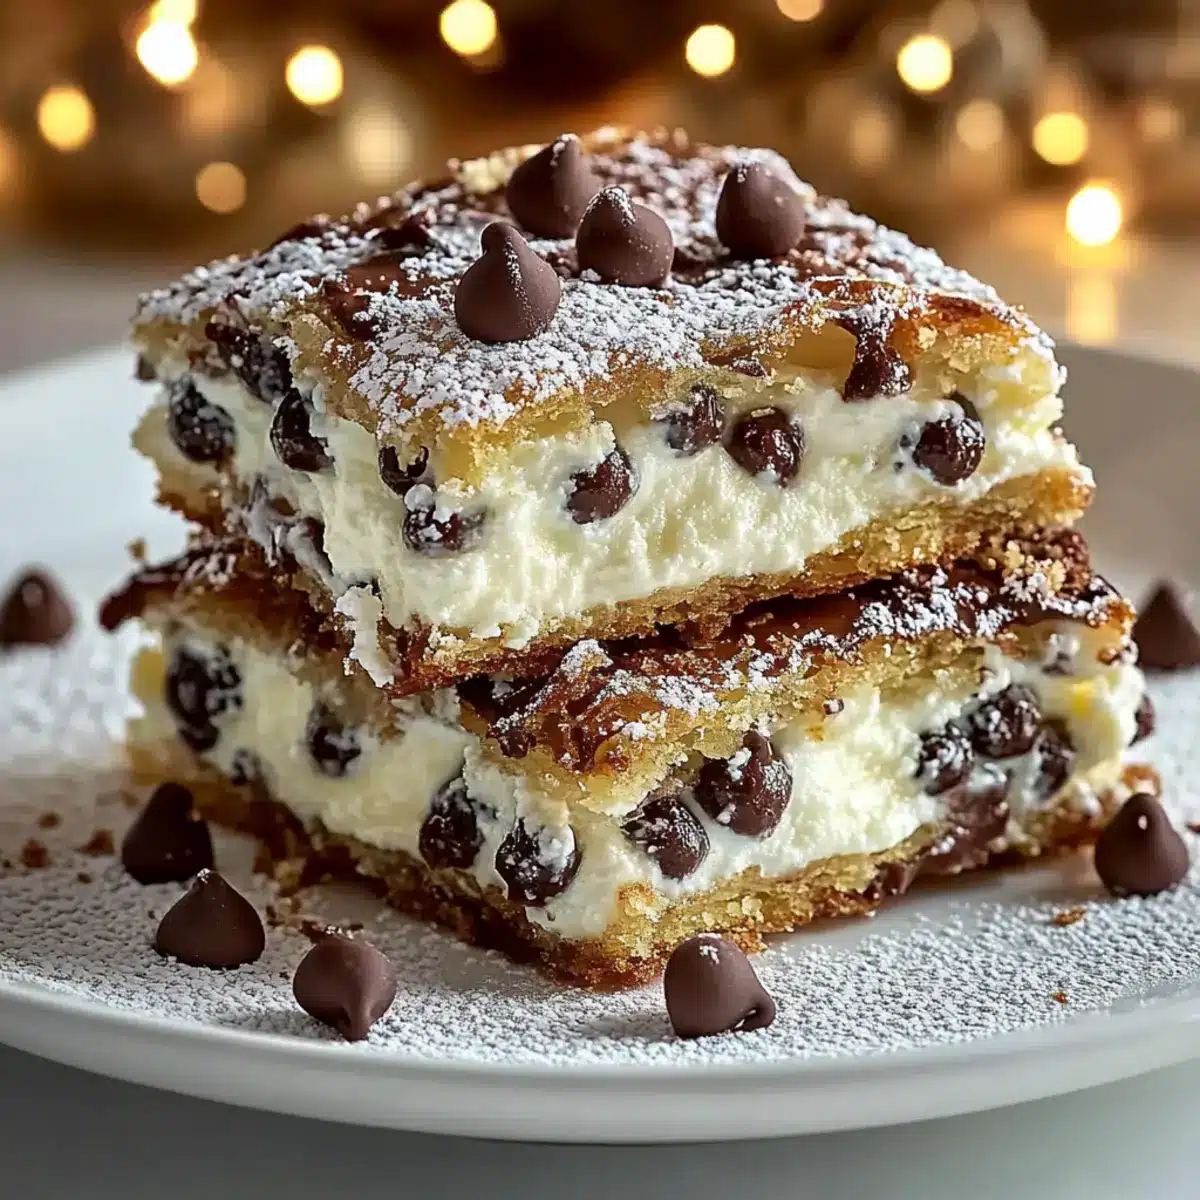
As I stood in my kitchen, balancing a bowl of creamy ricotta and fresh vanilla, the delicious aroma of nostalgia filled the air. Classic Cannoli Squares are my favorite way to celebrate those cherished Italian dessert moments without all the fuss of traditional frying. This simplified twist on the beloved cannoli offers the perfect fusion of a crispy crust and a velvety filling, making it an approachable dessert for any gathering. Plus, the ease of preparation allows me to whip these up in no time, ensuring I often steer clear of fast food cravings. Whether you’re planning a Sunday dinner or simply indulging yourself, these delightful squares promise to satisfy your sweet tooth while leaving you feeling accomplished in the kitchen. Curious to discover just how effortless this delectable dessert can be? Keep reading to unlock the secrets behind this must-try recipe!
Why Try Classic Cannoli Squares?
Simplicity: This recipe transforms the traditional cannoli into an easy-to-make dessert that anyone can tackle. You won’t need frying skills or complicated techniques here!
Flavorful Fusion: The combination of creamy ricotta, warm cinnamon, and mini chocolate chips creates a rich taste that perfectly complements the flaky crust.
Versatile Options: Want to put a unique spin on it? Try using mascarpone for a denser filling or add lemon zest for a refreshing twist.
Crowd-Pleaser: Serve these at your next gathering and watch them disappear faster than your favorite takeout!
Make-Ahead Friendly: These squares can be made a day in advance, no last-minute rushing required. Just prepare them ahead of time, and they’re ready to impress.
Dive into the deliciousness of these Classic Cannoli Squares and feel the joy of homemade desserts!
Classic Cannoli Squares Ingredients
To create these delightful treats, gather the essentials that will make your Classic Cannoli Squares shine!
For the Filling
• Ricotta Cheese – Provides creaminess and structure; whole milk ricotta enhances flavor, while low-fat offers a lighter option.
• Powdered Sugar – Adds sweetness and smooth texture; consider coconut sugar for a healthier alternative.
• Vanilla Extract – Elevates the overall flavor profile, making it irresistibly delicious.
• Cinnamon – Infuses warmth and depth into the filling, a classic cannoli touch.
• Mini Chocolate Chips – Introduces chocolate richness; swap for dark chocolate chips if you desire an indulgent boost.
For the Crust
• Pre-made Pie Crusts – Simplifies your baking process by forming the base and top layers; feel free to use homemade if preferred.
• Egg (beaten) – Serves as an egg wash for a shiny, golden finish on the top crust.
• Sugar – A sprinkle on top before baking adds a sweet touch and tempting crunch.
Optional Garnishes
• Chopped Pistachios – Adds a lovely crunch and vibrant color to your presentation.
• Maraschino Cherries – A classic garnish that incorporates an extra sweet pop!
• Extra Chocolate Chips – Perfect for decorating and elevating the chocolate experience.
With these ingredients, you’re well on your way to crafting delightful Classic Cannoli Squares that will wow your dessert table!
Step‑by‑Step Instructions for Classic Cannoli Squares
Step 1: Prepare the Filling
In a large mixing bowl, combine 2 cups of ricotta cheese, 1 cup of powdered sugar, 1 teaspoon of vanilla extract, 1 teaspoon of cinnamon, and ½ cup of mini chocolate chips. Using a spatula or hand mixer, blend until the mixture is smooth and creamy, about 2-3 minutes. This luscious filling will form the heart of your Classic Cannoli Squares, so ensure there are no lumps.
Step 2: Preheat the Oven
While your filling comes together, preheat your oven to 375°F (190°C). This step is essential to achieve that perfect golden crust on your Classic Cannoli Squares. A properly heated oven will help the crust rise and become flaky, giving your dessert the delightful texture it deserves.
Step 3: Roll Out the Pie Crust
Take one pre-made pie crust and gently press it into a 9×9-inch baking dish, ensuring an even layer over the bottom. Trim any excess crust hanging over the edges for a clean presentation. The crust should fit snugly in the dish as it will hold the delicious ricotta filling of your Classic Cannoli Squares beautifully.
Step 4: Add the Filling
Spread the ricotta filling evenly over the pressed pie crust, leaving a small border around the edges. Use a spatula to ensure the filling is smooth and spread evenly. This creamy layer is what makes the Classic Cannoli Squares so indulgent and rich, so take your time to get it just right!
Step 5: Prepare the Top Crust
Carefully place a second pie crust over the ricotta filling, sealing the edges with your fingers or using a fork to create a decorative pattern. Brush the top crust with a beaten egg for that beautiful golden shine and sprinkle sugar over the crust for added sweetness and crunch. This step enhances the visual appeal of your Classic Cannoli Squares, making them irresistible.
Step 6: Bake
Place the baking dish in the preheated oven and bake for 30-35 minutes, or until the top crust is golden brown and flaky. Keep an eye on it during the last few minutes, as oven temperatures can vary. The aroma wafting through your kitchen will signal that your Classic Cannoli Squares are almost ready!
Step 7: Cool and Serve
Once baked, remove the dish from the oven and let it cool at room temperature for at least 30 minutes. This cooling period allows the filling to set, making it easier to cut into squares. Once cooled, slice into squares and serve, perhaps garnishing with chopped pistachios or a sprinkle of extra chocolate chips for an elegant finish.
Expert Tips for Classic Cannoli Squares
• Drain the Ricotta: Ensure to drain excess moisture from ricotta before mixing; this prevents a soggy filling and achieves a perfect texture for your Classic Cannoli Squares.
• Watch the Crust: Keep an eye on the crust as it bakes; use a timer to check at 30 minutes to avoid over-baking and maintain that golden-brown finish.
• Cool Completely: Allow the squares to cool for at least 30 minutes before cutting; this helps the filling set and ensures cleaner slices, enhancing presentation.
• Customize Flavors: Don’t hesitate to personalize your filling with lemon zest or almond extract; these subtle touches can elevate your Classic Cannoli Squares to a whole new level.
• Storage Tips: Refrigerate any leftovers in an airtight container; these squares are great for snacking and stay delicious for days, making them a perfect make-ahead dessert!
Classic Cannoli Squares Variations & Substitutions
Get ready to personalize your dessert adventure with these delightful twists on Classic Cannoli Squares, ensuring every bite is a unique experience!
- Dairy-Free: Swap ricotta for a dairy-free alternative like cashew cream or coconut yogurt for a creamy texture without the dairy.
- Gluten-Free: Use gluten-free pie crusts to make this dessert accessible for those with gluten sensitivities.
- Fruit-Infused: Add chopped strawberries or diced peaches to the ricotta filling for a refreshing fruit twist that brightens each bite.
- Nutty Delight: Stir in finely chopped pistachios or walnuts into the filling for an extra layer of crunch and flavor.
- Spiced Up: Mix in a pinch of nutmeg along with the cinnamon; this adds a warm spice that beautifully complements the filling.
- Boozy Kick: Infuse your filling with a splash of amaretto or rum for a sophisticated twist that elevates your Classic Cannoli Squares to dessert perfection.
- Choco-Lover’s Dream: Substitute mini chocolate chips for crushed Oreos to create a cookie-inspired filling that’s wildly indulgent.
- Sugar-Free: Experiment with a sugar substitute like erythritol in place of powdered sugar to make a lower-calorie version without compromising sweetness.
For more tantalizing dessert ideas, don’t forget to check out my Chicken Buttered Noodles, which pairs beautifully with your luscious squarish creations! Customize to your heart’s delight and savor the unique flavors—your loved ones will be begging for more!
What to Serve with Classic Cannoli Squares?
As you prepare to delight your guests with this creamy treat, consider these perfect pairings to round out your meal.
-
Espresso: The rich, bold flavors of espresso beautifully complement the sweetness of the cannoli squares, offering a delightful contrast and making for a classic Italian duo.
-
Mixed Berry Salad: A refreshing, juicy berry salad adds vibrant color and lightness to your dessert spread, balancing the richness of the squares with its tartness.
-
Whipped Cream: A dollop of lightly sweetened whipped cream elevates the creaminess of the filling, creating a luxurious texture that enhances every bite of your cannoli squares.
-
Chocolate Ganache: Drizzling warm chocolate ganache over the squares adds an extra layer of indulgence, combining beautifully with the chocolate chips in the filling while appealing to chocolate lovers.
-
Pistachio Ice Cream: The nutty flavor and creamy texture of pistachio ice cream pair wonderfully with the cannoli, offering an elegant touch and a contrasting temperature experience.
-
Limoncello: A glass of chilled limoncello introduces a refreshing zing that complements the dessert’s sweetness, leaving your palate revitalized after each delectable square.
Transform your gathering into a sweet memory with these delightful additions, and watch as everyone savors every moment!
How to Store and Freeze Classic Cannoli Squares
Fridge: Store leftover Classic Cannoli Squares in an airtight container for up to 3 days. This keeps their creamy filling fresh while preserving the flaky crust.
Freezer: If you want to extend their life, freeze the squares for up to 2 months. Wrap them tightly in plastic wrap, then place in a freezer bag to prevent freezer burn.
Reheating: To enjoy after freezing, thaw in the fridge overnight. Reheat in the oven at 350°F (175°C) for about 10-15 minutes to revive that crispy crust without overcooking the filling.
Make-Ahead: Feel free to prepare these squares a day in advance. They taste even better after resting in the fridge, allowing all the flavors to meld beautifully!
Make Ahead Options
These Classic Cannoli Squares are perfect for meal prep enthusiasts! You can prepare the ricotta filling up to 24 hours in advance, storing it in an airtight container in the refrigerator to maintain its creamy texture. Additionally, you can assemble the entire dessert (filling and crust) and refrigerate it overnight before baking. When ready to bake, simply remove the dish from the fridge and allow it to sit at room temperature for 15-20 minutes to ensure even baking. Then, brush with the beaten egg, sprinkle sugar, and pop it in the oven. This way, you’ll enjoy a delicious dessert with minimal effort on busy days!
Classic Cannoli Squares Recipe FAQs
How do I choose the right ricotta cheese for Classic Cannoli Squares?
Absolutely! For the best flavor and texture, opt for whole milk ricotta cheese, as it provides a richer taste and creaminess. If you’re looking for a lighter option, low-fat ricotta can be used, but keep in mind that it may result in a less creamy filling.
How should I store leftover Classic Cannoli Squares?
You can store leftover squares in an airtight container in the refrigerator for up to 3 days. This helps maintain the freshness of the creamy filling while keeping the crust flaky, allowing you to enjoy them later without compromising on taste.
Can I freeze Classic Cannoli Squares?
Yes, you can absolutely freeze them! Wrap each square tightly in plastic wrap and then place them in a freezer bag to prevent freezer burn. They can last for up to 2 months. When you’re ready to enjoy, just let them thaw in the refrigerator overnight and reheat them in the oven at 350°F (175°C) for about 10-15 minutes.
What should I do if my crust is over-baking?
Very! Keep an eye on your Classic Cannoli Squares as they bake. Using a timer to check for browning at the 30-minute mark is essential. If it seems to be browning too quickly, you can cover the edges with aluminum foil to prevent over-baking while keeping the filling perfectly creamy.
Are there any common allergies to consider when making Classic Cannoli Squares?
Yes, it’s great to be mindful of dietary considerations. The main ingredients include dairy (ricotta and egg), which may not be suitable for those with lactose intolerance or dairy allergies. For a dairy-free option, you might experiment with vegan cream cheese as an alternative, though the flavor will change slightly. Always check ingredient labels for allergens!
Classic Cannoli Squares That Will Wow Your Dessert Table
Ingredients
Equipment
Method
- In a large mixing bowl, combine ricotta cheese, powdered sugar, vanilla extract, cinnamon, and mini chocolate chips. Blend until smooth and creamy for about 2-3 minutes.
- Preheat your oven to 375°F (190°C).
- Press one pie crust into a 9x9-inch baking dish, trimming excess crust.
- Spread the ricotta filling evenly over the pressed pie crust.
- Place the second pie crust over the filling, sealing edges and brushing with a beaten egg. Sprinkle sugar on top.
- Bake for 30-35 minutes until the top crust is golden brown and flaky.
- Let cool at room temperature for at least 30 minutes before slicing into squares.
Leave a Reply