
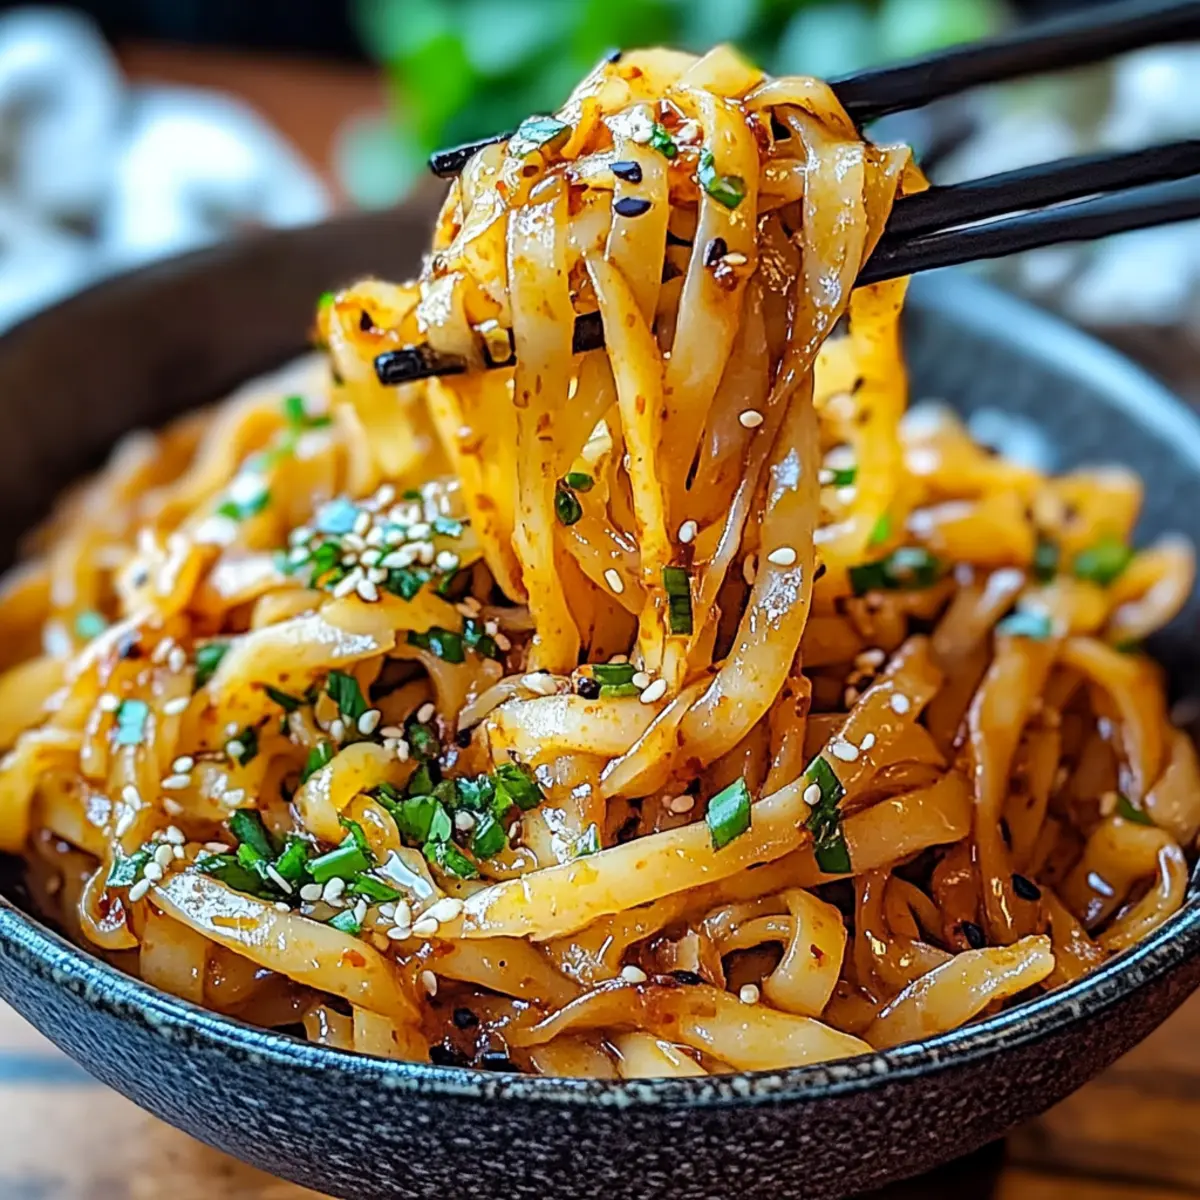
As the steam wafted through my kitchen, the sizzling sound of garlic met the sharp hint of chili oil, creating a mouthwatering melody that made my stomach growl. These Garlic Chili Oil Noodles are not just quick to prepare in just 10 minutes but are also a fantastic vegan option that can rescue you from the clutches of takeout. Picture a dish that’s both comforting and customizable, allowing you to adapt it to your taste buds—whether you crave extra spice or a medley of fresh veggies. What’s not to love about a dish that’s both satisfying and easy to whip up on a busy weeknight? Ready to dive into this flavor-packed creation and elevate your dinner game?
Why Are Garlic Chili Oil Noodles Amazing?
Quick and Easy: You can whip up this delicious meal in just 10 minutes, making it perfect for busy weeknights.
Vegan Delight: Fully plant-based, these noodles cater to your vegan cravings without compromising flavor.
Customizable: Feel free to toss in your favorite veggies or proteins, just like in my Greek Lemon Chicken recipe!
Satisfying Texture: Enjoy the delightful chewiness of the noodles, perfectly coated in garlicky, spicy goodness.
Crowd-Pleaser: Whether it’s a casual lunch or impressing your friends, these noodles are bound to be a hit at any gathering.
Get ready to experience a flavor explosion that’s too good to resist!
Garlic Chili Oil Noodles Ingredients
For the Noodles
• Noodles – Use your favorite type, like yok, rice, or even instant noodles for a quick fix.
For the Flavor Base
• Minced Garlic – Fresh garlic is key for that bold, aromatic flavor.
• Chili Oil – Choose a chili oil with visible sediment for a richer taste.
• Soy Sauce – Adds saltiness and umami; opt for gluten-free if needed.
• Vinegar – A splash of rice vinegar brings a lovely acidity to balance the richness.
• Sugar – Use to enhance flavor—or skip if you’re watching your sweetness.
• Sesame Oil – Adds a nutty depth; it’s optional but highly recommended.
• Salt – Adjust to taste, but remember soy sauce packs enough saltiness.
For Garnish
• Chopped Scallions – They lend freshness and a pop of color.
• Sesame Seeds – Sprinkle for a delightful crunch and visual appeal.
Elevate your dinner game with this delicious Garlic Chili Oil Noodles recipe!
Step‑by‑Step Instructions for Creamy Lemon Truffles Recipe
Step 1: Mix the Filling
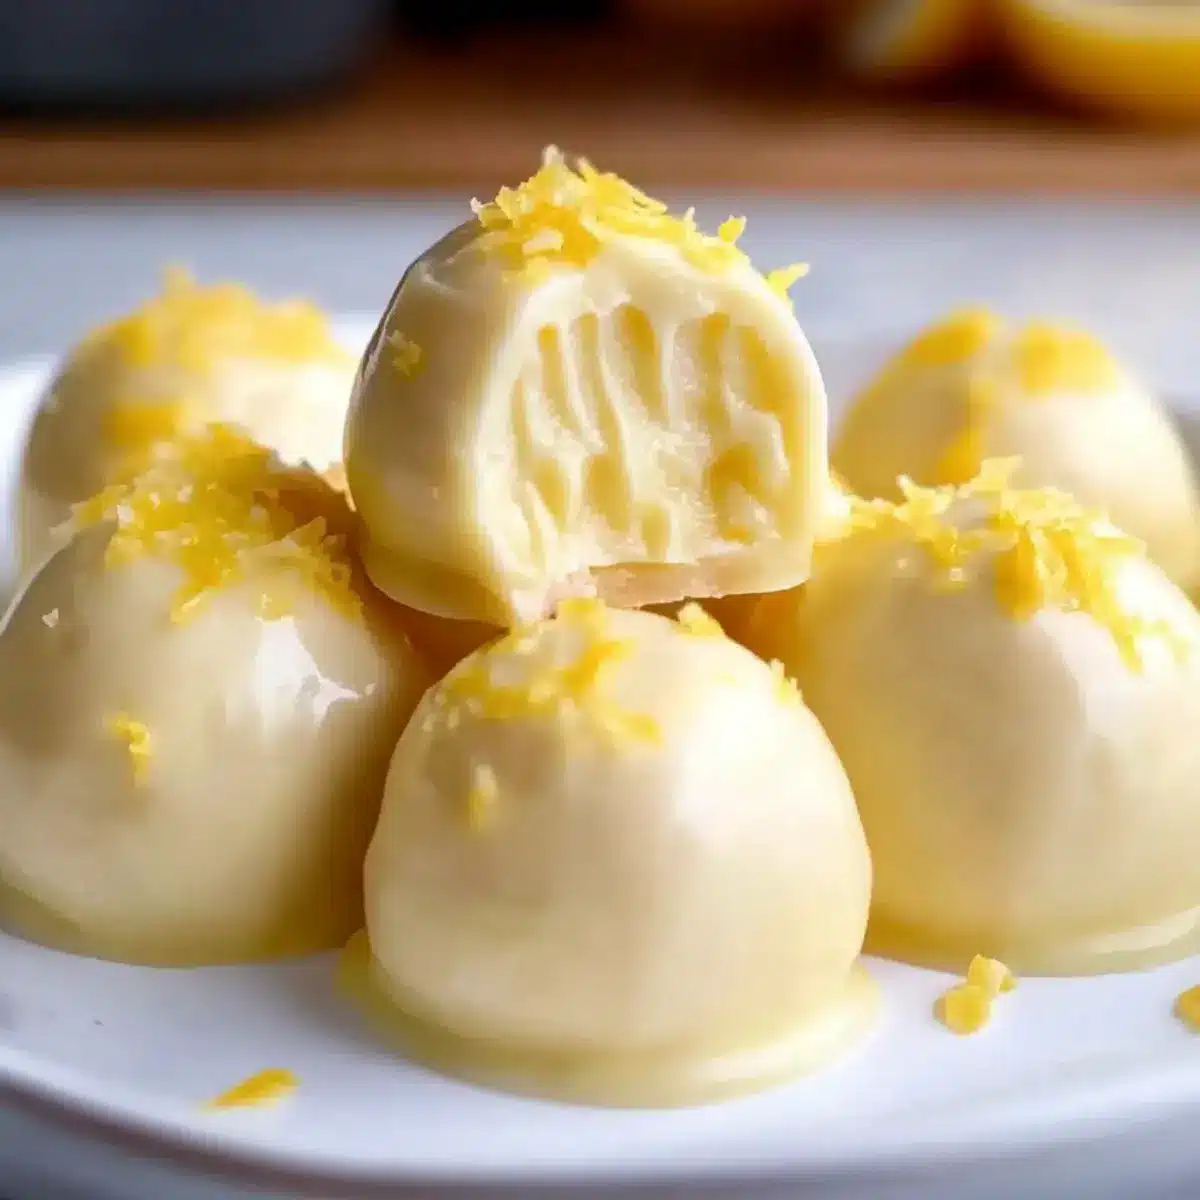
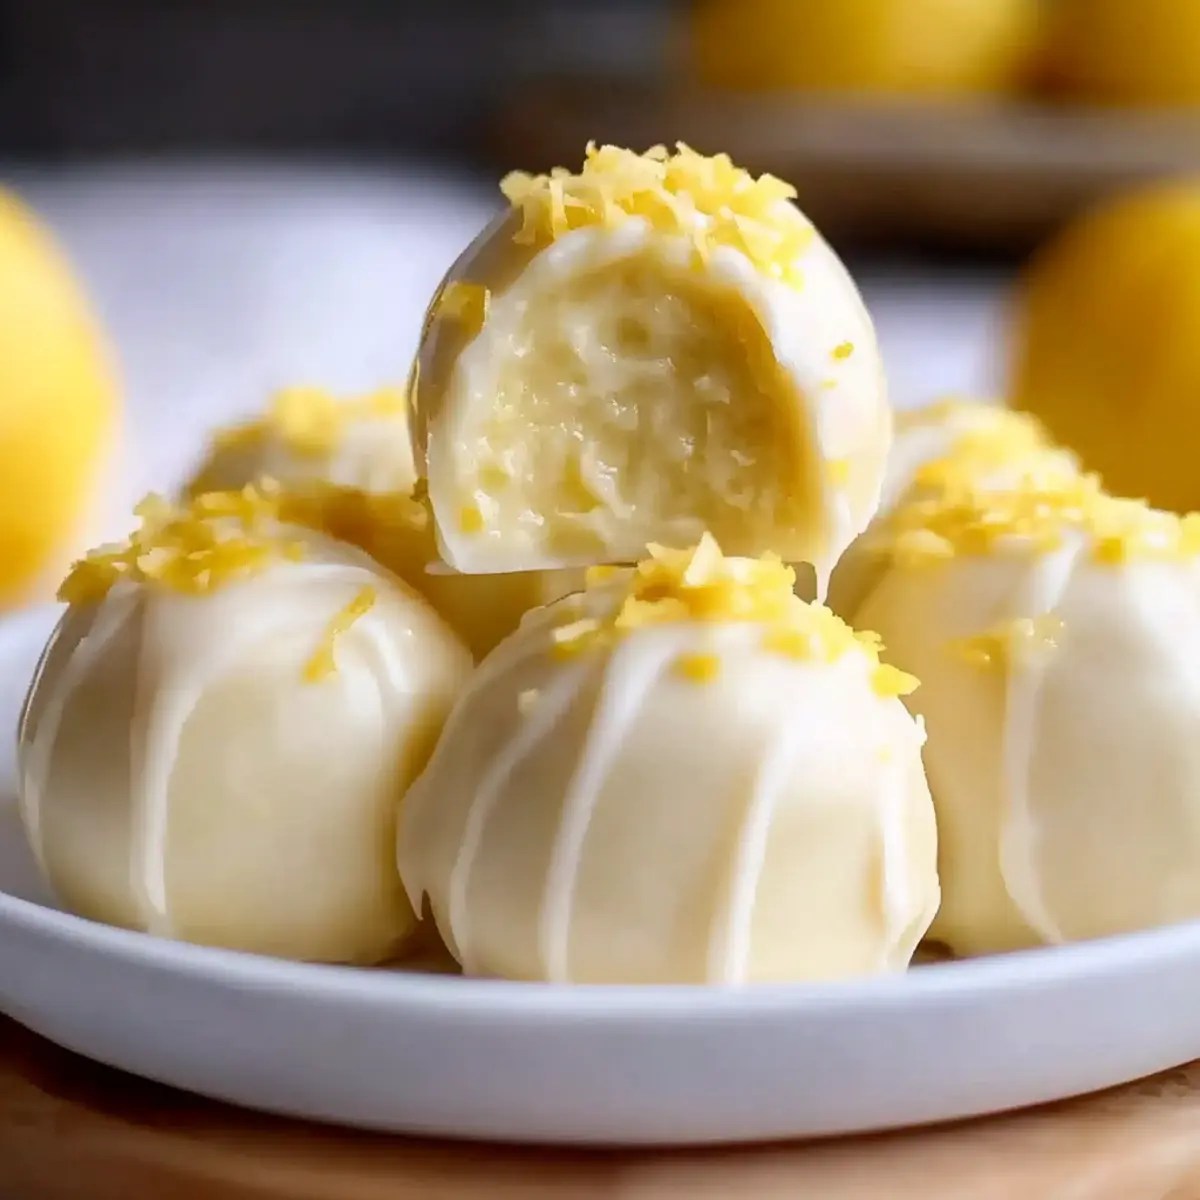
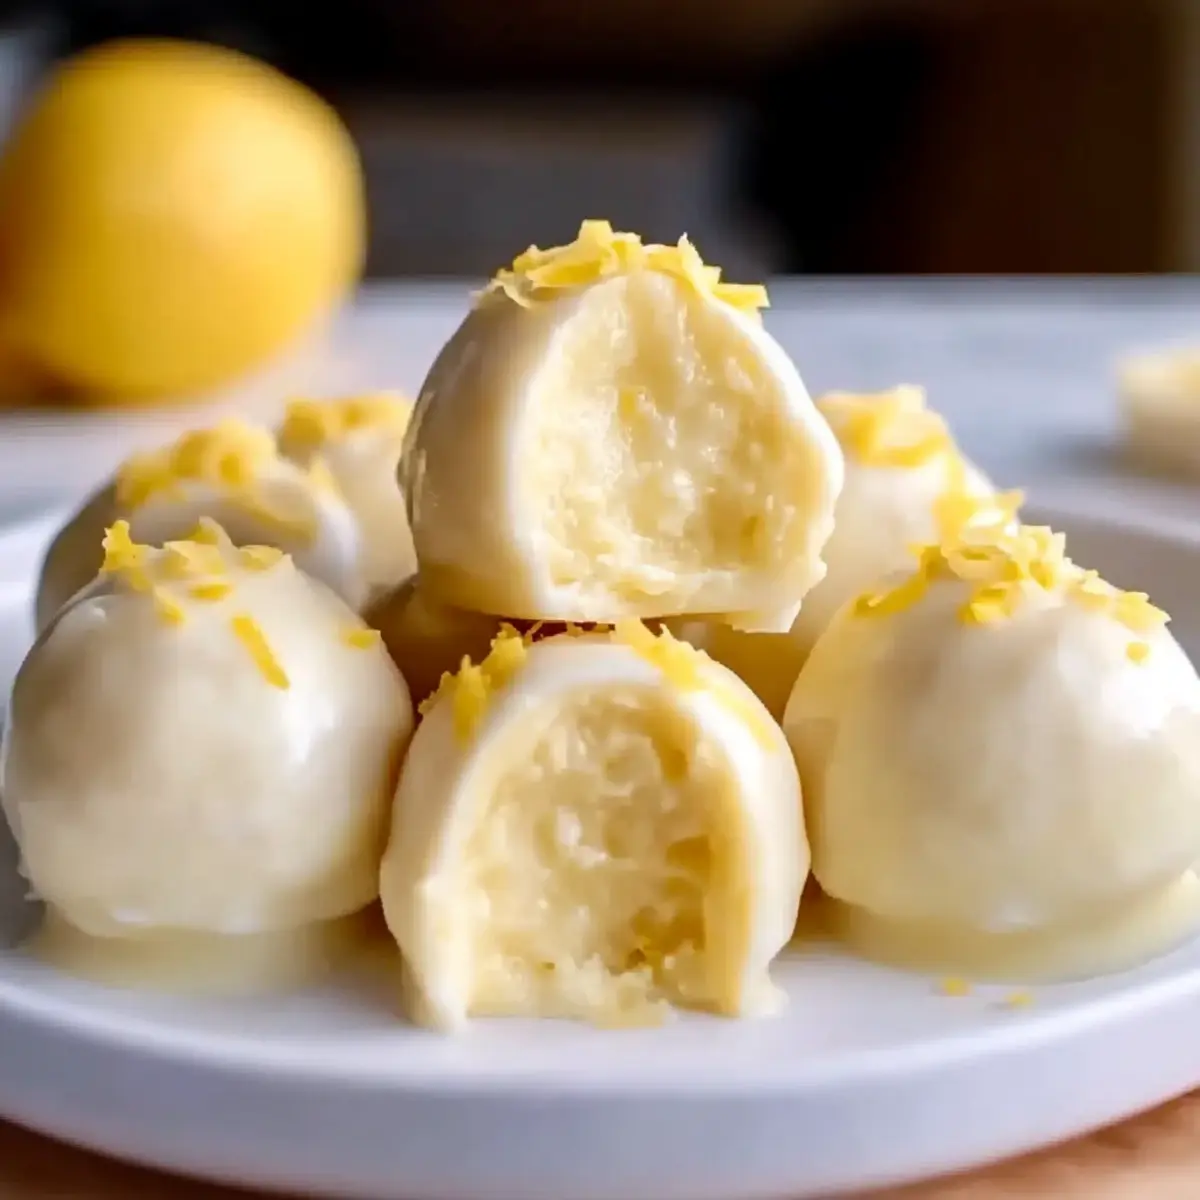
In a large mixing bowl, combine 8 ounces of softened cream cheese, 1 cup of powdered sugar, 2 tablespoons of fresh lemon juice, the zest of 1 lemon, and 1 teaspoon of vanilla extract. Beat the mixture on medium speed with an electric mixer for about 2-3 minutes until it’s smooth and creamy, scraping down the sides of the bowl to ensure everything is well combined and aromatic.
Step 2: Chill the Mixture
Once your mixture for the Creamy Lemon Truffles is perfectly blended, cover the bowl with plastic wrap and refrigerate it for approximately 30 minutes. This helps the filling firm up significantly, making it easier to handle when you shape your truffles. You’ll know it’s ready when you can scoop out a portion that holds its shape without being too soft.
Step 3: Shape the Truffles
After chilling, remove the mixture from the fridge. Using a small cookie scoop or your hands, take about a tablespoon of the mixture and roll it into a ball. Place each rolled truffle on a parchment-lined baking sheet. Continue this process until all the filling is shaped into delightful little spheres, making sure to keep them spaced apart for the next step.
Step 4: Melt the Chocolate
In a microwave-safe bowl, break up 8 ounces of white chocolate. Microwave the chocolate in 30-second increments, stirring each time, until fully melted and smooth—this should take about 1-2 minutes total. Allow the melted chocolate to cool slightly, ensuring it’s not too hot to avoid melting the truffles when coated.
Step 5: Coat the Truffles
Take each truffle and dip it into the melted white chocolate, using a fork to ensure even coverage. Allow any excess chocolate to drip off back into the bowl. If desired, roll the freshly coated truffle in chopped nuts or coconut flakes for added texture. This step adds a delightful crunch and enhances the presentation of your Creamy Lemon Truffles.
Step 6: Set the Truffles
Carefully place the coated truffles back on the parchment-lined baking sheet. Chill them in the refrigerator for about 15 minutes or until the chocolate is completely set and firm. Keep an eye on them; they’ll be ready to indulge once the chocolate has hardened into a smooth shell that beautifully encases the zesty lemon filling.
What to Serve with Creamy Lemon Truffles
Elevate your dessert experience by pairing these luscious treats with flavors that complement their zesty sweetness and creamy texture.
-
Fresh Berries: A medley of strawberries, blueberries, and raspberries adds a refreshing tartness that balances the sweet truffles perfectly. Consider a simple berry compote for extra flair!
-
Whipped Cream: Light and airy, a dollop of freshly whipped cream enhances the rich creaminess of the truffles while providing a delightful contrast in texture.
-
Mint Tea: The invigorating flavor of mint tea cleanses the palate after enjoying a rich dessert, making for a refreshing sip between truffles.
-
Chocolate Dipped Pretzels: The salty crunch of pretzels dipped in chocolate offers a pleasing textural contrast to the creamy lemon truffles, creating an irresistible sweet and salty combination.
-
Vanilla Ice Cream: Creamy vanilla ice cream complements the lemon flavor while providing a chilling effect, perfect for warm evenings.
-
Lemonade Spritzer: A fizzy lemonade spritzer, with its citrusy notes, enhances the overall lemony experience and serves as a delightful refreshment.
Let these pairing ideas light up your dessert table and make every bite of your Creamy Lemon Truffles unforgettable!
Make Ahead Options
These Creamy Lemon Truffles are a fantastic choice for meal prep! You can prepare the filling up to 24 hours in advance by following the mixing instructions, then cover and refrigerate it. Just like that, you’ll save precious time on busy days. Once you’re ready to finish, scoop and roll the mixture into balls, dip them in melted chocolate, and refrigerate for about 15 minutes until set. For the best quality, keep the finished truffles in an airtight container in the fridge, where they will stay fresh for up to two weeks. This way, you can enjoy a delightful sweet treat whenever you crave it, with minimal effort!
Tips for the Best Creamy Lemon Truffles
-
Fresh Ingredients: Always use fresh lemon juice and zest for the most vibrant flavor. Bottled juice can’t compete with the brightness of fresh.
-
Chill Time: Be patient and allow the mixture to chill before rolling. This helps the filling firm up and makes shaping easier.
-
Melted Chocolate Cool Down: Let melted chocolate cool slightly before dipping; too hot and it can ruin your truffles’ shape.
-
Experiment with Coatings: Try different toppings like crushed nuts or coconut flakes for a fun twist. This adds both texture and visual appeal to your Creamy Lemon Truffles.
-
Airtight Storage: To keep your truffles fresh, store them in an airtight container in the fridge. Enjoy them within two weeks for the best taste.
Creamy Lemon Truffles Recipe Variations
Feel free to dive in and customize your Creamy Lemon Truffles to match your taste buds and baking spirit!
-
Dairy-Free: Use a vegan cream cheese alternative and opt for dairy-free chocolate for a completely plant-based treat.
Switching to dairy-free options can give your truffles an exciting twist while keeping them indulgent and smooth. -
Nutty Crunch: Incorporate finely chopped almonds or walnuts into the filling for a delightful crunch.
The rich, nutty flavor pairs wonderfully with the zesty lemon, enhancing each bite with texture. -
Coconut Bliss: Roll your truffles in unsweetened shredded coconut instead of nuts for a tropical flair.
This simple touch adds a chewy element while complementing the lemony freshness beautifully. -
Dark Chocolate Delight: Dip the truffles in dark chocolate for a richer, more decadent finish.
The deeper flavor of dark chocolate perfectly balances the brightness of the lemon, creating a sophisticated treat. -
Fruit Fusion: Add a tablespoon of raspberry puree to the filling for a fruity twist that sings with sweetness.
This variation transforms your truffles into a berry-infused delight that’s perfect for summer gatherings. -
Almond Extract Boost: Replace vanilla extract with almond extract for a nutty flavor that deepens the truffle’s richness.
This subtle switch gives the truffles an unexpected and delightful depth that will surprise your taste buds. -
Spicy Kick: Add a pinch of cayenne pepper to the chocolate coating for a surprising heat that complements the sweetness.
This bold move will keep your guests guessing and add an exciting layer of flavor to every bite. -
Zesty Citrus Combo: Mix lime or orange zest into the filling for a citrus medley that brightens the flavor profile.
This twist will elevate your truffles to a whole new level of vibrant bliss, perfect for citrus lovers.
These variations make your truffles not only customizable but also an exciting canvas for all your flavor adventures. Don’t forget, just like in my Cheese Banana Pudding or lemon-blueberry cottage, the possibilities are endless!
How to Store and Freeze Creamy Lemon Truffles
Fridge: Keep your Creamy Lemon Truffles in an airtight container in the refrigerator for up to two weeks. This ensures they stay fresh and delicious for your sweet cravings.
Freezer: For longer storage, place the truffles in a single layer on a baking sheet to freeze until solid. Transfer to an airtight container and freeze for up to three months.
Thawing: To enjoy frozen truffles, transfer them to the fridge for several hours or let them sit at room temperature for about 30 minutes before indulging.
Reheating: These truffles don’t require reheating. Simply enjoy them chilled for the best flavor and texture.
Creamy Lemon Truffles Recipe FAQs
What kind of lemons should I use for the Creamy Lemon Truffles?
Absolutely, using fresh lemons is key! Opt for firm, vibrant lemons without any dark spots or wrinkles. This ensures maximum juice and zest flavor. Avoid bottled lemon juice if possible; fresh juice provides the zesty kick your truffles deserve.
How should I store my Creamy Lemon Truffles?
To keep your luscious truffles fresh, store them in an airtight container in the refrigerator for up to two weeks. This will help maintain their creamy texture and flavor, allowing you to savor each bite!
Can I freeze Creamy Lemon Truffles?
Yes, you can! To freeze, place the truffles in a single layer on a baking sheet until solid. Then transfer to an airtight container or freezer bag and enjoy them for up to three months. For thawing, simply move them to the refrigerator for several hours, or let them sit at room temperature for about 30 minutes before enjoying.
What if my truffle mixture is too soft to form into balls?
If you find your mixture is too soft, no worries! Just pop it back in the refrigerator for an additional 15-20 minutes to firm up. If it still doesn’t hold its shape, you can mix in a little extra powdered sugar until you reach the desired consistency.
Are these Creamy Lemon Truffles gluten-free?
Yes! This recipe is naturally gluten-free, as it contains no flour. However, always double-check the labels of any chocolate or mix-ins you use to ensure they meet your dietary needs.
Can I add other flavors to my Creamy Lemon Truffles?
Very! You can experiment by adding raspberry puree into the filling for a fruity twist or using almond extract in place of vanilla for a nutty flavor. Feel free to play around with flavors and toppings for a delightful variety!
Indulge in Creamy Lemon Truffles Recipe for a Sweet Zest!
Ingredients
Equipment
Method
- In a large mixing bowl, combine cream cheese, powdered sugar, fresh lemon juice, lemon zest, and vanilla extract. Beat the mixture on medium speed for 2-3 minutes until smooth and creamy.
- Cover the mixture with plastic wrap and refrigerate for approximately 30 minutes.
- Remove from the fridge and roll about a tablespoon of the mixture into a ball. Place on a parchment-lined baking sheet.
- Melt white chocolate in a microwave-safe bowl, stirring every 30 seconds until smooth.
- Dip each truffle into the melted chocolate, using a fork for even coverage.
- Place the coated truffles back on the baking sheet and chill for about 15 minutes until the chocolate has set.
Leave a Reply