
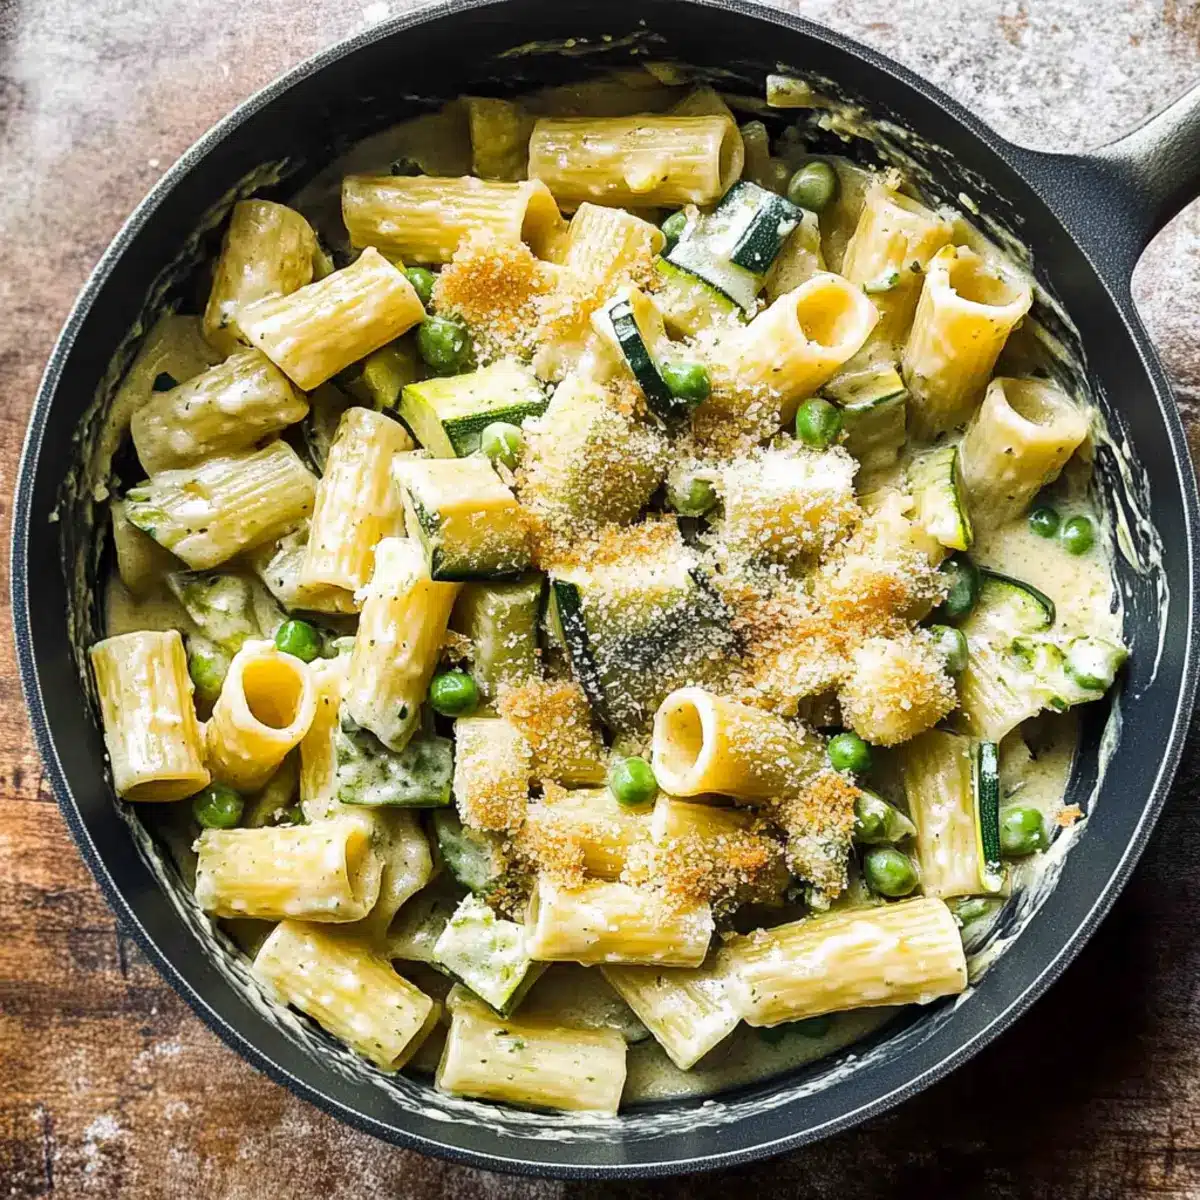
The sun peeks through the kitchen window, bringing with it a burst of colorful spring produce that beckons me to create something delicious. Enter my Creamy Garlic Spring Vegetable Pasta Primavera, where every twirl of rigatoni is enveloped in a luxurious, creamy sauce, highlighting the vibrant asparagus, peas, and zucchini. Not only is this dish a feast for the eyes, but it’s also a quick meal that can be whipped up in less than 30 minutes—perfect for those busy weeknights! With its rich flavors balanced by a zesty hint of lemon, it’s sure to become a family favorite. And don’t forget the crispy garlic parsley breadcrumbs that add the perfect crunch to each delightful bite. Ready to embrace the essence of spring on your plate? Let’s dive into this culinary adventure together!
Why is this pasta primavera special?
Creamy, Dreamy Sauce: This recipe creates a luscious sauce that hugs each piece of pasta, elevating your meal to an impressive dish that’s rich in flavor.
Fresh Spring Vibes: Packed with vibrant vegetables like asparagus and peas, this dish shines with the best of spring’s bounty.
Quick and Easy: Ready in under 30 minutes, it’s perfect for those busy nights when you crave something satisfying but don’t have hours to spend in the kitchen.
Versatile Goodness: Customize it with your favorite proteins or adjust the veggies based on what you have on hand—like swapping in fresh green beans or adding shrimp for extra heartiness.
Crowd-Pleasing Texture: The crunchy garlic parsley breadcrumbs sprinkled on top give a delightful contrast to the creamy pasta, making it a hit with family and friends!
To complement this dish, consider serving it with a side of Garlic Steak Tortellini or some crispy Sticky Garlic Chicken.
Garlic Spring Vegetable Pasta Primavera Ingredients
• Discover the fresh flavors of spring!
For the Pasta
• Rigatoni – Perfectly captures the creamy sauce for every delightful bite.
For the Sauce
• Olive Oil – Adds richness and depth; can be substituted with vegetable oil for a milder taste.
• Heavy Cream – Provides that essential creaminess; use half-and-half for a lighter touch or coconut milk for dairy-free.
• Whole Milk – Balances the creaminess; swap with non-dairy milk to suit your needs.
• Parmesan Cheese (grated) – Introduces umami richness; nutritional yeast works as a dairy-free alternative.
• Lemon Zest – Essential for a bright pop of flavor; absolutely do not skip this!
For the Vegetables
• Frozen Peas – Sweet bursts of flavor and vibrant color; fresh peas are a lovely substitute in season.
• Asparagus – Adds both crunch and a fresh flavor; green beans or broccoli would be great alternatives.
• Zucchini – Contributes moisture and volume to the dish; yellow squash can step in for a fun twist.
• Garlic (minced) – Is the aromatic backbone of this dish; adjust according to your garlic-love level.
• Shallot (minced) – Adds a gentle sweetness; feel free to replace with onion for a more pronounced flavor.
For the Finishing Touches
• Unsalted Butter – For toasting breadcrumbs to a perfect golden brown; use olive oil as a substitute if preferred.
• Panko Breadcrumbs – Ensures a satisfying crunch; consider gluten-free options ifneeded.
• Fresh Parsley (chopped) – Introduces freshness and color; basil or chives make excellent substitutions.
• Garlic Clove (smashed for breadcrumbs) – Infuses a delightful garlic flavor into the toast; a tasty addition worth preparing.
Now that you’re set with the ingredients for your Garlic Spring Vegetable Pasta Primavera, we’re ready to transform your kitchen into a vibrant spring feast!
Step-by-Step Instructions for Garlic Spring Vegetable Pasta Primavera
Step 1: Sauté Vegetables
In a large skillet, heat two tablespoons of olive oil over medium heat until shimmering. Add sliced asparagus, frozen peas, diced zucchini, minced shallot, and minced garlic, then season with kosher salt and freshly ground black pepper. Cook for 5 to 8 minutes, stirring occasionally, until the vegetables are tender and vibrant. This colorful mix will lay the hearty foundation for your Garlic Spring Vegetable Pasta Primavera.
Step 2: Prepare Sauce
Once the vegetables are softened, reduce the heat slightly and pour in one cup of whole milk and half a cup of heavy cream. Allow the mixture to simmer gently for about 8 to 10 minutes, stirring frequently until it thickens slightly. You want the sauce to cling beautifully to the pasta, so continue testing its consistency with a spoon as it cooks.
Step 3: Add Cheese
Stir in one cup of grated Parmesan cheese into the simmering sauce until melted and evenly blended. The cheese will enrich the creamy goodness of your Garlic Spring Vegetable Pasta Primavera, making the sauce even more luscious. If needed, adjust seasoning with salt and pepper, allowing the flavors to deepen while keeping a careful eye on the heat.
Step 4: Combine Pasta
Add your cooked rigatoni directly into the creamy sauce, gently tossing to coat the pasta evenly. Allow it to simmer together over low heat for another 2 to 3 minutes. This step will enable the pasta to absorb the delightful flavors and thicken the sauce slightly with its starch, creating a perfectly creamy dish.
Step 5: Finish with Lemon Zest
Just before serving, stir in the zest of one lemon, which will brighten up the creamy pasta dish beautifully. Ensure that the lemon zest is well incorporated, helping to balance all the rich flavors of your Garlic Spring Vegetable Pasta Primavera. This refreshing hint of citrus will elevate the vegetables and creaminess perfectly.
Step 6: Toast Breadcrumbs (Optional)
In a separate small pan, melt 2 tablespoons of unsalted butter over medium heat. Once melted, add one cup of panko breadcrumbs and a smashed garlic clove, stirring until the breadcrumbs are golden and crispy, about 3 to 4 minutes. Remove the garlic once toasted, and stir in freshly chopped parsley for an extra flavor boost, ready to sprinkle over your dish!
How to Store and Freeze Garlic Spring Vegetable Pasta Primavera
- Fridge: Store leftover Garlic Spring Vegetable Pasta Primavera in an airtight container for up to 3 days. Be sure to let it cool completely before sealing to maintain freshness.
- Freezer: For longer storage, freeze portions in airtight containers for up to 2 months. When ready to enjoy, simply thaw overnight in the fridge before reheating.
- Reheating: Reheat in the microwave or on the stovetop over low heat. Add a splash of milk or cream to help restore the creamy consistency if it thickens too much.
- Room Temperature: Avoid leaving the pasta out at room temperature for more than 2 hours to ensure food safety and quality.
What to Serve with Creamy Garlic Spring Vegetable Pasta Primavera
The delightful flavors of spring come alive in your kitchen, inviting you to create a meal that’s not only delicious but also beautifully balanced.
-
Garlic Bread: This crunchy side offers a buttery warmth that pairs perfectly with the creamy pasta, inviting you to savor every bite. The garlicky aroma complements the dish, making it a classic choice.
-
Fresh Arugula Salad: Tossed with a light lemon vinaigrette, this peppery salad provides a refreshing contrast to the richness of the pasta, adding a delightful crunch and brightness.
-
Grilled Lemon Chicken: Tender chicken marinated in zesty lemon evokes springtime grilling, providing a lovely protein option to round out your meal. The citrus notes amplify the lemon zest in the pasta.
-
Steamed Broccoli: This simple side adds color and extra veggies to your plate while its mild flavor doesn’t overpower the creamy sauce. A squeeze of lemon enhances both dishes beautifully.
-
Roasted Cherry Tomatoes: Caramelized and bursting with sweetness, these tender morsels make an elegant side, enhancing the fresh flavors of your primavera with their vibrant pop.
-
Chilled White Wine: A crisp Sauvignon Blanc or a light Pinot Grigio creates an ideal sipping companion, complementing the lemony notes in the pasta while refreshing your palate.
-
Lemon Sorbet: As a light, refreshing dessert, this sorbet cleanses the palate after the creamy pasta, with its bright citrus notes tying the meal together seamlessly.
-
Crispy Polenta Fries: These crunchy bites add a fun twist, introducing a different texture while their mild flavor gently complements the rich pasta. Their golden crust invites guests to reach for more.
Let your meal shine with these perfect pairings, enhancing the taste experience of your Creamy Garlic Spring Vegetable Pasta Primavera!
Make Ahead Options
These Creamy Garlic Spring Vegetable Pasta Primavera are perfect for those busy weeknights when time is tight! You can sauté the vegetables up to 24 hours in advance; simply store them in an airtight container in the refrigerator to maintain their freshness. Additionally, prepare the creamy sauce (minus the lemon zest) up to 3 days ahead and refrigerate. When you’re ready to serve, just reheat the sauce gently while you cook the rigatoni to al dente. Combine everything, add the lemon zest, and top with any toasted breadcrumbs for that delightful crunch! By prepping ahead, you’ll save time without sacrificing flavor, ensuring a delicious meal with minimal effort.
Garlic Spring Vegetable Pasta Primavera Variations
Feel free to get creative with this recipe, as there are endless ways to customize your creamy pasta delight!
- Protein Boost: Add grilled shrimp or sautéed chicken for a hearty protein option. This not only enhances the dish but provides a satisfying meal for all.
- Dairy-Free Dream: Replace heavy cream with coconut milk and use nutritional yeast in place of Parmesan cheese for a vegan delight. It’s a great twist without sacrificing creaminess!
- Pasta Substitution: Swap rigatoni for gluten-free pasta or try whole wheat for a more wholesome option. You’d be surprised at how different textures can change the flavor!
- Extra Veggies: Toss in chopped bell peppers or spinach during the sautéing step for added color and nutrients. These vibrant additions will make the dish even more appealing visually.
- Heat it Up: For a spicy kick, sprinkle in some red pepper flakes while sautéing the vegetables. Just a pinch can elevate the flavor profile and surprise your taste buds!
- Herb Forward: Substitute parsley with fresh basil or dill for a herbaceous flair, enhancing that spring freshness significantly. Herbs can transform the flavor landscape of the dish.
- Nutty Flavor: Add toasted pine nuts or walnuts on top for an added crunch and depth of flavor, giving your creamy pasta an unexpected twist.
- Zesty Twist: Mix in sun-dried tomatoes or artichoke hearts for a tangy burst that complements the creamy sauce beautifully. These delightful additions tantalize your palate!
If you’re looking for more delectable inspiration, consider pairing your pasta with a side of a Creamy Vegetable Casserole Comfort or a touching plate of Chicken Shawarma Garlic for a divine meal!
Expert Tips for Garlic Spring Vegetable Pasta Primavera
- Perfect Pasta: Always cook rigatoni until al dente; it should have a slight bite to hold up well in the creamy sauce.
- Vegetable Swaps: Feel free to incorporate whatever spring veggies you have on hand, but keep the garlic and shallot for robust flavor.
- Creamy Consistency: If your sauce thickens too much after cooking, a splash of additional milk can bring it back to the desired creamy texture.
- Zest Matters: Don’t skip the lemon zest; it adds a crucial brightness that balances the rich flavors of the creamy pasta.
- Breadcrumb Crunch: For the best texture, toast the panko breadcrumbs just before serving, ensuring they stay crispy on top of the Garlic Spring Vegetable Pasta Primavera.
Garlic Spring Vegetable Pasta Primavera Recipe FAQs
How do I choose the best asparagus and other vegetables for this dish?
Absolutely! When selecting asparagus, look for firm, bright green stalks with tightly closed tips. Avoid any that have dark spots or are wilted. For zucchini, choose smaller ones with shiny skin, and for peas, fresh pods should feel filled and vibrant. Always remember, the fresher your vegetables, the better the flavor in your Garlic Spring Vegetable Pasta Primavera!
How should I store leftover pasta primavera?
After enjoying a delightful meal, allow the Garlic Spring Vegetable Pasta Primavera to cool completely. Then, store it in an airtight container in the refrigerator for up to 3 days. It makes for a quick and delicious lunch option! Just remember to reheat gently to avoid thickening.
Can I freeze Garlic Spring Vegetable Pasta Primavera?
Absolutely! To freeze, portion out the pasta primavera into airtight containers and store for up to 2 months. For the best results, I recommend thawing overnight in the fridge before reheating to maintain the creaminess. This is a great way to have a delicious home-cooked meal ready for those busy days!
What should I do if my sauce is too thick?
If you find your creamy sauce has thickened too much after cooking, don’t worry! Just add a splash of milk or cream and stir over low heat until it reaches your desired consistency. This will restore that delightful creaminess which is essential for the perfect Garlic Spring Vegetable Pasta Primavera.
Are there any dietary considerations I should keep in mind?
Very! If you’re cooking for someone with a dairy allergy, substitute the heavy cream with coconut milk, and use nutritional yeast instead of Parmesan for a dairy-free version. Additionally, if you’re cooking for vegetarians or those avoiding gluten, opt for gluten-free pasta and check that your breadcrumbs are gluten-free as well. Everyone can enjoy this luscious dish with a little creativity!
Garlic Spring Vegetable Pasta Primavera: A Creamy Delight
Ingredients
Equipment
Method
- In a large skillet, heat two tablespoons of olive oil over medium heat until shimmering. Add sliced asparagus, frozen peas, diced zucchini, minced shallot, and minced garlic, then season with kosher salt and black pepper. Cook for 5 to 8 minutes, stirring occasionally, until the vegetables are tender.
- Once the vegetables are softened, reduce the heat and pour in one cup of whole milk and half a cup of heavy cream. Allow to simmer gently for about 8 to 10 minutes until thickened.
- Stir in one cup of grated Parmesan cheese into the simmering sauce until melted. Adjust seasoning with salt and pepper as needed.
- Add your cooked rigatoni directly into the creamy sauce, gently tossing to coat evenly. Allow to simmer for another 2 to 3 minutes.
- Just before serving, stir in the zest of one lemon to brighten the dish.
- In a separate pan, melt two tablespoons of unsalted butter over medium heat. Add one cup of panko breadcrumbs and a smashed garlic clove, cooking until golden and crispy. Stir in freshly chopped parsley.
Leave a Reply