
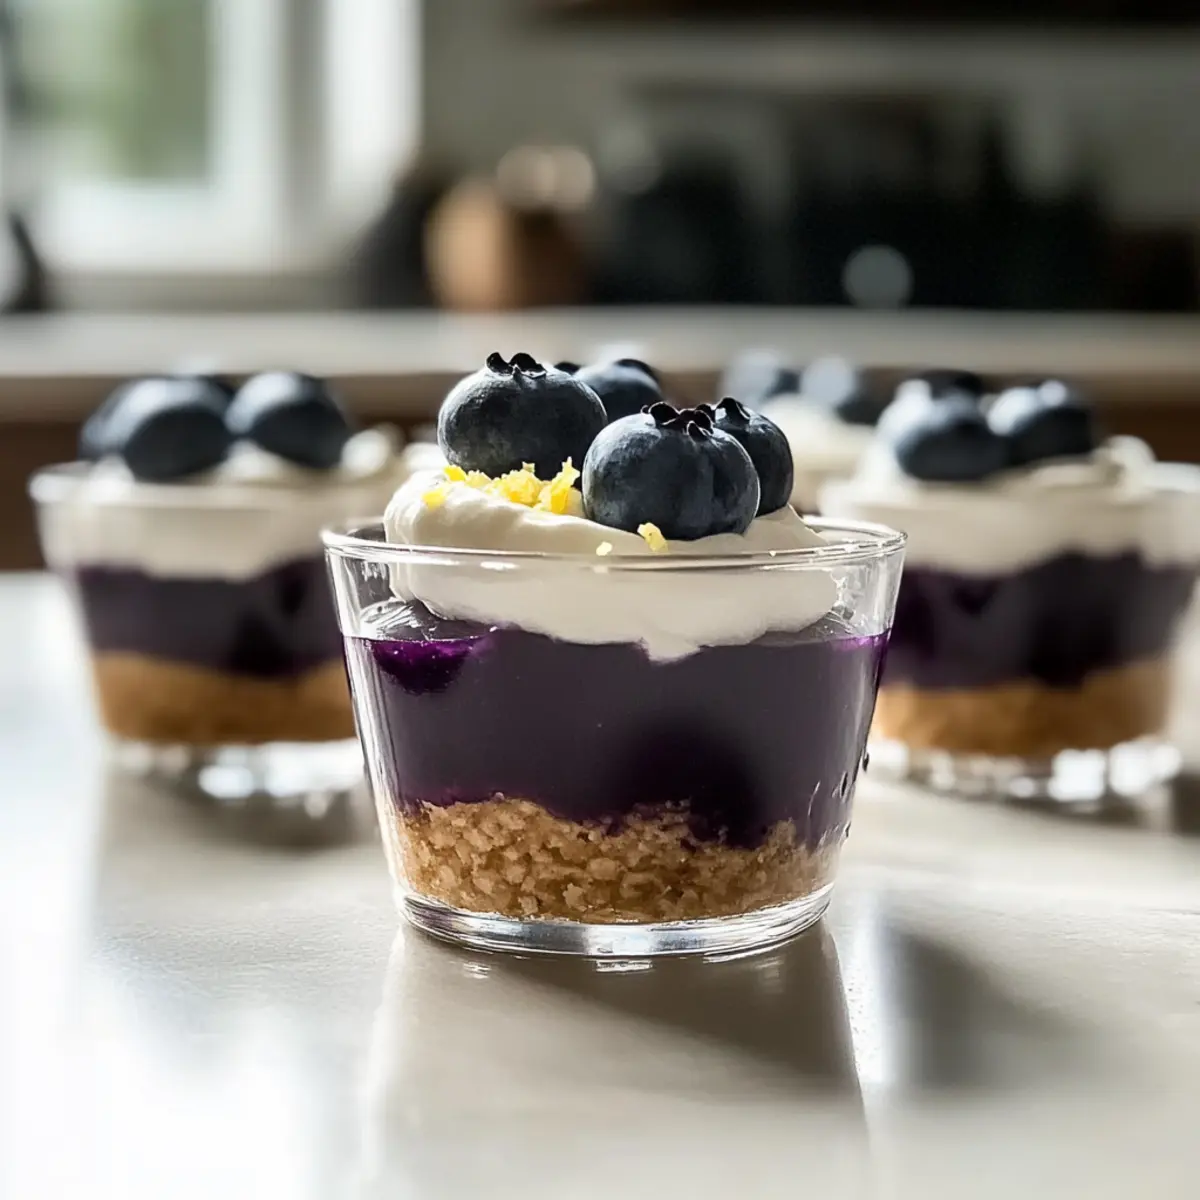
There’s something magical about the first sunny day of spring when the air is fragrant with blooming flowers and fresh berries beckon at the market. That’s when I find myself whipping up these delightful No-Bake Blueberry Cheesecake Cups, the ultimate no-bake dessert that captures the essence of warm weather. With their buttery graham cracker crust and smooth, creamy filling, each cup is a little piece of happiness, making them a top choice for gatherings or a sweet indulgence after a long day. Plus, they’re incredibly easy to prepare—no oven required! Imagine the joy of serving these elegant treats at brunches, picnics, or family get-togethers. Wouldn’t you love to impress your guests with a dessert that’s both simple and splendid? Let’s dive into this recipe!
Why are No-Bake Blueberry Cheesecake Cups irresistible?
Effortless Preparation: You can whip these cups together without turning on the oven, making them a stress-free option for entertaining.
Crowd-Pleasing Delight: Whether it’s a summer picnic or a cozy family gathering, these individual servings are sure to impress your guests.
Vibrant Flavors: The luscious blueberries on top add a burst of freshness, perfectly complementing the creamy cheesecake.
Versatile Variations: Feel free to experiment with flavors by using strawberries or other berries, or even swap the crust for chocolate cookies for a unique twist!
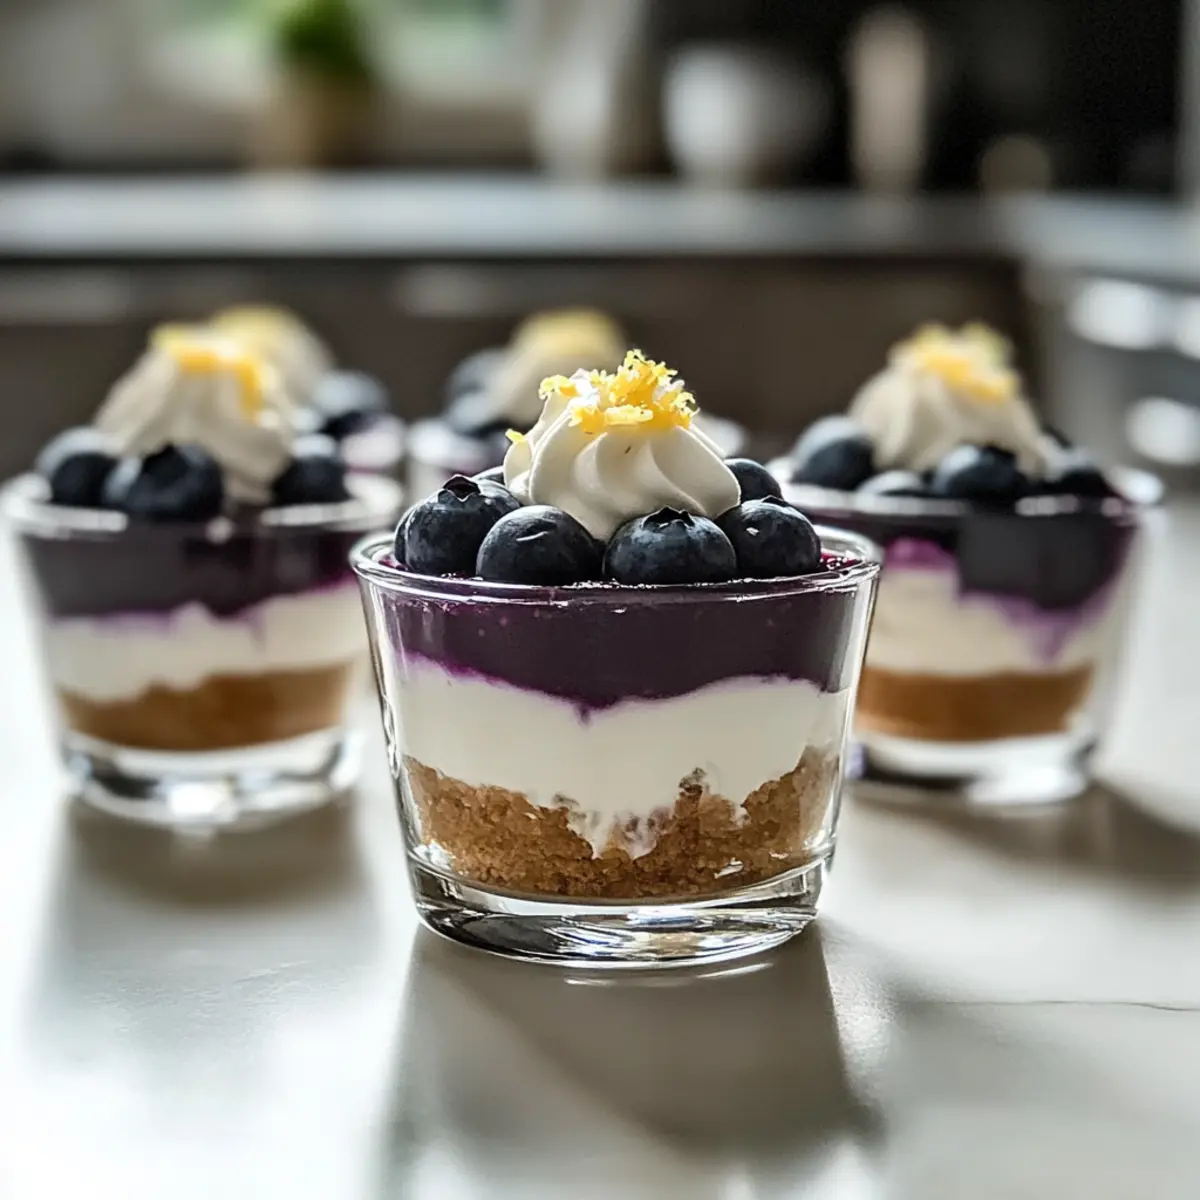
Charming Presentation: Serve in clear cups to showcase the beautiful layers, making your dessert not just tasty but visually stunning as well.
These No-Bake Blueberry Cheesecake Cups are a must-try. If you’re craving more fruity desserts, check out these Cheesecake Stuffed Strawberries for another delightful treat!
No-Bake Blueberry Cheesecake Cups Ingredients
For the Crust
- Graham Cracker Crumbs – The foundation for your cups; try substituting with vanilla wafers or digestive biscuits for a different taste.
- Unsalted Butter (melted) – Ensures the crumbs bind together perfectly for a sturdy base; be sure it’s fully melted for the best results.
- Granulated Sugar – Adds just the right amount of sweetness to the crust; feel free to reduce or swap with a sugar alternative if desired.
- Salt – A pinch enhances the flavors of the crust and balances the sweetness beautifully.
For the Cheesecake Filling
- Full-Fat Cream Cheese (softened) – Creates that rich, smooth texture we love; opt for low-fat if you prefer, though creaminess may vary.
- Heavy Whipping Cream (cold) – Essential for lightness and structure when whipped, contributing to the fluffy consistency of your cheesecake filling.
- Granulated Sugar – Sweetens the filling to perfection; adjust according to your taste preference.
- Lemon Juice – Adds a zesty brightness to the filling; fresh juice is best, and a touch of zest could elevate the flavor even more.
For the Blueberry Topping
- Fresh/Frozen Blueberries – Use fresh for optimal flavor; frozen blueberries work well too, and you don’t even have to thaw them!
- Cornstarch – Helps thicken your blueberry sauce; arrowroot can serve as a great gluten-free alternative.
Optional Garnishes
- Fresh Whipped Cream – A lovely topping for added creaminess; whip until soft peaks form for the best texture.
- Additional Blueberries – For a pop of color and freshness on top.
- Crushed Graham Crackers – Sprinkle on top for a delightful crunch.
- Lemon Zest – Enhances flavor and adds a vibrant touch.
- Mint Leaves – For an elegant finishing touch that brings a hint of freshness.
These No-Bake Blueberry Cheesecake Cups bring together easy ingredients for a complex flavor experience loved by all!
Step‑by‑Step Instructions for No-Bake Blueberry Cheesecake Cups
Step 1: Prepare the Crust
In a medium bowl, combine graham cracker crumbs, melted butter, granulated sugar, and a pinch of salt. Mix until the texture resembles damp sand. Firmly press the mixture into the bottoms of six dessert cups using the back of a spoon to create an even layer. Set aside for later assembly of your No-Bake Blueberry Cheesecake Cups.
Step 2: Cook the Blueberry Topping
In a saucepan over medium heat, combine fresh or frozen blueberries, sugar, and a splash of water. Stir gently for about 3-4 minutes until the blueberries soften and release their juices. The mixture should be bubbling lightly. Remove from heat, and let it cool slightly while you prepare the thickening agent.
Step 3: Thicken the Blueberry Sauce
Mix cornstarch with a tablespoon of cold water in a small bowl to create a slurry. Pour this mixture into the blueberry sauce, stirring continuously for about 1-2 minutes until it thickens slightly. Add the lemon juice, stir well, and then allow the blueberry topping to cool completely before layering it over the cheesecake.
Step 4: Blend the Cheesecake Filling
In a large mixing bowl, beat the softened cream cheese, sugar, vanilla extract, and a splash of lemon juice using an electric mixer on medium speed. Continue mixing until the mixture is smooth and free of lumps, which should take about 2-3 minutes. This creamy base will be the heart of your No-Bake Blueberry Cheesecake Cups.
Step 5: Whip the Cream
In a separate bowl, use the electric mixer to whip the cold heavy cream until it reaches medium-stiff peaks. This process typically takes around 3-4 minutes. Be careful not to over-whip, as you want it to retain its airy texture. Gently fold the whipped cream into the cream cheese mixture in two batches until fully incorporated.
Step 6: Assemble the Cheesecake Cups
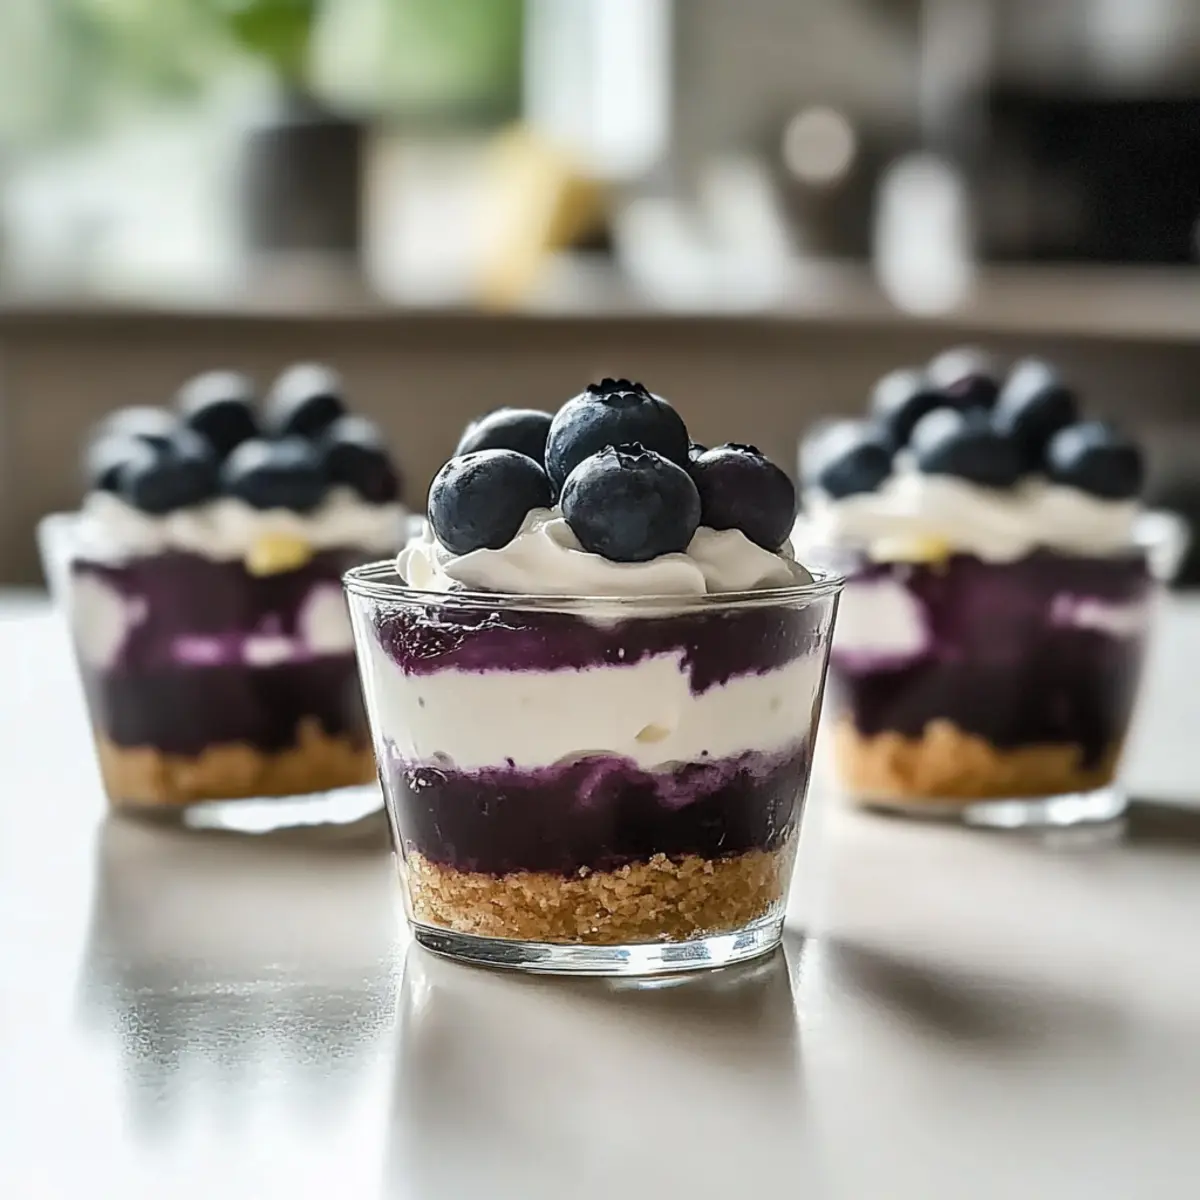
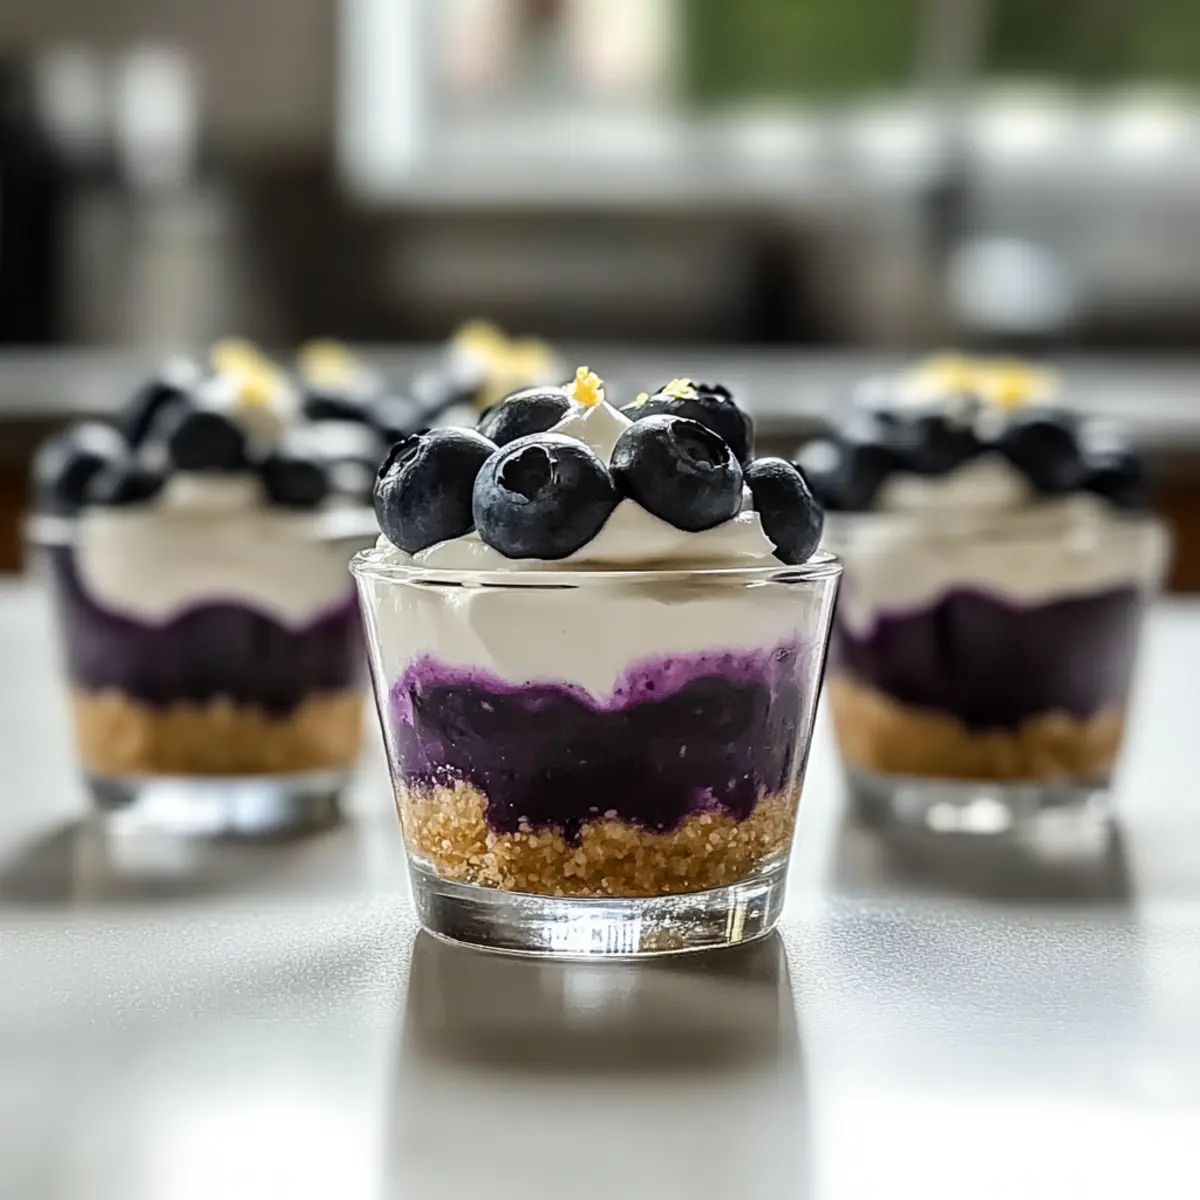
Spoon or pipe the creamy cheesecake filling into the cups over the prepared graham cracker crusts, smoothing the top for an even layer. Leave just a little space at the top for the blueberry topping. This charming layering is what makes your No-Bake Blueberry Cheesecake Cups visually appealing.
Step 7: Add the Blueberry Topping
Once the blueberry topping is at room temperature, carefully spoon it over the cheesecake filling, covering it fully or leaving a portion exposed for a decorative touch. The vibrant color of the blueberries will beautifully contrast with the creamy filling, enhancing the overall presentation of your No-Bake Blueberry Cheesecake Cups.
Step 8: Chill and Set
Cover each dessert cup with plastic wrap and refrigerate for at least 2 hours, allowing the cheesecake to firm up and the flavors to meld. This chilling time is essential for achieving the perfect texture. When it’s time to serve, remove the plastic wrap and enjoy these delightful treats chilled, garnished as desired.
What to Serve with No-Bake Blueberry Cheesecake Cups
Looking to create a delightful spread alongside your indulgent no-bake dessert? Let’s explore some perfect pairings that will make your gathering unforgettable.
-
Fresh Fruit Salad: A medley of seasonal fruits adds brightness and refreshes your palate after the rich cheesecake cups. Pair with a sprinkle of mint for a burst of flavor.
-
Minty Iced Tea: A chilled cup of minty iced tea offers a refreshing contrast to the creamy richness of your dessert, making each bite feel lighter.
-
Grilled Chicken Skewers: Juicy, marinated chicken skewers bring a savory element that complements the sweetness of the cheesecake cups, creating a balanced meal.
-
Mini Quiches: These savory treats can be tailored with your favorite ingredients, providing a hearty option that satisfies savory cravings before indulging in dessert.
-
Chocolate-Dipped Strawberries: For an added touch of elegance, serve chocolate-dipped strawberries that tie in beautifully with the fruity flavors of the cheesecake.
-
Sparkling Lemonade: The effervescence of sparkling lemonade cuts through the creaminess of the cheesecake, offering a delightful contrast while keeping the atmosphere festive.
-
Pistachio Crust Ice Cream: A scoop of ice cream with a pistachio crust brings a delightful crunch, echoing the texture of the graham cracker base, enhancing the dessert experience.
-
Cheese Platter: A mix of creamy and tangy cheeses served with crackers elevates the entire meal, providing a sophisticated touch that pairs wonderfully with the fruity dessert.
-
Lemon Bars: Bringing a zesty element to your dessert table, lemon bars are bright and cheerful companions, refreshing your taste buds and inviting a summer vibe.
Serve your No-Bake Blueberry Cheesecake Cups with these pairings, and watch your gathering become an unforgettable celebration of flavors!
Make Ahead Options
These No-Bake Blueberry Cheesecake Cups are perfect for meal prep enthusiasts looking to save time! You can prepare the graham cracker crust up to 24 hours in advance, simply press it into your dessert cups and store covered in the refrigerator. The blueberry topping can also be made ahead; just let it cool and refrigerate for up to 3 days. For the cheesecake filling, it’s best to prepare it on the day you plan to serve, ensuring it remains light and fluffy. When ready to serve, layer the filling into the cups over the crust, add the chilled blueberry topping, and enjoy a stress-free dessert that’s just as delicious as if you’d made it that same day!
No-Bake Blueberry Cheesecake Cups Variations
Feel free to get creative and customize your No-Bake Blueberry Cheesecake Cups with these delightful twists!
-
Berry Medley: Swap blueberries for strawberries, raspberries, or blackberries to create a vibrant fruit medley.
-
Chocolate Crust: Use crushed chocolate cookies instead of graham crackers for a rich, decadent crust that pairs beautifully with the blueberry filling.
-
Dairy-Free Delight: Substitute full-fat cream cheese with a plant-based cream cheese and use coconut whipped cream for a dairy-free version that’s just as creamy.
-
Sweetener Swap: For a healthier option, switch granulated sugar with honey, maple syrup, or a sugar substitute to adjust sweetness according to your preferences.
-
Lemon Zing: Add extra lemon zest into your cheesecake filling for a refreshing zest that enhances the overall flavor of the dessert.
-
Nutty Crunch: Sprinkle chopped nuts, such as almonds or pecans, on top of the blueberry layer for an added crunch that complements the creamy texture.
-
Mini Heart Cups: Use mini dessert cups for a charming twist, perfect for weddings or romantic dinners, letting everyone enjoy their own petite serving.
-
Spice It Up: Incorporate a dash of ground cinnamon or nutmeg into the filling for a subtle warmth that pairs well with the tartness of the blueberries.
These variations can help you tailor the No-Bake Blueberry Cheesecake Cups to perfectly fit your taste or occasion. If you’re looking for other fruity desserts, consider making Lemon Blueberry Cottage or try these delightful Blueberry Lemon Zest bites!
Storage Tips for No-Bake Blueberry Cheesecake Cups
Fridge: Store prepared No-Bake Blueberry Cheesecake Cups covered in the refrigerator for up to 3 days to maintain their freshness and flavor.
Freezer: If needed, you can freeze the cheesecake cups for up to 2 months. Wrap them tightly to avoid freezer burn, but note that the texture may slightly change upon thawing.
Reheating: There’s no need for reheating—simply remove from the fridge or freezer, let thaw completely in the fridge, and serve chilled for the best experience.
Make-Ahead: These cups can be made a day in advance, perfect for gatherings; the flavor only improves as they chill and set!
Expert Tips for No-Bake Blueberry Cheesecake Cups
-
Soften Cream Cheese: Always let the cream cheese sit at room temperature for at least 30 minutes to avoid lumps in your filling.
-
Cool Blueberries Thoroughly: Allow the blueberry topping to cool completely before adding it to the cheesecake layer; this helps maintain the dessert’s structure.
-
Whip to Perfection: For the best texture in your filling, whip the cream to medium-stiff peaks—this ensures a light, fluffy cheesecake.
-
Chill Adequately: Ensure you refrigerate your No-Bake Blueberry Cheesecake Cups for at least 2 hours to achieve a perfect set.
-
Presentation Matters: Serve in clear cups to showcase the stunning layers, making each individual dessert a beautiful centerpiece.
No-Bake Blueberry Cheesecake Cups Recipe FAQs
How do I select ripe blueberries for the topping?
Absolutely! When selecting blueberries, look for ones that are plump, firm, and a deep blue color. Avoid any with greenish or red hues, as these indicate they are not yet ripe. Additionally, steer clear of berries that have dark spots all over, which can suggest overripeness or mold. Fresh blueberries should be stored in the fridge in a breathable container for up to a week.
How should I store the No-Bake Blueberry Cheesecake Cups?
You can store your prepared No-Bake Blueberry Cheesecake Cups covered in the refrigerator for up to 3 days. Make sure they are tightly covered to keep them fresh and to prevent any odors from other foods in the fridge.
Can I freeze the cheesecake cups, and if so, how?
Absolutely! To freeze your No-Bake Blueberry Cheesecake Cups, wrap each cup tightly with plastic wrap and then place them in a freezer-safe container or zip-top bag. They can be frozen for up to 2 months. When you’re ready to enjoy them, simply transfer them to the fridge and allow them to thaw overnight. Keep in mind that the texture might change slightly upon thawing, but they’ll still be delicious!
What if my cheesecake filling is lumpy?
If you find your cheesecake filling is lumpy, don’t worry too much! It typically results from the cream cheese not being softened adequately. To correct this, simply put the mixture back in your mixer and blend it for an additional minute or two. If it’s already mixed with the whipped cream, consider using a spatula to gently fold in more whipped cream to smooth it out. Just remember to whip your cream cheese at room temperature next time!
Are there any dietary considerations I should be aware of?
If you’re making the No-Bake Blueberry Cheesecake Cups for guests, it’s wise to ask about any allergies. The recipe contains dairy products like cream cheese and heavy whipping cream, which can be problematic for those with lactose intolerance. For a dairy-free variation, you can use plant-based cream cheese and whipped cream. Always check if anyone has berry allergies, though blueberries are generally safe for most people and pets!
No-Bake Blueberry Cheesecake Cups for Effortless Indulgence
Ingredients
Equipment
Method
- In a medium bowl, combine graham cracker crumbs, melted butter, granulated sugar, and a pinch of salt. Mix until the texture resembles damp sand.
- Firmly press the mixture into the bottoms of six dessert cups using the back of a spoon to create an even layer. Set aside.
- In a saucepan over medium heat, combine fresh or frozen blueberries, sugar, and a splash of water. Stir gently for about 3-4 minutes until the blueberries soften and release their juices.
- Mix cornstarch with a tablespoon of cold water in a small bowl to create a slurry. Pour this into the blueberry sauce, stirring continuously for about 1-2 minutes until it thickens slightly. Add the lemon juice, stir, and let it cool completely.
- In a large mixing bowl, beat the softened cream cheese, sugar, and a splash of lemon juice using an electric mixer on medium speed until smooth.
- In a separate bowl, whip the heavy cream until it reaches medium-stiff peaks. Gently fold the whipped cream into the cream cheese mixture until fully incorporated.
- Spoon the creamy cheesecake filling into the cups over the prepared graham cracker crusts, smoothing the top.
- Carefully spoon the blueberry topping over the cheesecake filling once cooled, covering it fully or leaving a portion exposed for decoration.
- Cover each dessert cup with plastic wrap and refrigerate for at least 2 hours before serving chilled, garnished as desired.
Leave a Reply