
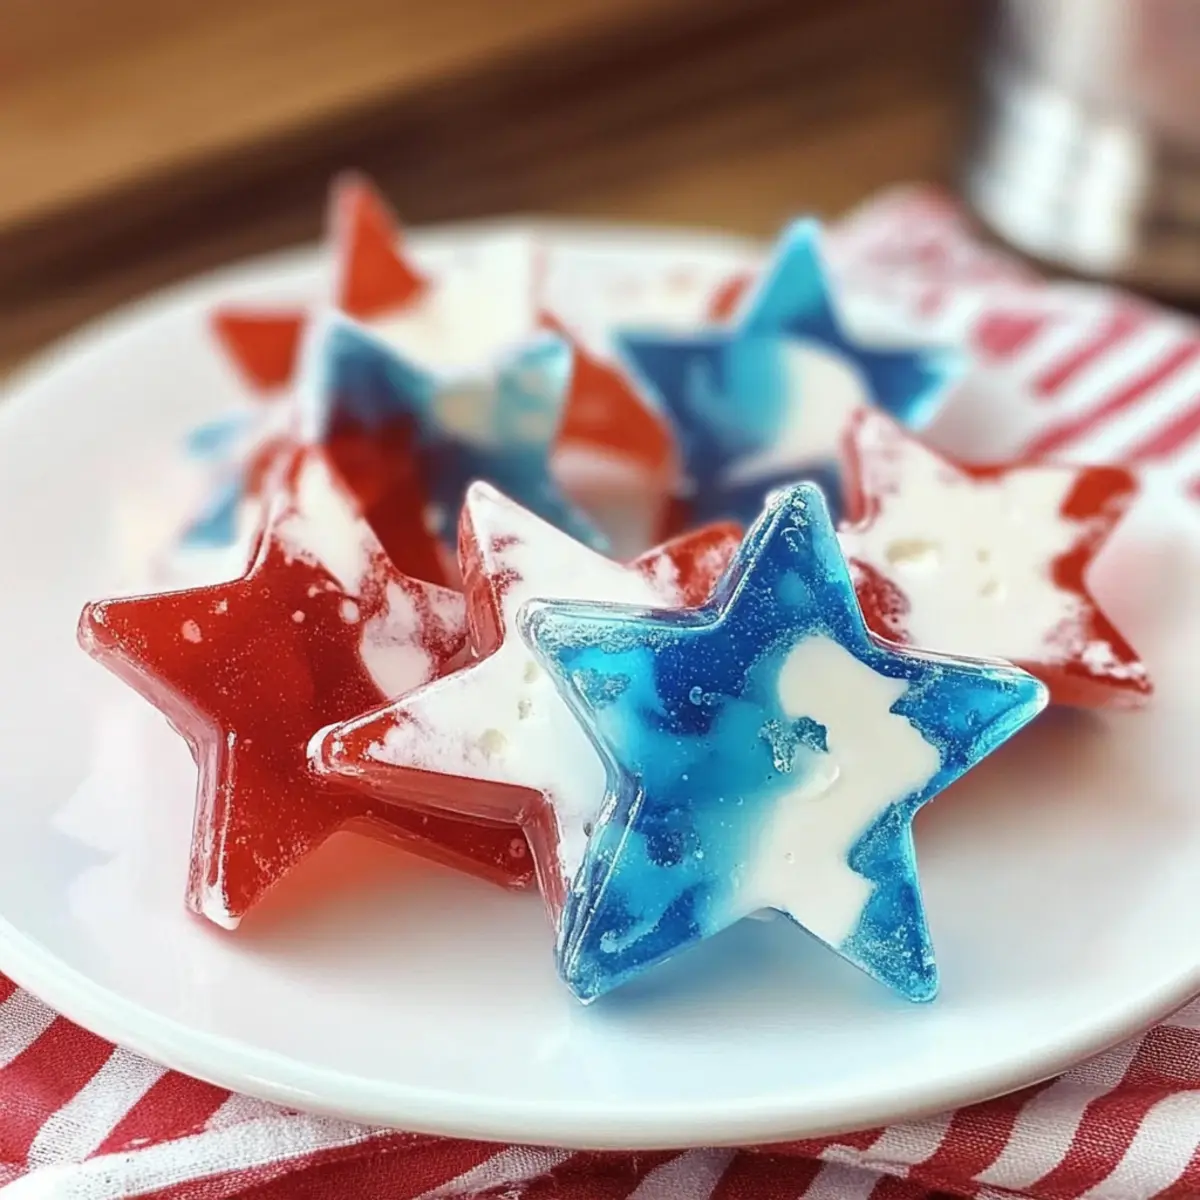
As the sun dips below the horizon and the scent of summer barbecues fills the air, a wave of excitement washes over me—it’s time for a festive treat! I introduce you to my Red, White, and Blue Jell-O Stars, a no-bake dessert that not only dazzles the eyes but is also super fun to make with the kids. This playful dessert bursts with color and offers an irresistible creamy layer that perfectly complements the fruity flavors. Plus, it’s an incredibly easy recipe that will leave your guests marveling at your culinary skills without the fuss. Picture yourself setting these delightful stars on the dessert table, sparking joy and delight at every celebration. What color combination will you choose for your next family gathering?
Why Choose Jell-O Stars for Celebrations?
Festive Appeal: These vibrant Jell-O stars are not only fun to make but also stunning on any dessert table, instantly bringing a holiday vibe to your gatherings.
Kid-Friendly Fun: Perfect for little hands, kids will love helping to create these cheerful treats, making them a great way to bond in the kitchen.
No-Bake Convenience: This recipe is easy to whip up, providing a hassle-free dessert option that requires minimal time and fuss, allowing you more moments with family and friends.
Customizable Flavors: Feel free to experiment with flavors! Swap out the Jell-O for seasonal colors or tastes, like orange and lime for Halloween or options like Blueberry Grilled Cheese for a twist!
Crowd-Pleasing: Bright, colorful, and utterly delicious, these treats are sure to be a hit with guests, making them perfect for celebrations like BBQs, birthday parties, or Independence Day festivities.
Red White and Blue Jell-O Stars Ingredients
For the Blue Layer
• Berry Blue Jell-O – Provides the blue color and a fruity flavor; feel free to substitute with an alternative blue flavor for variety.
• Boiling Water – Activates the gelatin powders; ensure it’s boiling for effective mixing.
For the Red Layer
• Strawberry Jell-O – Gives the red color and sweetness; can be replaced with cherry Jell-O for a different taste.
For the Creamy Layer
• Unflavored Gelatin – Essential for creating the creamy layer over the colored Jell-O; do not substitute as it is crucial for texture.
• Cold Water – Used to bloom the unflavored gelatin; critical for proper gelling.
• Sweetened Condensed Milk – Adds creaminess and sweetness; substitute with coconut milk for a dairy-free option if desired.
For Assembly
• Medium Size Star Cookie Cutters – Perfect for cutting the finished Jell-O into star shapes; use any festive-shaped cutter to add variety.
Step‑by‑Step Instructions for Red White and Blue Jello Stars
Step 1: Prepare the Jell-O Layers
Start by boiling water as per package instructions for both the Berry Blue Jell-O and Strawberry Jell-O. In separate bowls, pour the boiling water over the Jell-O powder for each color, stirring until completely dissolved. Once mixed, pour the blue Jell-O into a baking dish and the red Jell-O into another. Refrigerate for at least 4 hours, or overnight, until fully set and firm to the touch.
Step 2: Bloom the Unflavored Gelatin
In a large mixing bowl, sprinkle the unflavored gelatin over cold water, allowing it to bloom for 5 minutes. This step is crucial for achieving the right texture. After blooming, heat 1.5 cups of boiling water and stir into the gelatin mixture until completely dissolved. Mix in the sweetened condensed milk, creating a creamy base, and let it cool down to room temperature while you await the set Jell-O layers.
Step 3: Assemble the Jell-O Cubes
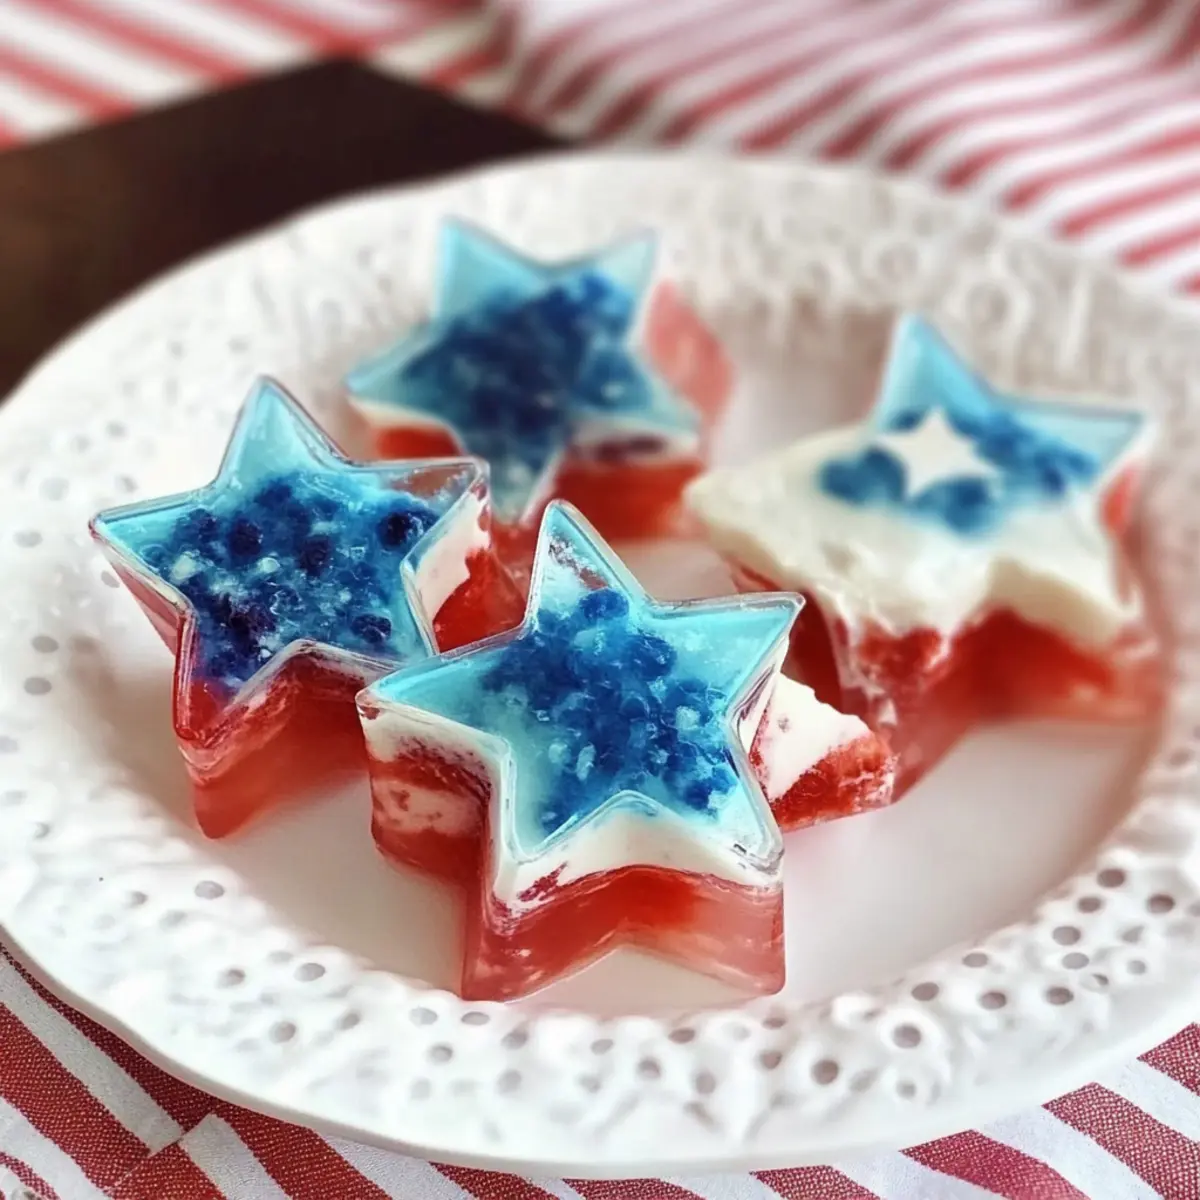
Once your colored Jell-O layers are completely set, remove them from the refrigerator. Use a knife to cut each Jell-O layer into cubes, ensuring they are uniform for a neat presentation. Transfer the colorful Jell-O cubes into a 9×13 glass baking dish, layering them evenly. The vibrant colors will create a beautiful base for your Red White and Blue Jell-O Stars.
Step 4: Pour the Creamy Layer
With your cooled condensed milk mixture ready, gently pour it over the Jell-O cubes in the baking dish. This creamy layer should cover all the colorful Jell-O, forming a stunning top layer. Return the dish to the refrigerator and chill overnight to ensure everything sets well and the flavors meld beautifully together for your festive treat.
Step 5: Cut Out the Stars
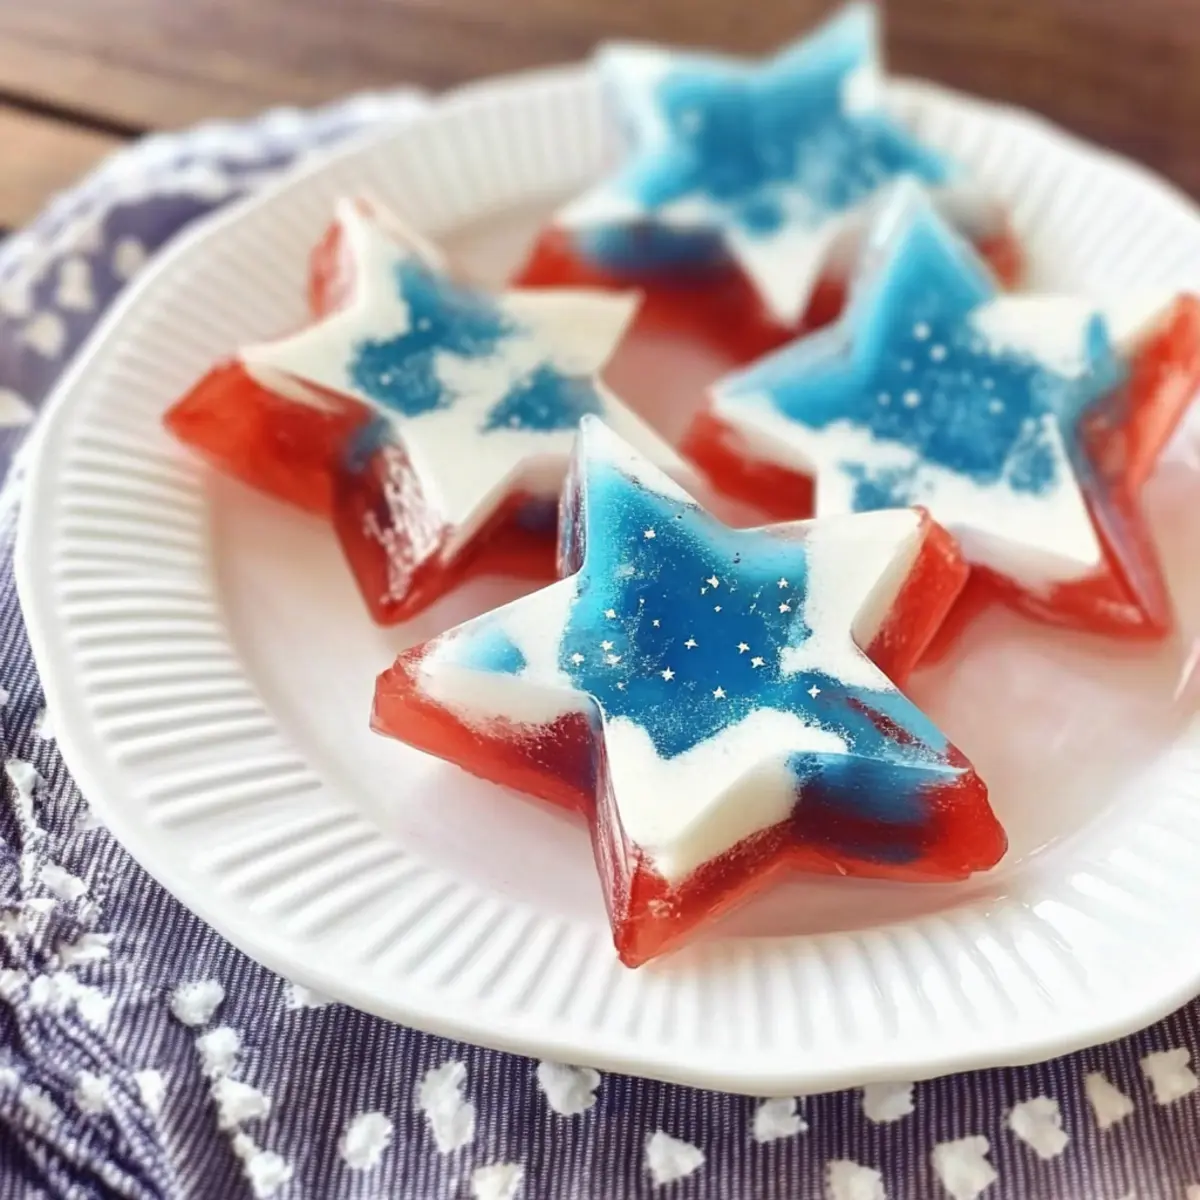
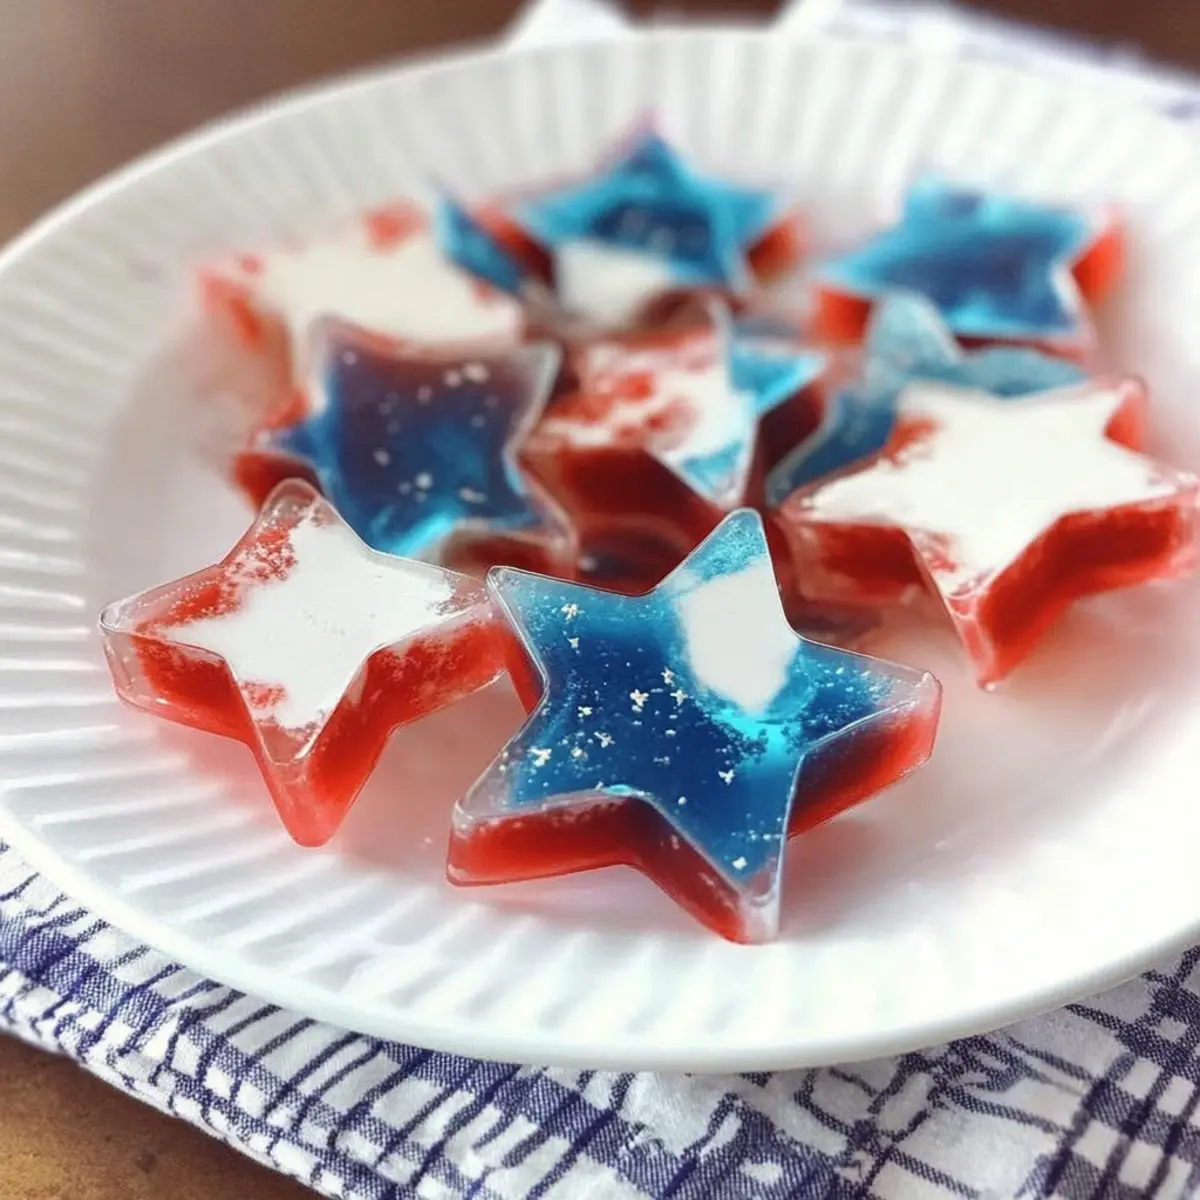
When you’re ready to serve your Red White and Blue Jell-O Stars, remove the set Jell-O from the refrigerator. Use medium-sized star cookie cutters to cut out star shapes from the vibrant dessert. Press down firmly to ensure clean edges, and carefully lift the stars out of the dish. Arrange them on a colorful platter for a delightful presentation at your next gathering.
How to Store and Freeze Red White and Blue Jell-O Stars
Fridge: Store any leftover Jell-O stars in an airtight container in the refrigerator for up to 3 days to maintain their freshness and eye-catching colors.
Freezer: For longer storage, you can freeze the Jell-O stars for up to 2 months. Place them in a single layer on a baking sheet until frozen, then transfer to a freezer-safe bag.
Thawing: When ready to enjoy, thaw the Red White and Blue Jell-O Stars in the refrigerator overnight. Avoid microwave thawing, as it can affect texture.
Reheating: There’s no need to reheat these stars, as they are best enjoyed chilled. Serve them straight from the fridge for a refreshing treat!
Red White and Blue Jell-O Stars Variations
Feel free to get creative and customize your Jell-O stars to suit your taste and the occasion!
-
Flavor Swap: Try orange and lime Jell-O for a festive Halloween treat that keeps the fun alive!
-
Berry Bliss: Use mixed berry Jell-O for a delightful twist, bringing an explosion of flavor to each bite.
-
Dairy-Free Delight: Substitute sweetened condensed milk with coconut milk for a creamy, dairy-free version that everyone can enjoy.
-
Colorful Layers: Alternate flavors by using green Jell-O for a vibrant twist; think grasshopper green for St. Patrick’s Day!
-
Shape Shift: Opt for different cookie cutter shapes like hearts or flowers to match your themed parties, adding a personal touch to every celebration.
-
Add Some Zing: Toss in some fresh fruit pieces like blueberries or strawberries among the layers for an extra burst of flavor and texture.
-
Fruity Garnish: Top the stars with a sprinkle of edible glitter or shredded coconut to elevate their presentation for special occasions.
-
Warm Heat: For a spicy twist, add a splash of jalapeño syrup to your sweetened condensed milk layer for a delightful kick that will surprise your guests.
Each of these variations is a chance to create a personal version of the classic Red White and Blue Jell-O Stars, perfect for showcasing your unique culinary flair!
Expert Tips for Red White and Blue Jello Stars
• Chill Time Matters: Make sure to chill the Jell-O layers for at least 4 hours, or ideally overnight, to ensure they set properly for those beautiful stars.
• Cool Before Pouring: Allow the condensed milk mixture to cool before pouring it over the Jell-O. This prevents the layers from melting into each other, preserving the colorful design.
• Uniform Sizes: For a neat presentation, cut the Jell-O into uniform cubes before pouring the creamy layer. This ensures even layering and beautiful star shapes.
• Creative Customization: Don’t hesitate to mix colors and flavors! Use different Jell-O varieties to match your celebration theme, making your Red White and Blue Jell-O Stars even more exciting.
• Assess Your Cutters: Choose cookie cutters that are sturdy and the right size, as this makes cutting through the layers easier, resulting in perfect star shapes every time.
Make Ahead Options
These Red, White, and Blue Jell-O Stars are perfect for busy home cooks looking to save time during festive gatherings! You can prepare the colored Jell-O layers up to 24 hours in advance, allowing busy cooks to have one less thing to do on the day of the celebration. Simply follow the recipe to set the Jell-O and chill it overnight. The creamy layer can also be made in advance; simply refrigerate it separately. When you’re ready to serve, cut the Jell-O into stars and enjoy a stunning dessert just as delightful as if it were made fresh that day. By prepping ahead, you’ll not only reduce stress but also have more time to enjoy the festivities with family and friends!
What to Serve with Red, White, and Blue Jell-O Stars?
Elevate your festive gathering with delightful side dishes that perfectly complement your vibrant dessert and create a complete meal experience.
- Grilled Burgers: Juicy, flavorful burgers bring a classic BBQ vibe, enhancing the fun atmosphere and satisfying hearty appetites. A range of toppings can cater to every taste.
- Corn on the Cob: Sweet, buttery corn on the cob adds a summery crunch, perfectly balancing the soft texture of the Jell-O stars. Serve it with fresh herbs for extra flavor!
- Fruit Salad: A colorful fruit salad bursting with berries and melons ties in with the theme while refreshing palates, making it an ideal companion to rich Jell-O layers.
- Potato Salad: Creamy potato salad introduces a satisfying creaminess and heartiness to your meal, harmonizing beautifully with the sweetness of the Jell-O.
- Caprese Skewers: With fresh mozzarella and tomatoes drizzled in basil, these skewers add a savory touch that complements the sweet flavors of the dessert while offering a delightful presentation.
- Sparkling Lemonade: Instead of simple soda, serve sparkling lemonade. Its zesty brightness cuts through the richness of the Jell-O and keeps things refreshing.
- Chocolate Chip Cookies: For an indulgent treat, pair the Jell-O stars with warm, gooey chocolate chip cookies, creating an ultimate dessert duo that everyone will love.
- Ice Cream Floats: Make a fun dessert experience with ice cream floats combining soda and your favorite scoop, providing a fizzy, creamy counterpart to the colorful Jell-O.
- Banana Pudding: Creamy banana pudding adds a rich, comforting feel to the dessert table, drawing in both kids and adults to its classic charm.
- Patriotic Themed Drinks: Create red, white, and blue layered drinks using fruit juices and soda. They’ll tie right into your Jell-O stars, creating a cohesive festive look.
Red, White, and Blue Jell-O Stars Recipe FAQs
What is the best way to select Jell-O flavors?
Absolutely! When choosing Jell-O flavors for your Red, White, and Blue Jell-O Stars, look for vibrant hues and fruity scents. Freshness is key; check the expiration date and avoid any boxes with visible damage. If you’re feeling adventurous, feel free to swap traditional flavors—like using watermelon or blue raspberry—according to your personal preference!
How should I store leftover Jell-O stars?
For any leftover Red, White, and Blue Jell-O Stars, simply place them in an airtight container in the refrigerator. They’ll stay fresh for about 3 days. If you notice the colors become less vibrant or they start to lose their firm texture, it’s a sign that it’s time to enjoy them soon!
Can I freeze Red, White, and Blue Jell-O Stars?
Yes, you can certainly freeze your Jell-O Stars! Start by placing them in a single layer on a baking sheet and freeze until solid, which usually takes about 2-3 hours. Once frozen, transfer them to a freezer bag, squeezing out as much air as possible. They can be kept frozen for up to 2 months. To thaw, place them in the refrigerator overnight—this helps maintain their delightful texture and presentation.
What if my Jell-O layers don’t set properly?
If you encounter a situation where the Jell-O layers aren’t setting as expected, try increasing the chill time. Sometimes, they need an additional 2-3 hours to fully set, especially if your refrigerator temperature is slightly warmer. Make sure your boiling water is indeed boiling when activating the gelatin, as this is crucial for proper gelling.
Are there any dietary considerations with this recipe?
It’s great to think about dietary needs! The Red, White, and Blue Jell-O Stars can be adapted for various dietary restrictions. For a dairy-free option, simply substitute sweetened condensed milk with coconut milk. Additionally, check that your chosen Jell-O and unflavored gelatin do not contain any allergens that might affect your guests, such as gluten or artificial coloring, as these can vary by brand. Always keep your pets away from these treats—they might be pretty, but ingredients like xylitol found in some sweeteners can be harmful to them!
Delightful Red White and Blue Jello Stars for Festive Fun
Ingredients
Equipment
Method
- Start by boiling water as per package instructions for both the Berry Blue Jell-O and Strawberry Jell-O. In separate bowls, pour the boiling water over the Jell-O powder for each color, stirring until completely dissolved. Once mixed, pour the blue Jell-O into a baking dish and the red Jell-O into another. Refrigerate for at least 4 hours, or overnight, until fully set and firm to the touch.
- In a large mixing bowl, sprinkle the unflavored gelatin over cold water, allowing it to bloom for 5 minutes. After blooming, heat 1.5 cups of boiling water and stir into the gelatin mixture until completely dissolved. Mix in the sweetened condensed milk, creating a creamy base, and let it cool down to room temperature.
- Once your colored Jell-O layers are completely set, remove them from the refrigerator. Use a knife to cut each Jell-O layer into cubes, ensuring they are uniform for a neat presentation. Transfer the colorful Jell-O cubes into a 9x13 glass baking dish, layering them evenly.
- Gently pour the creamy layer over the Jell-O cubes in the baking dish. Return the dish to the refrigerator and chill overnight to ensure everything sets well and the flavors meld beautifully.
- When you're ready to serve, remove the set Jell-O from the refrigerator. Use medium-sized star cookie cutters to cut out star shapes from the vibrant dessert. Arrange them on a colorful platter for a delightful presentation.
Leave a Reply