
As I walked through the local farmer’s market, a vibrant array of seasonal vegetables caught my eye, sparking an idea for a dish that would truly embody the essence of spring. Enter the Bright Spring Salad: fresh, healthy, and bursting with life, it’s the perfect addition to your lunch rotation or a light dinner alongside your favorite protein. What I adore about this customizable salad is not just its colorful presentation, but also how quick and easy it is to throw together. With a mix of crunchy vegetables, tender greens, and a zesty lemon vinaigrette, every bite celebrates the season’s bounty. Why settle for mundane meals when you can elevate your dining experience with this delightful dish? Ready to discover how to craft your own Bright Spring Salad? Let’s dive in!
Why Is This Salad a Must-Try?
Freshness at Its Best: With seasonal produce, this salad bursts with flavors that celebrate spring, making every bite feel vibrant and alive.
Endless Customization: You can tailor it to your taste preferences with various veggies and toppings, like adding Honeycrisp Apple Feta Salad for a fruity twist or even some delicious Cucumber Salad Sandwiches on the side.
Quick & Simple: Throwing together a healthy meal has never been easier! This recipe only requires about 15 minutes of prep time.
Crowd-Pleasing Appeal: Whether for a potluck or a family dinner, this salad will impress everyone with its eye-catching presentation and delicious taste.
Perfect for Any Occasion: Serve it as a light lunch, dinner side, or at festive gatherings— your guests will thank you!
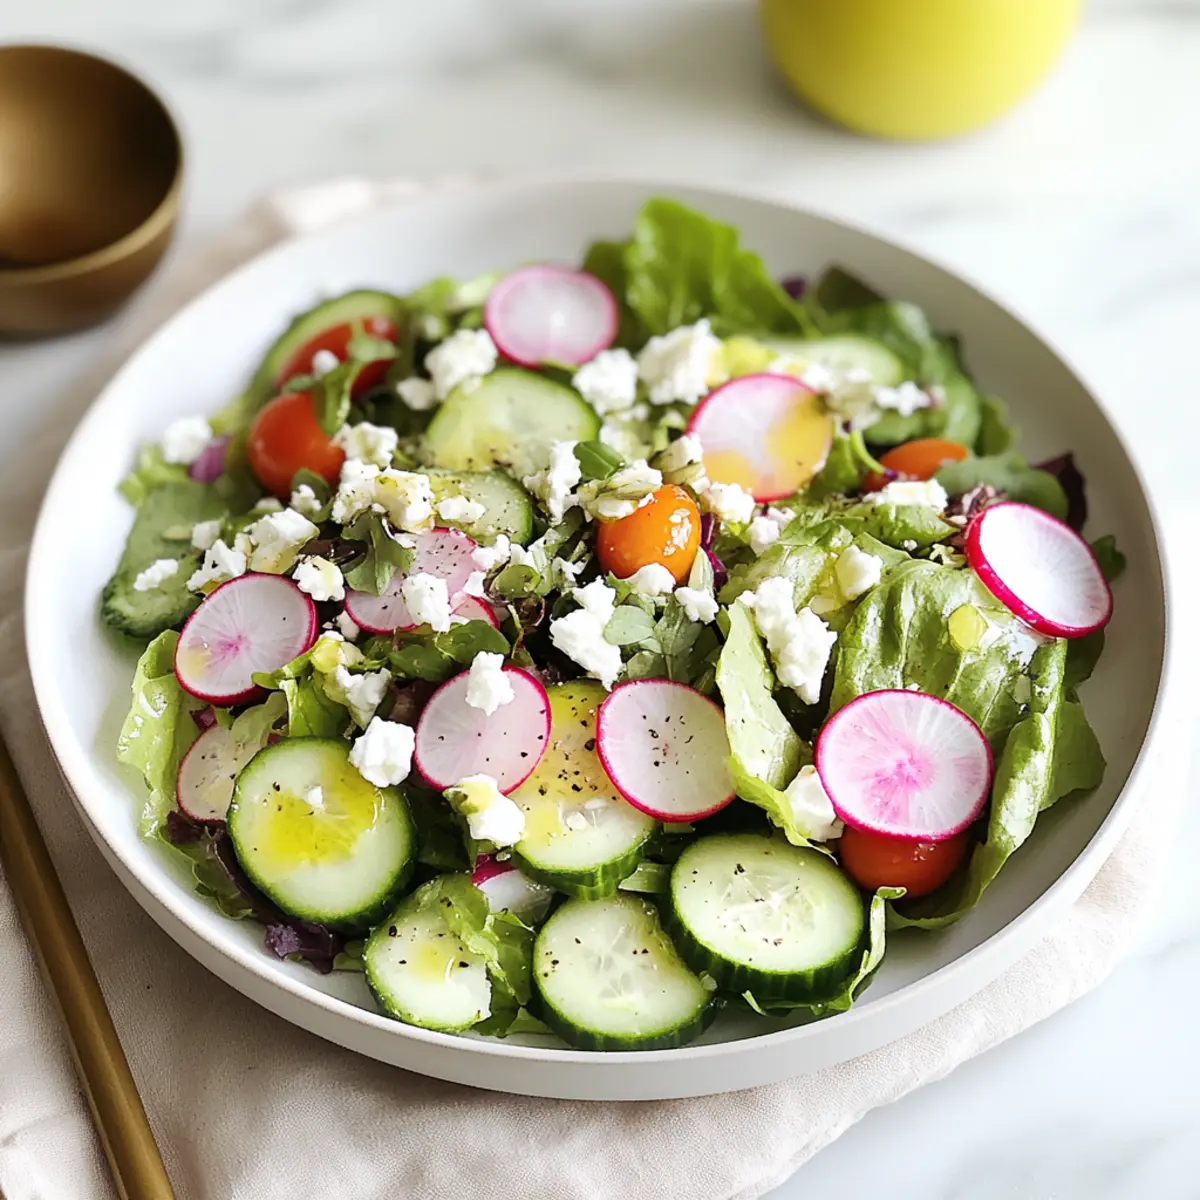
Bright Spring Salad Fresh Healthy Ingredients
• Get ready to enjoy a burst of flavor!
For the Salad
- Mixed Spring Greens – Provides the leafy base; substitute with spring mix, baby spinach, or arugula.
- Cucumber – Adds refreshing crunch; zucchini can be used for a different texture.
- Radishes – Contributes a peppery flavor; omit if not preferred.
- Carrots – Adds sweetness and vibrant color; shredded carrots or bell peppers work too.
- Cherry Tomatoes – Offers juicy freshness; feel free to use any tomato variety, but cherry tomatoes are more flavorful.
- Green Onions – Introduces a mild onion flavor; red or yellow onions can be used in smaller amounts for stronger taste.
- Fresh Herbs (Parsley, Basil, Dill) – Enhance fragrance and brightness; any fresh herbs on hand will work perfectly.
- Feta or Goat Cheese – Adds richness and tang; for a dairy-free option, consider vegan cheese or nutritional yeast.
- Nuts/Seeds (Almonds, Sunflowers, Pumpkin Seeds) – Provide crunch and texture; choose based on your dietary preferences.
For the Dressing
- Olive Oil – Base for the vinaigrette; avocado oil can be a lighter alternative.
- Lemon Juice – Adds freshness and acidity; lime juice or vinegar (like apple cider) can be used as well.
- Dijon Mustard – Provides depth to the dressing; yellow mustard is a more accessible option for enhanced flavor.
- Honey/Maple Syrup – Adds a hint of sweetness; agave syrup is a vegan-friendly alternative.
- Salt and Black Pepper – Enhances flavors; adjust to your taste preferences.
Step‑by‑Step Instructions for Bright Spring Salad Fresh Healthy
Step 1: Prepare the Greens
Begin by washing and drying your mixed spring greens thoroughly; use a salad spinner for efficiency or gently pat them dry with paper towels. Once clean, place the vibrant greens in a large salad bowl, allowing them to form a colorful base for your Bright Spring Salad. Take a moment to admire the freshness before moving to the next step.
Step 2: Chop the Vegetables
Next, thinly slice the cucumber, radishes, carrots, and cherry tomatoes, ensuring each piece is uniform for even distribution of flavors. As you chop, enjoy the smells and colors of each vegetable; the crunchiness of the cucumber and the peppery bite of radishes will enhance the salad’s appeal. Add all the sliced ingredients directly into the bowl with the greens.
Step 3: Add Fresh Herbs
Chop your selected fresh herbs—such as parsley, basil, or dill—and sprinkle them over the salad mixture. Their aromatic scent will elevate the entire dish and add a delightful burst of flavor. Use your hands to gently toss the ingredients together, ensuring that the herbs are well-distributed throughout the Bright Spring Salad.
Step 4: Top with Cheese and Nuts
Layer on your choice of cheese—feta or goat cheese works beautifully—followed by a sprinkle of nuts or seeds for added crunch. If you prefer a creamy touch, consider adding slices of avocado. This combination will create a delicious contrast of textures, making each bite of your salad both satisfying and intriguing.
Step 5: Whisk the Dressing
In a small bowl, whisk together fresh lemon juice, Dijon mustard, honey or maple syrup, and olive oil until the mixture is well-emulsified and smooth. The dressing should feel vibrant and zesty. Season it with salt and black pepper to taste, adjusting as needed to suit your preference.
Step 6: Dress the Salad
Drizzle the freshly made dressing over your salad, starting with a small amount to avoid overdressing. Gently toss the salad using salad tongs or your hands, ensuring every ingredient is coated without bruising the delicate greens. The Bright Spring Salad should appear vibrant and glistening with the dressing.
Step 7: Serve and Enjoy
Finally, serve your Bright Spring Salad immediately for optimal freshness, allowing the colors and flavors to shine through. If desired, add extra toppings like additional nuts or herbs before bringing it to the table. This refreshing dish is perfect on its own or as a vibrant side to your favorite protein!
Bright Spring Salad Fresh Healthy Variations
Feel free to mix things up and personalize your Bright Spring Salad to create your own favorite version bursting with flavor!
- Sweet & Fruity: Add strawberries or mandarin oranges for a delightful sweetness that contrasts the earthy greens.
- Mediterranean Twist: Include olives and feta for a savory Mediterranean flair that’s both satisfying and rich in taste.
- Hearty Grains: Toss in cooked quinoa or farro for a more filling meal that adds a nutty flavor and chewy texture.
- Creamy Avocado: Substitute cheese with ripe avocado slices for a velvety texture packed with healthy fats—absolutely scrumptious!
- Spicy Kick: Incorporate jalapeños or a pinch of red pepper flakes to elevate your salad with heat and excitement.
- Herb Magnitude: Experiment with flavorful herbs like cilantro or mint for a fresh and vibrant taste that brings summer vibes.
- Crunchy Boost: Add crispy chickpeas or roasted nuts for an extra crunch that elevates the overall texture wonderfully.
- Variations in Dressing: Swap the lemon juice for lime or apple cider vinegar to give the dressing a new tangy twist—deliciously refreshing!
With these variations, your Bright Spring Salad can be whatever your heart desires! Pair it with a lovely grilled chicken or a tangy Pomegranate Salad Honey for a complete meal.
Make Ahead Options
These Bright Spring Salad components are perfect for meal prep! You can wash and dry the mixed spring greens, slice the vegetables, and chop the fresh herbs up to 24 hours in advance, keeping them in separate airtight containers in the refrigerator to maintain their freshness and crunch. To prevent the greens from wilting, avoid adding the dressing until just before serving. Additionally, you can prep the dressing itself up to 3 days ahead of time and store it in a sealed jar in the fridge. When you’re ready to enjoy your Bright Spring Salad, simply combine all the prepped ingredients, drizzle with dressing, and toss gently for a quick, delicious meal—all while saving valuable time on busy days!
What to Serve with Bright Spring Salad
Bright Spring Salad is a delightful way to embrace the season’s flavors, and pairing it with complementary dishes will elevate your meal beautifully.
-
Grilled Chicken: The smoky, juicy flavor of grilled chicken adds heartiness, balancing the salad’s fresh crunch and bright dressing.
-
Roasted Salmon: A rich, flaky salmon complements the zesty salad perfectly, enhancing the overall freshness while adding a dose of omega-3s. This pairing sings together like a summer duet!
-
Quinoa or Farro: These nutty grains offer a filling texture, making it a complete meal option. They absorb the salad’s dressing beautifully, allowing every bite to echo the vibrant flavors.
-
Crusty Bread: A slice of warm, crusty bread is perfect for scooping up the salad. The crunchy texture and chewy center create a delightful contrast with the salad’s crisp greens.
-
Sparkling Water with Lemon: This refreshing drink will cleanse your palate between bites, enhancing the bright citrus flavors found in the salad’s dressing.
-
Fresh Fruit Tart: For dessert, a light fruit tart brings a sweet finish, with fresh fruits mirroring the salad’s vivid colors and seasonality. It’s a sweet note to end a delightful meal!
-
Cheese Platter: Pair your salad with a small cheese board featuring creamy brie or sharp cheddar, adding another layer of flavor and richness to your meal.
-
Herb-Infused Pasta: Lightly seasoned pasta tossed with herbs and olive oil complements the salad’s fresh ingredients, creating a balanced plate that’s visually and tastefully appealing.
Each of these pairings will enhance your dining experience, celebrating the essence of fresh, seasonal ingredients alongside your Bright Spring Salad.
Expert Tips for Bright Spring Salad
- Fresh Ingredients: Use the freshest seasonal vegetables available to maximize flavor and nutrition; old produce can dull your salad’s vibrant taste.
- Wash Thoroughly: Make sure to wash greens and vegetables thoroughly to remove any grit or pesticides; this ensures a clean, enjoyable salad.
- Dress Just Before Serving: Add dressing just before serving to maintain the crispness of your greens; soggy salad is a common mistake that can be easily avoided.
- Uniform Cuts: Slice vegetables uniformly for both aesthetic appeal and even flavor distribution; uneven pieces can detract from the experience.
- Taste as You Go: Always taste your salad and dressing before serving; adjust salt, pepper, or acidity based on your preference for the best homemade experience.
- Customize Freely: Feel free to experiment with other veggies, herbs, or proteins based on personal preference; this Bright Spring Salad is a canvas for creativity!
How to Store and Freeze Bright Spring Salad
Fridge: Store the salad components separately in airtight containers, keeping everything fresh for up to 3 days. This ensures that light ingredients like mixed greens remain crisp.
Freezer: It’s best not to freeze a fully assembled salad, as the greens can become wilted. However, you can freeze chopped vegetables (except tomatoes and cucumbers) for up to 2 months—just thaw in the fridge before adding to the salad.
Dressing: Keep the dressing in a sealed jar in the fridge for up to a week. Shake well before using. Consider making it ahead for quick assembly during mealtime!
Reheating: If you’ve added grains or cooked proteins to your salad, enjoy them cold or at room temperature. Avoid reheating the greens to keep that lovely fresh crunch in your Bright Spring Salad.
Bright Spring Salad Fresh Healthy Recipe FAQs
How do I choose the best vegetables for my Bright Spring Salad?
Absolutely! When selecting vegetables, look for fresh, firm options. For greens, choose vibrant mixed spring greens without wilting or dark spots. Cucumbers should be crisp and bright green; opt for ones without soft spots. Pick radishes that are firm with a smooth skin, and choose cherry tomatoes that feel slightly soft to the touch for maximum flavor.
What’s the best way to store my salad leftovers?
Very good question! Store the individual components of your Bright Spring Salad in airtight containers. Mixed greens can last up to 3 days in the fridge, while chopped vegetables can remain fresh for about the same time. Make sure to dress the salad just before serving to keep the greens crisp and avoid sogginess.
Can I freeze vegetables for my salad?
Yes, you can! While it’s best not to freeze assembled salads due to texture changes, you can freeze chopped vegetables such as carrots and bell peppers for up to 2 months. Just wash, chop, and place them in a freezer-safe bag. When you’re ready to use, thaw them in the refrigerator overnight and add them to your salad for a fresh taste.
What should I do if my salad dressing is too tangy?
No worries! If your dressing turns out tangy, try adding a pinch of sugar or a drizzle of honey to balance the acidity. Alternatively, whisk in a bit more olive oil to mellow the flavors. Remember, you can taste and adjust as you go, so don’t hesitate to tweak it for your perfect balance.
Is this salad suitable for people with allergies?
Absolutely! The Bright Spring Salad is totally customizable to accommodate various dietary needs. If you have nut allergies, simply omit the nuts and seeds, and you can replace cheese with avocado for a creamy twist. Always check ingredient labels for potential allergens and feel free to swap any components based on your preferences!
How should I serve my salad to keep it fresh and appealing?
For a beautifully presented salad, serve it immediately after dressing. If preparing ahead, keep the dressing in a separate container and combine it just before serving. This will ensure that your Bright Spring Salad retains its lively colors and crisp textures, making it an inviting dish for your guests!
Bright Spring Salad Fresh Healthy: Your New Favorite Spring Dish
Ingredients
Equipment
Method
- Prepare the Greens: Wash and dry your mixed spring greens thoroughly, then place them in a large salad bowl.
- Chop the Vegetables: Thinly slice the cucumber, radishes, carrots, and cherry tomatoes. Add to the bowl with the greens.
- Add Fresh Herbs: Chop your selected fresh herbs and sprinkle them over the salad mixture. Toss gently to combine.
- Top with Cheese and Nuts: Layer on your choice of cheese, followed by a sprinkle of nuts or seeds.
- Whisk the Dressing: In a bowl, whisk together lemon juice, Dijon mustard, honey/maple syrup, and olive oil until smooth. Season to taste.
- Dress the Salad: Drizzle the dressing over the salad, toss gently to coat all ingredients evenly.
- Serve and Enjoy: Serve immediately, optionally adding extra toppings like nuts or herbs before enjoying.
Leave a Reply