
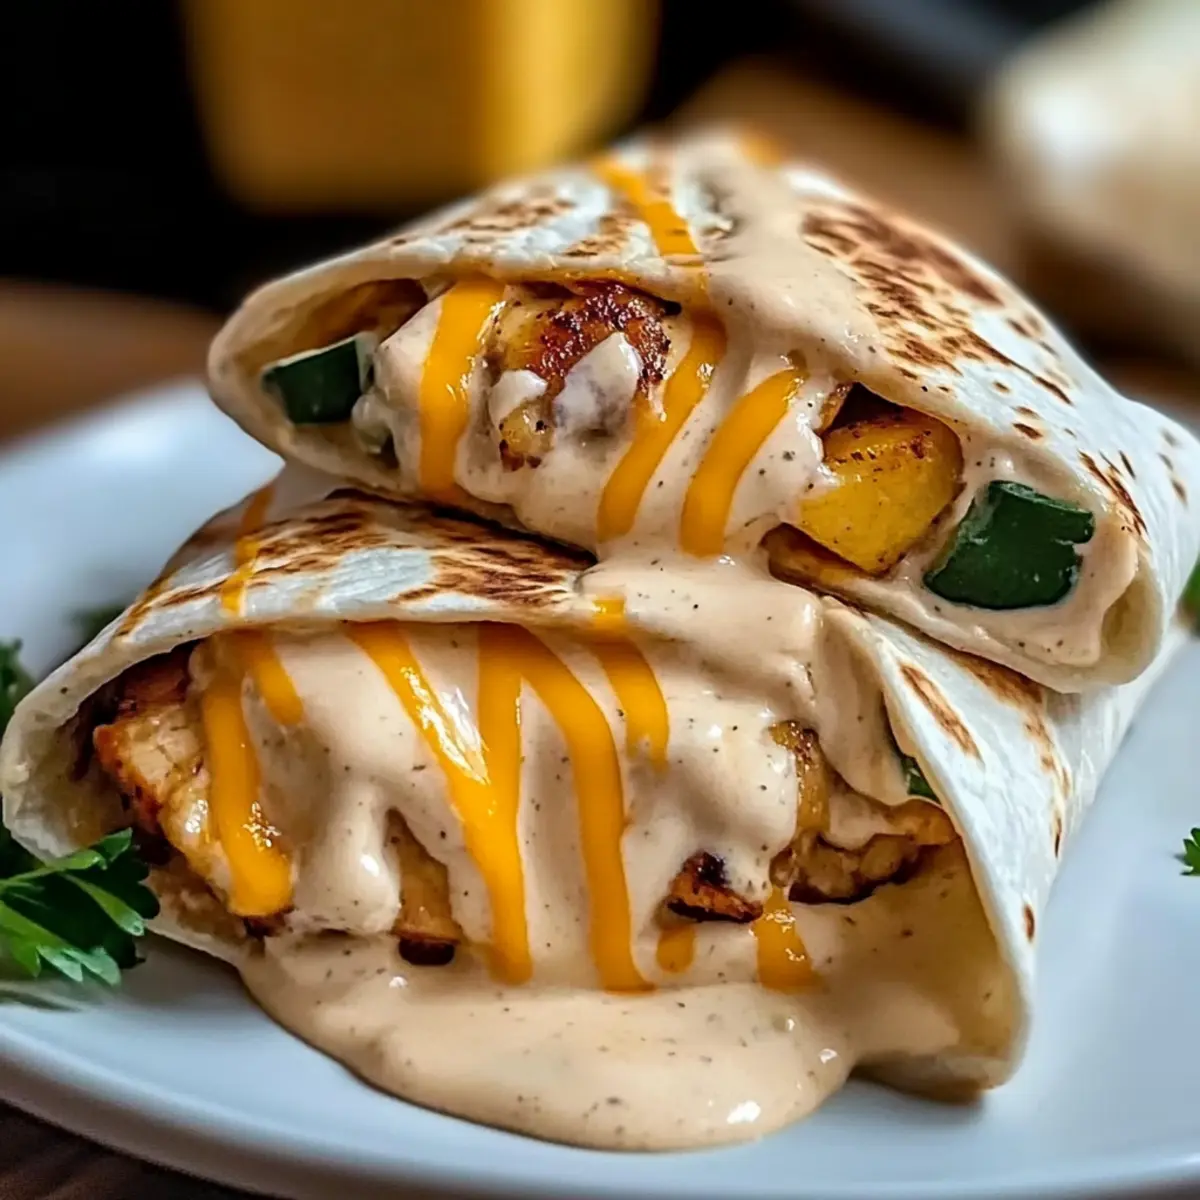
The scent of sizzling garlic dances through my kitchen, instantly lifting my spirits. This is the magic of Cheesy Garlic Chicken Wraps—a quick dinner that seamlessly marries comfort food vibes with a burst of savory goodness. Whether you’re winding down after a long day or hosting friends for a casual get-together, these wraps deliver not just satisfaction, but also delicious versatility. With juicy chicken, creamy cheese, and a hint of garlic wrapped in a crisp tortilla, they become a crowd-pleaser in no time. Plus, they’re easily customizable—think Mediterranean herbs or a zesty Southwest twist—and can fit any dietary needs with a gluten-free option available. Curious how to make this flavor-packed meal? Let’s dive in!
Why Choose Cheesy Garlic Chicken Wraps?
Flavorful and customizable, these wraps allow you to switch up ingredients to satisfy any craving—think Mediterranean or Buffalo Chicken variations that keep dinner exciting! Quick to prepare, they make weeknight cooking a breeze, and you can easily meal prep them in advance. With a comforting crunch on the outside and a gooey, creamy filling that delights, you’re sure to impress guests or the family alike. Try them alongside a fresh green salad or a side of salsa for dipping—trust me, your taste buds will thank you! Want to try other delicious chicken wraps? Check out these tempting options: Chicken Coleslaw Wraps and Chicken Shawarma Garlic.
Cheesy Garlic Chicken Wraps Ingredients
For the Chicken
• Extra Virgin Olive Oil – Adds richness and aids in cooking; can substitute with avocado oil.
• Chicken Breast (1.5 pounds) – Main protein, sliced into strips; turkey breast or tofu can be used for alternatives.
• Garlic (5 cloves, minced) – Provides aromatic flavor; adjust amount to taste, or use garlic powder as a substitute.
• Mediterranean Herb Blend (1 teaspoon) – Adds depth of flavor; Italian seasoning can serve as a good alternative.
• Smoky Paprika (0.5 teaspoons) – Offers warmth and color; sweet paprika is a suitable replacement.
• Chili Flakes – Spice level is optional; customize according to your preference.
• Sea Salt & Cracked Black Pepper – Essential for seasoning; kosher salt or white pepper can be great alternatives.
For the Vegetables
• Sweet Onion (1, thinly sliced) – Adds sweetness and bulk; shallots or red onion are good substitutes.
• Red Bell Pepper (1, julienned) – Provides crunch and sweetness; feel free to swap with any bell pepper or omit.
• Fresh Spinach Leaves (2 cups) – Nutritional boost; kale or arugula can also be used instead.
For the Cheese Filling
• Shredded Mozzarella (1.5 cups) – Acts as the gooey cheese filling; any melting cheese such as Monterey Jack can be utilized.
• Sharp Cheddar (0.5 cups) – Provides tanginess; can replace with mild cheddar for a lighter touch.
• Cream Cheese (3 tablespoons) – Ensures creaminess of the filling; use vegan cream cheese for a dairy-free option.
• Sour Cream (2 tablespoons) – Adds a tangy element; Greek yogurt is a healthier substitute.
• Fresh Chives (2 teaspoons, chopped) – Boosts freshness; green onions or leeks can be alternatives.
For the Tortillas
• Large Flour Tortillas (6) – The base for your wrap; corn or gluten-free tortillas are available options.
• Melted Butter (1.5 tablespoons) – Brush on tortillas for extra flavor; olive oil is a good substitute.
• Roasted Garlic Powder (0.75 teaspoons) – Enhances the flavor of tortillas; garlic salt can work as a replacement.
• Olive Oil Cooking Spray – Ensures even toasting, optional for use.
Step‑by‑Step Instructions for Cheesy Garlic Chicken Wraps
Step 1: Cook Chicken
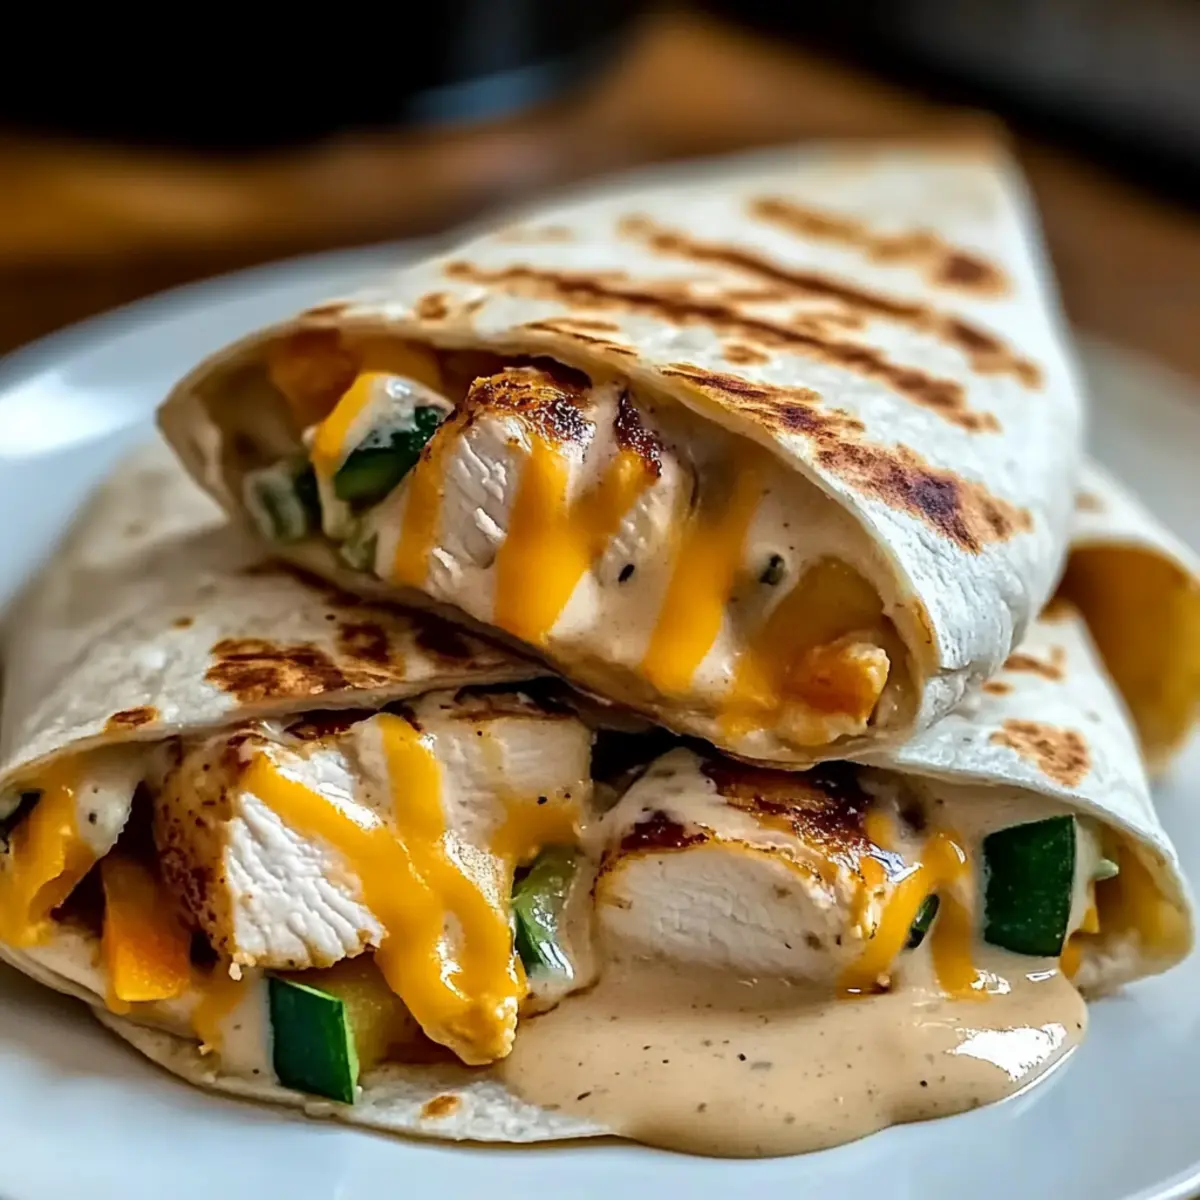
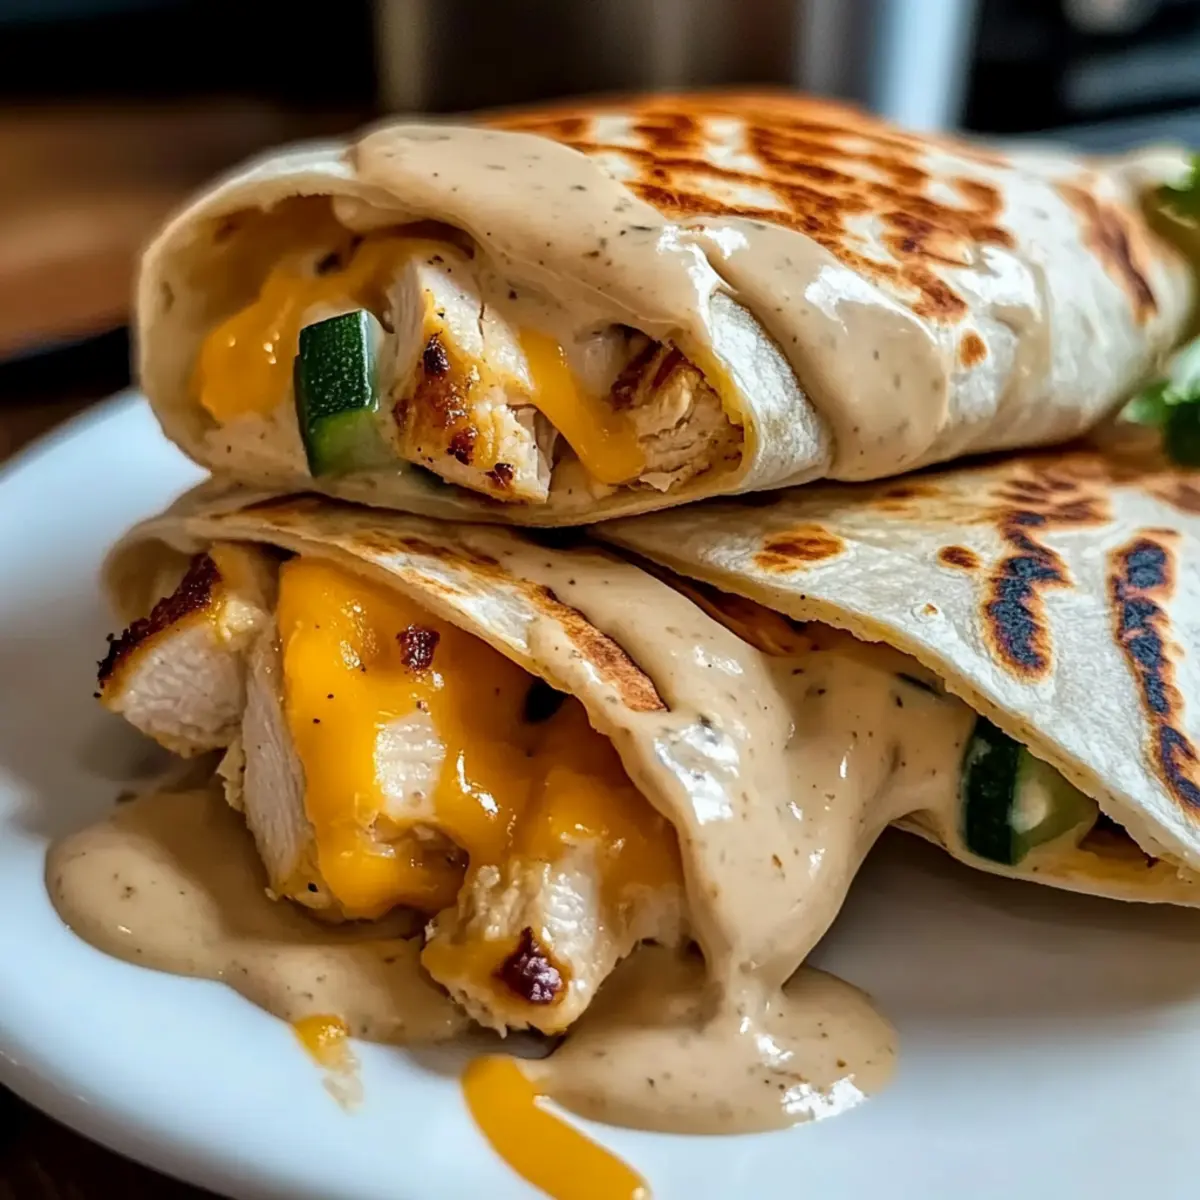
Heat a large skillet over medium-high heat and add a drizzle of extra virgin olive oil. Once hot, season the sliced chicken breast with salt, cracked black pepper, Mediterranean herb blend, and a sprinkle of smoky paprika. Sauté the chicken for about 5-6 minutes until golden brown and cooked through. Remove the chicken from the skillet and set it aside to rest.
Step 2: Sauté Vegetables
In the same skillet, add a bit more olive oil if needed, then toss in the thinly sliced sweet onion, julienned red bell pepper, and fresh spinach leaves. Cook over medium heat for 3-4 minutes until the onions are translucent and the spinach is wilted. The vibrant colors will signal that your vegetables are perfectly tender and ready to join the filling.
Step 3: Mix Cheese Filling
In a large mixing bowl, combine the shredded mozzarella, sharp cheddar, cream cheese, sour cream, and chopped fresh chives. Mix well until everything is thoroughly combined and creamy. This luscious cheese filling will add that gooey goodness to your Cheesy Garlic Chicken Wraps, making them absolutely irresistible!
Step 4: Prepare Tortillas
Brush each large flour tortilla lightly with melted butter and sprinkle a pinch of roasted garlic powder on top for added flavor. This step not only adds taste but also helps the tortilla become wonderfully crisp once toasted. Make sure the tortillas are slightly warmed for better flexibility before moving on to the assembly.
Step 5: Assemble Wraps
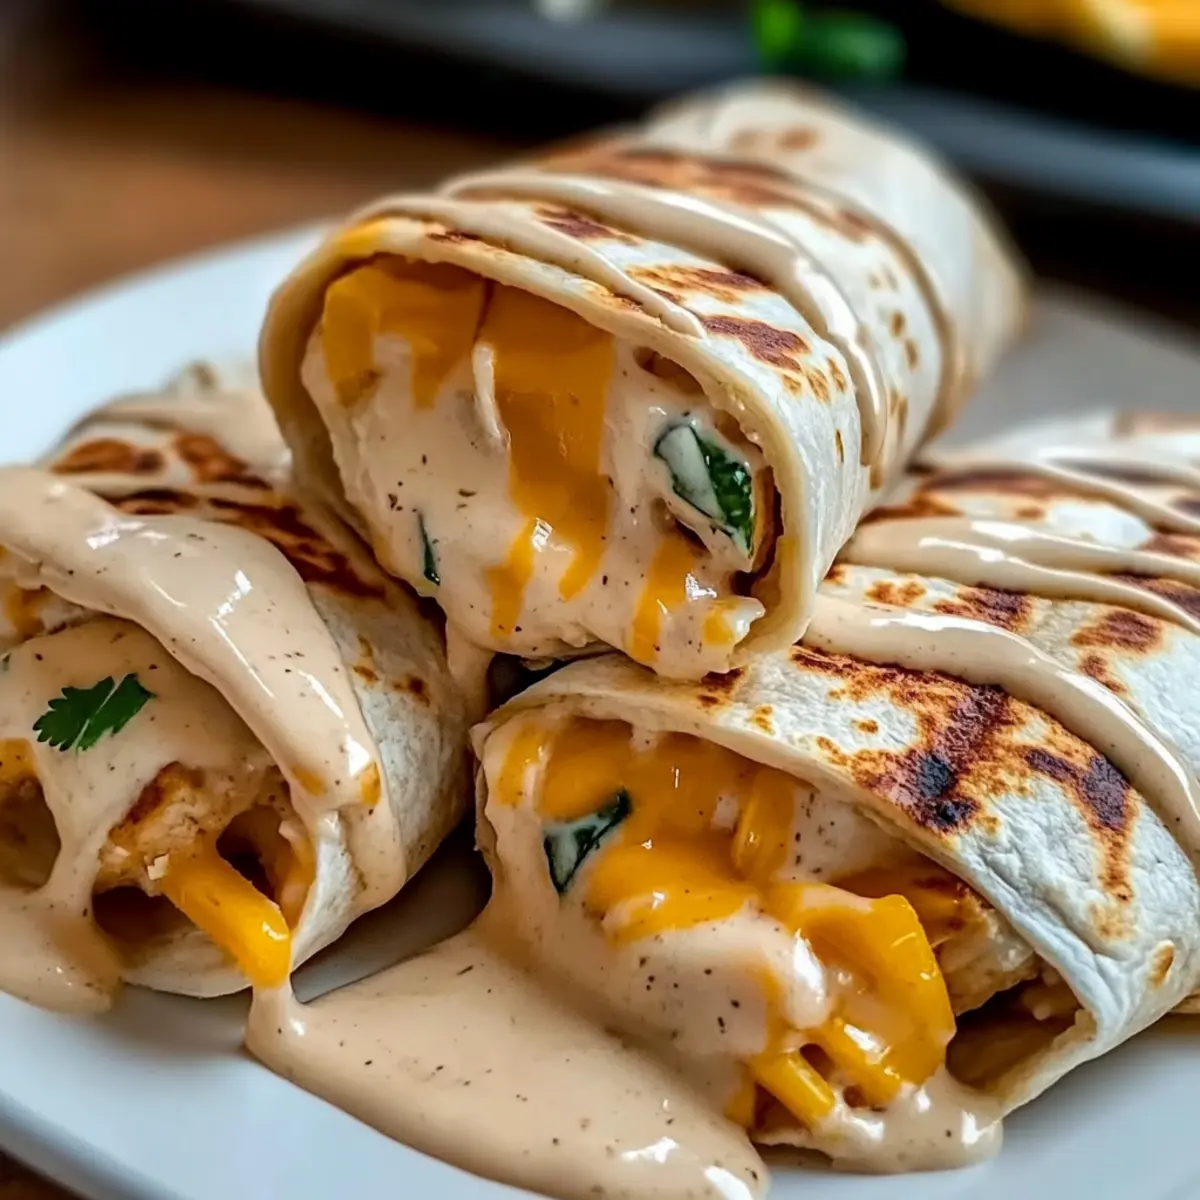
Take a tortilla and place a generous scoop of the cheesy chicken filling in the center, then add some of the sautéed vegetables on top. Roll the tortilla tightly to enclose the filling, tucking in the sides as you go to prevent spillage. Repeat this process until all tortillas are filled, ensuring a satisfying combination in each Cheesy Garlic Chicken Wrap.
Step 6: Toast Wraps
Return the skillet to medium heat and add a little olive oil or cooking spray. Place the assembled wraps seam-side down in the skillet and toast for 2-3 minutes until they are golden and crispy. Carefully flip the wraps and toast the other side for an additional 2-3 minutes. The delicious aroma and golden color will let you know they’re almost ready to enjoy!
Step 7: Serve Hot
Once your Cheesy Garlic Chicken Wraps are beautifully toasted, remove them from the skillet and let them cool for a minute before slicing them in half. Serve them warm with a side of salsa or a fresh green salad for a delightful meal. Your homemade comfort food is now ready to be savored!
What to Serve with Cheesy Garlic Chicken Wraps
You’ll love exploring delightful pairing options that elevate your Cheesy Garlic Chicken Wraps into a complete meal experience.
- Fresh Green Salad: A crisp, vibrant salad with mixed greens, cherry tomatoes, and a light vinaigrette adds a refreshing contrast to the savory wraps.
- Garlic Roasted Vegetables: Roasted seasonal vegetables seasoned with garlic enhance the flavors while providing a nutritious complement to your wraps.
- Crispy Sweet Potato Fries: The sweetness and crunch of these fries create a delightful juxtaposition to the creamy and savory filling in the wraps.
- Salsa: A zesty side of tomato salsa (or any favorite variation) invites vibrant flavor interludes and a smooth texture that enhances each bite.
- Mexican Street Corn: Grilled corn topped with cotija cheese, cilantro, and lime brightens your meal, offering a smoky-sweet flavor pairing with the wraps.
- Chips and Guacamole: Crispy tortilla chips with avocado guacamole add a satisfying crunch and creamy element that dances well with the cheesy goodness.
- Lemon-Herb Quinoa: A light quinoa dish infused with zesty lemon and fresh herbs provides a nutritious and grainy texture that complements your meal effortlessly.
- Iced Tea or Lemonade: A refreshing beverage like herbal iced tea or zesty lemonade balances the flavors of the wraps and keeps you refreshed.
- Chocolate Chip Cookies: For a sweet finish, serve warm, gooey cookies—an irresistible way to cap off your savory meal experience!
Expert Tips for Cheesy Garlic Chicken Wraps
- Cool Before Assembly: Allow filling ingredients to cool slightly before wrapping; this prevents soggy Cheesy Garlic Chicken Wraps.
- Fresh Cheese: Opt for freshly grated cheese instead of pre-shredded for better melting and flavor in your wraps.
- Warm Tortillas: Briefly warm your tortillas to enhance flexibility, making for easier assembly and better wraps that hold together.
- Avoid Overfilling: Keep the filling modest to ensure your wraps stay intact while toasting; this helps maintain a crispy texture.
- Reheat Wisely: If you have leftovers, reheat them in a dry skillet to preserve the crunchy exterior instead of microwaving.
Make Ahead Options
These Cheesy Garlic Chicken Wraps are perfect for busy home cooks looking to save time during the week! You can prep the chicken and cheese mixture up to 3 days in advance; simply sauté the chicken and mix it with the cheeses, then store it in an airtight container in the refrigerator. Additionally, you can assemble the wraps and refrigerate them up to 24 hours before cooking. To maintain their quality, make sure the filling cools slightly before assembly to prevent sogginess. When you’re ready to enjoy, just toast the wraps in a skillet for a few minutes on each side, and you’ll have a piping-hot meal that’s just as delicious as when freshly made!
How to Store and Freeze Cheesy Garlic Chicken Wraps
Fridge: Keep leftover Cheesy Garlic Chicken Wraps in an airtight container for up to 3 days. Be sure to separate layers with parchment paper to avoid sogginess.
Freezer: Wrap un-toasted Cheesy Garlic Chicken Wraps in plastic wrap, then aluminum foil, to freeze for up to 3 months. This method protects against freezer burn while keeping flavors intact.
Reheating: To reheat, cook frozen wraps in a skillet over medium heat for about 4-5 minutes per side until heated through and crispy. Avoid the microwave for the best texture.
Make-Ahead: You can prepare the chicken and cheese mixture up to 2 days in advance. Assemble the wraps 24 hours before cooking for a quick weeknight dinner option!
Cheesy Garlic Chicken Wraps Variations
Feel free to riff on the classic recipe and create a version that fits your tastebuds!
-
Mediterranean Twist: Use oregano and add olives and feta for a herbaceous kick. This savory blend will transport your taste buds to sun-soaked shores!
-
Southwest Style: Spice things up by incorporating cumin and black beans into the filling. This hearty combo injects a delightful warmth into every bite.
-
Buffalo Chicken Version: Toss the cooked chicken in buffalo sauce prior to assembly and add a sprinkle of blue cheese. It’s the perfect fiery twist for heat lovers!
-
Breakfast Adaptation: Swap out chicken for scrambled eggs, crispy bacon, and salsa for a hearty morning wrap. Who says wraps are just for lunch?
-
Vegan Option: Replace chicken with lentils or chickpeas and use a dairy-free cream cheese. You’ll still enjoy that luscious goodness without the animal products.
-
BBQ Chicken Delight: Substitute buffalo sauce with your favorite barbecue sauce. This sweet and smoky version will satisfy any craving for southern comfort food.
-
Asian-Inspired: Use teriyaki chicken, sautéed bell peppers, and bean sprouts. This unique twist will wrap your taste buds in a dreamy, umami experience.
-
Caprese-Inspired: Layer fresh mozzarella, tomatoes, and basil with a drizzle of balsamic glaze for a lighter, refreshing take. Perfect for summer nights!
For more delightful variations, don’t forget to check out Cowboy Butter Chicken Wings or give Sticky Garlic Chicken a try to keep your meal ideas endless and exciting!
Cheesy Garlic Chicken Wraps Recipe FAQs
What is the best way to select ripe ingredients for the recipe?
Absolutely! When selecting your chicken, look for fresh, pink breast meat without any dark spots or odors. For vegetables, opt for bright and crisp bell peppers with no soft spots. Spinach should be vibrant green and free from wilting. For garlic, choose firm bulbs with no signs of sprouting or mold.
How should I store leftover Cheesy Garlic Chicken Wraps?
Very! Store leftover wraps in an airtight container in the fridge for up to 3 days. To prevent sogginess, I recommend separating layers with parchment paper to absorb excess moisture. If you want them crispy, reheat them in a skillet rather than the microwave.
Can I freeze Cheesy Garlic Chicken Wraps for later?
Definitely! To freeze, wrap un-toasted Cheesy Garlic Chicken Wraps tightly in plastic wrap and then in aluminum foil to maintain their quality. They can be frozen for up to 3 months. When ready to enjoy, simply cook them from frozen in a skillet for about 4-5 minutes per side until they’re heated through and crispy!
What if my wraps are soggy after cooking?
Oh no! If you find your wraps soggy, it’s likely from filling components not cooling sufficiently before assembly. To prevent this, allow the chicken and vegetables to cool slightly before rolling. Additionally, avoid overfilling your wraps to keep them crisp.
Are Cheesy Garlic Chicken Wraps suitable for gluten-free diets?
Absolutely! You can easily make these delicious wraps gluten-free by using corn or gluten-free tortillas, which are widely available. Just be sure to check other ingredients like seasonings and cheese for hidden gluten.
Can I use other types of cheese for the filling?
For sure! If you’re not a fan of mozzarella or cheddar, feel free to substitute with any melting cheese you like, such as Monterey Jack or Pepper Jack for added spice. Just keep in mind that different cheeses may slightly alter the flavor profile, but experimenting is part of the fun!
Cheesy Garlic Chicken Wraps that Will Elevate Your Dinner Game
Ingredients
Equipment
Method
- Heat a large skillet over medium-high heat and add a drizzle of extra virgin olive oil. Season the sliced chicken breast with salt, cracked black pepper, Mediterranean herb blend, and a sprinkle of smoky paprika. Sauté for about 5-6 minutes until golden brown and cooked through.
- In the same skillet, add a bit more olive oil if needed, then add the sweet onion, red bell pepper, and spinach. Cook over medium heat for 3-4 minutes until the onions are translucent and the spinach is wilted.
- In a large mixing bowl, combine the mozzarella, cheddar, cream cheese, sour cream, and chives. Mix well until everything is thoroughly combined and creamy.
- Brush each tortilla lightly with melted butter and sprinkle with roasted garlic powder. Slightly warm the tortillas for better flexibility.
- Place a generous scoop of the cheesy chicken filling in the center of a tortilla, add vegetables, and roll tightly, tucking in the sides.
- Return the skillet to medium heat, spray with olive oil, and toast the wraps seam-side down for 2-3 minutes until golden. Flip and toast the other side.
- Once toasted, let them cool for a minute before slicing in half. Serve warm with salsa or a fresh green salad.
Leave a Reply