
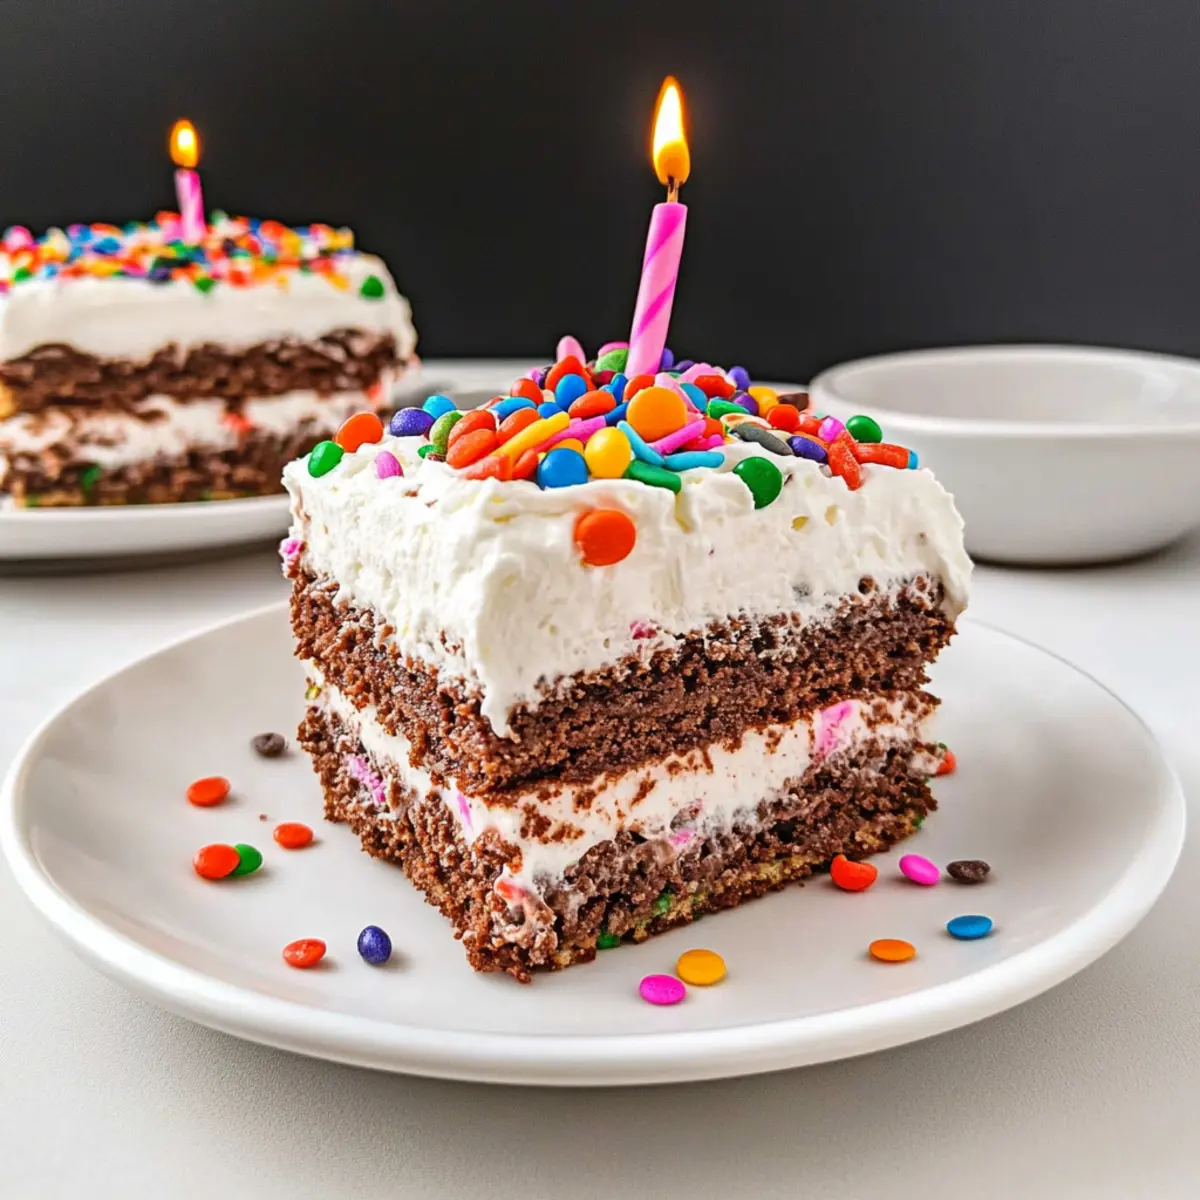
Have you ever faced sweltering summer days, yearning for a cool treat to beat the heat? This Easy No-Bake Ice Cream Sandwich Cake is my go-to remedy, transforming simple ingredients into a fun and refreshing dessert that everyone will adore. With just 15 minutes of prep time, this crowd-pleaser layers creamy pudding, fluffy Cool Whip, and delightful ice cream sandwiches to create a luscious summer cake without the fuss of an oven. Perfect for backyard barbecues or last-minute celebrations, it’s the sweet escape we all need when the temperatures rise. So, are you ready to whip up a slice of summer joy with this indulgent treat? Let’s dive into the recipe!
Why is Ice Cream Sandwich Cake a Must-Try?
Endless Variety: With layers of creamy pudding and cookies, you can easily customize this cake to fit your taste buds.
No-Bake Joy: Enjoy a sweet treat without turning on the oven—perfect for those hot summer days!
Quick Prep: In just 15 minutes, you’ll have a delightful dessert ready to freeze, making it a fantastic last-minute option.
Crowd-Pleasing Appeal: From kids to adults, this cake is a guaranteed hit that will have everyone asking for seconds.
Texture Delight: Experience the luscious combination of creamy and crunchy layers that pamper your palate.
Add a scoop of your favorite ice cream on the side or drizzle some chocolate sauce for an extra touch!
Ice Cream Sandwich Cake Ingredients
• An easy way to savor a summer treat!
For the Pudding Layer
• Instant Chocolate Pudding Mix – Provides a rich, chocolate flavor; can substitute with vanilla pudding for a different taste.
• Unsweetened Cocoa Powder – Enhances the chocolate flavor; omit if using only vanilla pudding.
• Half-and-Half – Adds creaminess to the pudding mixture; swap with whole milk or a dairy-free alternative if needed.
For the Creamy Layer
• Cool Whip (16 oz) – Adds a fluffy, creamy layer; feel free to use homemade whipped cream as a delightful substitute.
• Rainbow Sprinkles (½ cup) – Adds fun color and texture; you can omit for a simpler look or use chocolate sprinkles for a twist.
For the Cake Structure
• Vanilla Ice Cream Sandwiches (19 pieces) – The foundation of the cake; try using chocolate or another flavor for a unique touch.
• Hot Fudge Topping (½ cup) – Offers sweetness and richness; can replace with caramel sauce for a different profile.
Optional Toppings
• Additional sprinkles, M&Ms, chopped candy bars, caramel sauce, etc. – Customize your cake to your heart’s content for a personal touch!
Embrace the coolness of this Ice Cream Sandwich Cake as you indulge in this easy-to-make, no-bake summer dessert!
Step‑by‑Step Instructions for Ice Cream Sandwich Cake
Step 1: Prepare the Baking Dish
Line a 9 x 13 inch baking dish with parchment paper, allowing some overhang for easy removal later. This will serve as the base for your Ice Cream Sandwich Cake. The parchment paper will prevent sticking and make cleanup a breeze, so ensure it fits snugly in the corners without any wrinkles.
Step 2: Mix the Pudding Layer
In a mixing bowl, whisk together the instant chocolate pudding mix, unsweetened cocoa powder, and half-and-half until the mixture thickens—usually about 2 minutes. Once thickened, carefully fold in half of the Cool Whip and half of the rainbow sprinkles to add a delightful texture to the pudding. Set this creamy mixture aside for the next layer.
Step 3: Layer the Ice Cream Sandwiches
Take your vanilla ice cream sandwiches and lay them evenly at the bottom of the prepared baking dish. If necessary, trim the edges of the sandwiches to fit snugly in the dish. This layer will form the foundation of your Ice Cream Sandwich Cake, creating a solid base for the next delicious components.
Step 4: Add the Hot Fudge Topping
Spread ¼ cup of hot fudge evenly over the layer of ice cream sandwiches. Make sure the fudge is at room temperature to prevent melting the sandwiches beneath. This rich layer will add sweetness and a contrasting texture, creating a delightful surprise in each bite of your Ice Cream Sandwich Cake.
Step 5: Pour the Pudding Mixture
Gently pour the chocolate pudding mixture over the fudge layer, using a spatula to spread it evenly. Make sure it covers the fudge completely, sealing in all the flavors and textures beneath. Once spread, place the dish in the freezer for 20 minutes to allow the layers to set slightly.
Step 6: Repeat with More Ice Cream Sandwiches
After the pudding layer has set, add another layer of ice cream sandwiches on top. Again, trim as necessary to fit the dish. This second layer not only adds height to your Ice Cream Sandwich Cake but also balances out the richness of the pudding and fudge below.
Step 7: Spread Remaining Hot Fudge
Pour the remaining hot fudge over the top layer of ice cream sandwiches, ensuring it is evenly distributed. This will add a decadent swirl of flavor that complements the cake beautifully. At this point, you’re building layers of flavor and texture that will make this dessert unforgettable.
Step 8: Finish with Cool Whip
Spread the remaining Cool Whip over the top evenly, creating a fluffy and inviting finish. This airy layer will act as the perfect light topping for your Ice Cream Sandwich Cake. After decorating, cover the dish with plastic wrap and freeze until firm for at least 2 hours, letting all the layers meld together perfectly.
Step 9: Decorate and Serve
Before serving, feel free to sprinkle your optional toppings like extra rainbow sprinkles or chopped candy bars on top for an enticing presentation. Once decorated, slice into squares and serve this delectable Ice Cream Sandwich Cake straight from the freezer, enjoying a chilled slice of summer bliss!
Expert Tips for Ice Cream Sandwich Cake
-
Deep Dish Required: Use an extra-deep 9 x 13-inch dish to prevent overflow while layering, ensuring the cake holds all those delicious ingredients.
-
Cool Fudge: Allow the hot fudge to cool to room temperature before spreading to prevent melting the ice cream sandwiches, keeping the layers intact.
-
Layer with Care: If using a shallow dish, wait to add the final Cool Whip layer until about 30 minutes before serving to avoid smooshing.
-
Don’t Rush Freezing: Ensure the cake freezes for at least 2 hours for the perfect texture. Patience brings out the flavor harmony in your Ice Cream Sandwich Cake!
-
Customize Toppings: Get creative with your optional toppings; chocolate chips or a drizzle of caramel add an extra layer of joy to each slice!
Make Ahead Options
This Ice Cream Sandwich Cake is perfect for busy cooks looking to save time during the week! You can prepare the pudding layer and assemble the cake up to 24 hours in advance, covering it with plastic wrap to maintain freshness. Simply layer the ice cream sandwiches and pudding mixture, then freeze as directed. If you’re prepping further in advance, you can make the entire cake and store it in the freezer for up to 3 days. When it’s time to serve, just add your Cool Whip topping and any desired decorations about 30 minutes before serving to keep everything fluffy and delicious. Enjoy your sweet-time savings!
What to Serve with Ice Cream Sandwich Cake
Nothing completes a summer gathering like adding delightful pairings that enhance the joy of this cool dessert!
-
Fresh Berries: The sweet-tartness of strawberries, raspberries, or blueberries adds a refreshing contrast and brightens up the plate. Serve them on the side for a burst of fruity goodness.
-
Chocolate Sauce: A drizzle of warm chocolate sauce elevates the dessert, complementing the chocolatey layers while adding extra richness that dessert lovers crave.
-
Whipped Cream: A dollop of fluffy whipped cream heightens the decadence of the cake, inviting each bite to be even creamier and more delightful. It’s like icing on the cake!
-
Sliced Bananas: Soft, sweet bananas bring a lovely creaminess and lightness that balances the richness of the cake, creating a pleasing combination of flavors. Try layering them between slices for added freshness.
-
Mint Leaves: Bright, fragrant mint offers a refreshing finish that cleanses the palate between bites, making it a perfect garnish alongside your cake. Plus, it adds that beautiful touch of greenery!
-
Lemonade or Iced Tea: Serve with a crisp glass of refreshing lemonade or iced tea, providing a zingy sip that contrasts beautifully with the sweet, creamy layers of the Ice Cream Sandwich Cake.
-
Fruit Sorbet: For an extra chill, pair the cake with a scoop of fruit sorbet, bringing a burst of fruity flavors that lightens up the dessert experience. Enjoy the combination of textures and tastes!
-
Coffee or Espresso: A rich cup of coffee or shot of espresso offers a delightful balance to the sweetness, enhancing the dessert experience with every sip. It’s the perfect companion for those who appreciate layered flavors!
Ice Cream Sandwich Cake Variations
Feel free to let your creativity shine and personalize this dessert to your taste!
-
Flavor Twist: Swap out vanilla ice cream sandwiches for chocolate or mint-flavored ones for a refreshing variation. Each version brings a unique flavor that enhances the cake’s appeal.
-
Pudding Alternatives: Try different pudding flavors like vanilla or cookies and cream for an exciting change. The versatility of pudding allows you to mix it up based on what you have on hand or what you’re craving.
-
Fruit Layers: Incorporate fresh fruits such as sliced strawberries or bananas between the layers for a bright and fruity infusion. A layer of fruit adds freshness that balances the richness of the cake beautifully.
-
Nutty Crunch: Add chopped nuts, like pecans or almonds, to the layers for some extra crunch. The nuts will create a delightful texture contrast and bring a depth of flavor that will keep everyone guessing.
-
Spicy Kick: Mix in a pinch of cayenne pepper or cinnamon to the pudding layer for a subtly spicy twist. This unexpected heat will intrigue your taste buds and add an element of surprise!
-
Decadent Caramel: Replace hot fudge with caramel sauce for a sweeter experience. The gooey caramel will lend a unique sweetness that complements the other rich layers perfectly.
-
Gourmet Toppings: Get creative with your toppings by adding chopped candy bars or drizzling chocolate sauce over the top just before serving. Make it extra memorable with a delightful decoration that everyone will love.
As you enjoy crafting this Ice Cream Sandwich Cake, don’t forget to serve it with a scoop of your favorite ice cream or a drizzle of warm fudge for that extra special touch! For other delightful dessert ideas, check out my Pistachio Cream Cake or the tempting Milkshake Pound Cake. Happy baking!
Storage Tips for Ice Cream Sandwich Cake
Fridge: Store leftovers covered in the fridge for up to 3 days. Each slice should be kept in an airtight container to maintain freshness.
Freezer: For longer storage, wrap the Ice Cream Sandwich Cake tightly in plastic wrap and aluminum foil. It can be kept in the freezer for up to 2 months without losing flavor or texture.
Reheating: When ready to enjoy, simply take out a slice and let it sit at room temperature for 10–15 minutes before serving for a softer bite.
Slicing Tip: To make slicing easier, dip a knife in warm water before cutting, ensuring clean edges for each delightful piece of cake!
Ice Cream Sandwich Cake Recipe FAQs
How do I choose the best ice cream sandwiches for this cake?
Absolutely! For the best flavor and texture, opt for high-quality ice cream sandwiches that are creamy and have a good balance of cookie and ice cream. Vanilla is a classic choice, but chocolate or even cookie dough flavors can elevate your cake’s taste. Just ensure they’re frozen solid before layering to avoid any melting mishaps!
What is the best way to store leftovers?
You can store leftovers of your Ice Cream Sandwich Cake covered in the refrigerator for up to 3 days in an airtight container to keep it fresh. For longer storage, wrap it tightly in plastic wrap and then aluminum foil to prevent freezer burn, and it can stay in the freezer for up to 2 months. Just remember to let it sit at room temperature for 10–15 minutes before serving for a softer bite upon thawing.
Can I freeze the Ice Cream Sandwich Cake?
Certainly! Freezing the Ice Cream Sandwich Cake is not only possible, but it’s also recommended for maintaining its delicious layers. After assembling, wrap the cake tightly in plastic wrap and cover it with aluminum foil. You can store it in the freezer for up to 2 months. For best results, slice it frozen and let the individual pieces thaw for 10-15 minutes for optimal taste and texture.
What should I do if my pudding mixture doesn’t thicken?
Very well! If your pudding mixture isn’t thickening, it could be due to a couple of reasons. First, check that you’re using instant pudding mix as directed and that you’re whisking it with enough liquid. Whisk continuously for about 2 minutes until smooth and thickened. If it still appears thin, give it a few more minutes in the fridge to chill before folding in the Cool Whip.
Are there any dietary considerations to keep in mind for this recipe?
Certainly! This Ice Cream Sandwich Cake can be easily adapted for various dietary needs. For a gluten-free version, choose certified gluten-free ice cream sandwiches and pudding mix. If you’re watching sugar intake, opt for sugar-free pudding and low-sugar ice cream sandwiches. Always check individual ingredients for allergens to ensure it’s safe for those with allergies or dietary restrictions.
How can I customize the toppings for my Ice Cream Sandwich Cake?
The more the merrier! Customize your Ice Cream Sandwich Cake with toppings like M&Ms, crushed cookies, or chopped nuts for added texture. You can also use fruit like sliced strawberries or bananas between layers for a fresh twist. When you’re ready to serve, sprinkle your chosen extras on top, or put them on the side for guests to customize their servings!

Ultimate Ice Cream Sandwich Cake for Easy Summer Bliss
Ingredients
Equipment
Method
- Line a 9 x 13 inch baking dish with parchment paper, allowing some overhang for easy removal later.
- In a mixing bowl, whisk together the instant chocolate pudding mix, unsweetened cocoa powder, and half-and-half until thick.
- Take your vanilla ice cream sandwiches and lay them evenly at the bottom of the prepared baking dish.
- Spread ¼ cup of hot fudge evenly over the layer of ice cream sandwiches.
- Gently pour the chocolate pudding mixture over the fudge layer, ensuring it covers the fudge completely.
- After the pudding layer has set, add another layer of ice cream sandwiches on top.
- Pour the remaining hot fudge over the top layer of ice cream sandwiches evenly.
- Spread the remaining Cool Whip over the top evenly, creating a fluffy finish.
- Before serving, sprinkle with your optional toppings and slice into squares.
Leave a Reply