
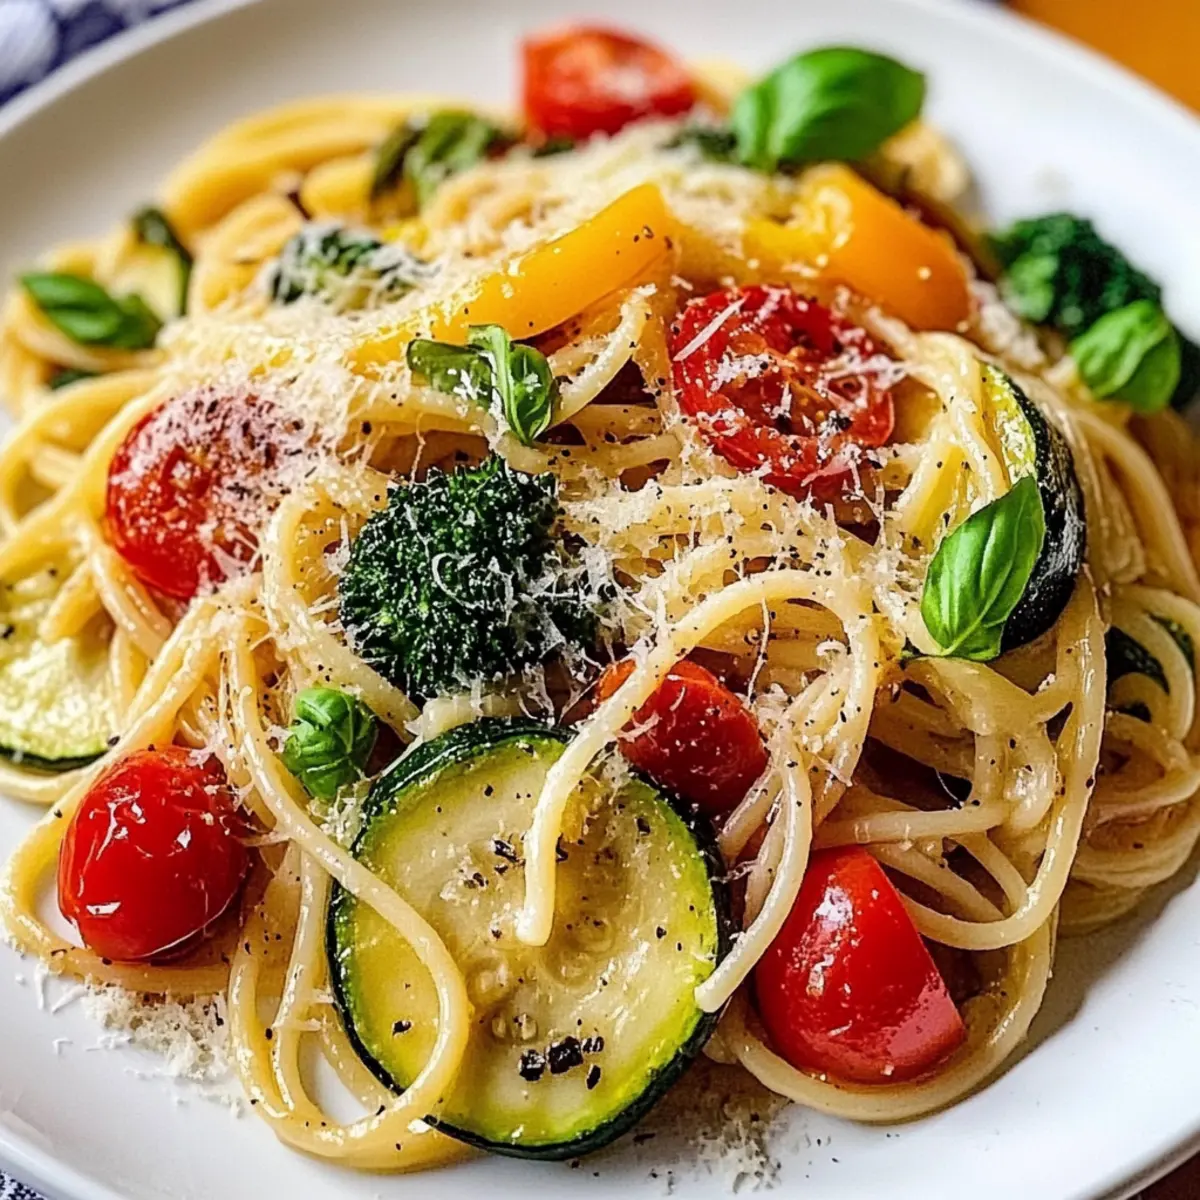
The vibrant colors of fresh vegetables glistening in the sun remind me of carefree summer days spent in the garden, and that’s the inspiration behind my delicious Pasta Primavera. This dish is a celebration of seasonal produce, combining the crunch of bell peppers, the tenderness of zucchini, and the burst of cherry tomatoes, all embraced by perfectly cooked pasta. Not only is this Pasta Primavera customizable to suit your taste preferences, whether you’re craving a gluten-free option or a heartier addition of protein, but it’s also a wholesome, healthy choice that leaves you feeling satisfied yet light. With minimal prep time, you can whip up this delightful meal in no time—perfect for a quick dinner or an impressive dish for entertaining. So, what seasonal veggies will you choose to make this dish truly your own?
Why is Pasta Primavera So Special?
Vibrant Colors: This Pasta Primavera is a visual feast, showcasing a rainbow of fresh vegetables that not only beautifies your plate but also packs it with nutrients. Customizable Delight: Tailor this dish to fit your tastes—swap veggies seasonally or add proteins like grilled chicken or chickpeas to make it your own. Quick Prep Time: In just minutes, you can create a delicious meal that’s perfect for busy weeknights or elegant gatherings. Healthy and Satisfying: Packed with vitamins, this dish leaves you feeling light and invigorated—a guilt-free indulgence. For more pasta inspiration, check out our Spicy Rattlesnake Pasta or Tomato Rigatoni Pasta recipes!
Pasta Primavera Ingredients
• Make your dish shine with these fresh choices!
For the Pasta
- Pasta – Choose your favorite type; whole wheat or gluten-free pasta works beautifully here.
For the Vegetables
- Olive Oil – Essential for sautéing; opt for extra virgin for richer flavor.
- Garlic – This fragrant herb adds depth; just be careful not to burn it!
- Bell Peppers – Fresh and crunchy; replace with asparagus or snap peas if you prefer.
- Zucchini – Adds moisture and tenderness; summer or yellow squash makes a great swap.
- Broccoli – Nutrient-dense and colorful; substitute green beans if you like.
- Cherry Tomatoes – Sweet and juicy; diced regular tomatoes can also be a tasty option.
For Seasoning
- Salt and Pepper – Simple but vital; season to your taste for the best flavor.
For the Finishing Touch
- Parmesan Cheese – A creamy finish that elevates the dish; skip it for a dairy-free version or try plant-based cheese instead.
Each of these ingredients contributes to a delightful Pasta Primavera that you can customize as desired!
Step‑by‑Step Instructions for Pasta Primavera
Step 1: Cook the Pasta
Start by bringing a large pot of salted water to a rolling boil over high heat. Add your preferred pasta, such as spaghetti, and cook it according to package instructions until al dente, about 8-10 minutes. Remember to taste a strand a minute before the time is up. Save about half a cup of the pasta cooking water, then drain the rest and set the pasta aside.
Step 2: Heat Olive Oil
In a large skillet, heat 2 tablespoons of extra virgin olive oil over medium heat. Allow the oil to warm until it shimmers, which usually takes about 2 minutes. This preheating step is important to ensure even cooking, setting the stage for your vibrant Pasta Primavera by enhancing all those lovely ingredients to follow.
Step 3: Sauté Garlic
Add 2 minced garlic cloves to the hot skillet and sauté for about 1 minute, stirring continuously. Watch for the garlic to turn fragrant and slightly golden but not brown, which could introduce bitterness into your dish. This aromatic base will infuse the pasta and vegetables with a beautiful depth of flavor.
Step 4: Add Vegetables
Stir in the chopped bell peppers, zucchini, and broccoli, cooking for 5-7 minutes. Toss the vegetables regularly, allowing them to soften while still maintaining some crunch. The colors will brighten and the scents will fill your kitchen, creating a delightful medley that embodies the essence of Pasta Primavera.
Step 5: Incorporate Cherry Tomatoes
After the other vegetables have softened, add a cup of halved cherry tomatoes into the skillet. Cook for an additional 2-3 minutes, or until the tomatoes begin to burst and release their juices. This adds a sweet acidity to your Pasta Primavera, balancing the flavors and adding extra vibrancy to the dish.
Step 6: Combine
Gently fold the drained pasta into the skillet, mixing everything together. Season with salt and pepper to taste, and if your mixture appears dry, slowly add in some of the reserved pasta water until you achieve a light, cohesive sauce. This step ensures every strand of your Pasta Primavera is coated in flavor.
Step 7: Serve
To plate your Pasta Primavera, use tongs to twirl individual servings and place them on warm plates. For the finishing touch, generously sprinkle freshly grated Parmesan cheese on top and add a few fresh basil leaves for an aromatic burst. Your colorful and wholesome dish is now ready to be savored!
How to Store and Freeze Pasta Primavera
Fridge: Store any leftover Pasta Primavera in an airtight container for up to 3–4 days. Ensure the dish has cooled before sealing to maintain freshness.
Freezer: If you want to enjoy this dish later, freeze it in a freezer-safe container for up to 3 months. Thaw in the fridge overnight before reheating.
Reheating: To reheat, warm in a skillet over medium heat, adding a splash of water or olive oil as needed to prevent dryness. Stir until heated through, about 5–7 minutes.
Prep Ahead: For a quick meal later, prepare the vegetables ahead of time and store them in the fridge for up to 2 days. Just sauté and combine with pasta when ready to serve.
Expert Tips for Pasta Primavera
-
Perfect Pasta: Always cook pasta al dente; taste it a minute before the package time is up to avoid mushiness.
-
Flavorful Veggies: Season your vegetables as you cook to enhance flavors, and remember that garlic should be fragrant but never burnt.
-
Extra Crunch: To maintain the crispiness of vegetables, avoid overcooking them—5-7 minutes is ideal for that perfect texture in your Pasta Primavera.
-
Adjusting Sauce: If your dish looks dry, add a splash of reserved pasta cooking water to create a light, cohesive sauce without overpowering the flavors.
-
Customize Wisely: Mix and match seasonal vegetables based on your preferences; flexibility is key to making this Pasta Primavera your own.
Pasta Primavera Variations & Substitutions
Feel free to unleash your creativity and customize this inviting Pasta Primavera to suit your personal taste and pantry staples!
-
Gluten-Free: Substitute traditional pasta with your favorite gluten-free option like brown rice or chickpea pasta for a delicious twist.
-
Seasonal Veggies: Add seasonal favorites like asparagus, peas, or corn to celebrate fresh produce and bring a variety of flavors to your dish.
-
Protein-Packed: Boost the meal’s heartiness by mixing in grilled chicken, shrimp, or chickpeas for a protein kick that transforms it into a fulfilling entree.
-
Spicy Kick: For a bit of heat, sprinkle red pepper flakes into the mix while cooking; this tempers the sweet flavors beautifully.
-
Creamy Touch: Stir in a dollop of cream cheese or a splash of heavy cream at the end for a luxurious finish that brings the dish together.
-
Herbaloza: Experiment with herbs like basil, thyme, or oregano to elevate the aroma and taste, adding freshness that complements the veggies.
-
Nutty Flavor: Toss in some toasted pine nuts or shredded almonds as a crunchy topping for added texture and a nutty flavor enhancement.
-
Cheese Options: If you prefer a different cheese, try feta or goat cheese crumbles for a tangy twist—just remember to adjust for the saltiness!
No matter how you choose to customize your Pasta Primavera, remember it pairs beautifully with a slice of garlic bread or a refreshing light salad! If you’re looking for more pasta inspirations, don’t miss our delightful Creamy Steak Pasta Garlic or the vibrant Tomato Rigatoni Pasta recipes!
Make Ahead Options
These flavorful Pasta Primavera meals are perfect for busy home cooks looking to save time during their week! You can chop and prep all the vegetables, including bell peppers, zucchini, and broccoli, up to 3 days in advance—just store them in an airtight container in the refrigerator to maintain freshness. If you cook the pasta ahead of time, be sure to toss it with a splash of olive oil to prevent sticking. When ready to enjoy, simply sauté the garlic and vegetables, adding your prepped pasta for a quick finish. With these make-ahead steps, you can have a delicious, nutritious meal on the table in minutes, ensuring your Pasta Primavera remains just as delightful!
What to Serve with Vibrant Pasta Primavera?
Indulging in this colorful medley sets the stage for a delightful meal full of flavor and textures.
- Garlic Bread: The crispy, buttery delight of garlic bread is perfect for soaking up any remaining sauce while adding a comforting touch.
- Crisp Green Salad: A refreshing salad with mixed greens and a light vinaigrette brings a balance of crunch and acidity, elevating your plate.
- Roasted Veggies: Simple yet satisfying, roasted seasonal vegetables enhance the dish’s vibrant theme and provide comforting, caramelized flavors.
- Quinoa Side Dish: This healthy grain is an excellent choice for added protein; toss it with lemon and herbs to complement the Pasta Primavera.
- Sparking Water with Lemon: A refreshing drink like sparkling water with a squeeze of lemon cleanses the palate and keeps the meal light and invigorating.
- Fruit Sorbet: Close your meal with a tangy fruit sorbet that refreshes your taste buds, echoing the colors and flavors of the Primavera.
Each of these pairings creates harmony, ensuring that your dining experience is as memorable as the beautiful dish itself.
Pasta Primavera Recipe FAQs
How do I choose the best vegetables for my Pasta Primavera?
Absolutely! Opt for seasonal vegetables that are vibrant and fresh. Bell peppers should be firm and glossy, without any dark spots. Zucchini should be smooth and slightly springy to the touch. When selecting broccoli, look for bright green florets and a fresh scent. Don’t hesitate to swap in your favorites—snap peas or asparagus can add a delightful crunch, too!
What is the best way to store leftover Pasta Primavera?
Very! Store your leftover Pasta Primavera in an airtight container in the fridge. It’s best consumed within 3–4 days. To maintain the pasta’s texture, allow it to cool before sealing. If you’re saving it for later, consider freezing as well.
Can I freeze Pasta Primavera for later?
Absolutely! To freeze your Pasta Primavera, let it cool completely, then transfer it to a freezer-safe container. It can last in the freezer for up to 3 months. When you’re ready to enjoy, thaw it overnight in the fridge. Reheat gently in a skillet, adding a splash of water or olive oil to keep it moist!
What if my vegetables are overcooked or soggy?
Oh no! If you find your vegetables are too soft in your Pasta Primavera, give them a quick sauté in a hot skillet with a bit of olive oil. This can help revive some crunch. In the future, stick to a 5–7 minute cooking time to maintain that perfect bite while allowing natural flavors to shine.
Is Pasta Primavera suitable for everyone, including those with allergies?
Yes! Pasta Primavera is highly customizable. If you have an allergy to dairy, simply omit the Parmesan cheese or substitute with a plant-based option. For gluten-free needs, whole wheat or gluten-free pasta works wonderfully, allowing everyone to enjoy this delicious dish without worry.
How long can I prepare the vegetables ahead of time for Pasta Primavera?
Wonderful question! You can prepare your vegetables up to 2 days in advance. Store them properly in the fridge in an airtight container. When it’s time to serve, simply sauté them briefly until they’re heated through and incorporate them into your cooked pasta for a quick and healthy meal!
Delicious Pasta Primavera: A Colorful Veggie Delight
Ingredients
Equipment
Method
- Cook the pasta according to package instructions until al dente, about 8-10 minutes, and save about half a cup of the cooking water before draining.
- Heat olive oil in a large skillet over medium heat until it shimmers, about 2 minutes.
- Sauté minced garlic for about 1 minute until fragrant and lightly golden.
- Add chopped bell peppers, zucchini, and broccoli; cook for 5-7 minutes until softened.
- Incorporate halved cherry tomatoes and cook for an additional 2-3 minutes until they burst.
- Fold in the drained pasta, season with salt and pepper, and add reserved pasta water as needed.
- Serve with a sprinkle of Parmesan cheese on top and enjoy!
Leave a Reply